
Install mods on your Project Zomboid server
Install Steam Workshop mods on a Project Zomboid server hosted on the OVHcloud Game Panel, add several Workshop IDs at once, and manage individual Mod IDs.
Objective
The OVHcloud Game Panel lets you customise your Project Zomboid server by installing mods from the Steam Workshop.
This guide explains how to install mods on your Project Zomboid server hosted on the OVHcloud Game Panel.
Requirements
- A VPS or a dedicated server in your OVHcloud account with the Game Panel feature enabled.
- A Project Zomboid server deployed on the Game Panel. Refer to Deploy a Project Zomboid server on the Game Panel.
- Access to the Game Panel. Refer to Log in to the Game Panel.
Instructions
Step 1 — Find the mods you want
Project Zomboid mods are distributed through the Steam Workshop. Browse the Workshop and find the mods you want to install.
Once you have opened a mod's page, look at the URL in your browser. The Workshop ID is the number that appears after ?id=.
For example:
In this example, the Workshop ID is 3762296152. Copy this ID: you need it in the next step.
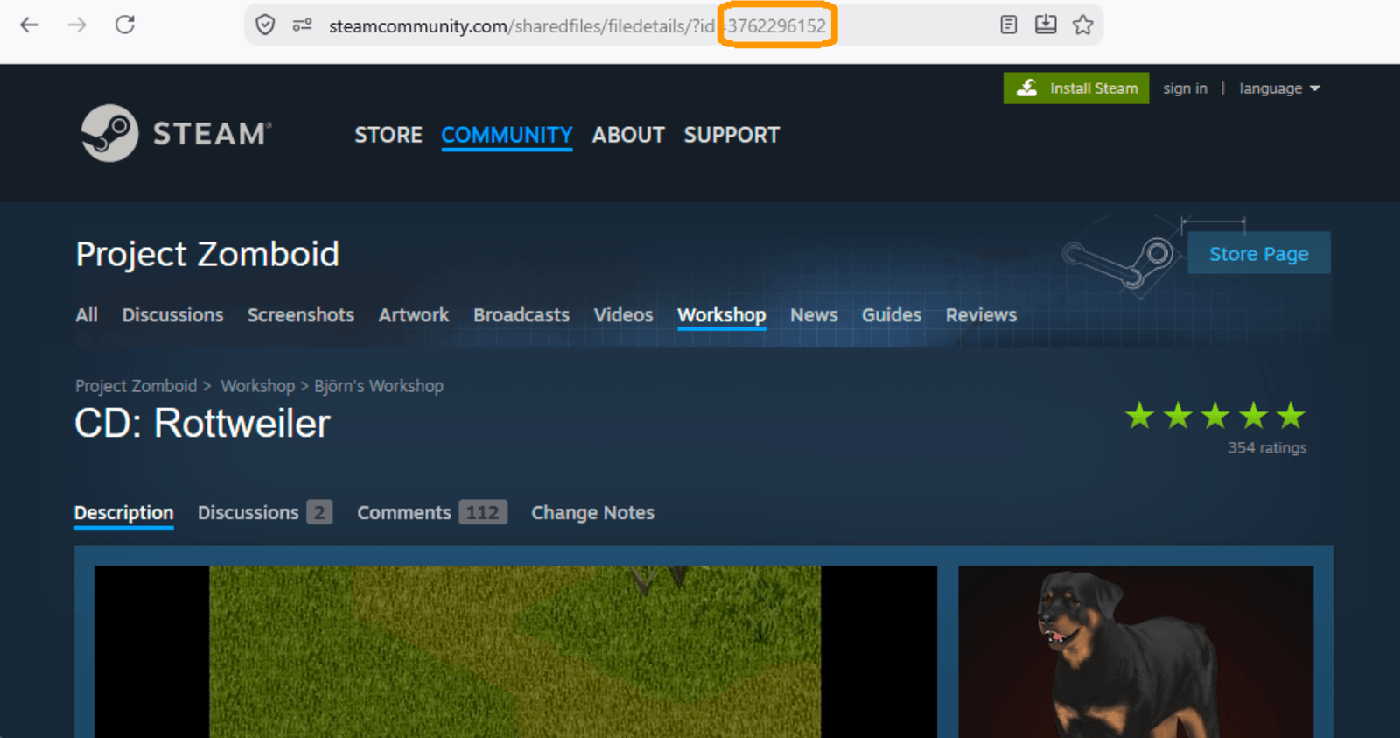
Always make sure the mod is compatible with your server's game version. For example, a Build 41 (B41) mod will most likely not work on a Build 42 (B42) server. Installing incompatible mods may prevent your server from starting.
Step 2 — Add the mod through the Game Panel
Your server must be stopped before you add or remove mods. Mod changes apply on the next start.
If your server is running, stop it first: in the Game Servers list, click the stop icon in the Power column of your server, then confirm. All connected players are disconnected.
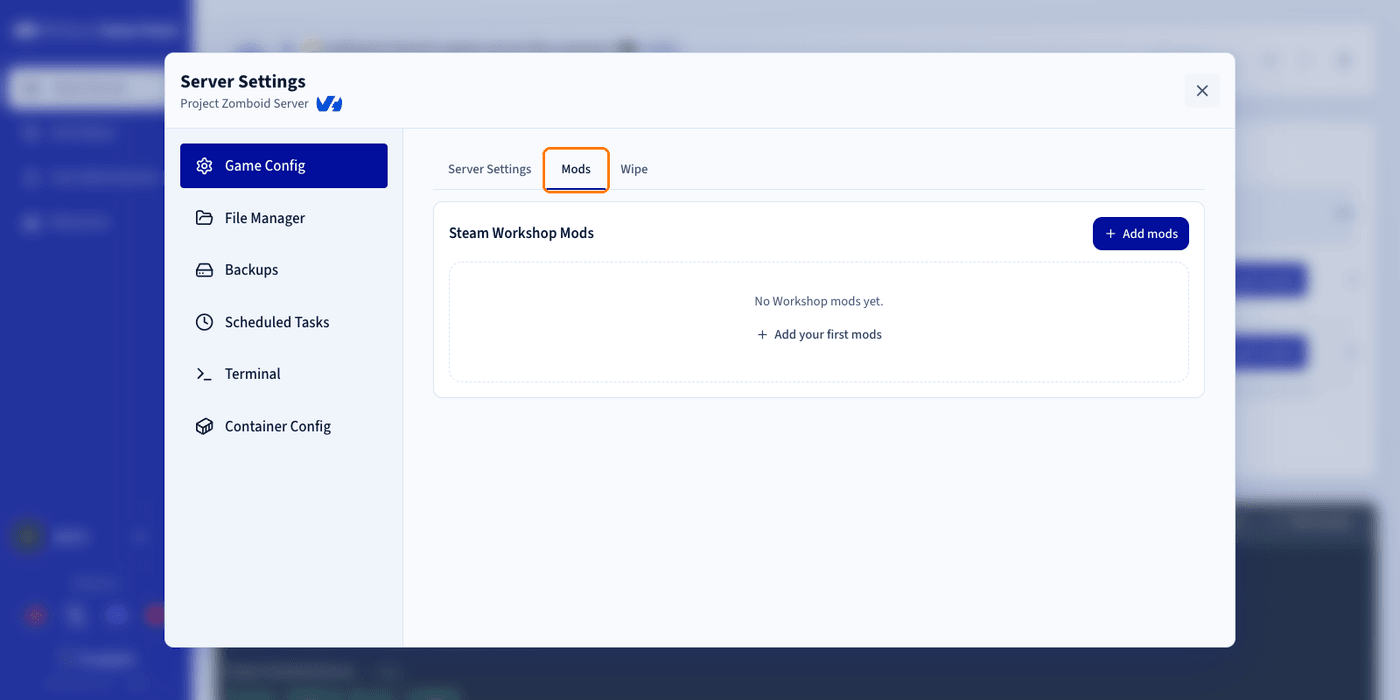
In the Game Panel, find your Project Zomboid server in the Game Servers list, then go to Settings > Game Config > Mods.
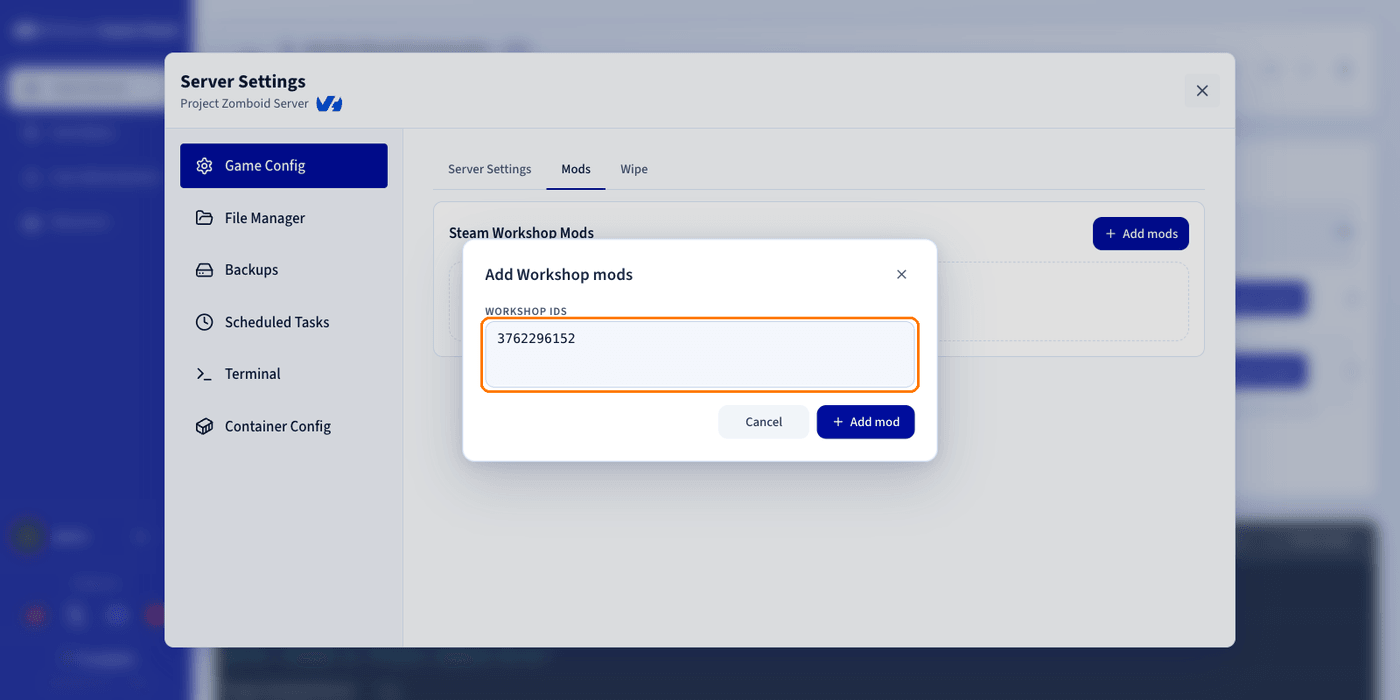
Click Add mods, then enter the Workshop ID you copied earlier.
Adding several mods at once
You can add several Workshop IDs at once by separating them with:
- spaces
- commas
- new lines
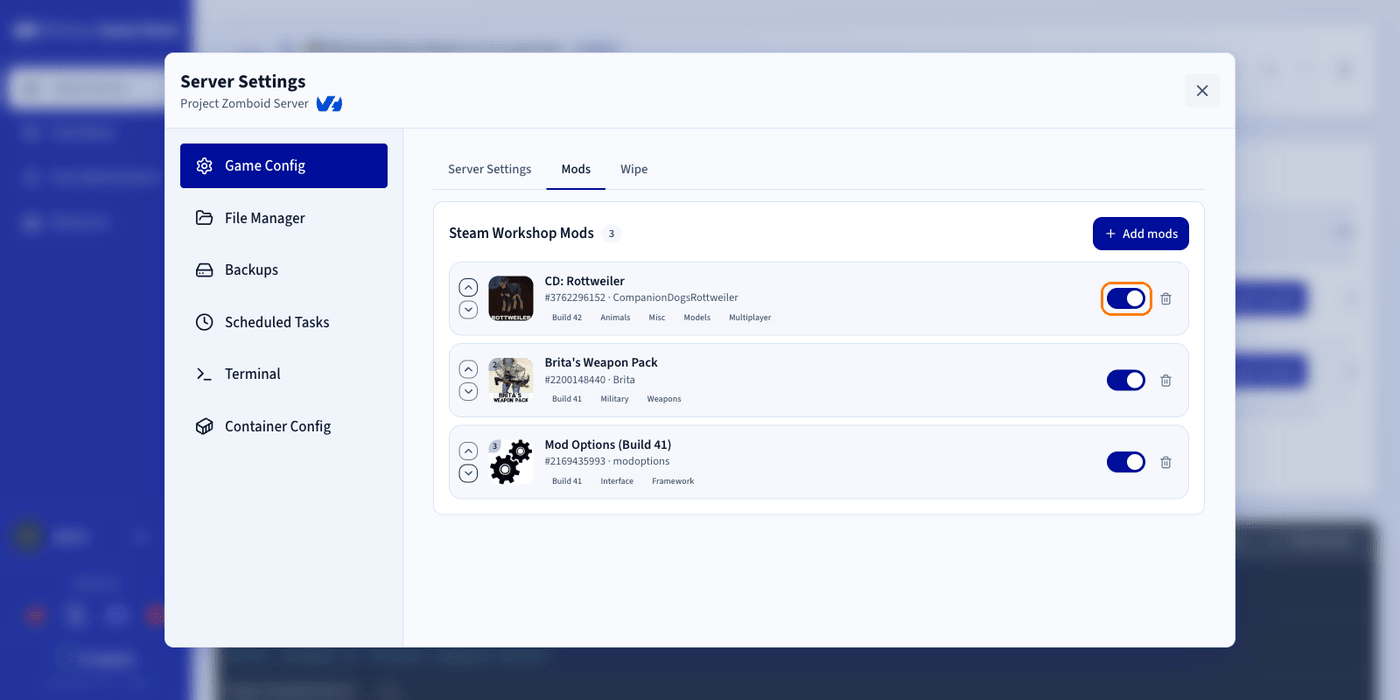
After adding your mods, you can rearrange their loading order with the up and down arrows on each row.
Mods with several Mod IDs
Some Workshop items contain several Mod IDs. For example, a user interface overhaul may include two Mod IDs:
UI_DarkUI_Light
In this case, enable only one of them, not both.
You can enable or disable individual Mod IDs using the toggle switch at the end of each row.
Step 3 — Start your server
Return to the main page of the Game Panel and click Start to launch your server.
When players connect, the Project Zomboid client automatically downloads any Workshop mods installed on the server.
Increase the game's RAM allocation
If you are running many mods, Project Zomboid may require more memory on the client side. If the game struggles to launch or crashes because of heavy mod usage, allocate more RAM.
To do so:
- Close Project Zomboid completely.
- Open Steam and locate Project Zomboid in your library.
- Click the gear icon on the right.
- Select Manage > Browse local files.
- In the game folder, locate the
ProjectZomboid64.jsonfile and open it with Notepad (or any text editor). - Scroll down until you find the
VMArgssection. - Locate the line containing
-Xmx3072mand replace the memory value with a larger one, for example-Xmx8g. This allocates 8 GB of RAM to the game, if your computer has enough memory. - Save the file, close it, and launch Project Zomboid again.
Do not allocate all your system's RAM to the game. Leave enough memory available for the operating system and any background applications, so that your system remains stable.
Install mods manually
You can also install mods manually instead of using the automatic Workshop importer. The file to edit manually is /zomboid/Server/<server_name>.ini (by default servertest.ini).
The Game Panel links to it directly: open Settings > Game Config > Server Settings, expand Advanced Configuration, then click Open in File Manager next to the INI entry.
Do not use both methods at the same time. If you install your mods manually and later use the automatic mod import feature, your manual changes may be overwritten, which can lead to conflicts or configuration loss. Choose either automatic installation or manual installation, but avoid mixing the two.
Go further
- Deploy a Project Zomboid server on the Game Panel
- Getting started with the Game Panel
- How to use the Game Panel File Manager
- How to create and restore backups on the Game Panel
Join our community of users.