
Configuring and using Git with an OVHcloud web hosting plan
Find out how to configure and use Git with your web hosting plan in the OVHcloud Control Panel
Objective
In today's digital landscape, companies are becoming increasingly dynamic and innovative. The ability to effectively manage and deploy your website's code is vital to maintaining your brand's competitiveness and sustainability. Git, the most widely used version control system in the world, allows you to store your website's code on platforms like GitHub, allowing for better change traceability, as well as faster automation and deployments. As an OVHcloud customer, you benefit from a robust infrastructure to host your website, while leveraging the many benefits of Git and GitHub for website development and scalability.
Find out how to configure and use Git with your web hosting plan via the OVHcloud Control Panel.
Requirements
- An OVHcloud Web Hosting plan.
- A GitHub account on which you must be logged in.
To date, only the GitHub platform is supported for use with OVHcloud Web Hosting services.
OVHcloud Control Panel Access
- Direct link:
- Navigation path:
Web Cloud>Hosting plans> Select your web hosting plan
Instructions
To associate and configure Git, you will need to make changes to your GitHub account. Before starting the guide, log in to your GitHub account.
Associate a directory with Git
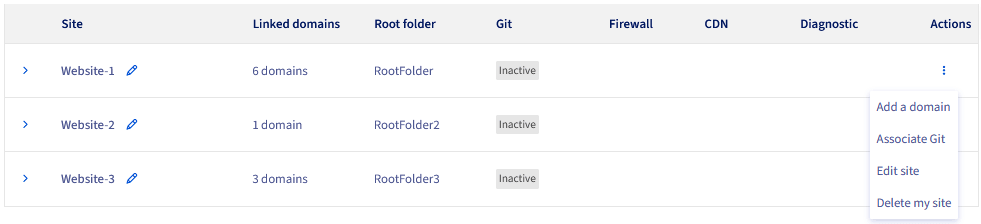
When you associate a directory with Git, all domain names in that directory will also be associated with Git. For example, if the directory corresponding to the website you are associating with is www, then all domain names associated with the www directory will also be associated with Git.
Click on the tabs below to view each of the 4 steps.
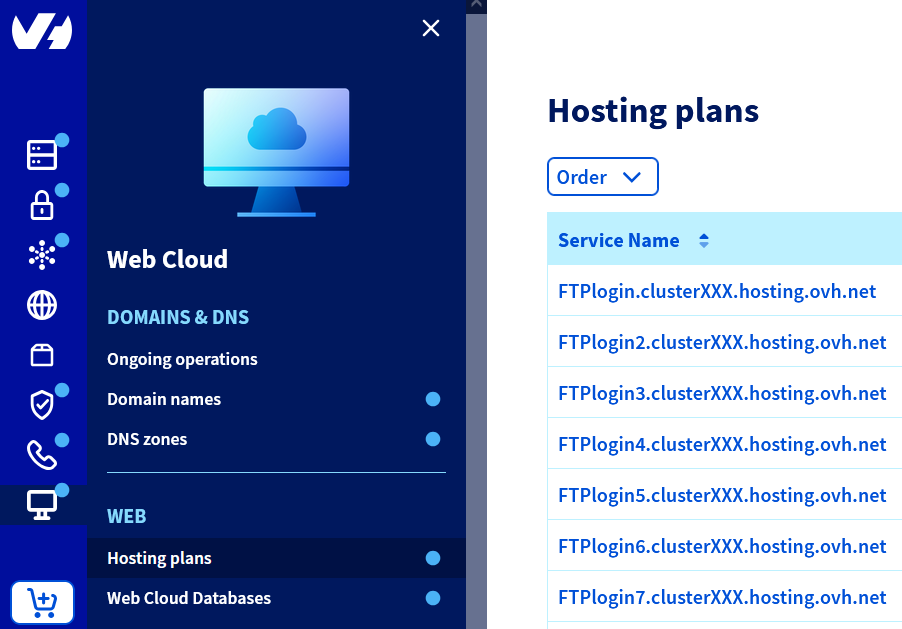
Go to the page, then select the web hosting plan concerned.

Set GitHub repository
Enter the address of your GitHub repository. If you don't have a GitHub repository for your project yet, create one.
To create a new repository:
- Log in to your GitHub account.
- Click on your profile picture in the top right-hand corner, then on
Your repositories. - On the right of the screen that appears, click
New.
Define a name for your deposit and fill in the requested information.
Tick the option Add a README file for GitHub to correctly initialise your repository.
Finally, click Create Repository.
Copy the address of your GitHub repository. It must be of the form:
https://github.com/<username>/<repository_name>.gitfor a public repository.git@github.com:<username>/<repository_name>.gitfor a private repository.
Return to the Git association form and paste the address of your GitHub repository into the Deposit field. If the address format is not correct, the following error message appears:

Now define the branch of your GitHub repository. The default branch is main, but if you want to use another branch, create one on GitHub by following the steps below:
- Log in to your GitHub account.
- Click on your profile picture in the top right-hand corner, then on
Your repositories. - Go to the relevant GitHub repository.
- Click
Main, thenView all branches, or directly clickx Branch. - To the right of the screen that appears, click
New branch. - Enter the name of the new branch and confirm by clicking
Create new branch.
Go back to the Git association form in the OVHcloud Control Panel, and enter the name of the new branch you have just created.
If you enter the address of a private GitHub repository (of type git@github.com:<username>/<repository_name>.git), an SSH key field will appear under the Branch field.
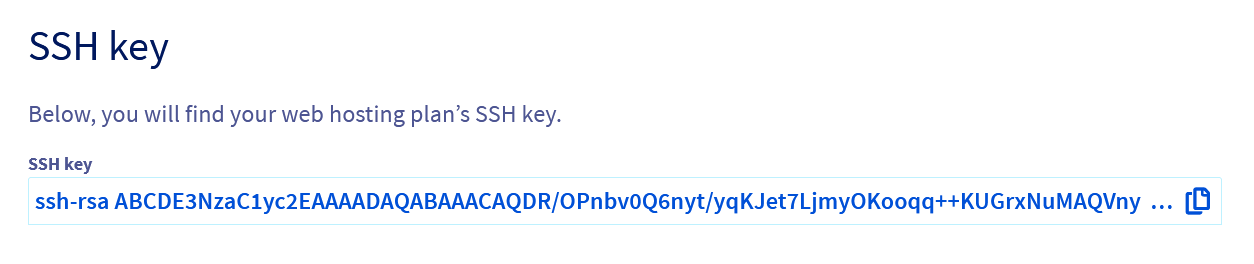
To configure your SSH key, please refer to the "Attach an SSH key to GitHub (only for private GitHub repositories)" step below.
Attach an SSH key to GitHub (only for private GitHub repositories)
Why is the SSH key required only for a private deposit?
When your GitHub repository is public, files can be retrieved without authentication, which means Git can clone and update code without the need for an SSH key. However, if your repository is private, GitHub requires authentication to access it. The SSH key can then be used to establish this secure connection and guarantee that only authorized users can interact with the repository.
Generating an SSH key is a crucial step, as it establishes a secure and encrypted connection between your website's directory and the GitHub repository. This key ensures that data transfers and code changes are done in a secure and authenticated manner, preventing unauthorized access and ensuring code integrity.
Copy your SSH key by clicking on the button on the right.
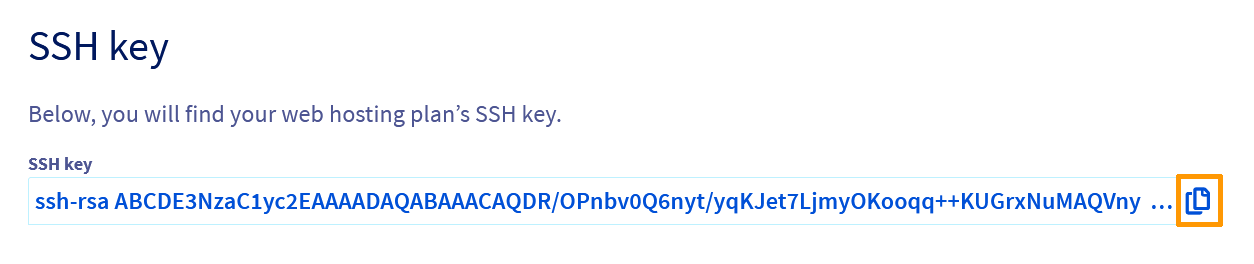
Save the SSH key to your GitHub account:
- Log in to your GitHub account.
- Click on your profile picture in the top right-hand corner, then on
Settings. - On the new page, click
SSH and GPG keysin the left-hand column. - Select
New SSH keyorAdd SSH key.
The form for adding a new SSH key will open:
- Title: add a description for your SSH key. For example, you can name this key "OVHcloud".
- Type of key: leave the default value
authentication key - Key: Paste your SSH key.
To confirm the information, click Add SSH key. If prompted, confirm access to your account in GitHub.
Configure automatic deployment
At the bottom of the Git association form, a Configuring automatic deployment section will appear, along with the webhook URL. By configuring a webhook, your GitHub repository can automatically notify your OVHcloud web hosting plan of events that occur on the GitHub repository (new deployment, changes in code, etc.). This feature is especially useful if you work as a group on the same project and want to stay up to date with all changes in the GitHub repository. To learn more, learn how to configure a webhook on GitHub.
Validate Git association
Before validating the Git association form, make sure that:
- Your SSH key has been saved in your GitHub account.
- The address of your GitHub repository is correct. It must be of the form
https://github.com/<username>/<repository_name>.git. - The name of the GitHub repository branch is correct.
- Your installation directory is empty.
To validate the information in the Git association form, click Apply configuration.
Enabling Git association
Successful association of Git
After submitting the Git association form, you are redirected to the My sites tab page.

A green banner will show you that Git is being enabled. Follow the activation of Git by clicking on the Current tasks link.

The status Running indicates that the Git association is in progress. The process may take several minutes. When the task is complete, the status Enabled is displayed.
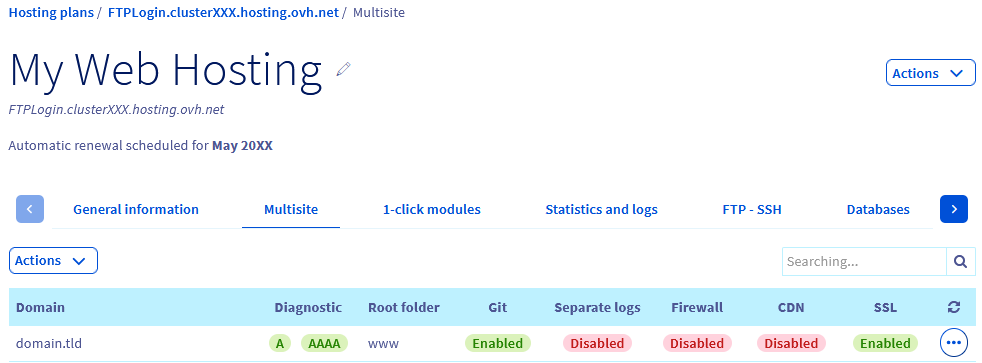
You can also follow the progress of Git activation from the My sites tab. In the Git column of the table, the In progress message on the line of the relevant website indicates that Git is being activated.
When Git association is completed, the Enabled status appears in the Git column for the relevant website.
Git association errors
In the table of the My sites tab, identify the rows corresponding to the website directory you want to associate with Git. In the Git column, if the Error message appears, it means that at least one of the following errors has occurred:
- The SSH key has not been saved in your GitHub account.
- The installation directory is not empty.
- The GitHub repository address does not exist or is incorrect.
- The branch of the GitHub repository does not exist or its name is incorrect.
To find out the exact cause of the error, check the information of the last deployment. In the table, click on the ⁝ button to the right of the relevant website, then on Latest deployment information.
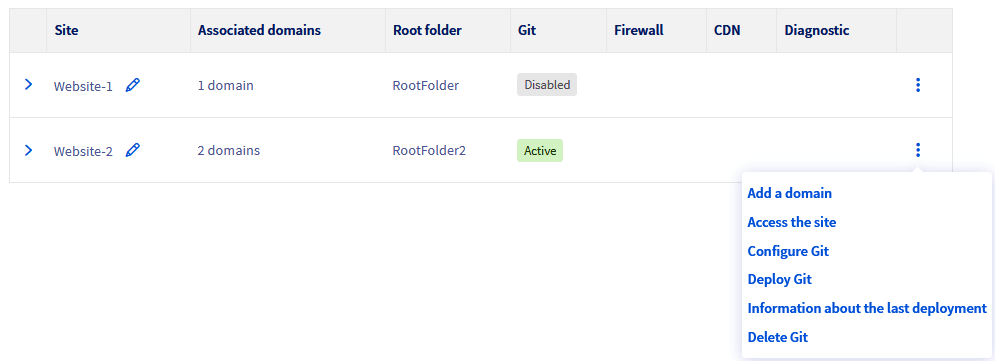
Once the error(s) has been identified, associate Git again. Repeat the operation by clicking on the ⁝ button to the right of the relevant website, then on Link Git.
Deploy your GitHub repository on your OVHcloud web hosting plan
Click on the tabs below to view each of the 4 steps.
Go to the page, then select the web hosting plan concerned.
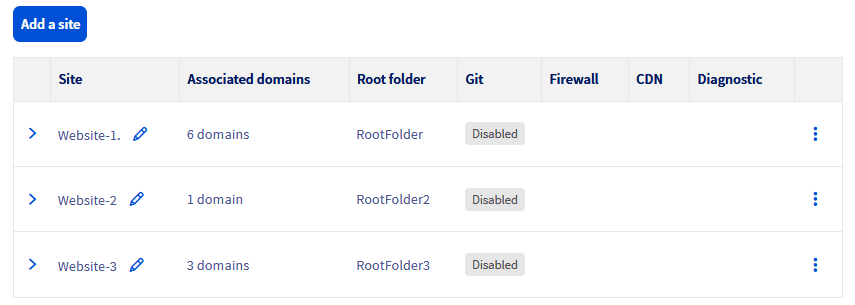
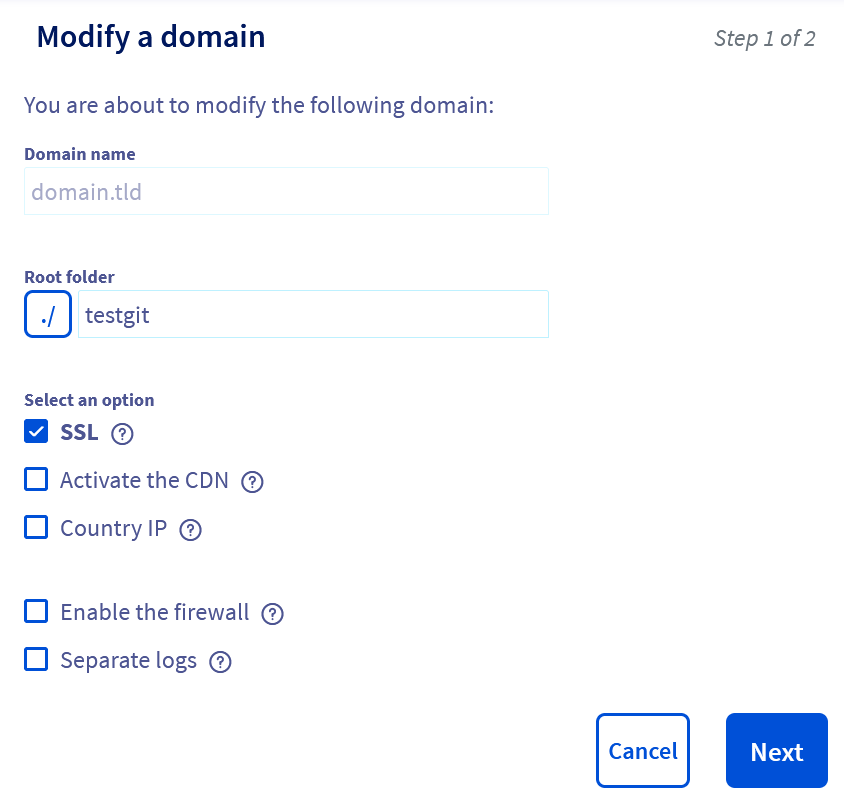
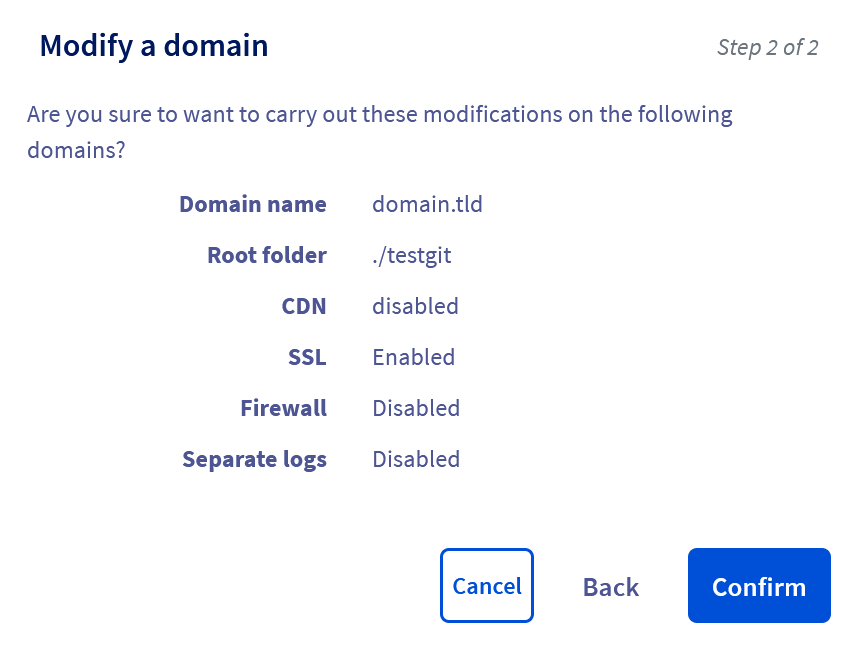
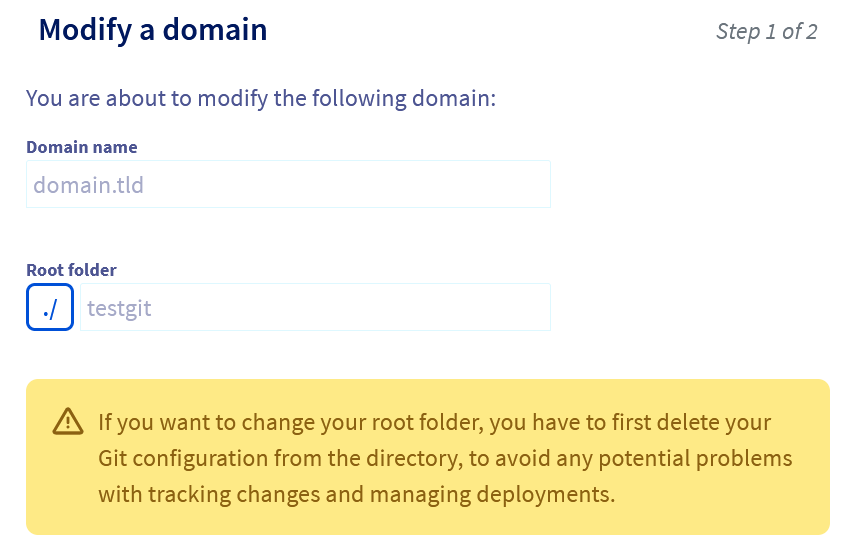
Modify a domain name
Click on the tabs below to view each of the 4 steps.
Go to the page, then select the web hosting plan concerned.
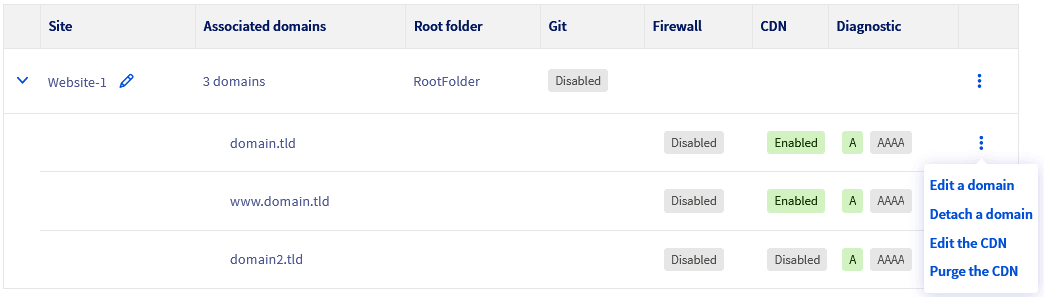
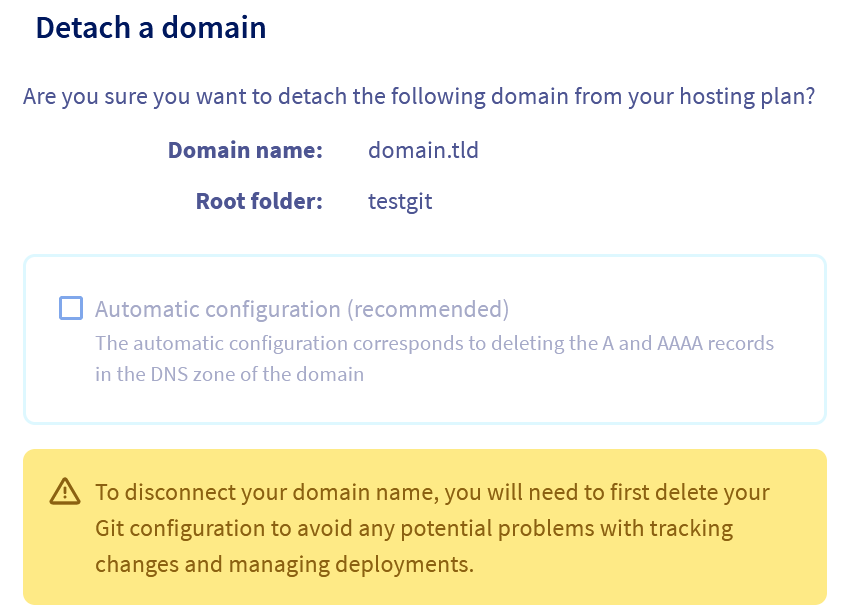
Detach a domain name
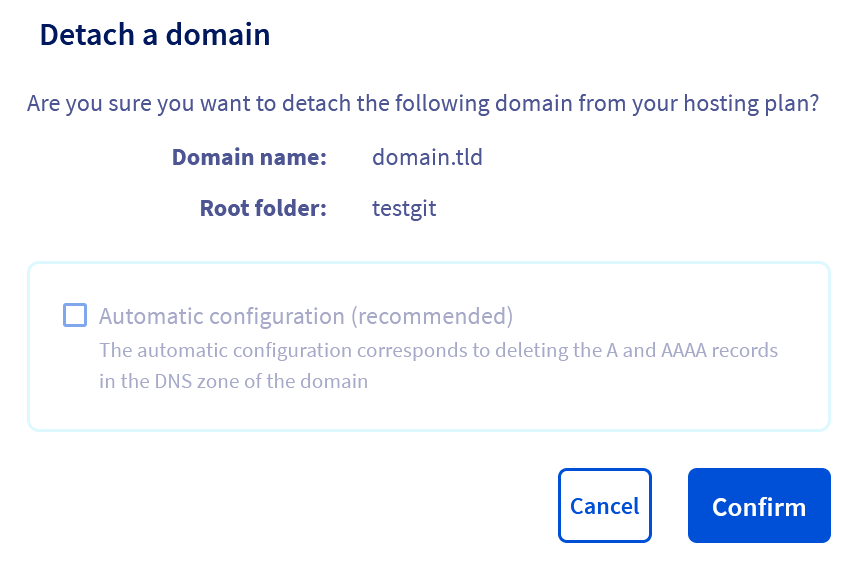
Click on the tabs below to view each of the 4 steps.
Go to the page, then select the web hosting plan concerned.
Configure Git
Click on the tabs below to view each of the 4 steps.
Go to the page, then select the web hosting plan concerned.
Latest deployment information
Once you have deployed your GitHub repository on your web hosting plan, you can view information on the latest deployment, such as errors, tests and any useful information.
Click on the tabs below to view each of the 3 steps.
Go to the page, then select the web hosting plan concerned.
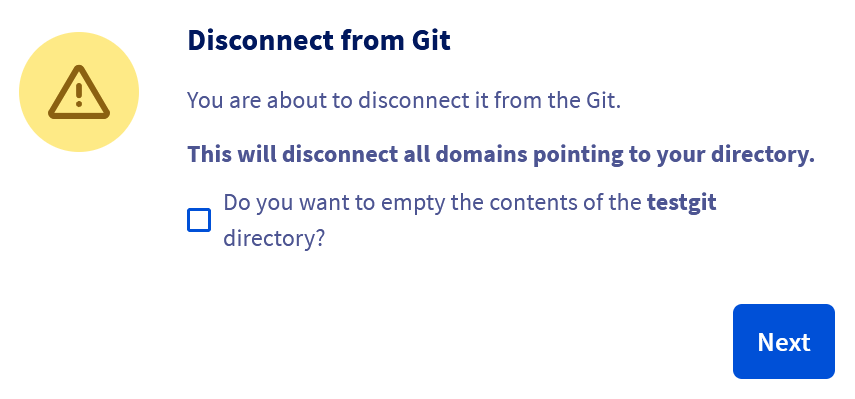
Delete Git association
Click on the tabs below to view each of the 4 steps.
Go to the page, then select the web hosting plan concerned.


Configure a webhook on GitHub
Retrieve the webhook URL
If you are already in the Git association form, copy the webhook URL and go to the step "Configure the webhook".
Click on the tabs below to view each of the 4 steps.
Go to the page, then select the web hosting plan concerned.
Configure the webhook
Log in to your GitHub account, and go to the repository where you want to configure the webhook. Go to the Settings tab, then in the settings side menu, click Webhooks. Click the Add webhook button to access the form:
- Payload URL: Enter the URL provided in the Git association form (
Webhook URL). - Content type: Choose
application/jsonas the content type for the data sent. - Secret: The secret is optional. GitHub will use it to sign messages sent by the webhook, enhancing security.
- SSL verification: If your website supports HTTPS, leave this option enabled for increased security.
- Which events would you like to trigger this webhook?: Select the events that will trigger the webhook to be sent. For automatic deployment,
Just the push eventis often enough, but you can chooseSend me everythingto receive notifications for all events. - Active: Make sure that the box is ticked to enable the webhook.
Click Add webhook to save and activate your new webhook.
Test your webhook
Once you have created your webhook in GitHub, go to the list of your webhooks and select the one you have just created, or click Edit.
On the screen that appears, click on the Recent Deliveries tab. To send a test event specifically, GitHub usually sends a ping event when creating the webhook, and you can use the Redeliver button next to this event to test it.
If the test has worked, the Response tab returns a code of 200. If an error code is returned (usually 500 or 400), this means that your webhook has been misconfigured. Return to the form for adding a webhook, and check the information, specifically the webhook URL provided by OVHcloud.
Use the webhook
Once your webhook has been set up, your website's code will be updated automatically whenever changes occur on the GitHub repository. For example, if changes are made by one of your colleagues on the GitHub repository, then your website code will be updated locally (on your OVHcloud hosting plan).
Conclusion
You have just linked your website code with Git, via your GitHub repository. You can now deploy the changes made on the GitHub repository to your web hosting plan, or deploy them in an automated way using the webhook. You can also view your deployment logs and perform multiple actions in just a few clicks via the OVHcloud Control Panel.
Go further
Putting a website online on your web hosting plan
For specialised services (SEO, development, etc.), contact OVHcloud partners.
If you would like assistance using and configuring your OVHcloud solutions, please refer to our support offers.
Join our community of users.