How to use Terraform
Find out how to generate an Application Credential from Horizon and automate the deployment of your OPCP resources with Terraform
Objective
Terraform is an open source Infrastructure as Code (IaC) tool developed by HashiCorp. It allows you to describe and provision your infrastructure declaratively from configuration files written in HashiCorp Configuration Language (HCL).
Since the OPCP offer is based on OpenStack, you can use the Terraform OpenStack provider to automate the deployment of your resources: instances, networks, volumes, key pairs, etc.
This guide also applies to OpenTofu, the open source fork of Terraform maintained by the Linux Foundation. OpenTofu is compatible with the HCL syntax and Terraform providers: simply replace the terraform command with tofu in the examples below.
This guide details the steps required to generate an Application Credential from Horizon, configure Terraform and deploy a first server on your OPCP infrastructure.
Requirements
- An active OPCP service.
- A user account with sufficient rights to log in to Horizon on the OPCP offer.
- Terraform installed (version >= 1.0) or OpenTofu on your workstation.
- An SSH key pair on your local workstation to access your instance.
- A private network previously created in your OPCP project (see the guide How to install an instance from the Horizon interface).
Table of Contents
- 1. Creating an Application Credential from Horizon
- 2. Preparing the Terraform environment
- 3. Creating a server
- 4. Additional node-level configurations (RAID, LACP)
- 5. Removing the infrastructure
- 6. Troubleshooting
- 7. References
Instructions
1. Creating an Application Credential from Horizon
To allow Terraform to communicate with your OPCP infrastructure, you need to generate an Application Credential pair (id / secret) from the Horizon interface. This mechanism avoids using your Keycloak credentials directly and provides dedicated authentication for your automation workflows, with a permissions scope limited to the current project.
An Application Credential is automatically deleted when the user who created it is revoked. To avoid any loss of access in an automation workflow, do not generate an Application Credential from a nominative or easily revocable user account; use a dedicated account instead.
Logging in to Horizon
Log in to the Horizon interface of your OPCP environment, then select the project in which you want to deploy your resources via Terraform. For more information, refer to the Getting started with your OPCP guide.
Creating the Application Credential
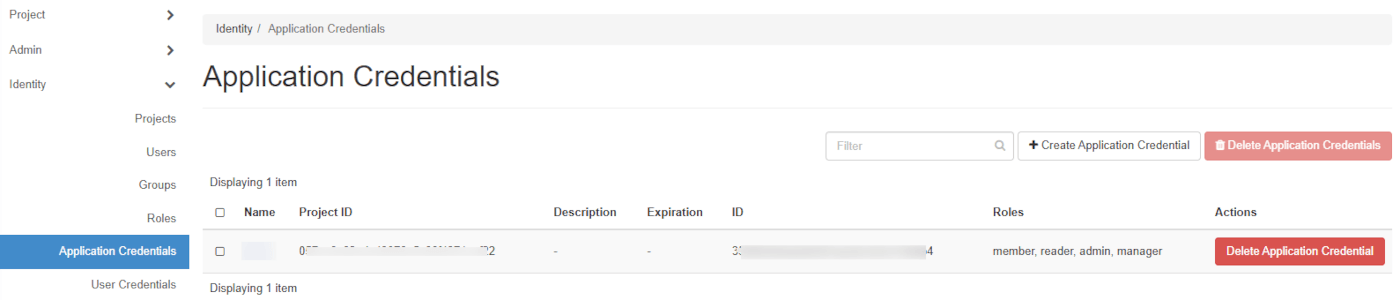
In the left-hand menu, click on Identity, then on Application Credentials.
Click on + Create Application Credential.
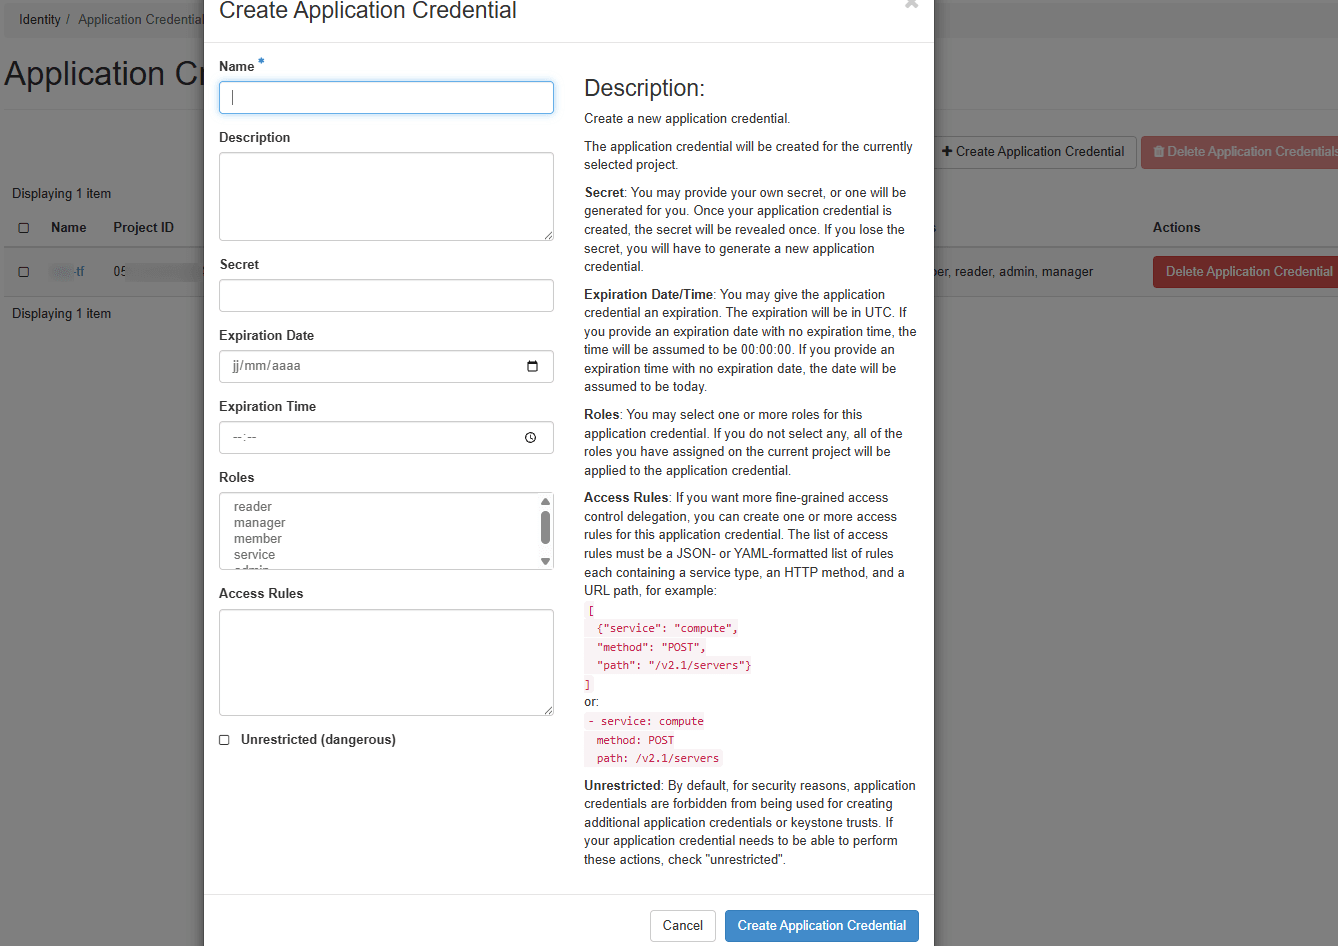
Fill in the following fields:
Click on Create Application Credential.
Once the window is closed, the secret will no longer be accessible. Download the clouds.yaml or openrc file offered by Horizon, or copy the id and secret values to a secure location.
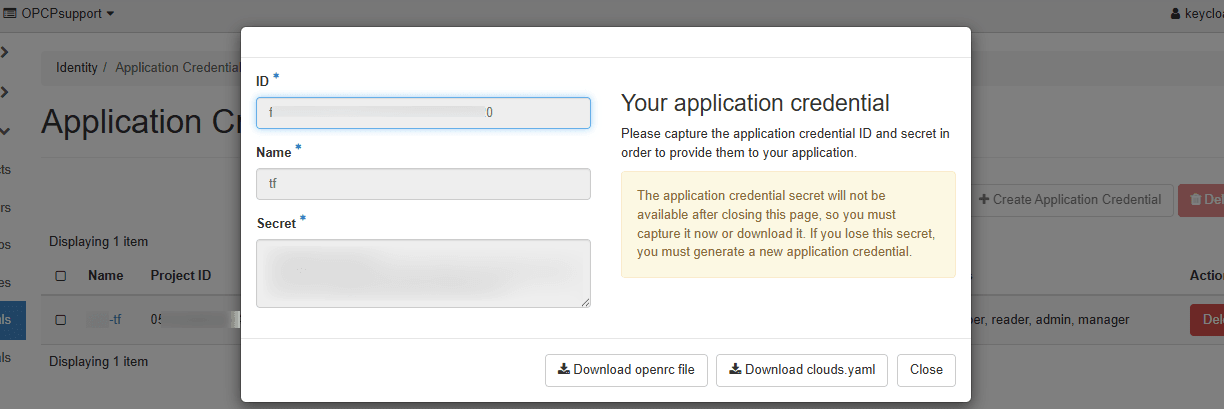
For the rest of this tutorial, download the openrc file: it will be used in the next step to authenticate Terraform against your OPCP infrastructure.
2. Preparing the Terraform environment
Creating the working directory
Create a directory dedicated to your Terraform project:
Defining the OpenStack provider
In a file named provider.tf, add the following lines:
No parameters are required in the provider block: the OpenStack provider automatically retrieves the authentication information from the OS_* environment variables.
Loading OpenStack environment variables
When you created your Application Credential, Horizon offered to download a clouds.yaml or openrc file. The simplest approach is to source this openrc.sh file in your shell before running Terraform:
The openrc.sh file exports OS_AUTH_URL, OS_REGION_NAME, OS_APPLICATION_CREDENTIAL_ID and OS_APPLICATION_CREDENTIAL_SECRET, among others. These variables will automatically be used by the Terraform OpenStack provider.
Initialisation
Download the OpenStack provider plugins:
3. Creating a server
In a main.tf file, declare the resources required to create an instance attached to an existing private network:
The names of available images, flavors and networks can be listed from Horizon or with the OpenStack CLI (openstack image list, openstack flavor list, openstack network list). To configure the CLI, refer to the guide How to use the API and get credentials.
Reviewing the plan
Before any deployment, preview the actions that will be performed:
Applying the configuration
Deploy the instance with the following command:
Confirm with yes when Terraform asks you to. Once the creation is complete, the instance is visible in the Horizon interface, in the Compute > Instances section.
4. Additional node-level configurations (RAID, LACP)
Some configurations must be applied on the baremetal node before deploying the instance and are not covered by the Terraform OpenStack provider. They require admin Ironic rights (or nodes transferred to your project) and must be performed via the OpenStack CLI.
Software RAID: to configure software RAID on a baremetal node, refer to the guide How to set up software RAID on a node. The target_raid_config attribute is not exposed by the openstack_baremetal_node_v1 resource. This operation must be performed before the terraform apply that deploys the instance, and the configured node should then be targeted via availability_zone = "nova::<node-id>".
LACP / bonding: to aggregate several network interfaces of a node, refer to the guide How to set up LACP on a node. Baremetal port and bonding configuration cannot be managed declaratively by the Terraform OpenStack provider. This operation must be performed before the terraform apply that deploys the instance.
5. Removing the infrastructure
To delete all resources created via Terraform:
terraform destroy does not reset the RAID or LACP configurations applied to the node. To remove them, follow the dedicated section of the corresponding guide using the OpenStack CLI.
6. Troubleshooting
7. References
- Official Terraform documentation
- Official OpenTofu documentation
- Terraform OpenStack provider
- openstack_compute_instance_v2 resource
- OpenStack Application Credentials
Go further
For training or technical assistance implementing our solutions, contact your sales representative or visit our Professional Services page to request a quote and have your project analyzed by our experts.
Join our community of users.