
Creating an OVHcloud DNS zone for a domain name
Find out how to create an OVHcloud DNS zone for your domain name via the OVHcloud Control Panel
Objective
The DNS (Domain Name System) zone is a domain name's configuration file. It consists of DNS records that map the domain name to various services and functions.
For more information, please refer to our guides:
- Everything you need to know about DNS servers
- Everything you need to know about DNS zone
- Everything you need to know about DNS records
For a number of reasons, you may need to create a DNS zone for your domain name at OVHcloud.
This guide explains how to create an OVHcloud DNS zone for your domain name via the OVHcloud Control Panel.
Requirements
- You have administrative access to manage your domain name.
- The domain name concerned does not already have an active or inactive DNS zone with OVHcloud, nor is it the subject of an operation or order in progress with OVHcloud.
OVHcloud Control Panel Access
- Direct link:
- Navigation path:
Web Cloud>DNS zones> Click the Order button
Instructions
You can create multiple DNS zones (from different DNS/hosting providers) for the same domain name. However, you can only have one active DNS zone for your domain name. This restriction is designed to avoid DNS conflicts.
You can activate/deactivate a DNS zone by declaring the DNS servers of your domain name. You can change this declaration and change the DNS servers of a domain name at:
- The registrar registered your domain name.
- The service provider that manages it, if you use a specialised service provider to manage your domain name.
By modifying the DNS servers of a domain name, you disable the configuration of the old DNS zone applied in favour of the configuration of the new DNS zone (present on the new DNS servers declared).
Therefore, please check that the configuration of the new DNS zone meets your expectations before changing the DNS servers registered with your domain name.
1 - Create the DNS zone via the OVHcloud Control Panel
In the , open the Web Cloud section and click DNS zones. Then click the Order button.
On the page that appears, enter the domain name (for example: domain.tld) for which you want to create an OVHcloud DNS zone. Wait a few moments while the tool performs checks on the domain name.
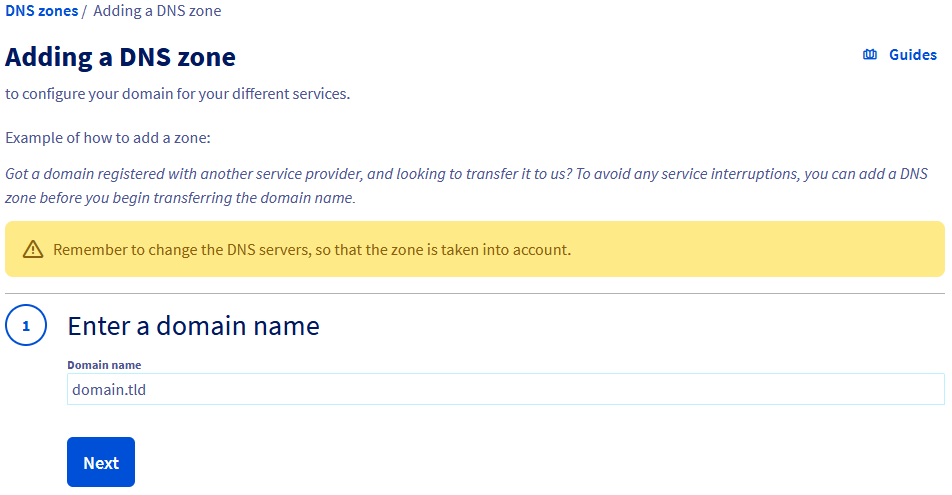
If a message indicates that the DNS zone cannot be created, check that the domain name meets the necessary requirements or contact the person who manages it. Once everything is correct, try the operation again.
Once the verification is complete, choose whether to enable the minimum records for the DNS zone you are going to create. This choice is not definitive, as you can always edit DNS zone records later.
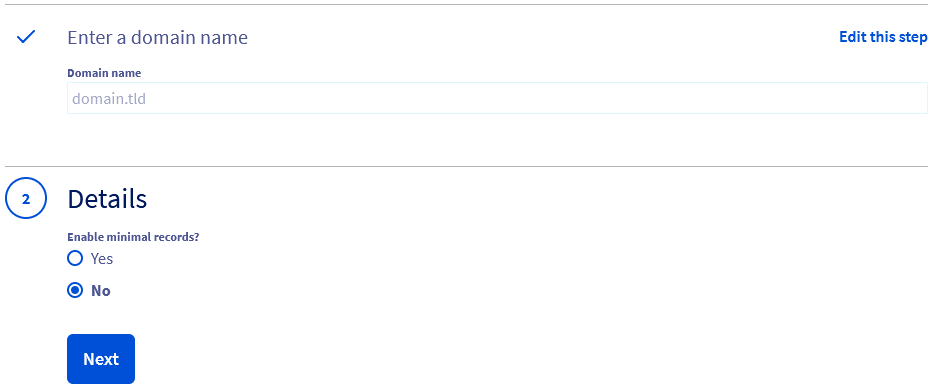
| Enable minimal entries? | Details |
|---|---|
| Yes | Select this option if you would like to customise the DNS zone yourself at a later stage.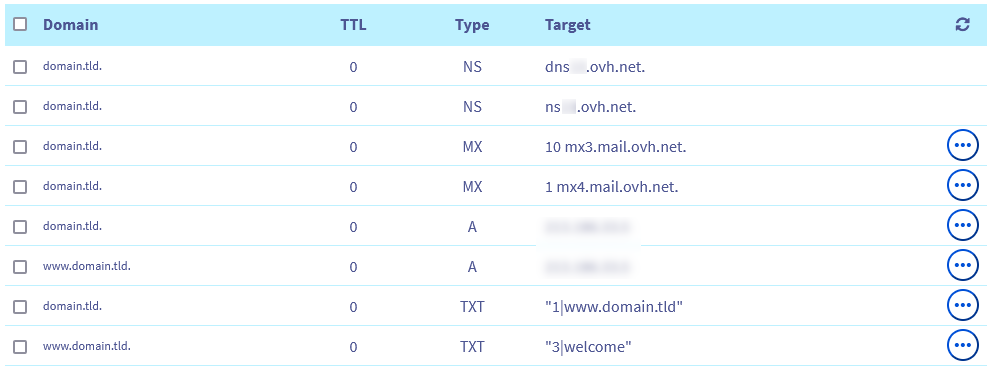 |
| No | Select this option if you plan to use OVHcloud services as a web hosting, with the zone preconfigured for this purpose.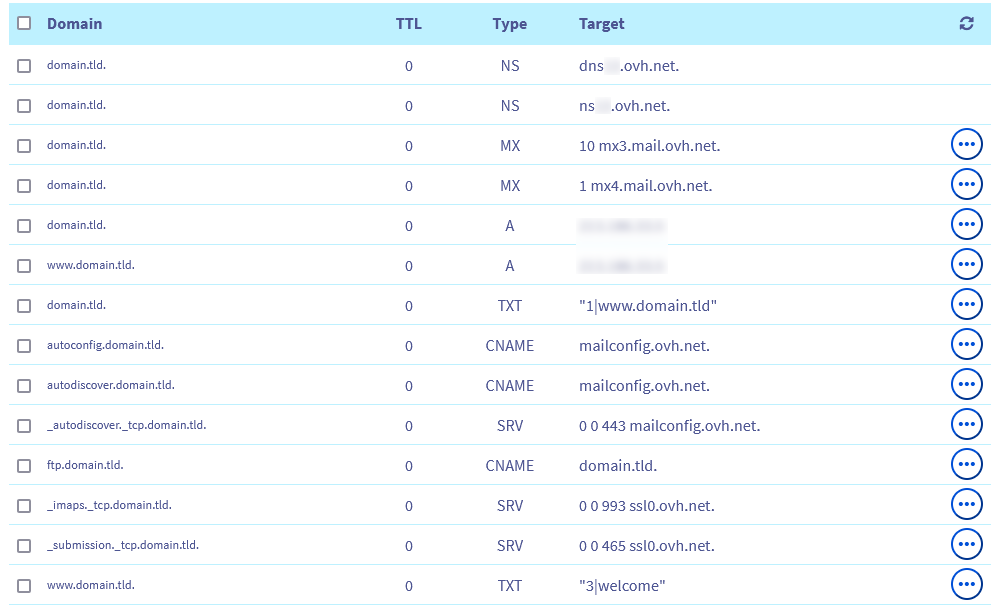 |
Once your choice is made, follow the steps displayed in your OVHcloud Control Panel until the DNS zone is created.
2 - Edit the DNS zone (optional)
Now that your domain name's DNS zone has been created, you can edit it. This step is optional, but it may be necessary if you want to ensure that the services associated with your domain name remain available (e.g. your website and/or emails).
To edit this DNS zone, please read our guide on Editing a DNS zone at OVHcloud.
If you have just created the DNS zone and the domain name does not yet appear in your list of services, wait 15 to 20 minutes, then reload the page.
3 - Modify the domain name's DNS servers
Once the OVHcloud DNS zone is ready to be used, activate it by declaring the corresponding DNS servers. First, retrieve the names of the OVHcloud DNS servers on which your domain name's DNS zone was created.
In the table, locate the Type and Target columns, find the two NS rows and retrieve the two values in the Target column.
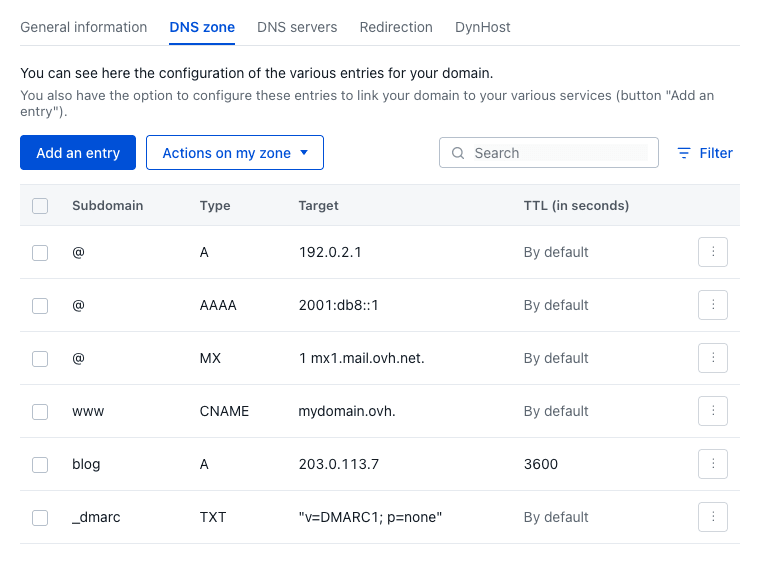
The names of the DNS servers should be in one of the following three forms:
nsXX.ovh.netanddnsXX.ovh.netor,nsXXX.ovh.netanddnsXXX.ovh.net(where eachXrepresents a number between 0 and 9).nsXX.ovh.caanddnsXX.ovh.caor,nsXXX.ovh.caanddnsXXX.ovh.ca(where eachXrepresents a number between 0 and 9).ns200.anycast.meanddns200.anycast.me(if you have subscribed to the DNS anycast option).
Once the two DNS server names have been retrieved, two situations are possible.
As a reminder, please check that the configuration of the new DNS zone meets your expectations before changing the DNS servers registered with your domain name.
Click on one of the two situations to display the content.
The domain name has its active DNS zone with OVHcloud
Refer to this guide to verify or modify the DNS servers registered for your domain name.
The domain name has its active DNS zone with another provider
In this specific case, contact your DNS provider and specify that you want to replace the NS-type DNS records for your domain name.
Here is an example of a request to send to your DNS provider:
Hello,
For my domain name domain.tld, I would like to replace the current DNS servers with the following DNS servers:
- nsXX.ovh.net.
- dnsXX.ovh.net.
Kind regards,
In the example above, replace the values domain.tld, nsXX.ovh.net and dnsXX.ovh.net with your own values.
After modifying the domain name's DNS servers, the propagation of changes may take up to 48 hours.
If you would like to customise the names of the DNS servers associated with your domain name's active DNS zone, please read our guide "Customising a domain name's DNS servers (Glue Records)".
Go further
Everything you need to know about DNS servers
Everything you need to know about DNS zone
Everything you need to know about DNS records
For specialised services (SEO, development, etc.), contact OVHcloud partners.
If you would like assistance using and configuring your OVHcloud solutions, please refer to our support offers.
Join our community of users.