Deploy a Minecraft server on the Game Panel
Learn how to deploy a Minecraft server on the OVHcloud Game Panel, monitor installation progress, and connect from the Minecraft client.
Objective
The OVHcloud Game Panel lets you deploy a Minecraft server with automated installation and port configuration.
This guide explains how to deploy and connect to a Minecraft server on the OVHcloud Game Panel.
Requirements
- A VPS or a dedicated server in your OVHcloud account with the Game Panel feature enabled.
- Access to the Game Panel. Refer to Log in to the Game Panel.
Instructions
Step 1 — Access the Game Panel
Log in to your OVHcloud Game Panel. From the left-hand menu, go to the Game Servers section and click Add Game Server.
Step 2 — Create a Minecraft server
Select Minecraft from the game list. A configuration window opens.
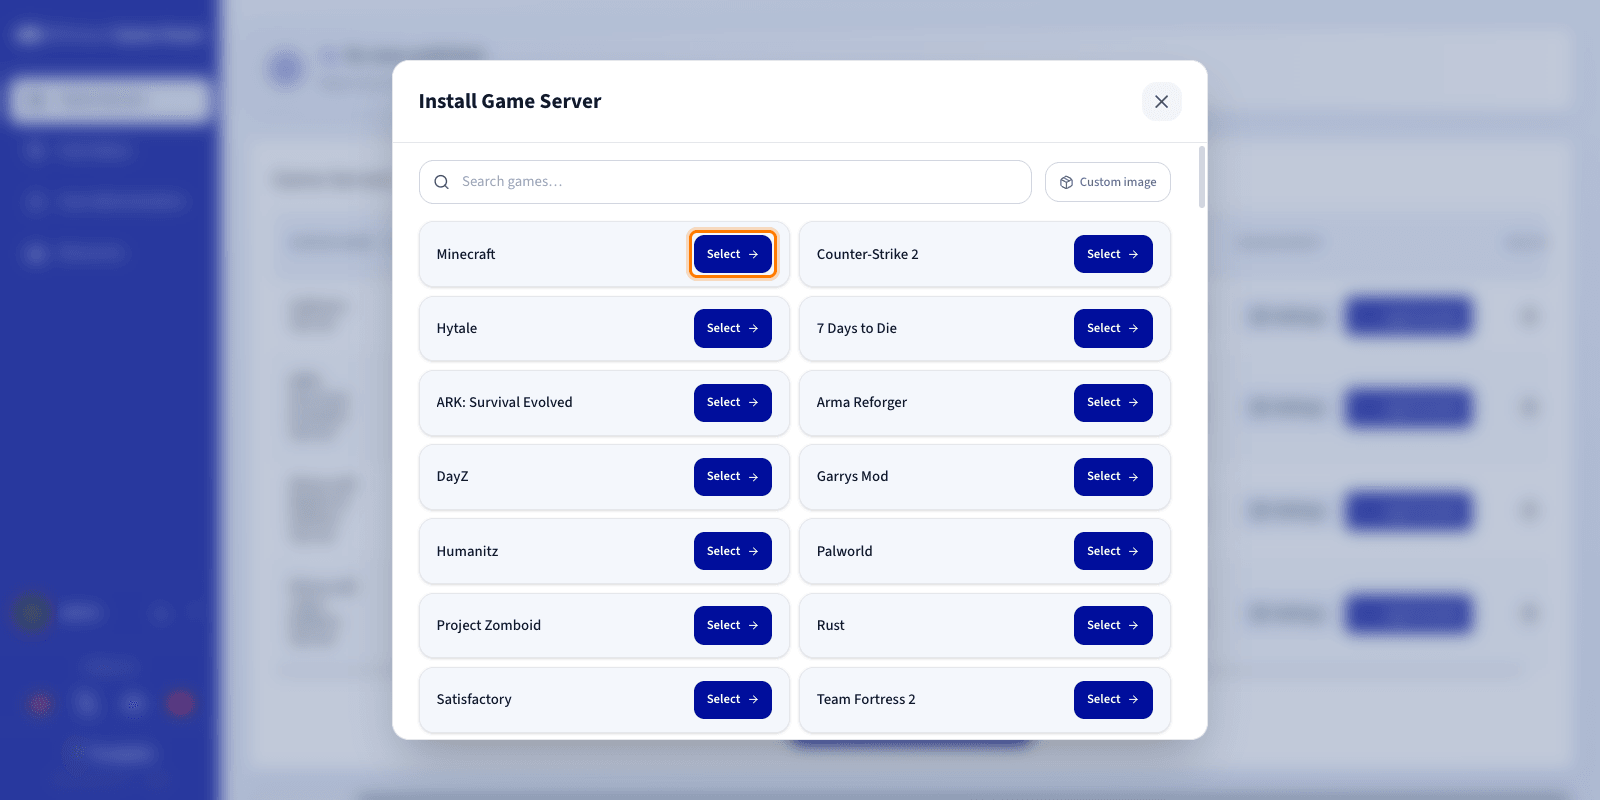
Step 3 — Choose the Minecraft server type
When creating your server, you must choose the type of Minecraft server you want to install. Each option meets different needs:
- Minecraft Java Edition: the official version of Minecraft for PC. It suits servers that want to offer a classic Minecraft experience, with no specific plugin or mod system preinstalled.
- Minecraft Bedrock Edition: the version designed to let players connect from different devices, including Windows, consoles, and smartphones. It is the ideal choice for cross-platform play.
- PaperMC: an optimised solution for community servers that use plugins. Plugins add features without modifying the players' game, such as economy systems, teleportation, area protection, or mini-games.
- Fabric: a lightweight and fast mod platform. It is appreciated for its performance and its vast mod ecosystem, while keeping a relatively low resource consumption.
- NeoForge: an advanced mod platform offering extensive customisation possibilities. It is particularly suited to servers using complex mods or large modpacks that require extended features.
Step 4 — Configure the Minecraft server
Enter a name for your server and review the configuration before launching the installation.
If this is your first Minecraft server on the Game Panel and the default Game Port is available, all required ports are configured automatically. No manual setup is needed.
You can expand Advanced settings to adjust options such as ports binding and resource limits. The defaults are suitable for most game servers.
Step 5 — Launch the installation
Click Install to launch the installation. The deployment starts.
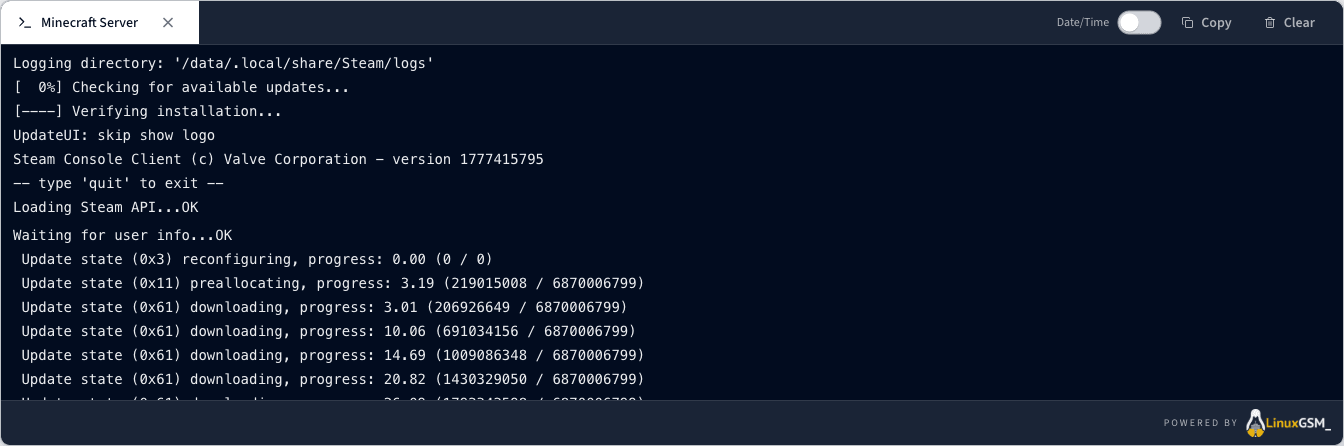
Step 6 — Monitor the installation
Click Log/Console to follow the installation progress in real time.
While the server is installing, the status will display Installing. You can track detailed progress directly in the logs panel.
Step 7 — Verify the server is running
Confirm the server status is Running and that CPU and RAM activity is visible. You can use the Log/Console and Settings controls to manage the server.

Step 8 — Confirm installation is complete
Once the installation is finished, the server status changes to Running.
Step 9 — Retrieve connection information
Once your server status is Running, copy the IP address and port from the Connection column of the Game Servers list.
Step 10 — Join your server in Minecraft
- Open Minecraft.
- Go to Multiplayer.
- Click Direct Connect and paste the IP address and port from the Connection column.
Go further
Join our community of users.