
Add or Remove Nodes in a Nutanix Cluster (Scale In/Out)
Scale your Nutanix on OVHcloud cluster by adding or removing nodes via the Control Panel or the API
Objective
Nutanix clusters on OVHcloud are scalable. You can now add (scale out) or remove (scale in) nodes directly from the OVHcloud Control Panel or the OVHcloud API.
OVHcloud provides services for which you are responsible, with regard to their configuration and management. You are therefore responsible for ensuring they function correctly.
This guide is designed to assist you in common tasks as much as possible. Nevertheless, we recommend that you contact the OVHcloud Professional Services team or a specialist service provider if you have difficulties or doubts concerning the administration, usage or implementation of services on a server.
Requirements
- A Nutanix cluster hosted in your OVHcloud account
- Access to the Prism Central administration interface
- Access to the .
Technical Information
- Your cluster must have between 3 and 32 nodes
- All new nodes must run the same AOS version as the existing cluster
OVHcloud Control Panel Access
- Direct link:
- Navigation path:
Hosted Private Cloud>Nutanix> Select your cluster
Instructions
Scale Out (add a node)
Add a node
-
Select your Nutanix cluster.
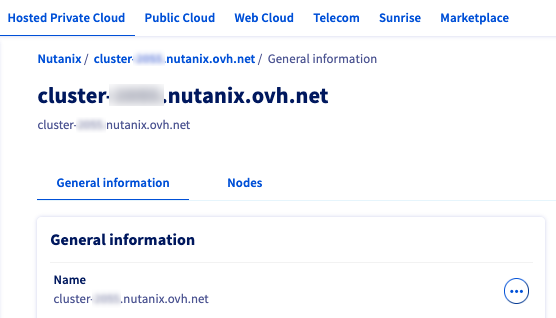
-
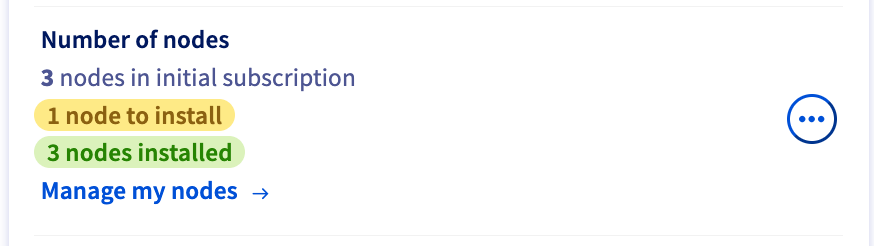
In the General information tab, you can see the Number of nodes. Click
Manage my nodes.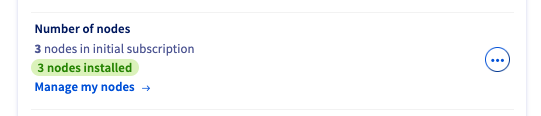
-
In the Nodes tab, select
Add nodes.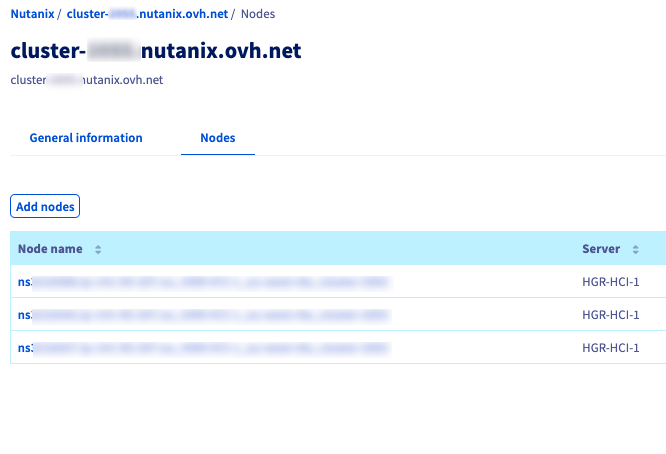
-
Review the configuration and pricing in the pop-up window, then click
Orderto add the node(s).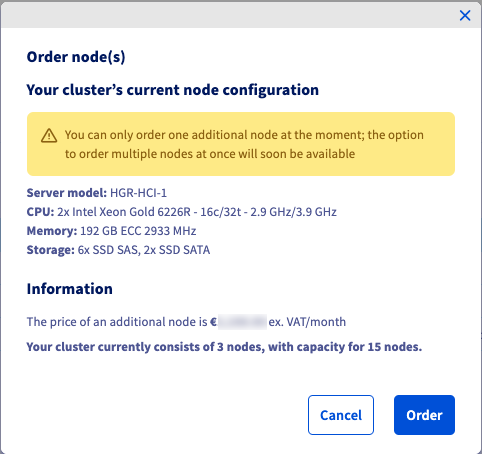
Once the node is delivered, you can see the status in the General information tab.
The Number of nodes area will show a new node to install.
Install an OS
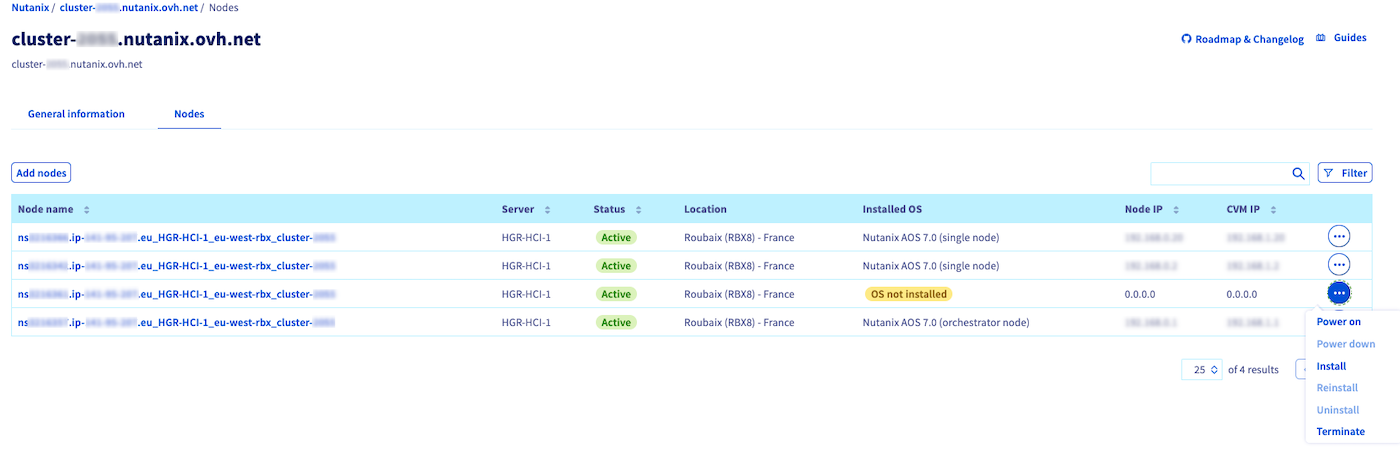
If you click Manage my nodes again, you will see a list of your nodes. For any node with an OS not installed status, click the more options ... button and select Install.
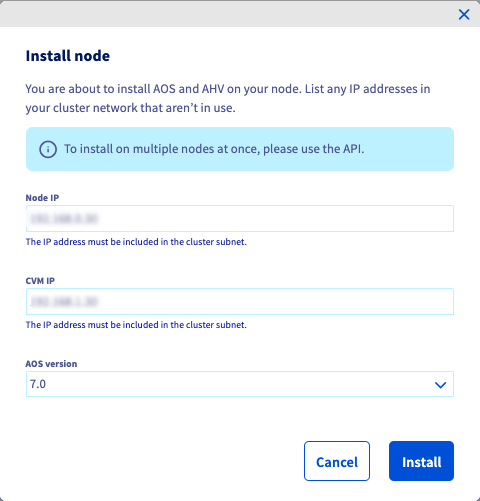
Enter the configuration details for your node. Be sure to install the same AOS version as your cluster.
Click Install.
A confirmation banner will appear.

Once the node has been installed, you can connect to Prism Central/Element and expand your cluster.
Please refer to the documentation below:
Scale In (remove a node)
Power down a node
-
Navigate to your Nutanix cluster via the
Nutanixmenu.
-
In the General information tab, you can see the Number of nodes. Click
Manage my nodes.
-
Here, you have 2 options:
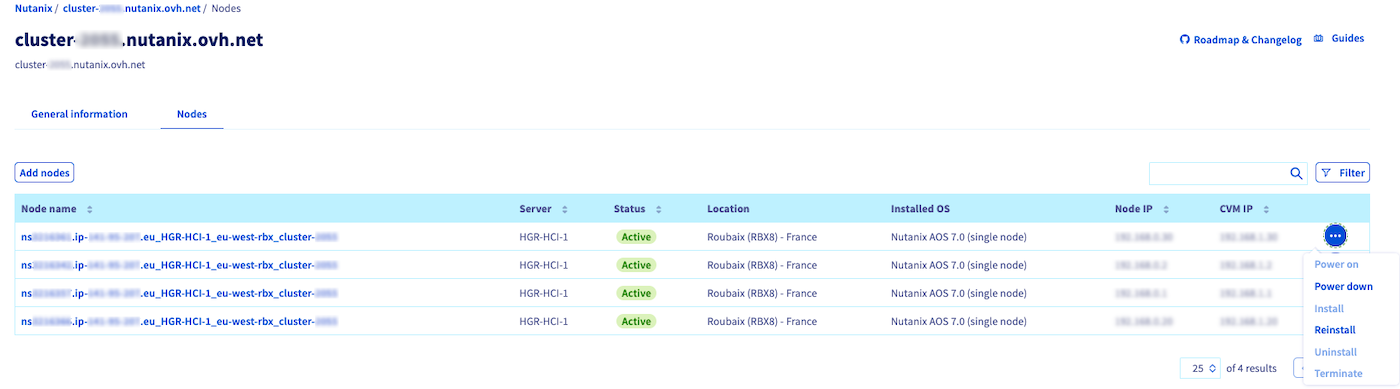
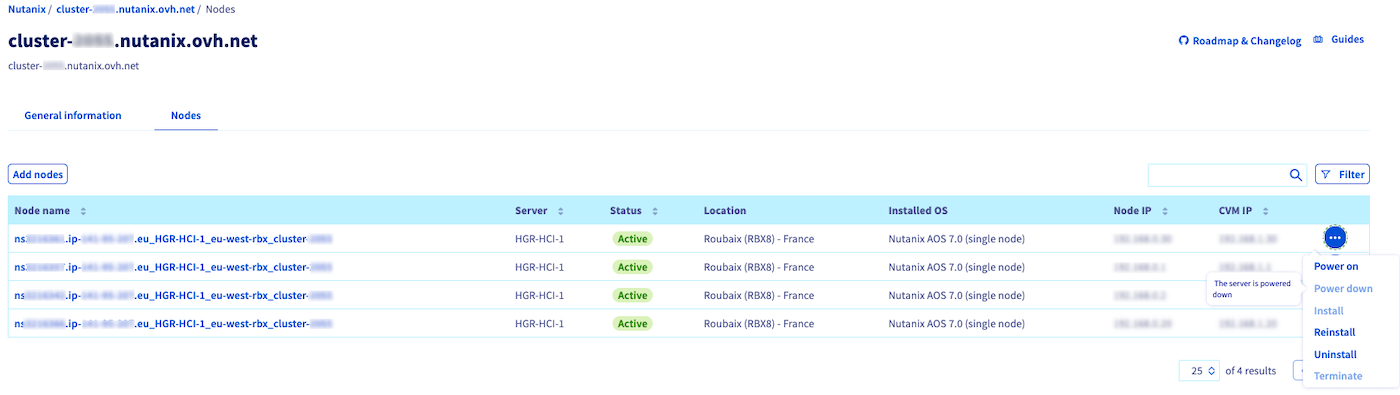
For the node you wish to remove, click the more options ... button and select Power down.
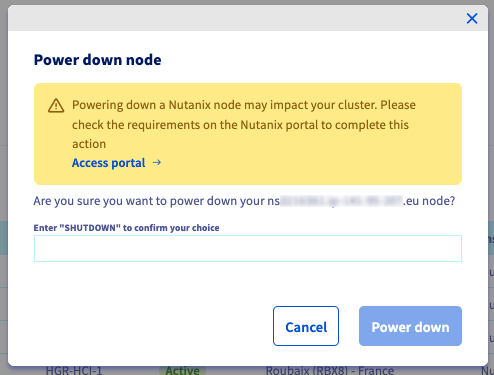
A warning pop-up will appear. Type the required term and click Power down.
Powering down a Nutanix node may impact your cluster. Please check the requirements on the Nutanix portal to complete this action.
A confirmation banner will appear.

Uninstall the node
Once the node is powered down, click the more options ... button and select Uninstall.
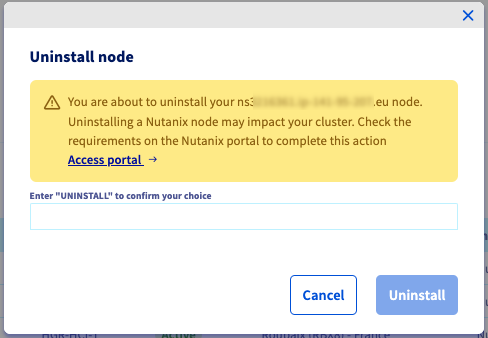
A warning pop-up will appear. Type the required term and click Uninstall.
Uninstalling a Nutanix node may impact your cluster. Please check the requirements on the Nutanix portal to complete this action.
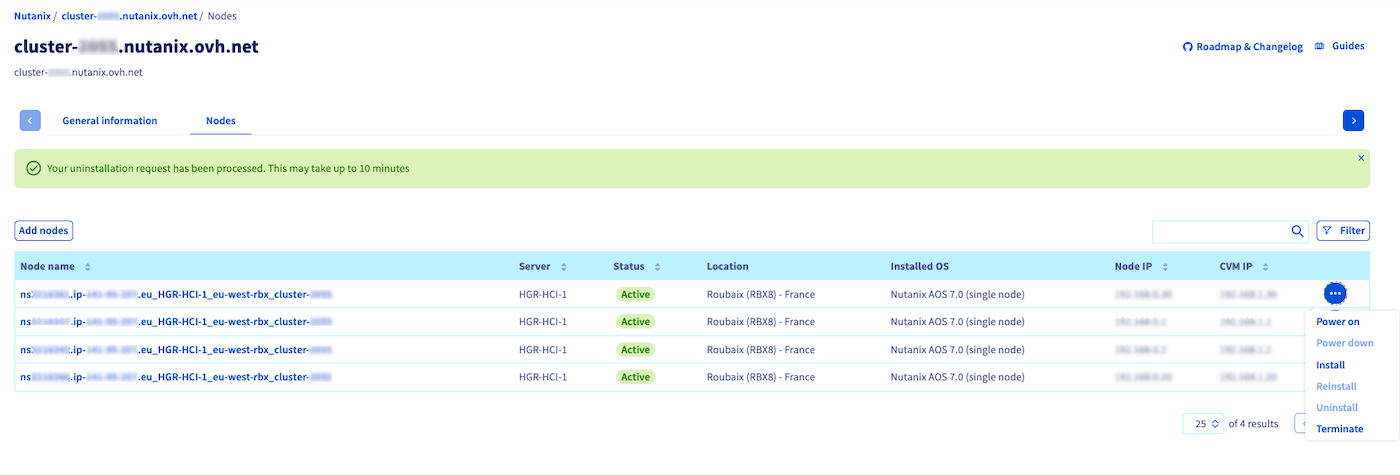
A confirmation banner will appear.

Remove the node
Once the node is uninstalled, click the more options ... button and select Terminate.
A warning pop-up will appear. Type the required term and click Confirm.
Your suspended service will appear in your nodes list for approximately one week before being permanently deleted. This allows you to reactivate the service if you need to reverse the deletion.
Go further
You can go even further by reading these guides:
For training or technical assistance implementing our solutions, contact your sales representative or visit our Professional Services page to request a quote and have your project analysed by our experts.
Ask questions, give your feedback and interact directly with the team building our Hosted Private Cloud services on the dedicated Discord channel.
Join our community of users.