
Managing a DNS zone's history
Find out how to view, compare, download and restore your DNS zone backups
Objective
The Domain Name System (DNS) zone of a domain name is its configuration file. It is made up of technical information, called DNS records. The DNS zone is, in a way, like a switching centre.
For more information, please refer to the following guides:
- Everything you need to know about DNS servers
- Everything you need to know about DNS zones
- Everything you need to know about DNS records
For various reasons, you may need to apply an older DNS configuration to your domain name.
DNS management is now made easier thanks to the history of your DNS zones.
Find out how to view, compare, download and restore your DNS zone backups.
Requirements
- Access to manage the domain name concerned.
OVHcloud Control Panel Access
- Direct link:
- Navigation path:
Web Cloud>Domain names> select your domain name >DNS zonetab
Instructions
Backup limits
Your DNS zone backups are subject to the following limitations:
- We keep a maximum of 200 backups for the same DNS zone.
- Once a backup is more than 31 days old, it is automatically deleted, with the exception of the 5 most recent backups made.
If your DNS zone has been deleted
When a DNS zone is deleted from your OVHcloud Control Panel (manual deletion, service expiry or any other reason), an email is sent to the service's administrator contact at the time of deletion. Its subject line reads [aa00000-ovh] [OVH-DNS] Deletion of your DNS Zone domain.tld and contains a link to retrieve the contents of your former DNS zone.
This link is only valid for 30 days from the date the email was sent. After this period, the configuration of the deleted DNS zone is permanently lost.
If you cannot find this email in your mailbox, you can view it in your OVHcloud Control Panel, in the My messages section, which contains all the messages sent to your contact email address. For more information, consult our guide "How to manage messages in your OVHcloud Control Panel".
To check or change the administrator contact of a service, consult our guide "Managing contacts for your services".
Open your DNS zone history
Above the table, open the Actions on my zone menu and click View the history of my DNS zone.
A new page lists the history of your DNS zone backups, from the most recent to the oldest. The current version of your DNS zone is at the top of the table, marked Current. Each row provides a View, a Download and a Retrieve action, and the Compare versions button lets you compare two versions.
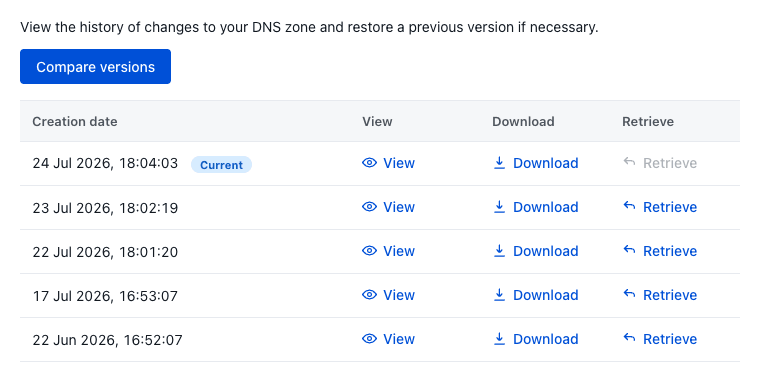
Click on the action of your choice to view the details.
View a DNS zone
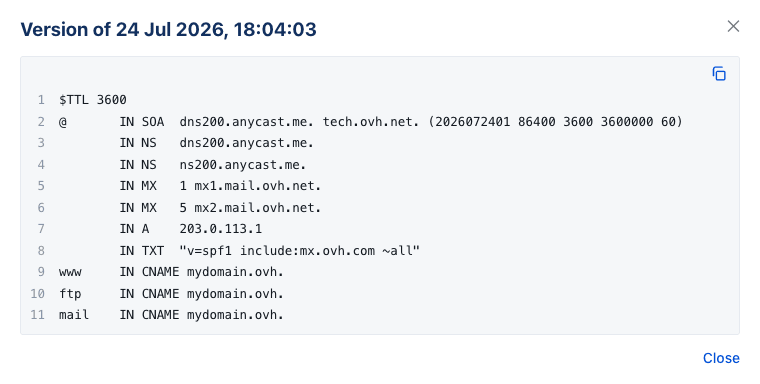
To view the content of a version, identify the corresponding row in the table, then click View in the View column. The records of that DNS zone version are displayed. Click Close to return to the DNS zone history page.
Download a DNS zone
To download a version, identify the corresponding row in the table, then click Download in the Download column. The DNS zone is downloaded in .txt format.
Restore a DNS zone
To replace your current DNS zone with an older one, identify the row corresponding to the version you want to restore (check the date on the left of the row), then click Retrieve in the Retrieve column.
In the confirmation window that appears, check that the date shown matches the version you want to restore. As the warning indicates, the current DNS zone (at the top of the history list) will be deleted and replaced by the version you restore. Click Retrieve to confirm, or Cancel.
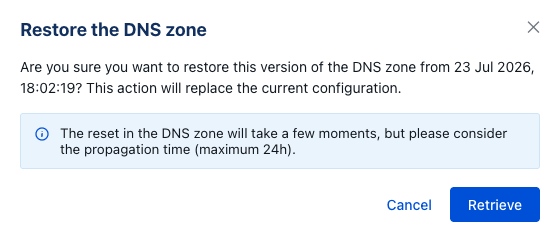
Modifying or restoring a DNS zone causes a propagation delay of 4 to 24 hours to be fully taken into account on the DNS network.
Compare two DNS zones
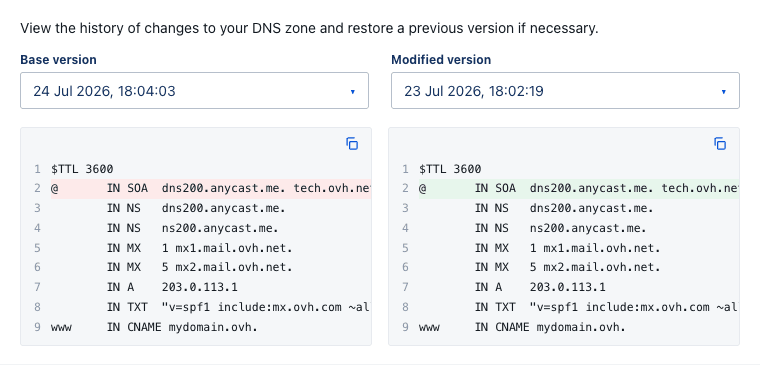
To compare two versions, click Compare versions above the table. On the page that opens, choose the versions to compare from the Base version and Modified version drop-down lists: by default, the base version is the most recent one and the modified version the one just before it.
Both versions are displayed side by side, line by line, and a colour code highlights the differences:
- In the
Base versionpane, on the left, the lines that differ are highlighted in red. - In the
Modified versionpane, on the right, the corresponding lines are highlighted in green.
Go further
Everything you need to know about DNS servers
Everything you need to know about DNS zones
Everything you need to know about DNS records
Log in to the OVHcloud Control Panel
For specialised services (SEO, development, etc.), contact OVHcloud partners.
If you would like assistance using and configuring your OVHcloud solutions, please refer to our support offers.
Join our community of users.