
Creating and configuring a security group in Horizon
Find out how to create a security group and configure it on a Public Cloud instance
Objective
For security reasons, you can configure and use filtering rules that define access to your instances. You can allow or block certain incoming or outgoing connections using security groups. You can apply these rules to traffic from specific IP addresses or to instances in particular security groups.
This guide explains how to create a security group in Horizon and configure it on a Public Cloud instance.
Requirements
- A Public Cloud project.
- Access to the Horizon interface
Instructions
Step 1: creating a security group
Access the Horizon interface. Then choose the region in which you want to create a security group, via the button in the top left-hand corner.
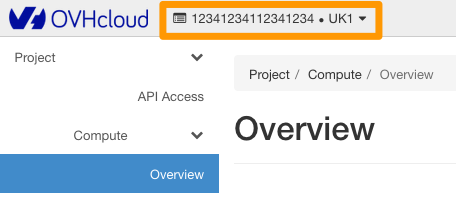
If a security group is to be used in several regions, you must create it for each region.
Now expand the Network menu and click Security Groups.
A table lists the security groups created. The default group is listed here and allows all traffic through.
Please do not modify or delete the "default" group. You will need to create a new security group and configure your rules in it.
Automated tasks on the infrastructure can reset the default security group, so it is important not to change it.
OpenStack closes all access to instances by default. If you delete the "default" security group, you will need to create your own group, which will open access to your instances, and apply it every time you create an instance. In addition, the default group will be created again later by the automated tasks on the infrastructure.
To add a new security group, click the + Create Security Group button.
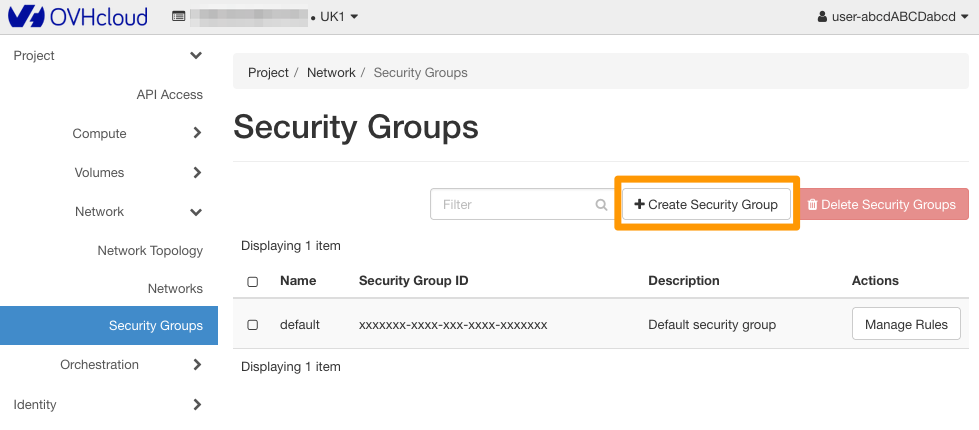
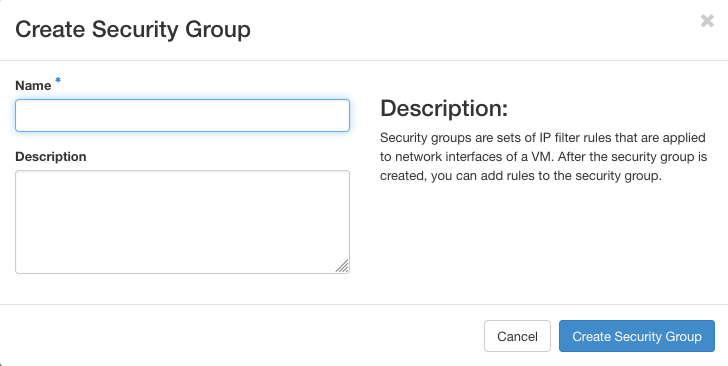
On the page that appears, give a name and description to the group you are about to create. Once you have done this, click the Create Security Group button.
Returning to the Security Groups tab, the table now displays the newly created group. Default rules allow only outgoing traffic.
To modify them, go to the next step.
If you are satisfied with these rules, go to Step 3: Configure a security group on your instance.
Step 2: configuring security group rules
Click the Manage Rules button.
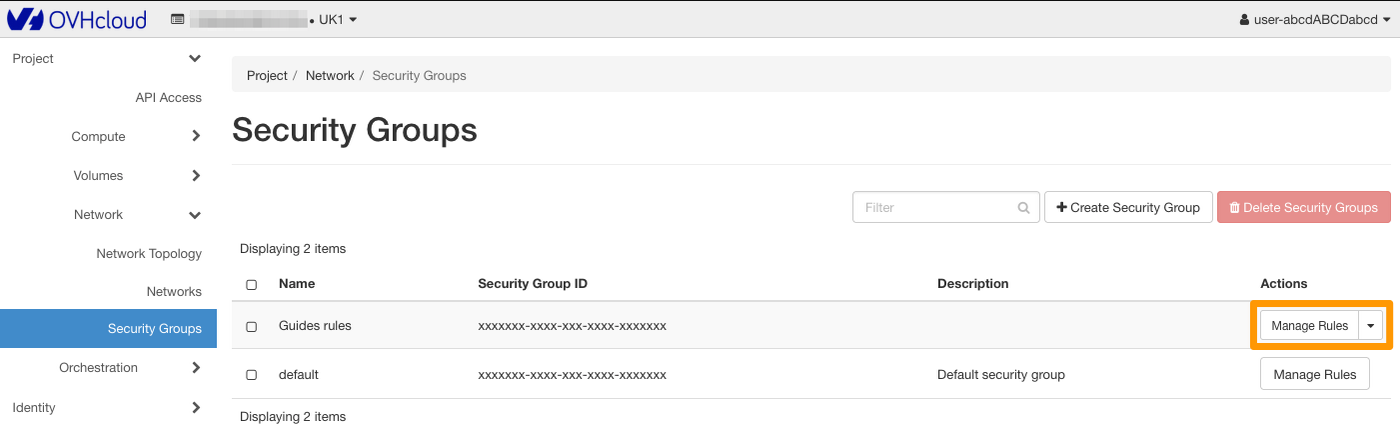
If you kept the default rules, they only allow outgoing traffic.
On the rules management page, you can:
- delete an existing rule: use the
Delete Rulebutton. - add a new rule: use the
+ Add Rulebutton.
When you add a rule, fill in the required information, then click Add.
In this example, we authorise an SSH connection to the instance.
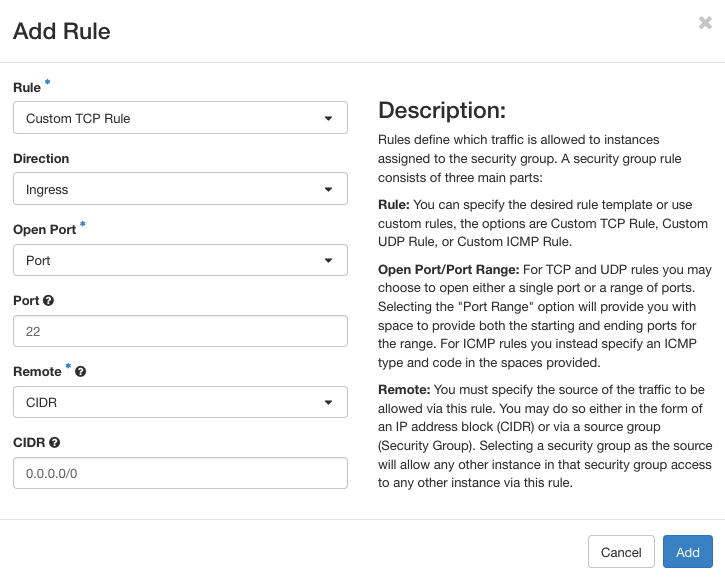
Once you have added the new rule, wait a few minutes for it to take effect.
Configuring a security group on an instance
From the Horizon interface, expand the Compute menu and select Instances. From this page, create a new instance via the Launch Instance button.
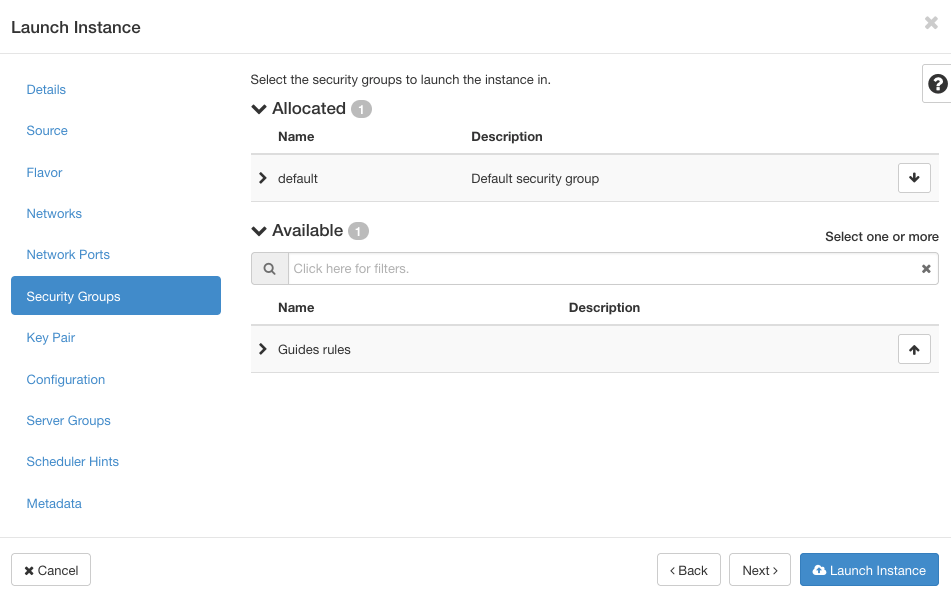
When you create your instance, you can choose the new security group created in the previous step via the Security Groups menu.
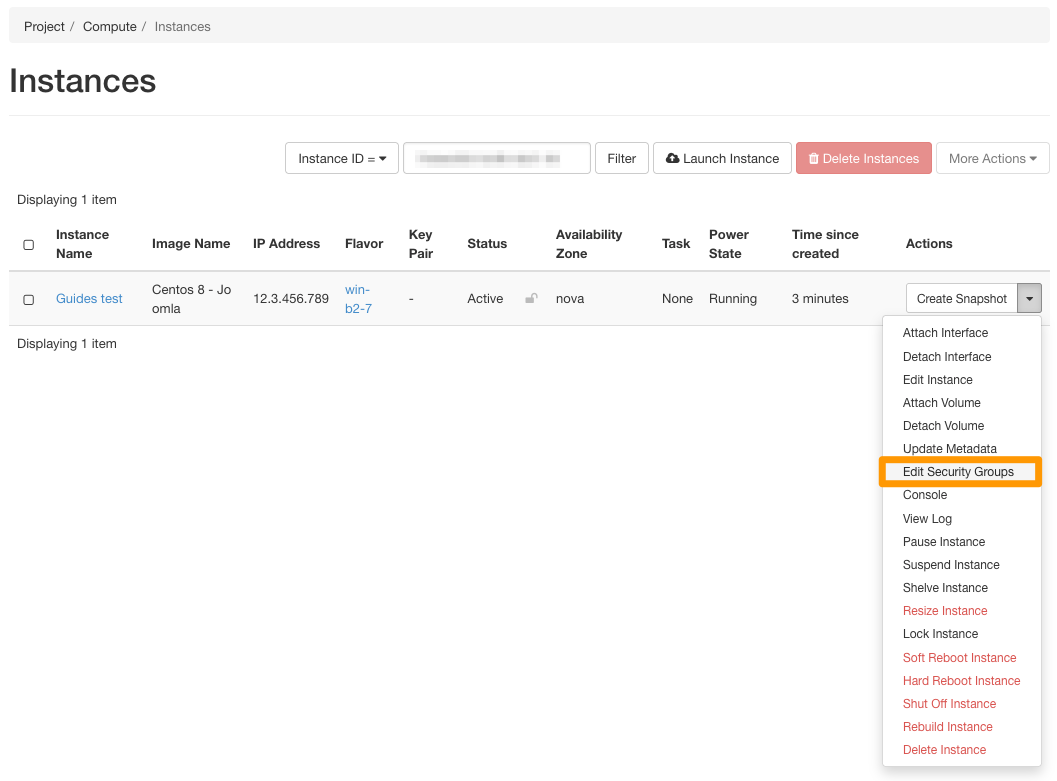
You can apply a new security group to an existing instance by clicking Edit Security Groups to the right of the instance.
Deleting a security group
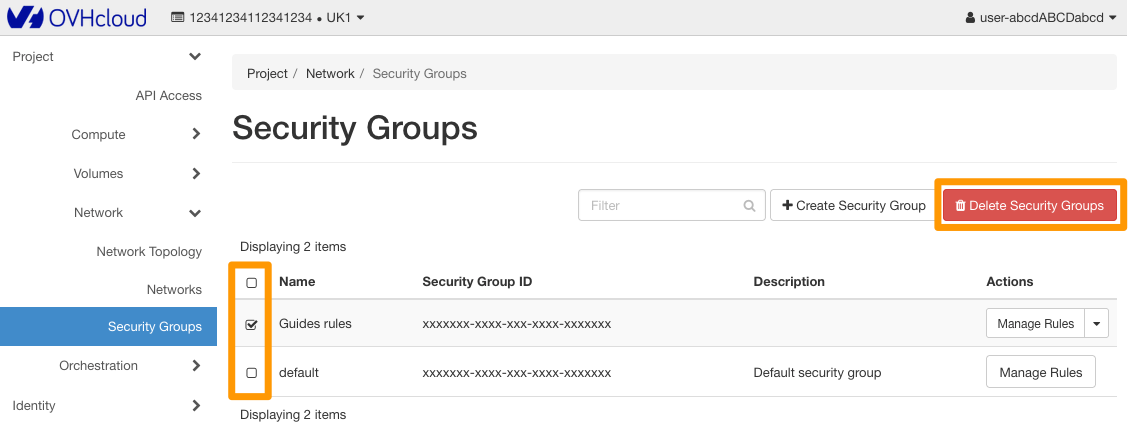
To delete a security group, select it by ticking the corresponding box on the left, then click Delete Security Groups.
Go further
Join our community of users.