Configuring the network on Windows Server with Hyper-V
Find out how to configure the network on Windows Server with Hyper-V
Objective
This guide explains how to configure the network in Windows Server with Hyper-V.
High Grade & Scale ranges
As of May 2025, virtual MACs can be used to operate Additional IPs in bridged mode on servers from the High Grade and Scale ranges.
If you want to use virtual MACs to configure the network with Hyper-V on High Grade or Scale servers, you can refer to this guide.
Advance range
As Advance servers only have 2 network interfaces, we advise configuring the server in full private mode with both interfaces in teaming connected to the vRack. A second server can act as an internet gateway with one interface connected to the private network and another connected to the public network.
For this type of configuration, it is possible to use the IP aliasing as described in the article Configuring IP aliasing.
It is also possible to set up such configuration (one interface on private network, the second on the public network) for each Hyper-V server and therefore not configure any teaming. In this case, the private network bandwidth is reduced and there’s no high availability on network interfaces.
Requirements
No virtual MACs should be applied to Additional IPs in the OVHcloud Control Panel.
Instructions
On these server ranges, there are 4 network cards. The first two for the public, the last two for the private network. To get all the bandwidth, aggregates must be created.
Additional IP in routed mode on public network interfaces
Explanations
You need to:
- Set up NIC Teaming.
- Install the Hyper-V and RRAS roles.
- Setup RRAS to act as a router.
Identify Interfaces and Configure NIC teaming
Open Windows Powershell and execute the command Get-NetAdapter:
In our example:
- The public interfaces are
Ethernet 3andEthernet 4. - The private interfaces are
EthernetandEthernet 2.
Check that your configuration is similar. You can access information on MACs and public or private interfaces in your or via the OVHcloud API.
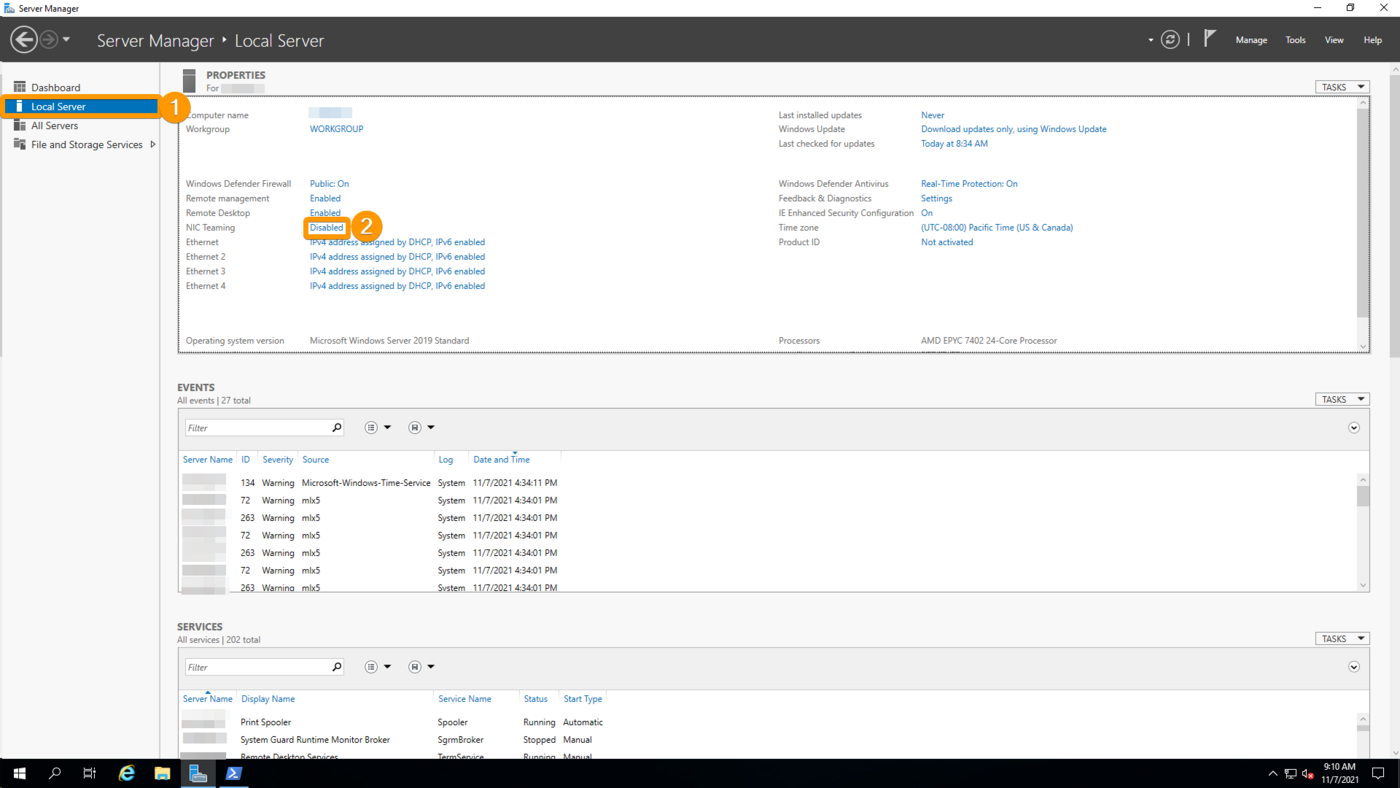
Now go back to the Server Manager and go to Local Server and click on Disabled opposite NIC Teaming.
On the following page, right-click one of public interfaces identified earlier and click Add to New Team.
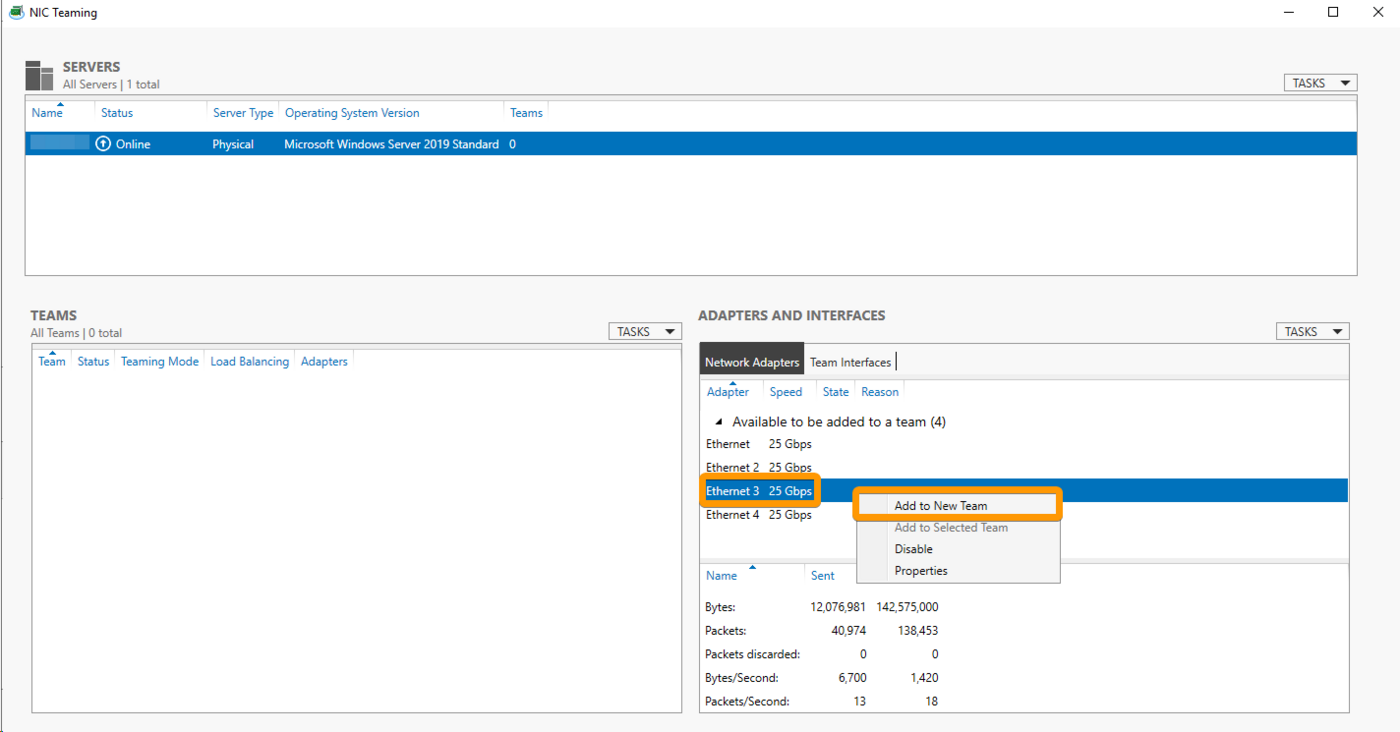
Next, give your team a name, add the second interface to the team, then expand the Additional Properties and set "Teaming Mode" to LACP, and finally click OK.
Configure a static IP
In order to prevent a connection loss on a reboot we will need to configure the IP statically on the team.
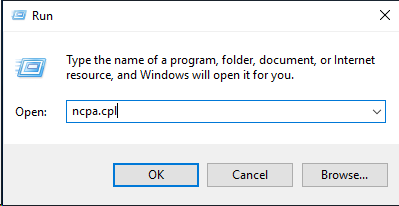
Press Windows Key + R to open a "Run" window. Enter ncpa.cpl and click OK. This will open your Network Connections control panel.
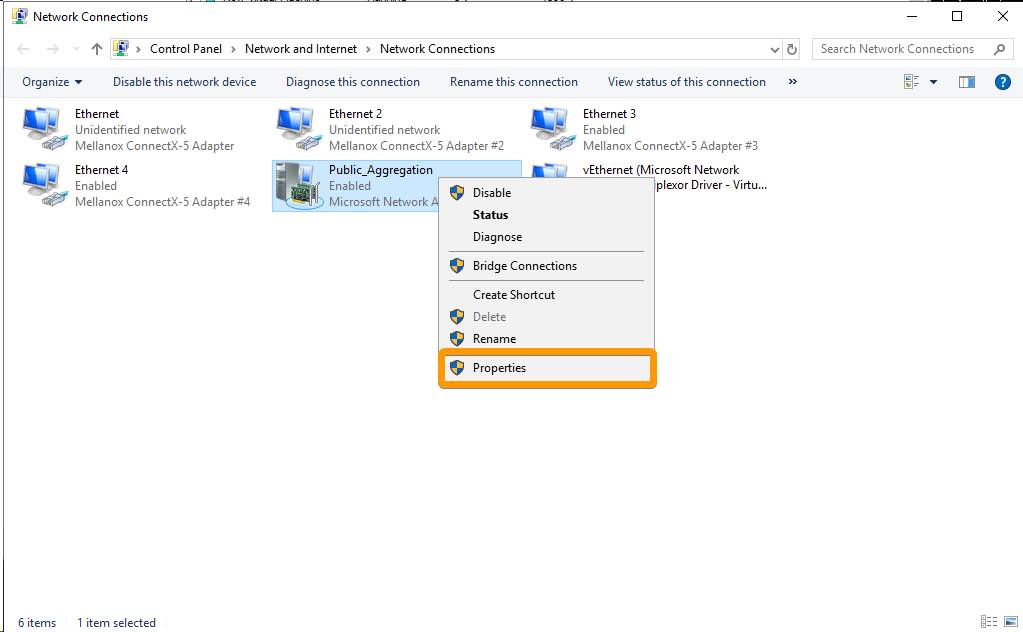
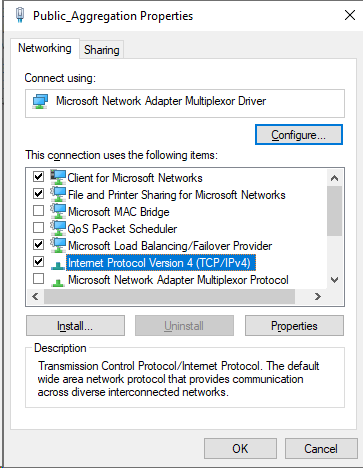
Right click on your team that you created and click Properties.
Next, double-click on Internet Protocol Version 4 (TCP/IPv4).
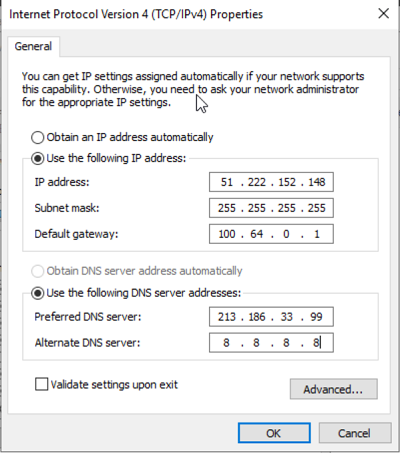
Select Use the following IP address and insert your IP address.
The "Subnet mask" and "Default gateway" will be: 255.255.255.255 and 100.64.0.1 as shown below.
For DNS servers, you can choose your own. For our example we are using 213.186.33.99 and 8.8.8.8.
Once done, click OK to close the Window, and OK again to close the adapter properties Window.
Installing the Hyper-V and RRAS Roles
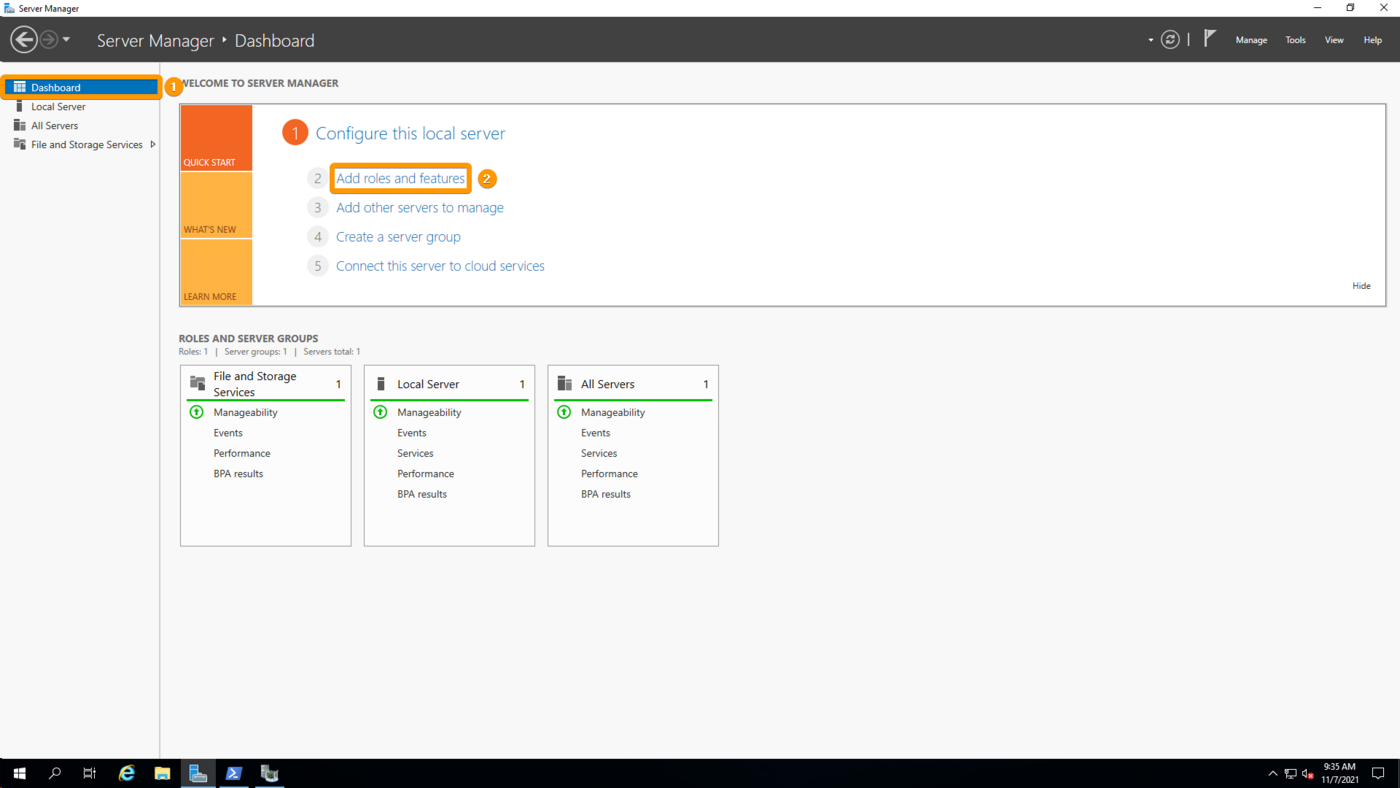
Go to the Server Manager and open the Dashboard, then click on Add roles and features
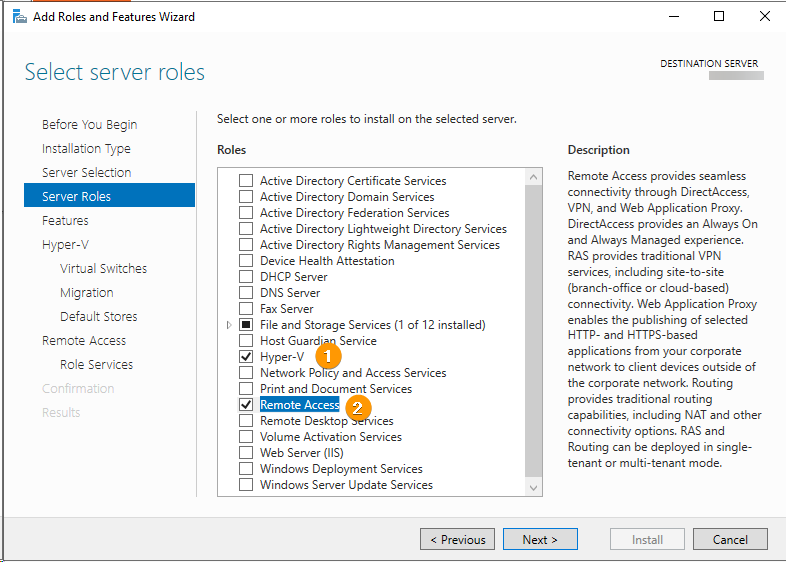
Go through the Wizard until you reach the Server Roles section and select Hyper-V and Remote Access.
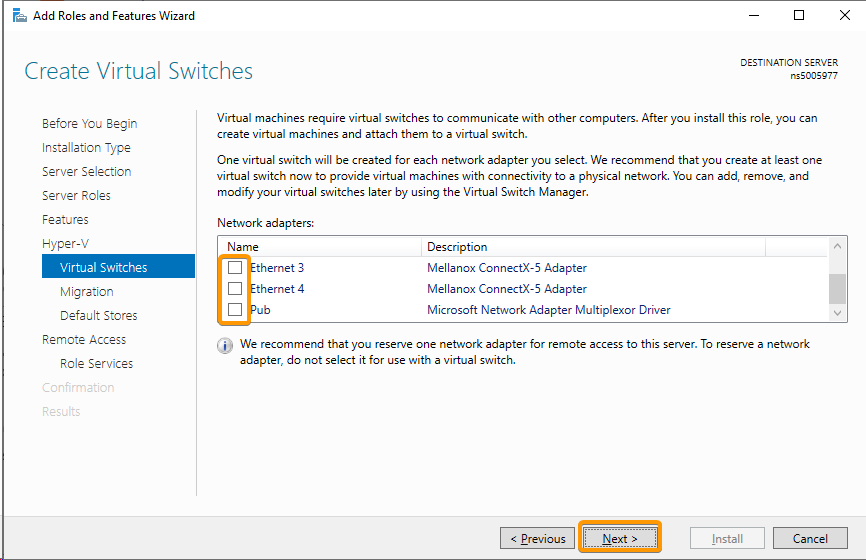
Next, proceed to the Virtual Switches subsection of Hyper-V and ensure no interfaces are selected.
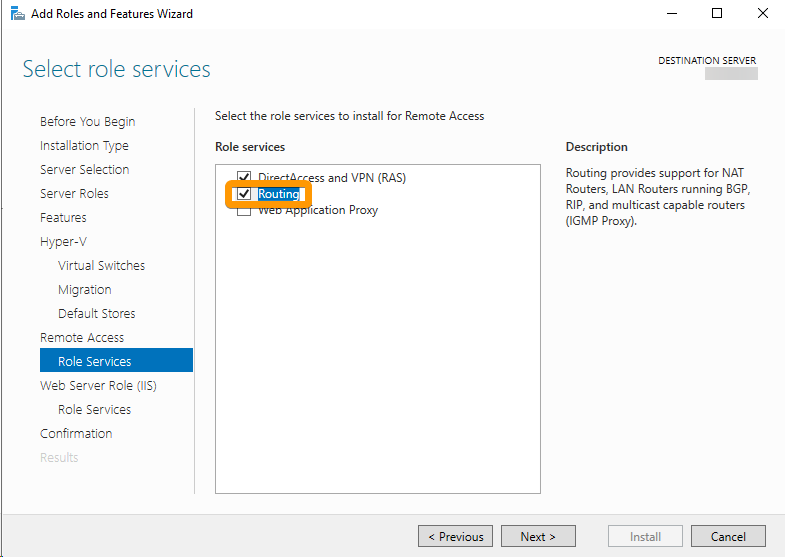
Next, proceed to the Role Services subsection of Remote Access and select Routing.
Finally, proceed to the Confirmation section, select Restart the destination server automatically if required and click Install.
Creating the Virtual Switch
With the newest versions of Windows Server, Hyper-V virtual switches on an LBFO-Type Network adapter cluster are deprecated. As such we will need to create the switch manually using Powershell. Run the following command and replace "vSwitch_Name" with the name of your choice and replace "NIC_Team_Name" with the name of the NIC team that you created earlier:
Configure Routing and Remote Access
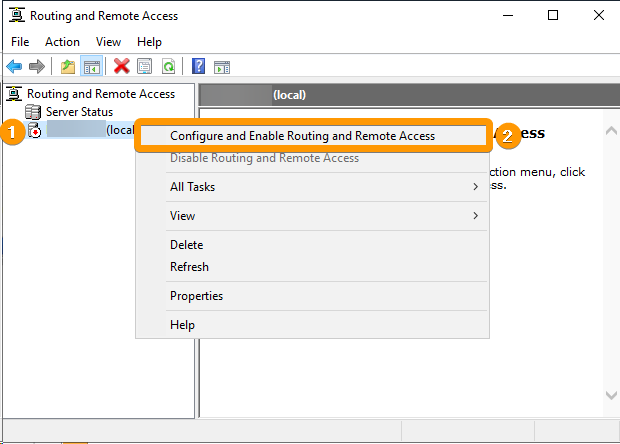
Open the new application called Routing and Remote Access and right click on your server and choose Configure and Enable Routing and Remote Access.
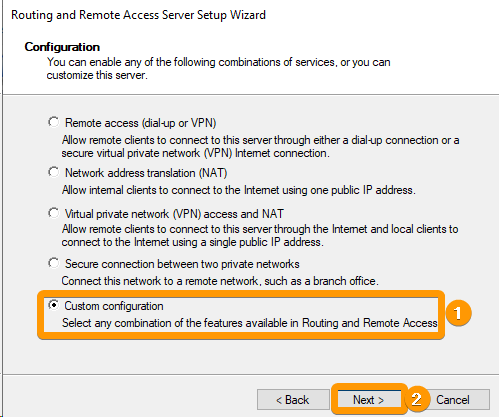
Now, choose Custom configuration and click Next.
Next, you need to select LAN routing and then click Next.
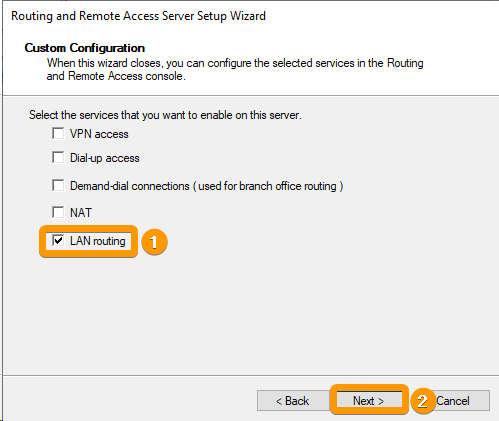
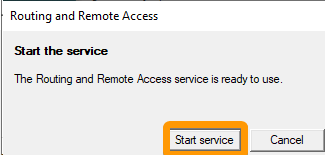
Finally, click on Finish and then Start Service on the popup that will appear.
Set Primary and Additional IP statically on Hyper-V interface
We must now move the IP configuration to the Hyper-V interface.
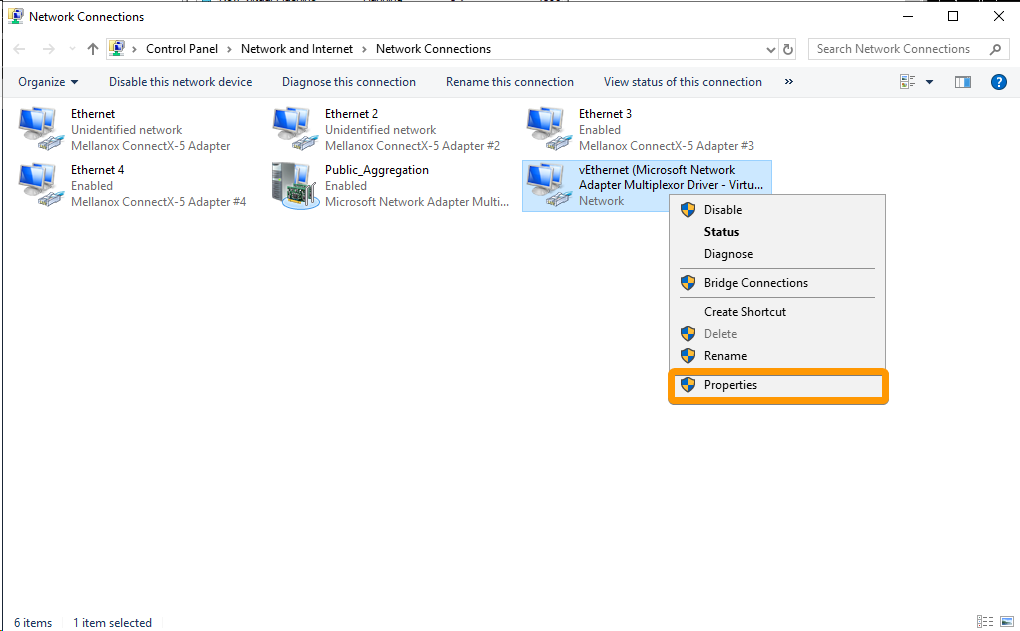
Press Windows Key + R to open a "Run" window. Enter ncpa.cpl and click OK. This will open your Network Connections control panel.
Right click on your vEthernet Adapter and click Properties.
Next, double-click on Internet Protocol Version 4 (TCP/IPv4).
Select Use the following IP address and insert your IP address.
The "Subnet mask" and "Default gateway" will be: 255.255.255.255 and 100.64.0.1 as shown below.
For DNS servers, you can choose your own. For our example we are using 213.186.33.99 and 8.8.8.8.
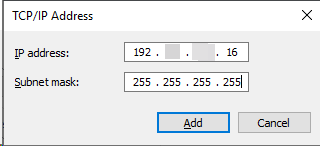
Next click on the Advanced... button and in the new Window click Add... under IP addresses.
Add your IP address and subnet mask for your Additional IP and click Add.
Once done, click OK to close the Advanced Window, click OK again to close the TCP/IPv4 settings, and finally click OK, to close the adapter properties Window.
This step can cause a connection loss. If it occurs, please connect using the IPMI and edit the configuration again. You will find that your default gateway is reverted back to blank. You would need to re-add the gateway of 100.64.0.1.
Add a static route
Open a command prompt as administrator and run the command route print interface:
In our example you will see that our Hyper-V adapter has the ID of 22.
Take note of your Hyper-V adapter then run the command route add -p 192.xxx.xxx.16 mask 255.255.255.255 0.0.0.0 if 22 (replace the IP and interface ID with the one you received).
You should have the result OK!
Your VM, once created and configured, should now have internet access.
Configuration example of a client VM on Ubuntu
File contents of /etc/netplan/ip.yaml:
Additional IP via vRack
Requirements
- A public block of IP addresses in your account, with a minimum of four addresses
- Your chosen private IP address range
- A vRack compatible server
- A vRack service activated in your account
Explanations
You need to:
- Create an aggregate.
- Create a bridge connected to the aggregate.
Identify Interfaces and Configure NIC teaming
Open Windows Powershell and Execute the command Get-NetAdapter:
In our example:
- The public interfaces are
Ethernet 3andEthernet 4. - The private interfaces are
EthernetandEthernet 2.
Check that your configuration is similar. You can access information on MACs and public or private interfaces in your or via the OVHcloud API.
Now go back to the Server Manager, go to Local Server and click on Disabled besides NIC Teaming.
On the following page, right-click one of private interfaces identified earlier and click Add to New Team.
Next, give your team a name, add the second interface to the team, then expand the Additional Properties and set "Teaming Mode" to LACP, and finally click OK.
Create the Virtual Switch via Powershell
We will need to create a virtual switch that will link our VMs to the Team that we created.
First, open Powershell as an admin and run the following command. Replace "vSwitch_Name" with the name of your choice and replace "NIC_Team_Name" with the name of the NIC team that you created earlier:
You are now ready to create your VM and configure the network for it.
Configure a usable IP address
For vRack, the first, penultimate, and last addresses in a given IP block are always reserved for the network address, network gateway, and network broadcast respectively. This means that the first usable address is the second address in the block, as shown below:
To configure the first usable IP address, you must edit the network configuration file as shown below. In this example, we use a subnet mask of 255.255.255.240.
The subnet mask used in this example is appropriate for our IP block. Your subnet mask may differ depending on the size of your block. When you purchase your IP block, you will receive an email notifying you of the subnet mask to use.
Configuration example of a client VM on Ubuntu
Content of the file /etc/netplan/vrack.yaml:
Go further
Join our community of users.