Managing Helm charts in the OVHcloud Managed Private Registry
OVHcloud Managed Private Registry service is a composite cloud-native registry which supports both container image management and Helm chart management.
This guide will explain how to manage Helm charts in the OVHcloud Managed Private Registry service: how to upload charts, and use them.
Before you begin
This tutorial presupposes that you already have a working OVHcloud Managed Kubernetes cluster, and some basic knowledge of how to operate it. If you want to know more on those topics, please look at the deploying a Hello World application documentation. You will need to have Helm installed on your cluster (see the installing helm guide for more information).
You also need to have a working OVHcloud Managed Private Registry and have followed the guides on creating a private registry, connecting to the UI, managing users and projects, creating and using private images and using Private Registry with OVHcloud Managed Kubernetes.
Prerequisites
Install Helm v3.8+
Check if Helm is installed in the required version:
If the version is less than v3.8.0, follow the official instructions to install Helm in latest version.
Instructions
Preparing a Helm chart
In order to do this tutorial, you will need a Helm chart to upload to your OVHcloud Managed Private Registry.
If you already have a Helm chart in your filesystem, you can use it for the example, but in this section we are assuming you haven't any. We are using a well known Helm chart often used as example: the WordPress chart.
Download the chart
The first step is downloading the WordPress chart using helm:
The WordPress Helm chart is downloaded as a tgz file.
Inspect the chart (optional)
The file you have downloaded is a packaged Helm chart, useful for downloading it, and for uploading it to your OVHcloud Private Registry. Let's unpack it to have a peek inside it and get a better undestanding of its structure,
An unpackaged chart is organized as a collection of files inside of a directory. The directory name is the name of the chart (without versioning information). Thus, the chart describing WordPress should be stored in a 'wordpress/' folder.
Inside of this directory, Helm will expect a structure that matches this:
Let's uncompress the Helm chart:
As expected, the file is uncompressed into a wordpress folder, with the required files and folders inside it:
You can now remove the tgz file, as we are recreating it.
To package a chart from a chart directory, you can use helm package:
It creates the packaged chart, with the version appended to the filename:
Manage Helm Charts via the Helm CLI
Login
Before being able to pull or push Helm charts, log in to Harbor:
For example:
Push Helm chart
Upload a chart to a registry:
For example, to push the Helm chart WordPress in the version "18.1.14" in the Harbor project named "private":
Pull Helm Chart
Download a chart from a registry:
For example to pull the Helm chart WordPress in the version "18.1.14" from the Harbor project named "private":
You should see a new file:
Install Helm Chart
Install a chart to a Kubernetes cluster:
For example, to install the Helm chart WordPress in the version "18.1.14" from the Harbor project named "private":
Manage Helm Charts via the Harbor UI
The charts pushed to the OCI-compatible registry of Harbor are treated like any other type of artifact.
We can list, copy, delete, update labels, get details, add or remove tags for them just like we can for container images.
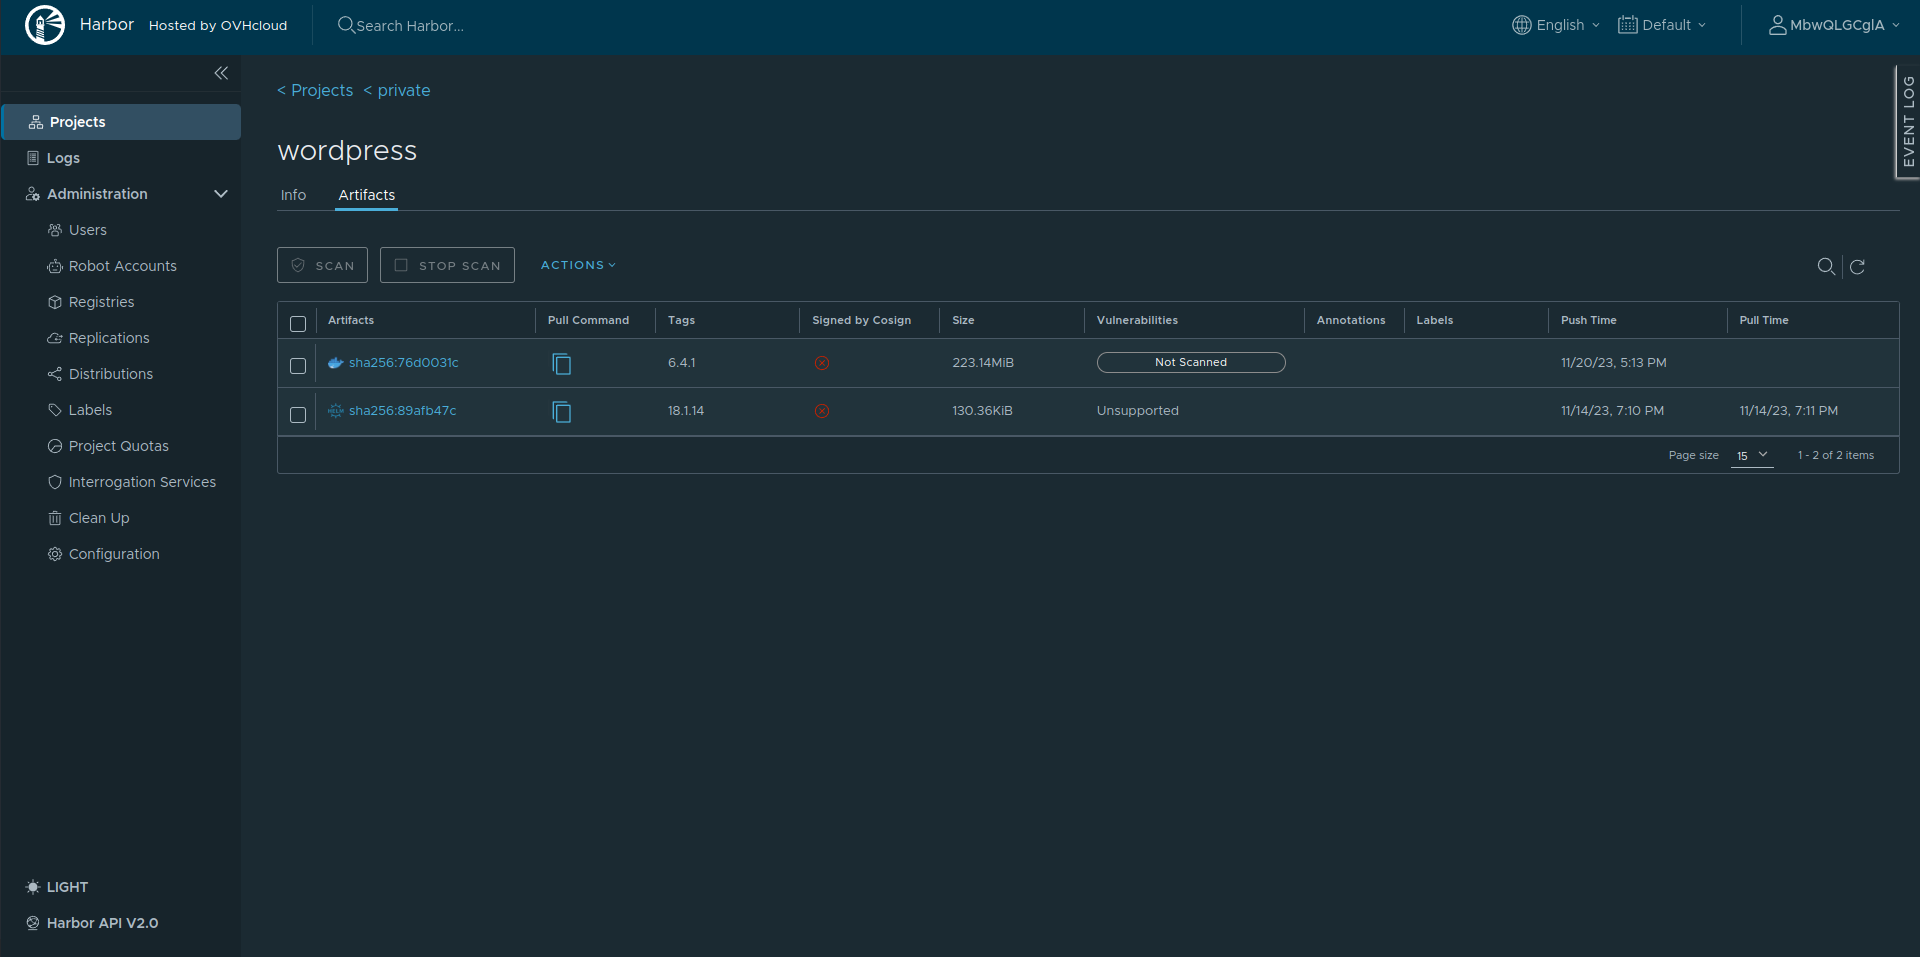
In the following example we pushed the WordPress Helm chart in version 18.1.14 and the WordPress Docker image in version 6.4.1:
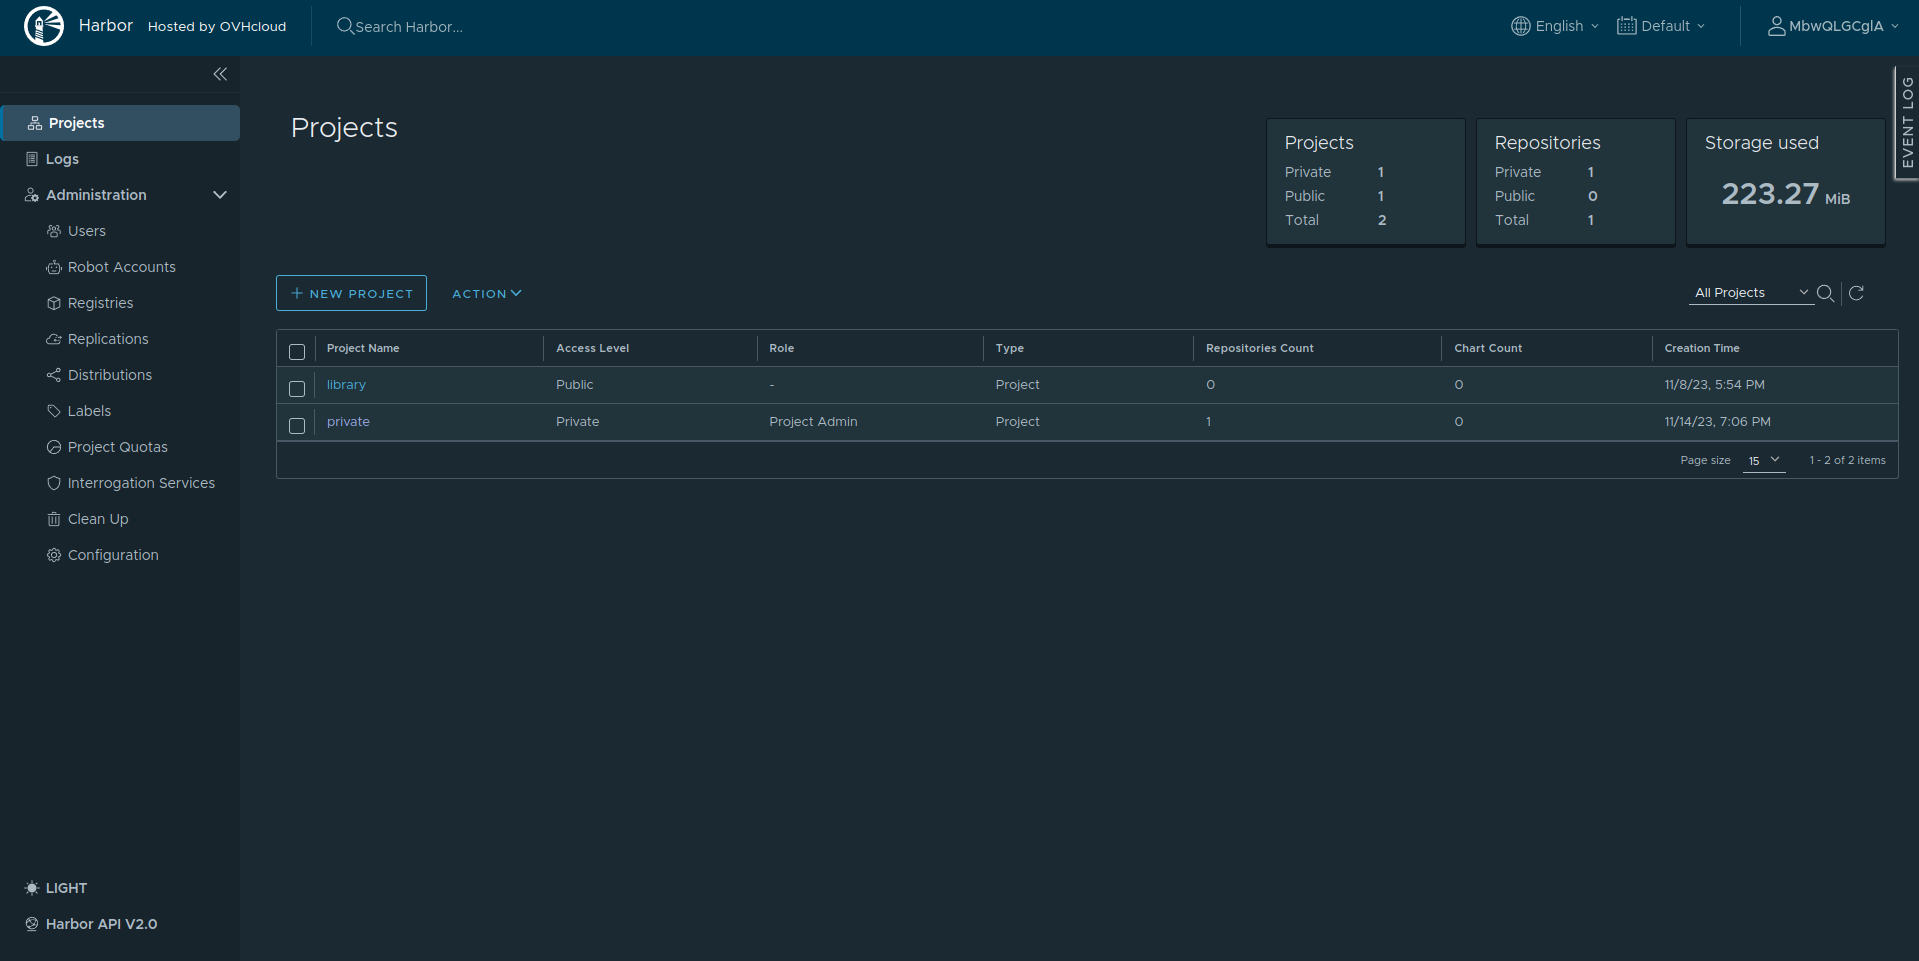
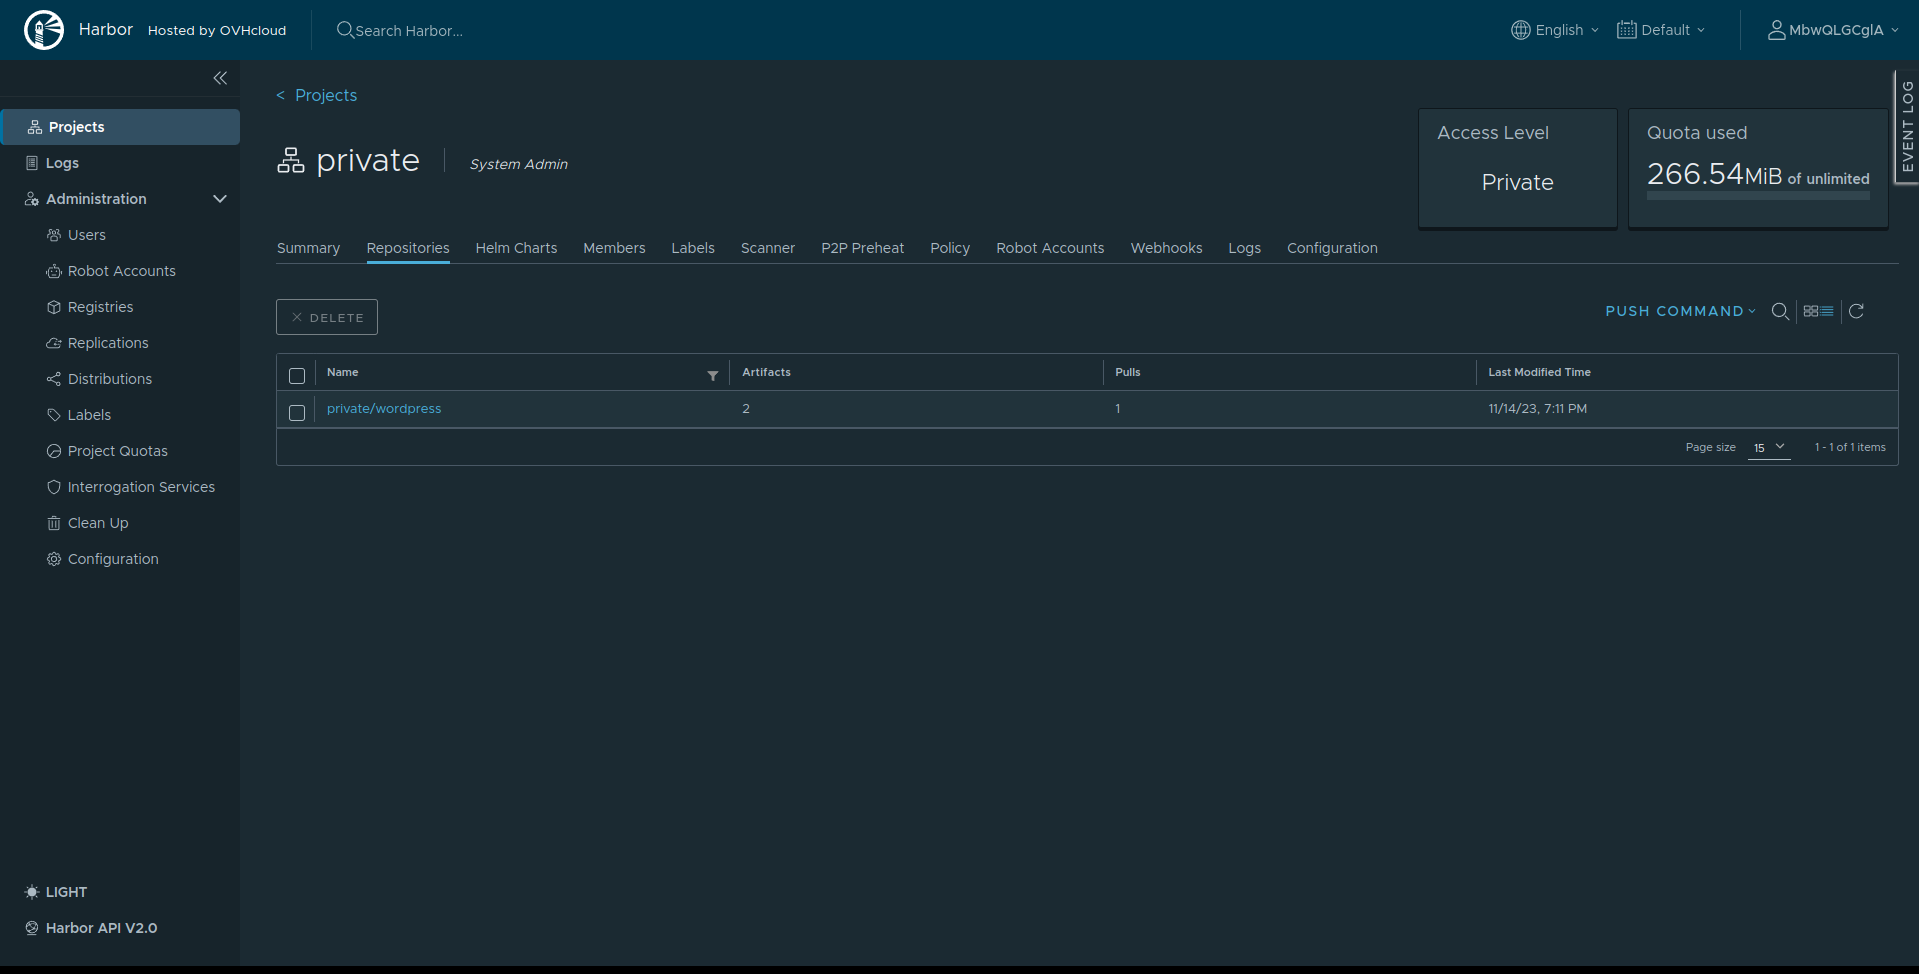
Click on the private project name to list its repositories:
Then click on the private/wordpress repository name to see its 2 artifacts: the Docker image and the Helm Chart, the logo on the left of the artifact hash allows to differentiate them:
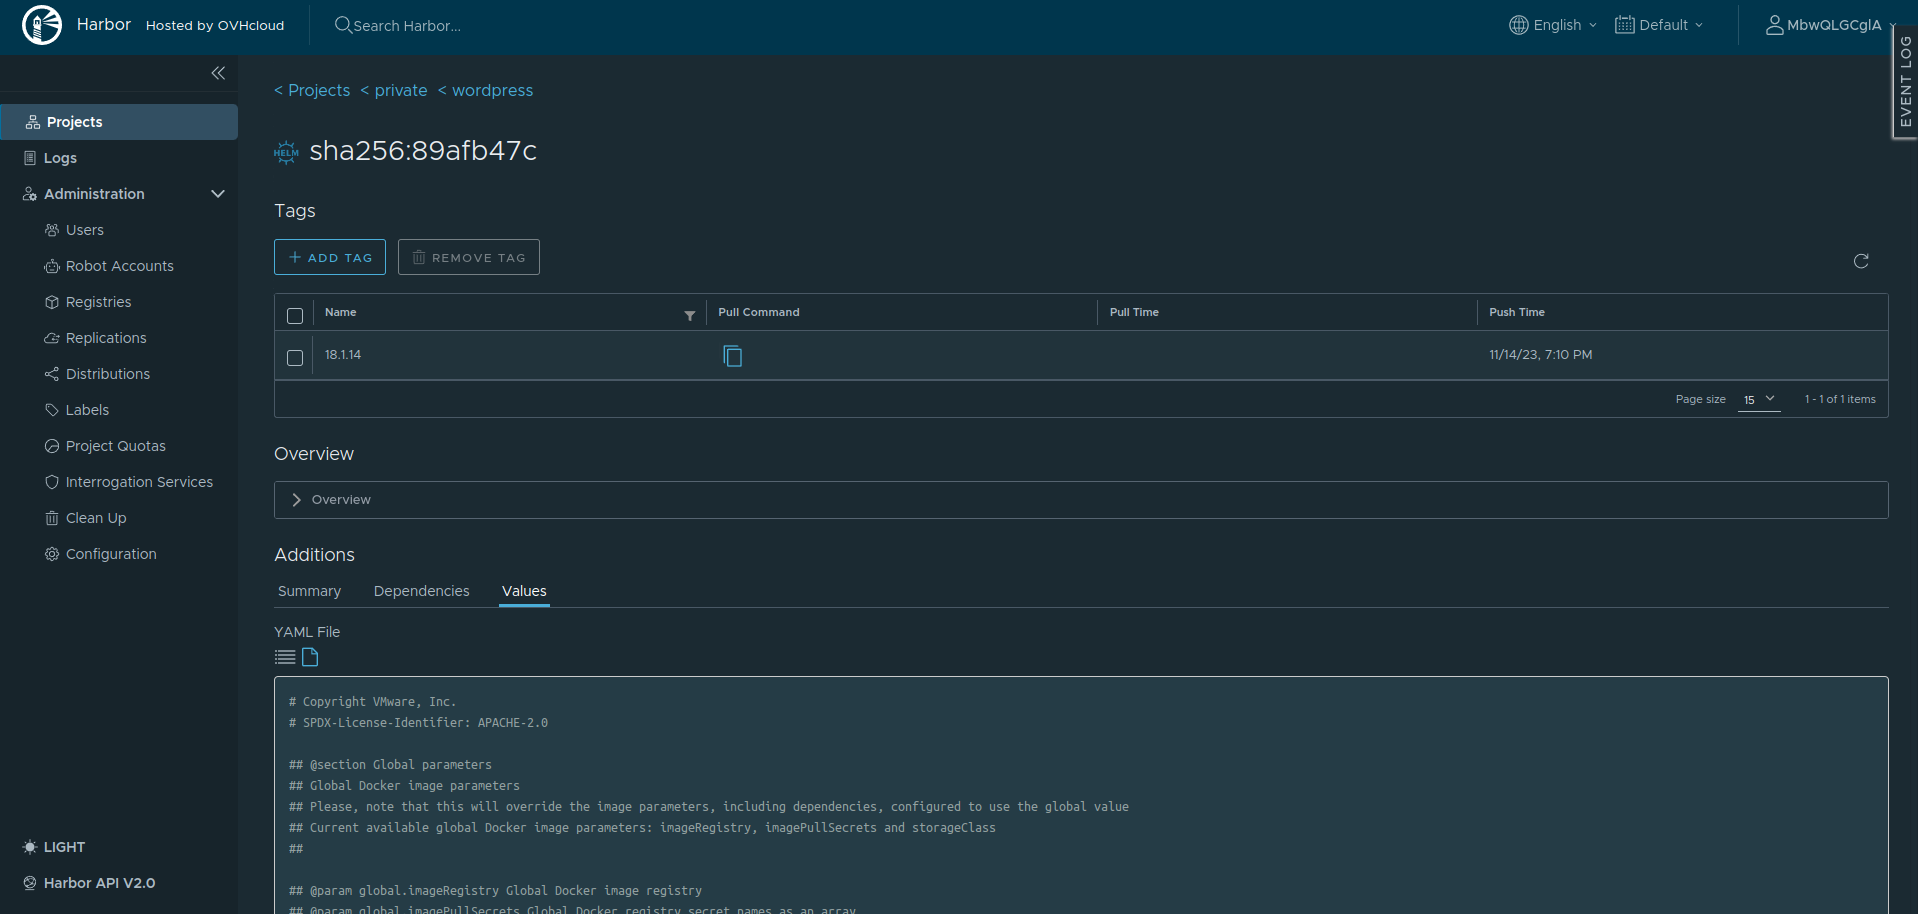
Finally click on the hash of the second artifact to see the Helm chart details:
Go further
To have an overview of OVHcloud Managed Private Registry service, you can go to the OVHcloud Managed Private Registry site.
Join our community of users on https://community.ovh.com/en/.