Installing and using Helm on OVHcloud Managed Kubernetes
Helm is a package manager for Kubernetes. It works with packages of pre-configured Kubernetes resources, called Helm charts.
With Helm you can:
- find, deploy and manage software in Kubernetes using a growing catalog of Helm charts in ArtifactHUB
- create and share your own Helm charts
Before you begin
This tutorial assumes that you already have a working OVHcloud Managed Kubernetes cluster, and some basic knowledge of how to operate it. If you want to know more on those topics, please look at the OVHcloud Managed Kubernetes Service Quickstart.
We are assuming that you have the KUBECONFIG environment variable pointing to your kubectl configuration file, as described in the Quickstarter. If that's not the case, you can use the --kubeconfig [LOCATION_OF_CONFIG_FILE] option in both kubectl and helm commands.
Helm concepts
Helm is built around three big concepts: charts, repositories and releases.
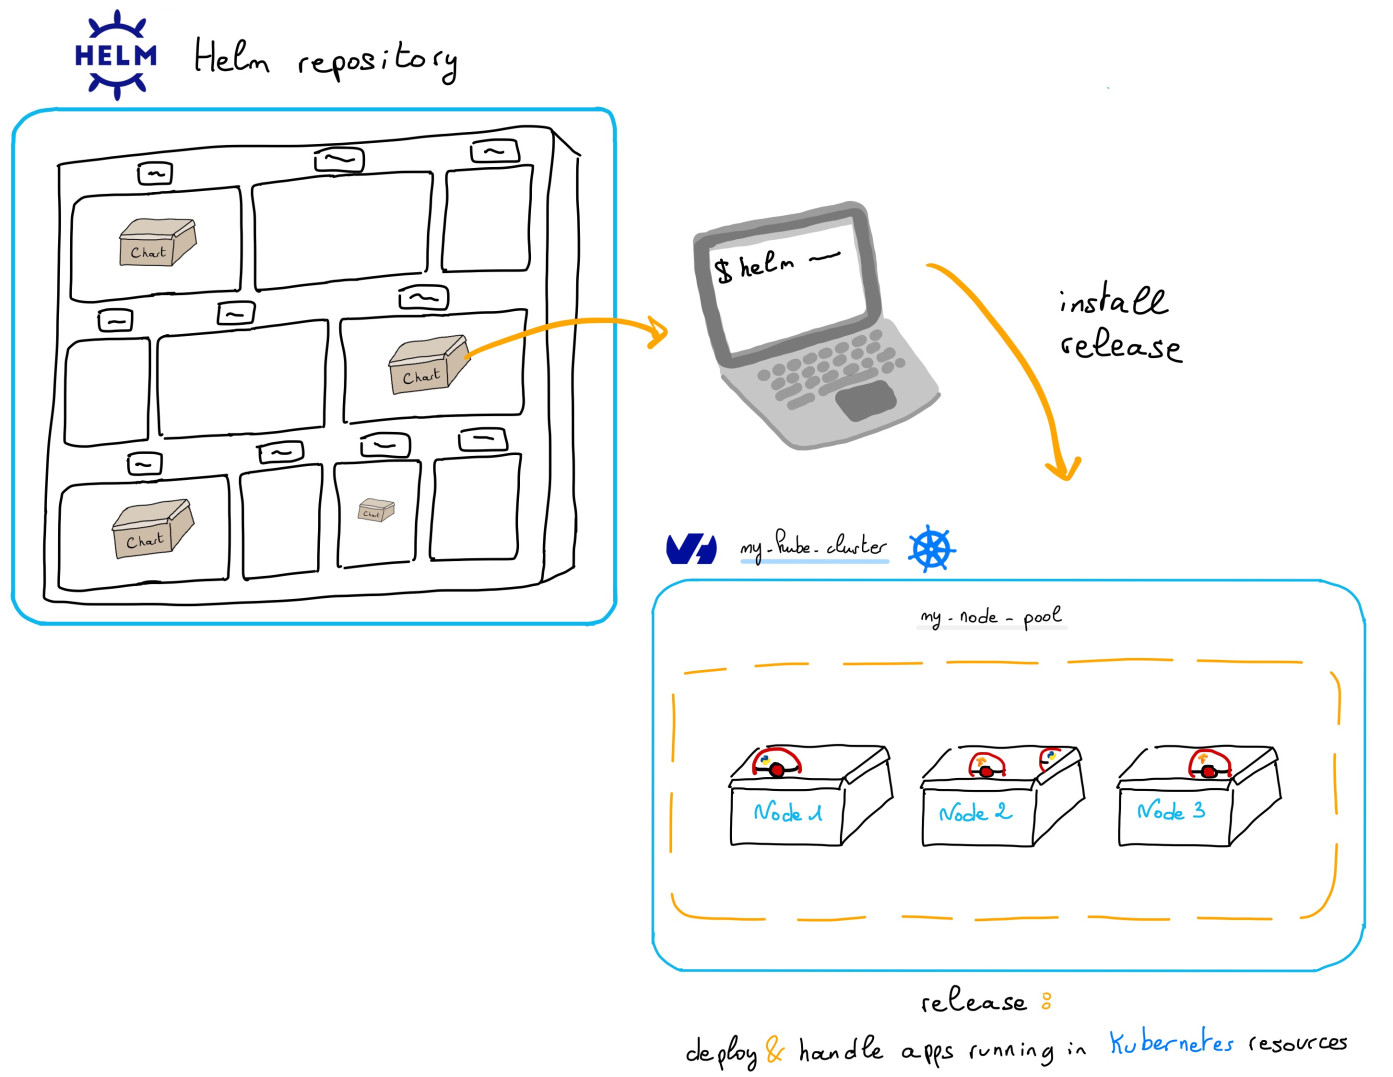
A chart is a Helm package. Inside the chart you have all the resource definitions necessary to run an application, tool, or service inside of a Kubernetes cluster. It's the Helm equivalent of a Debian pkg for Linux, a Maven file for Java or a package.json for Node.js.
Charts are stored in repositories, where they can be shared. Repositories are the Helm equivalent of the NPM registry for Node.js or Maven Central for Java.
When a chart is installed in a Kubernetes cluster, the running instance is called a release. Multiple releases of a single chart can be installed at the same time in a cluster (think for example several instance of the WordPress chart for several different blogs instances running in the cluster).
Installing Helm
This guide supposes you're using Helm 3, the latest major version of Helm. The legacy version Helm 2 is considered deprecated. If you want to use Helm 2, please refer to the official documentation
Install, the Helm CLI in your machine, from a package manager:
Or you can install Helm CLI from the binary releases.
To check if the helm CLI is correctly installed locally, you can display its version:
You can show the installed version:
Usage
You installed the Helm CLI in your machine, now you can use it to deploy applications in an OVHcloud Managed Kubernetes cluster.
Add a Helm Chart Repository
Once you have Helm installed on your machine, you can add a chart repository. The easiest way to begin with Helm is to add the Bitnami repository:
Once the repository added, run helm repo update to make sure we get the latest list of charts.
Install an example chart in an OVHcloud MKS
Let's validate your Helm installation by installing an example chart, the official Redis one, with no persistence, in your OVHcloud Managed Kubernetes cluster:
This will install the test-redis application in the Kubernetes cluster and give you useful commands and parameters for your new Redis database:
Verify your Redis
After installing the chart in the MKS cluster, follow the instructions on your console to test your Redis deployment and delete it when your tests are finished.
Cleaning up
To clean up your cluster, simply delete your Redis installation. You can use helm list to get the Redis release, in the current namespace, and then use helm delete [REDIS_RELEASE] to uninstall it.
Go further
-
If you need training or technical assistance to implement our solutions, contact your sales representative or click on this link to get a quote and ask our Professional Services experts for assisting you on your specific use case of your project.
-
Join our community of users on https://community.ovh.com/en/.