Resize an instance via the OVHcloud Console
Find out how to resize a Public Cloud instance from the OVHcloud Console
Objective
If your instance lacks resources due to increased activity or new needs, you can increase its resources in just a few clicks with the Public Cloud.
This guide explains how to resize your instance from the OVHcloud Console.
Only upscaling is possible for classic models. In addition, this manipulation causes the instance to be shut down for the time of the operation.
Flex instances allow resizing to higher or lower models due to a locked single disk size.
Requirements
- A Public Cloud instance in your OVHcloud account
OVHcloud Console Access
- Direct link:
- Navigation path:
Public Cloud> Select your project >Compute>Instances
Instructions
In the left-hand menu of your Public Cloud project, click Instances under Compute, then click on the name of the instance.
In the General information card of the Overview tab, click Modify model on the Model row. The Change model page opens.
Select the model of your choice in the Instance model list and in the table of models. Enable Include unavailable to also display the models that cannot be selected (out of stock, quota reached or disk too small).
For classic models, you can switch to any flavor that has a similar or bigger disk. You can't switch to a model with a smaller disk: these models are marked Disk too small.
Only Flexible instances can be upgraded and downgraded while maintaining a fixed disk size of 50GB.
Switching to a flexible model is not available in the OVHcloud Console. To do so, use the OpenStack CLI.
If you are editing a flex instance, you cannot revert to a classic instance via the OVHcloud Console. For more information, consult the guide on Revert a flex instance.
Once the selection has been made, click on Confirm to confirm your choice. Changing the model may cause downtime: we recommend creating a snapshot of your instance first.
Resizing a disk in Windows
When performing a resize for a Windows Instance, the partition size is not automatically updated. You must extend it using the disk manager:
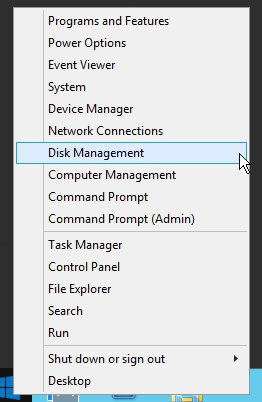
- Right-click on the
Startmenu and launch the disk manager by clicking onDisk Management:
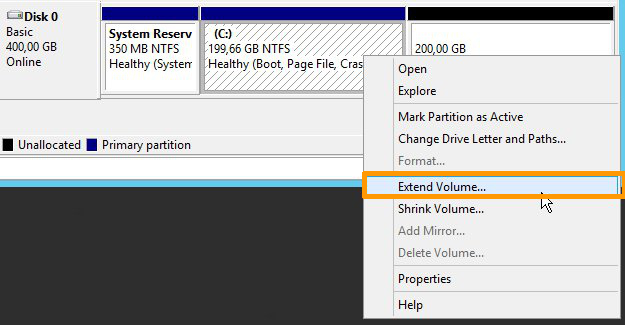
- Right-click on the main partition, then click on
Extend Volume.
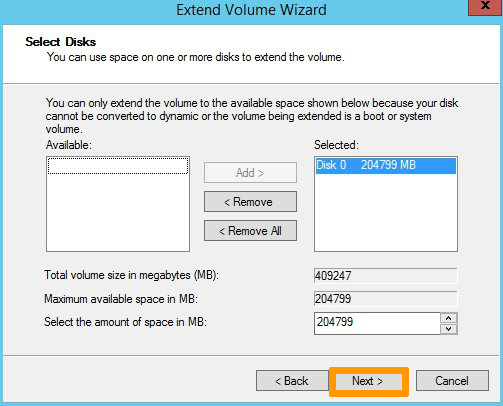
- In the
Extend Volume Wizardmenu, click onNextto proceed. In the next tab, choose the disk resources to extend and click onNext.
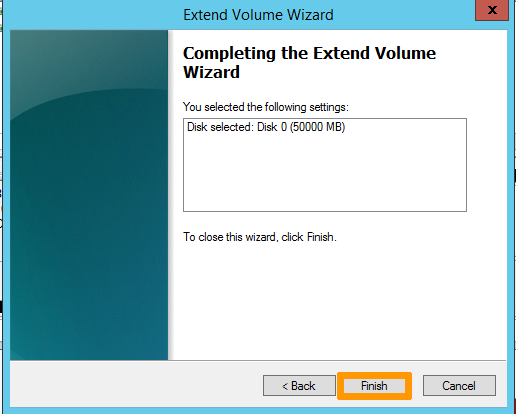
Once done, click on Finish to confirm your choice.
- The new disk size will then be displayed in the disk manager.

Go further
Join our community of users.