---
title: "Resize an instance via the OVHcloud Control Panel"
description: "Find out how to resize a Public Cloud instance from the OVHcloud Control Panel"
url: https://docs.ovhcloud.com/en/guides/public-cloud/compute/resize-instance-manager
lang: en
lastUpdated: 2026-03-04
---
# Resize an instance via the OVHcloud Control Panel
## Objective
If your instance lacks resources due to increased activity or new needs, you can increase its resources in just a few clicks with the Public Cloud.
**This guide explains how to resize your instance from the OVHcloud Control Panel.**
:::warning
Only upscaling is possible for classic models.
In addition, this manipulation causes the instance to be shut down for the time of the operation.
:::
:::tip
Flex instances allow resizing to higher or lower models due to a locked single disk size.
:::
## Requirements
- A [Public Cloud instance](https://www.ovhcloud.com/en-gb/public-cloud/) in your OVHcloud account
***
### OVHcloud Control Panel Access
- **Direct link:** Public Cloud Projects
- **Navigation path:** Public Cloud > Select your project
***
## Instructions
Click on `Instances
` in the left-hand menu.
Click on `...
` to the right of the instance, and select `Edit
`. You can also access this action from the instance details by clicking on its name, then on `Modify model
`.
In the new tab, scroll down to the **Template** section to select the model of your choice.
:::info
For classic models, you can switch to any flavor that has a similar or bigger disk. You can't switch to a model with a smaller disk.
Only **Flexible instances** can be upgraded and downgraded while maintaining a fixed disk size of 50GB.
:::
If your disk is equal to or smaller than 50GB, you can switch to a `Flexible instance
` if desired.
:::warning
If you are editing a flex instance, you cannot revert to a classic instance via the Control Panel. For more information, consult the guide on [Revert a flex instance](/en/guides/public-cloud/compute/revert-a-flex-instance.md).
:::
Once the selection has been made, click on `Modify template
` to confirm your choice.
### Resizing a disk in Windows
When performing a resize for a Windows Instance, the partition size is not automatically updated. You must extend it using the **disk manager**:
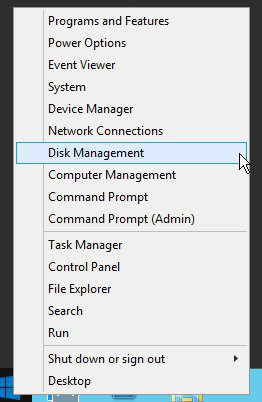
- Right-click on the Start menu and launch the disk manager by clicking on Disk Management:
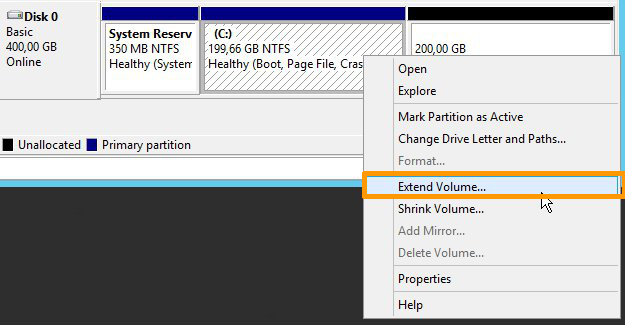
- Right-click on the main partition, then click on Extend Volume.
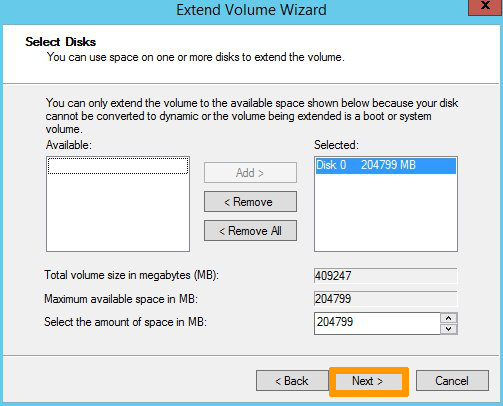
- In the `Extend Volume Wizard` menu, click on Next to proceed. In the next tab, choose the disk resources to extend and click on Next.
Once done, click on `Finish
` to confirm your choice.
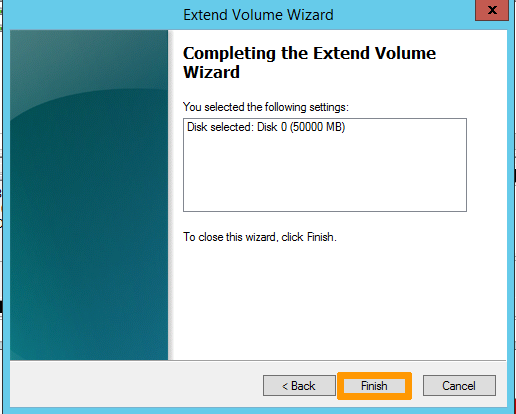
- The new disk size will then be displayed in the disk manager.

## Go further
Join our [community of users](https://community.ovhcloud.com/).