
OKMS authentication methods
Find out how to configure Personal Access Tokens, service accounts, or access certificates to authenticate to your OKMS domain regional REST API
Objective
This guide explains how to authenticate to the OKMS data plane — the regional REST API exposed on your OKMS domain (for example https://eu-west-rbx.okms.ovh.net). This API is shared by Key Management Service (KMS) and Secret Manager.
Three authentication methods are available for the REST API. KMIP integrations support access certificates only — we recommend reserving certificates for KMIP use cases, as they require a more complex setup than tokens.
Requirements
- An OVHcloud customer account.
- An OKMS domain in the target region (created when ordering KMS or activating Secret Manager in that region).
Instructions
Understand the OKMS data plane
The OKMS data plane is the regional API endpoint for cryptographic operations (KMS) and secret storage (Secret Manager). It is distinct from the centralized OVHcloud API control plane (/v2/okms/...), which manages OKMS domain provisioning and configuration.
You can interact with the data plane through the unified Swagger UI at https://<region>.okms.ovh.net/swagger/, the OKMS CLI, or the Go SDK.
Your okmsId and your regional endpoint are both returned by the following API call:
Both are also displayed in the General information tab of your .
Choose your authentication method
For REST API access, prefer a PAT or service account. Reserve access certificates for KMIP or mTLS-based clients.
Set up authentication
Step 1 — Create a local user
If you do not have one yet, create an OVHcloud local user.
Step 2 — Create a PAT
Create a Personal Access Token (PAT) on the local user.
Step 3 — Create an IAM policy
Create an IAM policy that grants the local user the required OKMS actions on your domain. See IAM rights for OKMS below.
Use the PAT on the data plane
Send the PAT as a Bearer token:
In the Swagger UI, use the personalAccessToken scheme in the Authorize dialog.
If the regional endpoint does not accept the Bearer scheme directly, use hybrid authentication with the pat_jwt_ prefix as described in the PAT guide.
Use the OKMS Swagger UI
The OKMS domain exposes a unified Swagger UI at https://<region>.okms.ovh.net/swagger/. For example, for a domain in eu-west-rbx: https://eu-west-rbx.okms.ovh.net/swagger/.
You can also open it from the Swagger link on your .
The Swagger UI supports all three REST API authentication methods. Complete the setup steps for your chosen method, including the required IAM policy, before executing requests.
Personal Access Token
- Click the
Authorizebutton (lock icon) in the Swagger UI. - Under personalAccessToken (HTTP Bearer, JWT format), paste the PAT you created for your local user.
- Click
Authorize, thenClose.
Swagger sends your token as an Authorization: Bearer <token> header on every request you execute.
Service account
- Click the
Authorizebutton in the Swagger UI. - Under oAuth2ClientCredentials, enter your service account
client_idandclient_secret. See How to use service accounts to connect to OVHcloud APIs to obtain these credentials. - Swagger obtains an OAuth2 access token using the client-credentials flow and attaches it to subsequent requests.
Access certificate
Access certificate authentication uses mutual TLS (mTLS) at the transport layer. The certificate is presented by your browser when connecting to the Swagger URL — it is not configured through the Authorize dialog.
Import your certificate into the browser
Convert your OKMS certificate and private key to PKCS#12 format (assuming files named ID_certificate.pem and ID_privatekey.pem):
You will be prompted to set a password for the encrypted file. Import client.p12 into your browser:
On Firefox
- Type
about:preferences#privacyinto the address bar. - Scroll down to the
Certificatessection.
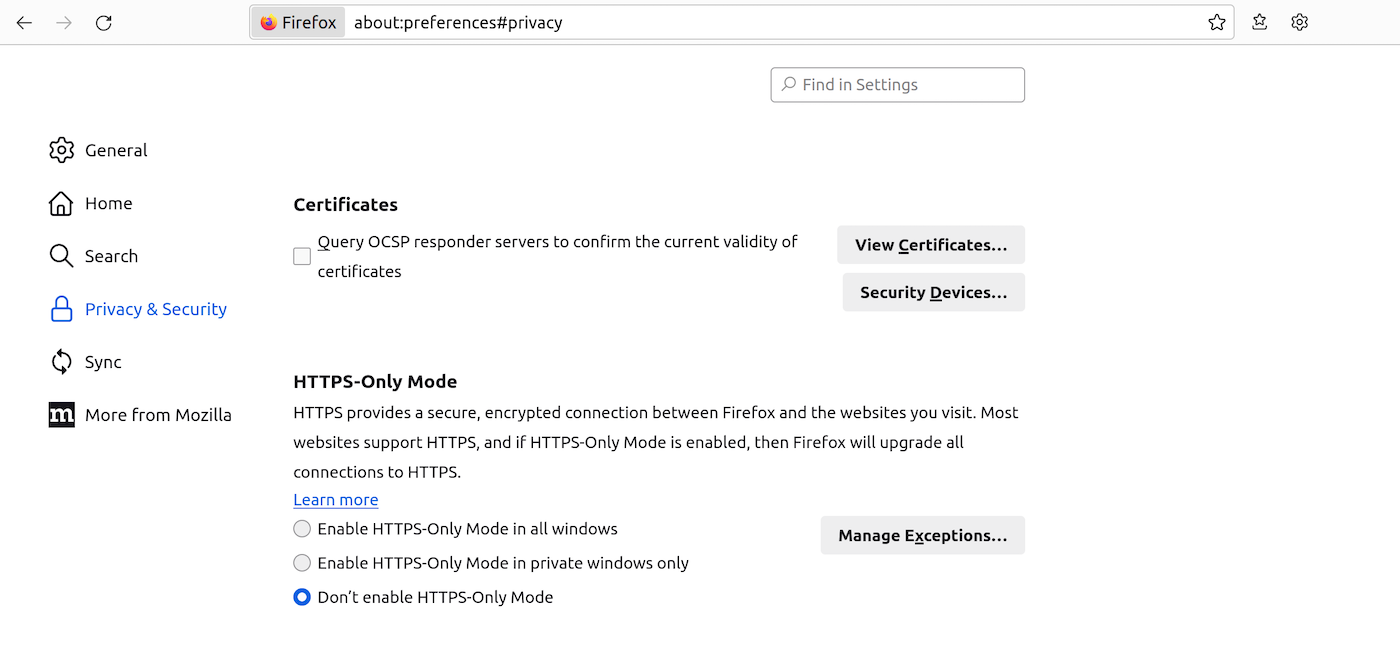
- Click
View Certificates..., open theMy Certificatestab, thenImport...and select yourclient.p12file. - Enter the PKCS#12 password when prompted.
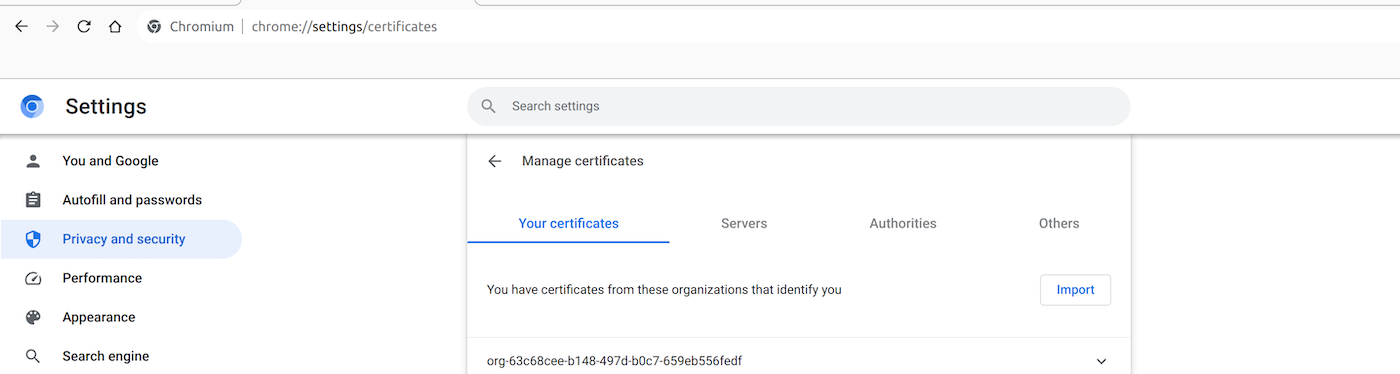
On Chrome/Chromium
- Type
chrome://settings/certificatesinto the address bar. - Open the
Your certificatestab, clickImport, and select yourclient.p12file. - Enter the PKCS#12 password when prompted.
Access Swagger with your certificate
Open https://<region>.okms.ovh.net/swagger/ in your browser. You will be prompted to select the imported certificate:
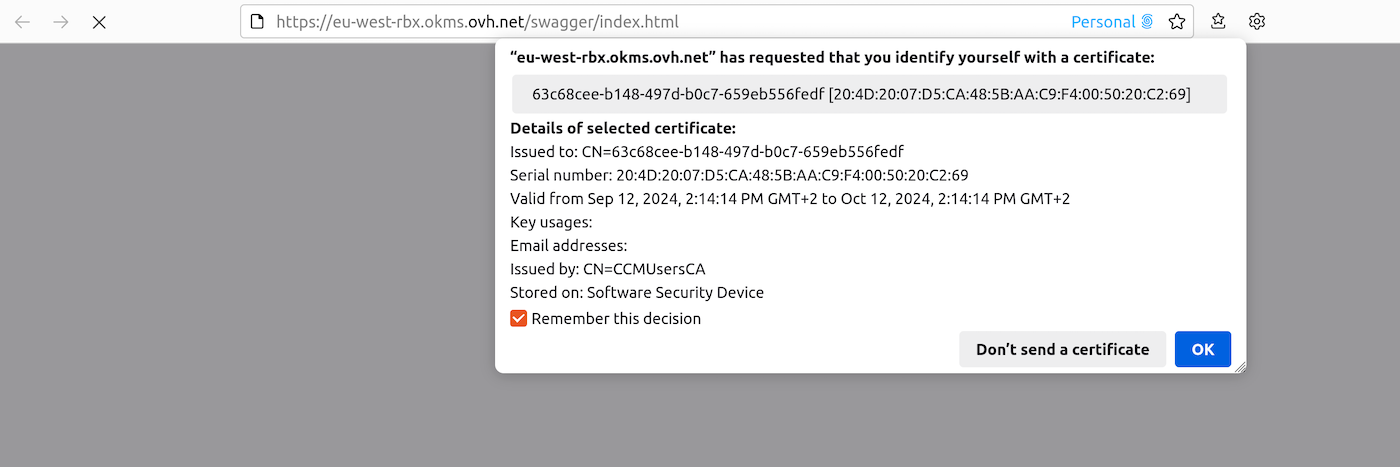
You can now execute API calls interactively from the Swagger UI.
IAM rights for OKMS
OKMS IAM actions follow the pattern okms:<channel>:<resource>/<operation>:
Domain management actions on OVHcloud API v2
Browse the full action list in the under product type Key Management System (KMS), or in IAM policies when creating a policy.
Actions for the KMS regional API
Browse the full action list in the regional Swagger UI at https://<region>.okms.ovh.net/swagger/ or in IAM policies when creating a policy.
Listing a secret version (okms:apikms:secret/get) is separate from reading its content (okms:apikms:secret/version/getData). Grant both when the identity must read secret values.
Importing a wrapped key needs both the permission to import a key on the OKMS domain (okms:apikms:serviceKey/import) and the permission to unwrap on the transport key (okms:apikms:serviceKey/unwrapKey).
Example IAM policies
Apply these templates to your OKMS domain resource. Its URN is displayed in the General information tab of your . Replace <identity_urn> and <okms_urn> with your values. Create policies via the Control Panel or the IAM API.
Full admin — full control over the OKMS domain via REST API:
Read-only — list and inspect resources without write or cryptographic operations:
Add okms:apiovh:secret/version/getData (OVHcloud API v2) or okms:apikms:secret/version/getData (KMS regional API) if the identity must be able to read secret values.
Cryptographic operations only — use keys for encrypt, decrypt, sign, and verify without managing keys or secrets:
Secret access only — read Secret Manager secrets without access to KMS keys, certificates, or domain configuration:
To manage secrets via the , add okms:apiovh:secret/create, okms:apiovh:secret/edit, okms:apiovh:secret/updateMetadata, and okms:apiovh:secret/delete. To manage them via the KMS regional API, add okms:apikms:secret/create, okms:apikms:secret/updateMetadata, and okms:apikms:secret/delete.
KMIP operations use okms:kmip:* actions, not okms:apiovh:* or okms:apikms:*. Certificate-based KMIP access requires both certificate creation and the KMIP IAM rights from the KMIP guide.
Go further
Using the OVHcloud Key Management Service (KMS) with your data
Use Secret Manager with REST API
How to connect a compatible product using KMIP protocol
Manage your OKMS access certificate
Join our community of users.