
Create an OVHcloud DNS zone for a subdomain
Find out how to create a DNS zone with OVHcloud for a subdomain of a domain name via your customer account
Objective
Would you like to create a DNS zone for a subdomain?
The DNS (Domain Name System) zone is a domain name's configuration file. It consists of technical information, called DNS records. The DNS zone acts as a routing center.
For more information, please refer to our guides:
- Everything you need to know about DNS servers
- Everything you need to know about DNS zones
- Everything you need to know about DNS records
Most often, the DNS records of a subdomain are configured directly from the active DNS zone of the domain name it depends on. However, it is also possible to create a DNS zone specific to a subdomain.
For various reasons, you may need to create a DNS zone for a subdomain with OVHcloud. The subdomain will then have its own zone to configure its DNS records.
To recap:
- A domain name usually has the form domain.tld. For example: ovhcloud.com.
- A subdomain usually has the form sub.domain.tld. For example: help.ovhcloud.com.
By default, a subdomain depends on a domain name to function. In practice, you will not be able to use the subdomain sub.domain.tld if you do not have access to the management of the domain name domain.tld.
If you want to create a DNS zone for a domain name, please refer directly to this guide.
Find out how to create a DNS zone with OVHcloud for a subdomain of a domain name via your OVHcloud Control Panel.
Requirements
- You can administrate the domain name on which the chosen subdomain will depend.
- The concerned subdomain must not already have an active or inactive DNS zone with OVHcloud or be the subject of an ongoing operation or order with OVHcloud.
OVHcloud Control Panel Access
- Direct link:
- Navigation path:
Web Cloud>Domain names> select your domain name >DNS zonetab
Instructions
1 - Create the DNS zone via the OVHcloud Control Panel
In the , open the Web Cloud section. Click the Order button, then select DNS zone.
On the page that appears, enter the subdomain (for example: sub.domain.tld) for which you want to create an OVHcloud DNS zone. Wait a few moments while the tool performs checks on the subdomain.
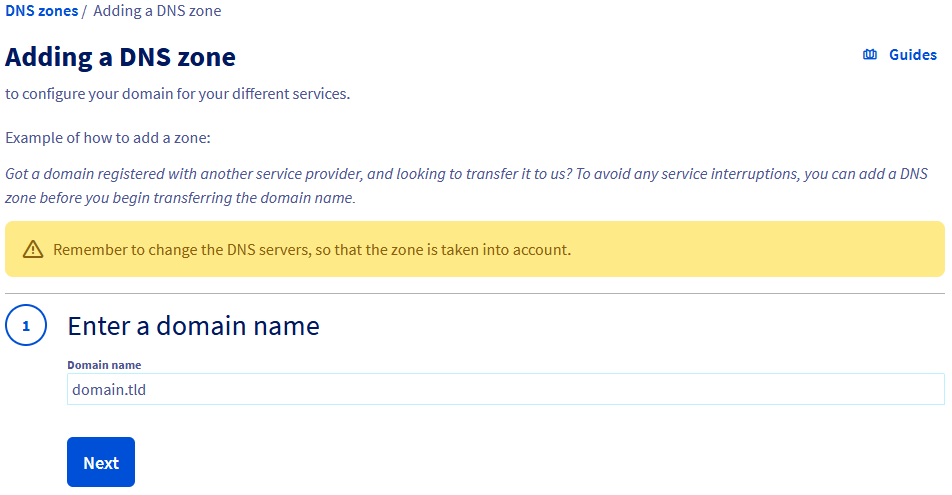
If a message indicates that the DNS zone cannot be created, check that the subdomain meets the necessary requirements or contact the person who manages it. Once everything is correct, try the operation again.
Once the verification is complete, choose whether to enable the minimum records for the DNS zone you are going to create. This choice is not definitive, as you can always edit DNS zone records later.
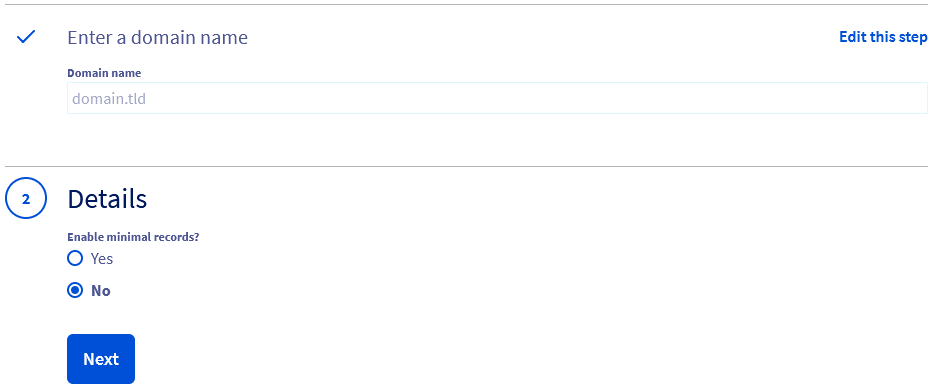
| Enable minimal entries? | Details |
|---|---|
| Yes | Select this option if you would like to customise the DNS zone yourself at a later stage.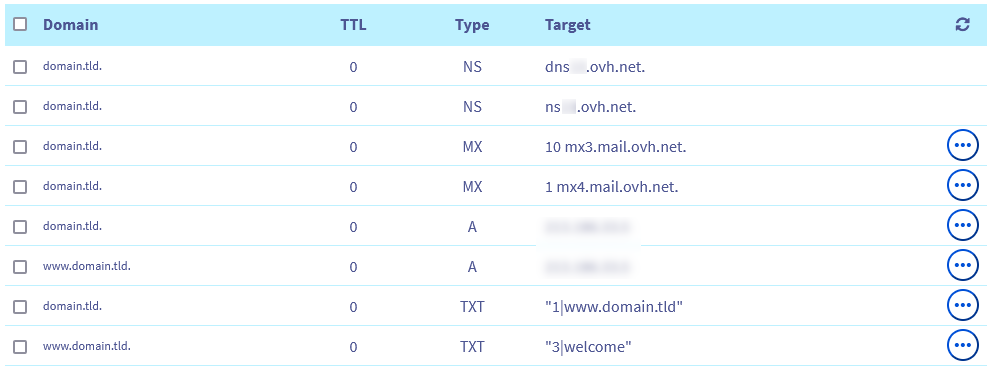 |
| No | Select this option if you plan to use OVHcloud services as a web hosting, with the zone preconfigured for this purpose.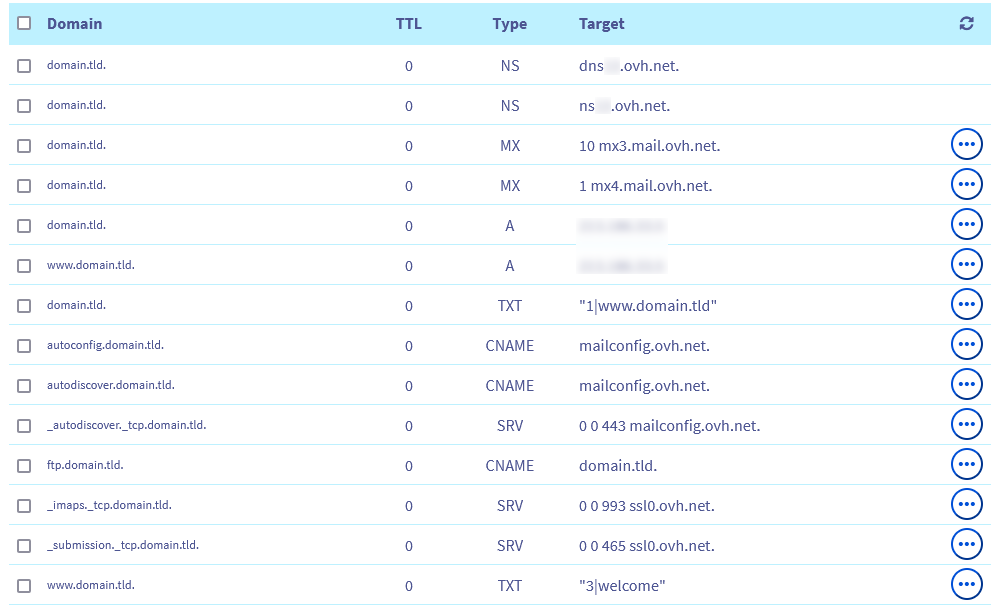 |
Once your choice is made, follow the steps displayed in your OVHcloud Control Panel until the DNS zone is created.
2 - Edit the DNS zone (optional)
Now that your subdomain's DNS zone has been created, you can edit it. This step is optional, but it may be necessary if you want to ensure that the services associated with your subdomain remain available (e.g. your website and/or emails).
To edit this DNS zone, please read our guide on Editing a DNS zone at OVHcloud.
If you have just created the DNS zone and the subdomain does not yet appear in your list of services, wait 15 to 20 minutes, then reload the page.
3 - Declare the DNS servers in the active DNS zone of the domain name on which the chosen subdomain depends
The activation of a DNS zone for a subdomain differs from that of a domain name, as a subdomain must depend on a domain name to function.
You must first retrieve the names of the DNS servers associated with the DNS zone created for your subdomain.
In the table, locate the Type and Target columns.
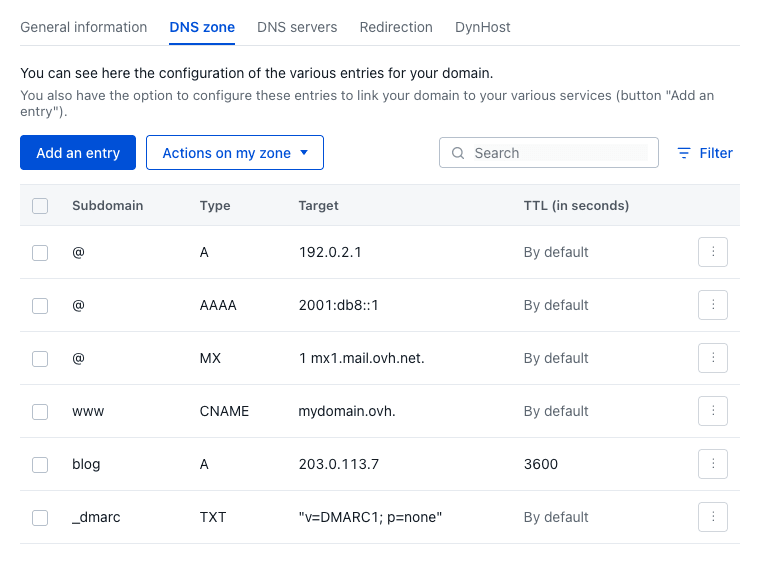
Find the two lines of type NS and retrieve the two values present in the Target column. The names of the DNS servers should be in one of the following three forms:
nsXX.ovh.netanddnsXX.ovh.netor,nsXXX.ovh.netanddnsXXX.ovh.net(where eachXrepresents a number between 0 and 9).nsXX.ovh.caanddnsXX.ovh.caor,nsXXX.ovh.caanddnsXXX.ovh.ca(where eachXrepresents a number between 0 and 9).ns200.anycast.meanddns200.anycast.me(if you have subscribed to the DNS anycast option).
Once the two DNS server names are retrieved, two situations are possible.
Click on one of the two situations to display the content.
The domain name on which your subdomain depends has its active DNS zone with OVHcloud
In the , open the Web Cloud section, click Domain names, select the domain name on which your subdomain depends, then open the DNS zone tab.
Click Add an entry above the table and select the NS type. In the Subdomain field, enter the concerned subdomain (for example: sub for the subdomain sub.domain.tld); in the Target (DNS server) field, enter one of the two DNS servers you retrieved (for example: nsXX.ovh.net). Then click Add.
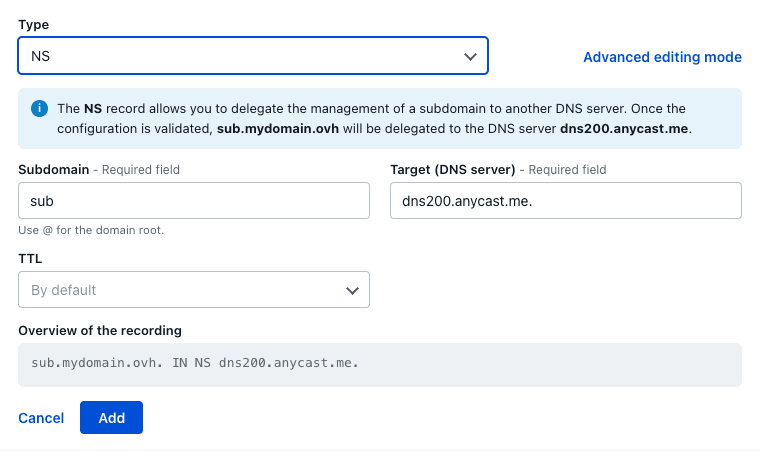
Repeat the operation for the second DNS server.
If needed, see our guide "Editing a DNS zone at OVHcloud" as a complement.
The domain name on which your subdomain depends has its active DNS zone with another provider
In this specific case, contact your DNS provider and specify that you want to add two DNS records of type NS for your subdomain.
Here is an example of a request to make to your DNS provider:
Hi,
I would like to add the following NS type DNS records in the active DNS zone of the domain name domain.tld for my subdomain sub.domain.tld :
- sub IN NS nsXX.ovh.net.
- sub IN NS dnsXX.ovh.net.
This is to activate a specific DNS zone for my subdomain sub.domain.tld.
Best regards,
In the example above, replace the values domain.tld, sub.domain.tld, nsXX.ovh.net and dnsXX.ovh.net with your own values.
The following point of attention does not concern the two DNS records of type NS that you have just added.
If other DNS records were present in the active DNS zone of the domain name on which your subdomain depends:
- Do not forget to duplicate them in the DNS zone created for your subdomain.
- Once duplicated, remove them from the active DNS zone of your domain name.
Indeed, there could be a conflict in DNS resolution.
After modifying the DNS zone of the domain name on which your subdomain depends, the propagation of the changes can take up to 48 hours.
Go further
Everything you need to know about DNS servers
Everything you need to know about DNS zone
Everything you need to know about DNS records
For specialised services (SEO, development, etc.), contact OVHcloud partners.
If you would like assistance using and configuring your OVHcloud solutions, please refer to our support offers.
Join our community of users.