
How to increase the size of an additional disk
Find out how to increase the size of an additional volume and enlarge its main partition
Objective
If you have reached the maximum capacity on your additional disk, you can add more storage by increasing its size.
This guide explains how to increase the size of an additional disk and extend the main partition accordingly.
Requirements
- A VPS in your OVHcloud account
- An additional disk configured on the VPS
- Administrative access via SSH or RDP to your VPS
OVHcloud Control Panel Access
- Direct link:
- Navigation path:
Bare Metal Cloud>Virtual private servers> Select your VPS
This feature is currently unavailable for Virtual Private Servers in Local Zones.
Instructions
The following steps presume that you have configured an additional disk according to our guide.
Modifying the size of the disk
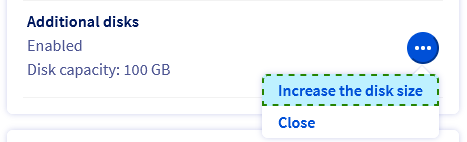
In the Home tab, go to the section labelled Your configuration. Click on ... next to the option Additional disks and in the context menu click on Increase the disk size.
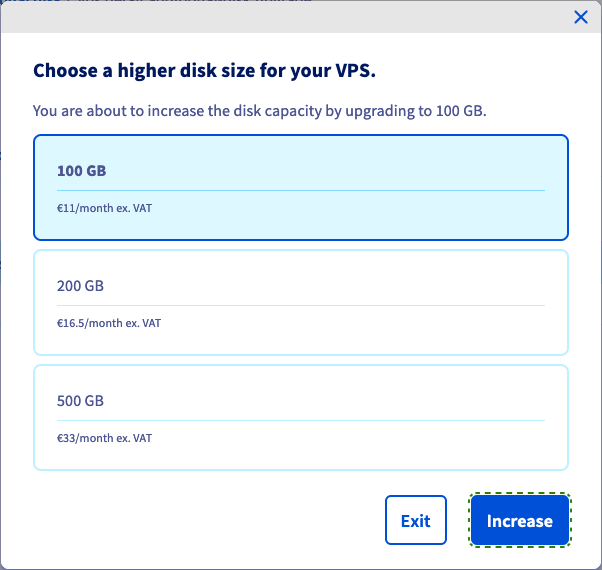
Choose the new disk size in the popup window, then click on Increase.
A message will appear to confirm your request. Click on the link inside the message box and follow the order process. A new browser tab opens to finalize the order.

After the payment is confirmed, the disk upgrade will take a few minutes. You can check the progress in the tab Additional disks: If your chosen new size is displayed, the disk is ready.

Back up your data located on the additional disk before continuing.
Extending the partition
Information regarding OVHcloud service administration and how to find appropriate assistance
When using OVHcloud guides, please be aware of the following conditions:
- User instructions aim to provide as many details as possible but cannot cover individual use cases. You might need to adapt the pertinent actions to your requirements.
- The OVHcloud ecosystem is built for flexibility and freedom of choice. Customers are therefore responsible for the secure and proper configuration of their services. To prevent data loss, we strongly recommend to apply backup strategies to all your important data.
- Our guides and tutorials may reference third-party software or services in combination with OVHcloud solutions. The technical support provided by OVHcloud does not include the configuration of systems or products outside of our responsibility. This includes but is not limited to:
- Operating systems and user interfaces (Windows, Debian, Plesk, etc.).
- Any other third-party software (FTP clients, email software, etc.).
- Services offered by other providers (DNS, APIs, user interfaces, etc.).
To receive the appropriate assistance for any issues you might experience, follow these guidelines:
- You seek personalized advice or you would like to discuss a topic that is not covered in detail by our documentation?
Join the OVHcloud Community to search for your topic and reach out to other users. - You need to report an incident regarding your OVHcloud service or you are experiencing difficulties in the OVHcloud Control Panel?
Create a support request in our Help Centre. - You require professional assistance for your project or you need help with tasks outside our support scope?
Visit our partner portal to search for experts who are familiar with OVHcloud solutions. - You are looking for more detailed information regarding our support levels and Professional Services?
Please visit our web pages for OVHcloud support levels and OVHcloud Professional Services.
You can participate in improving our documentation:
- You would like to share feedback to improve a guide page or you want to report insufficient information on a specific page?
Use the "Was this page helpful?" buttons at the bottom of the page to let us know. - You would like to propose a specific documentation update?
Use the "Edit this page" function, available at the bottom of the page and in the sidebar.
On a Linux VPS
Note that this section describes a general approach to the necessary steps, based on an Ubuntu server OS. Some commands may require customisation for the distribution or operating system you are using.
If a GNU/Linux distribution is installed on your VPS, establish an SSH connection to your server from the command line terminal or by using a SSH client application.
The examples below presume you are logged in as a user with elevated permissions.
Ensure that the disk is not mounted by using this command:
Replace /mnt/disk with your actual mount path to the additional disk, if needed.
Determine the names of disks and partitions:
In this example, the disk is named sdc and it has the correct new disk size of 100 GB after the upgrade explicated in the first part of this guide. The partition sdc1 exists on the disk and uses 50 GB.
Recreate the partition on the disk by running fdisk:
Enter the following commands at the fdisk prompt:
Confirm each of the default values by pressing Enter:
Enter n and finally w:
Verify the partition and extend the file system:
Finally, mount the disk:
Partition 1 is now using the full size of the disk.
On a Windows VPS
If a Windows OS is installed on your VPS, establish a remote desktop (RDP) connection to your server.
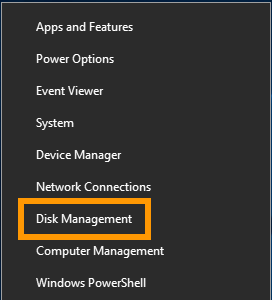
Once logged in, right-click on the Start Menu button and open Disk Management.
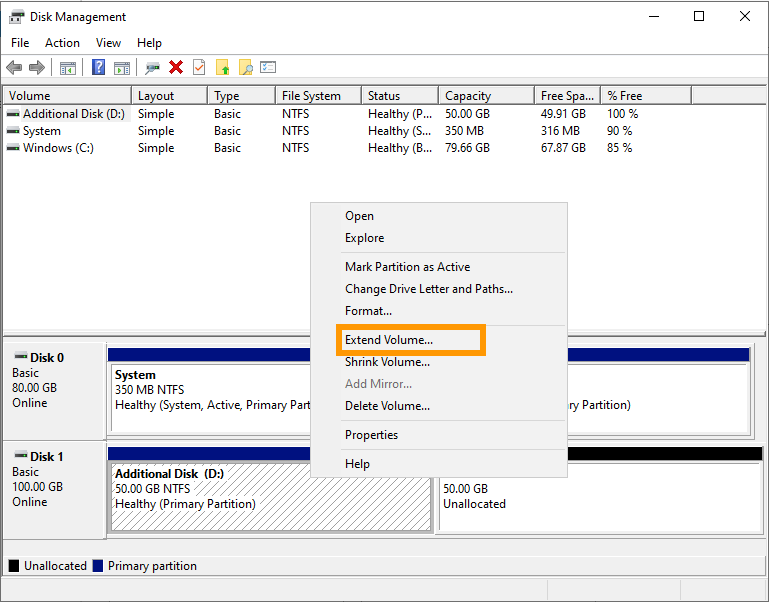
The extended disk displays the additional capacity as unallocated space. Right-click on the volume of your additional disk and select Extend Volume from the context menu.
In the "Extend Volume Wizard", click on Next to proceed.
You can modify the disk space in this step if necessary. Click on Next.
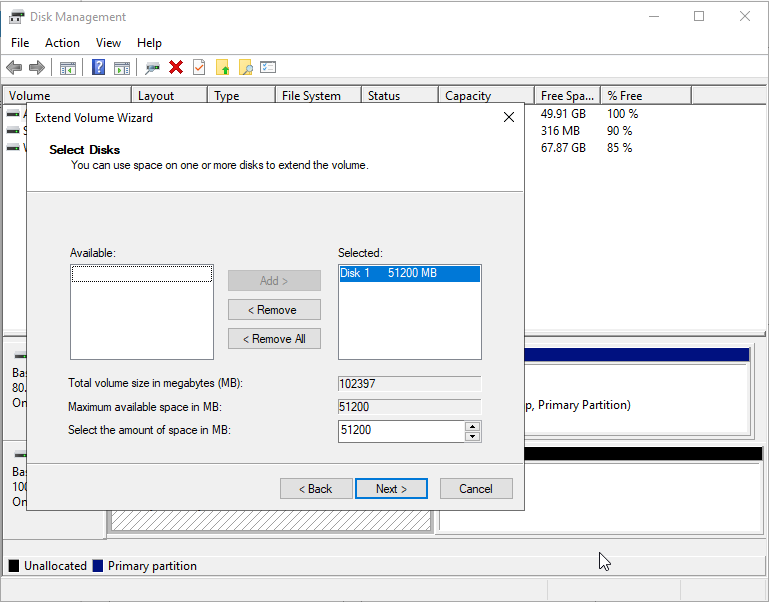
Click on Finish to complete the process.
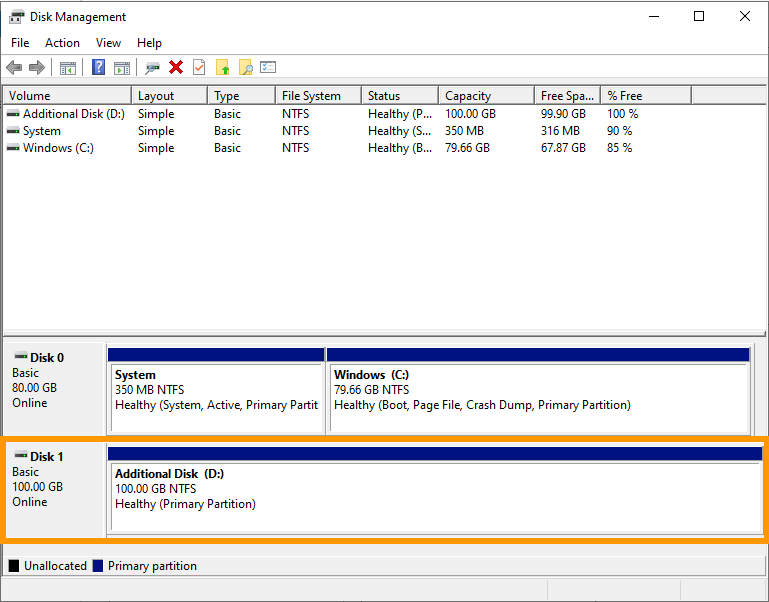
The resized volume now includes the additional disk space.
Go further
Join our community of users.