
MX Plan - Configure your email account on Gmail for Android
Find out how to configure an MX Plan email address on Android, via the Gmail app
Objective
You can configure MX Plan email addresses on email clients, if they are compatible. By doing so, you can use your email address through your preferred device. In this guide, we will detail the process of configuring an MX Plan email address in the Gmail application on Android devices.
Find out how to configure an MX Plan email address on Android, via the Gmail app.
Information regarding OVHcloud service administration and how to find appropriate assistance
When using OVHcloud guides, please be aware of the following conditions:
- User instructions aim to provide as many details as possible but cannot cover individual use cases. You might need to adapt the pertinent actions to your requirements.
- The OVHcloud ecosystem is built for flexibility and freedom of choice. Customers are therefore responsible for the secure and proper configuration of their services. To prevent data loss, we strongly recommend to apply backup strategies to all your important data.
- Our guides and tutorials may reference third-party software or services in combination with OVHcloud solutions. The technical support provided by OVHcloud does not include the configuration of systems or products outside of our responsibility. This includes but is not limited to:
- Operating systems and user interfaces (Windows, Debian, Plesk, etc.).
- Any other third-party software (FTP clients, email software, etc.).
- Services offered by other providers (DNS, APIs, user interfaces, etc.).
To receive the appropriate assistance for any issues you might experience, follow these guidelines:
- You seek personalized advice or you would like to discuss a topic that is not covered in detail by our documentation?
Join the OVHcloud Community to search for your topic and reach out to other users. - You need to report an incident regarding your OVHcloud service or you are experiencing difficulties in the OVHcloud Control Panel?
Create a support request in our Help Centre. - You require professional assistance for your project or you need help with tasks outside our support scope?
Visit our partner portal to search for experts who are familiar with OVHcloud solutions. - You are looking for more detailed information regarding our support levels and Professional Services?
Please visit our web pages for OVHcloud support levels and OVHcloud Professional Services.
You can participate in improving our documentation:
- You would like to share feedback to improve a guide page or you want to report insufficient information on a specific page?
Use the "Was this page helpful?" buttons at the bottom of the page to let us know. - You would like to propose a specific documentation update?
Use the "Edit this page" function, available at the bottom of the page and in the sidebar.
Requirements
- an MX Plan email address (included in the MX Plan solution, or in an OVHcloud web hosting plan).
- You need to have the Gmail app installed on your device. You can install it from the Google Play Store if it is not already present.
- the required credentials for the email address you would like to configure
This guide was written using a device that uses Android version 13.
Instructions
How to add your email account
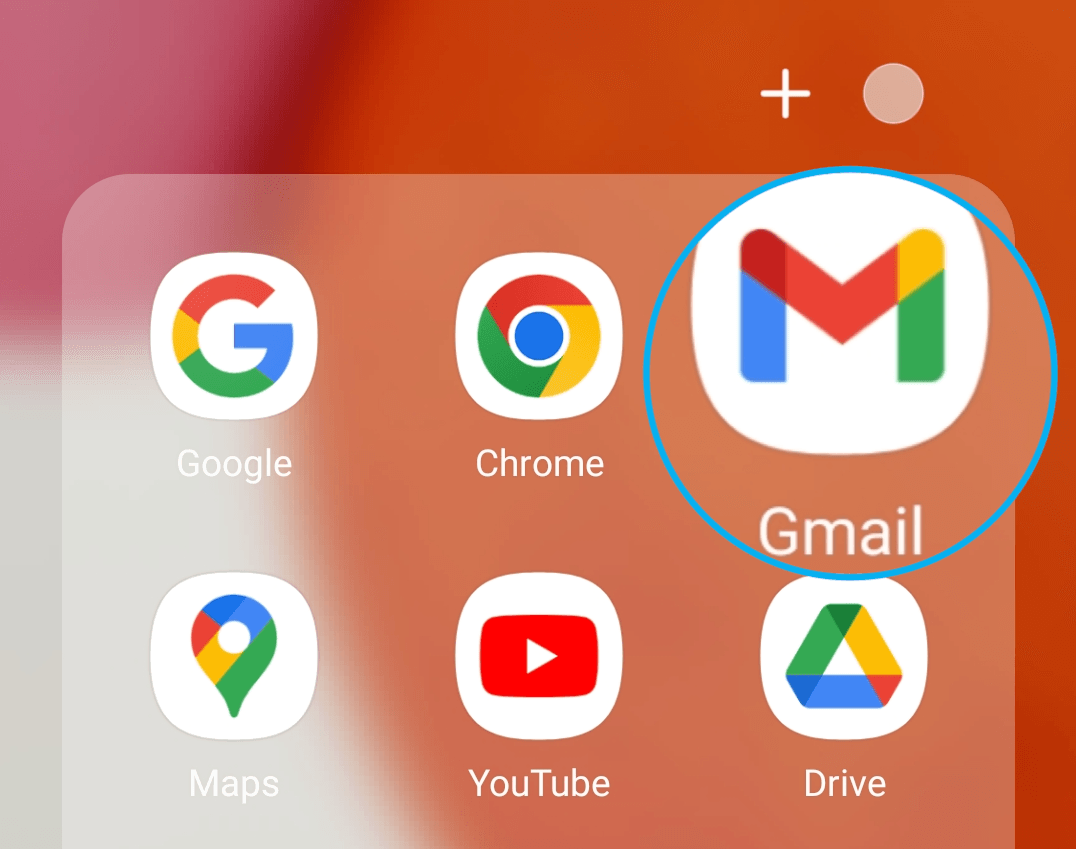
On your device’s homepage, open the Gmail app.
Adding an account will be done differently if no account is set up, or if an account has already been set up. Select the tab corresponding to one of the two situations mentioned:
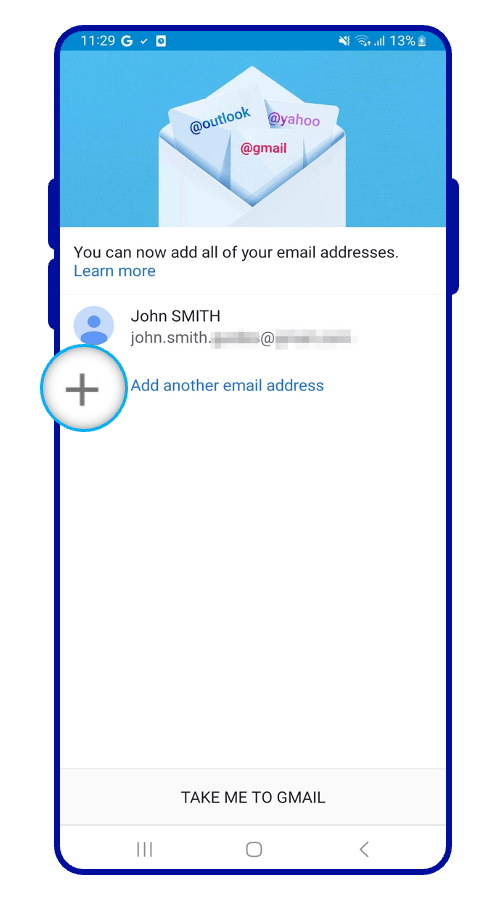 | Select Add Email Address |
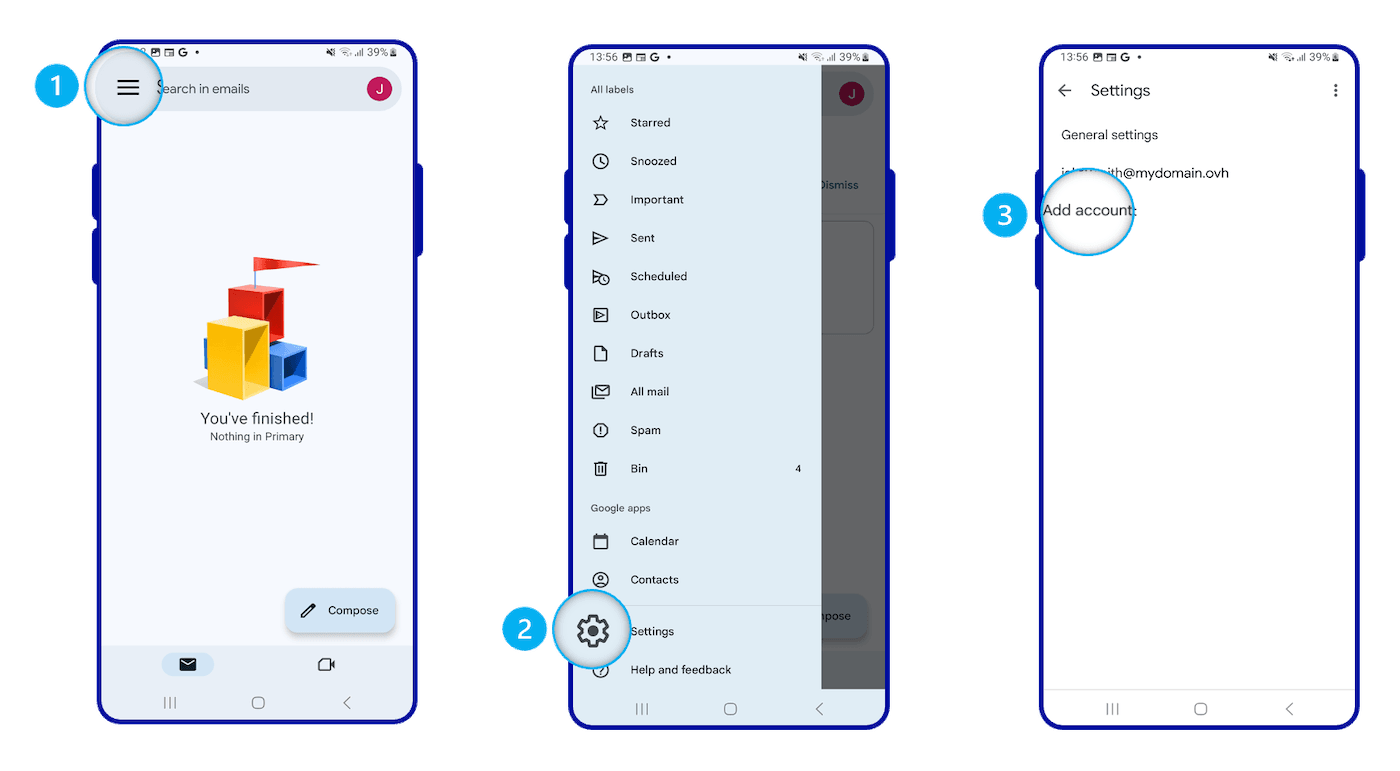
Follow the next steps in the configuration process by browsing the tabs below:
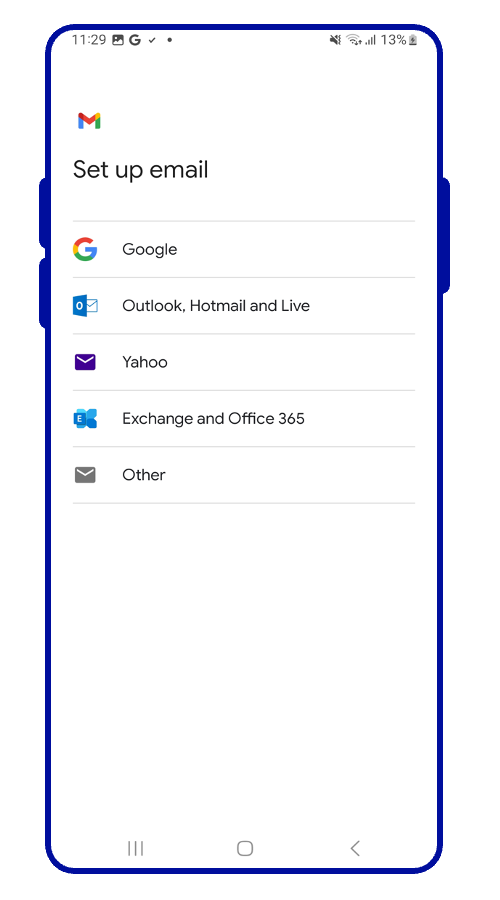 | From the menu of email account types, select Other. |
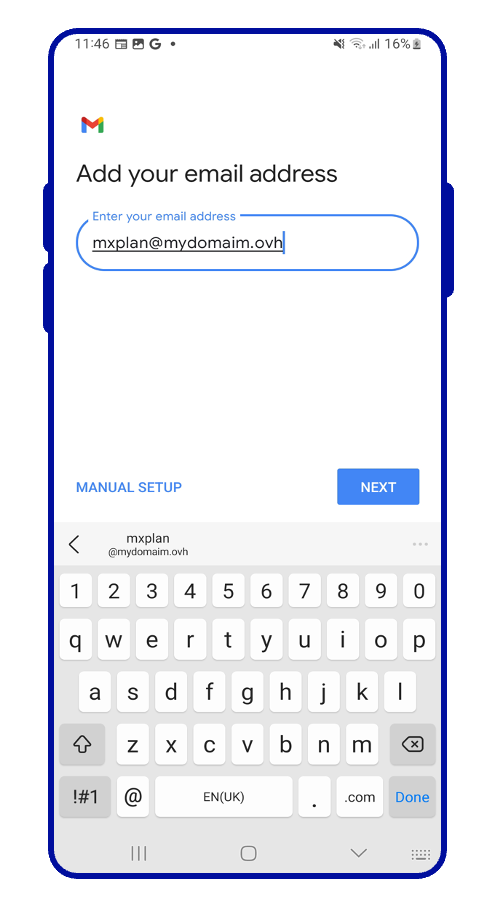
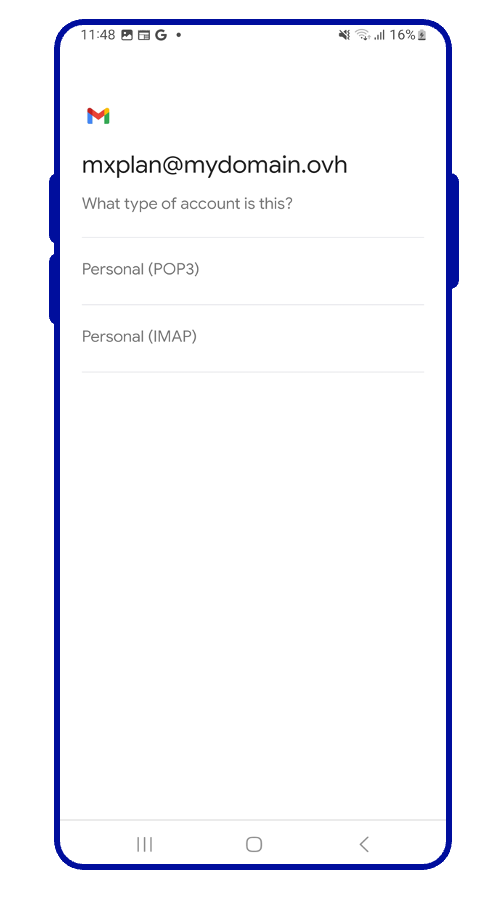
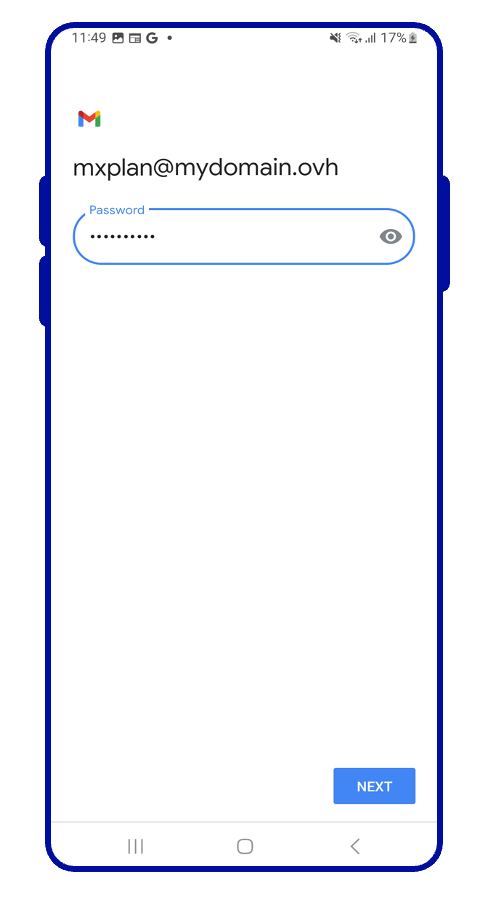
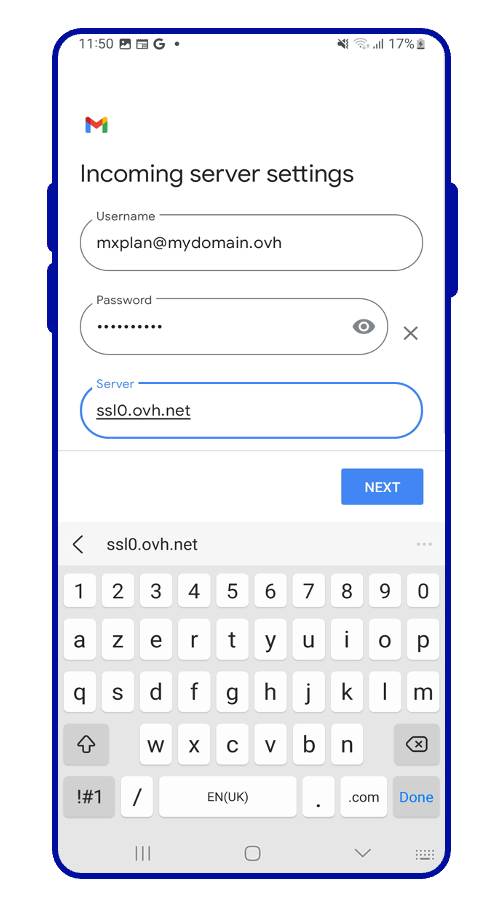
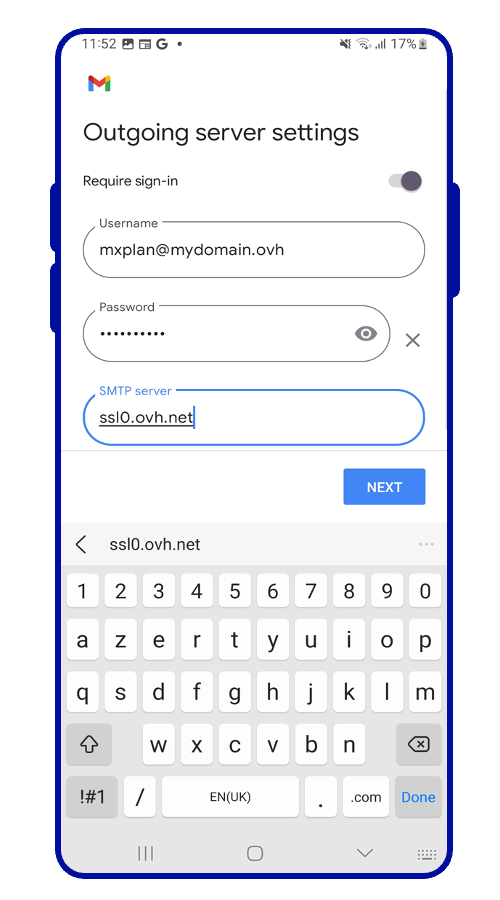
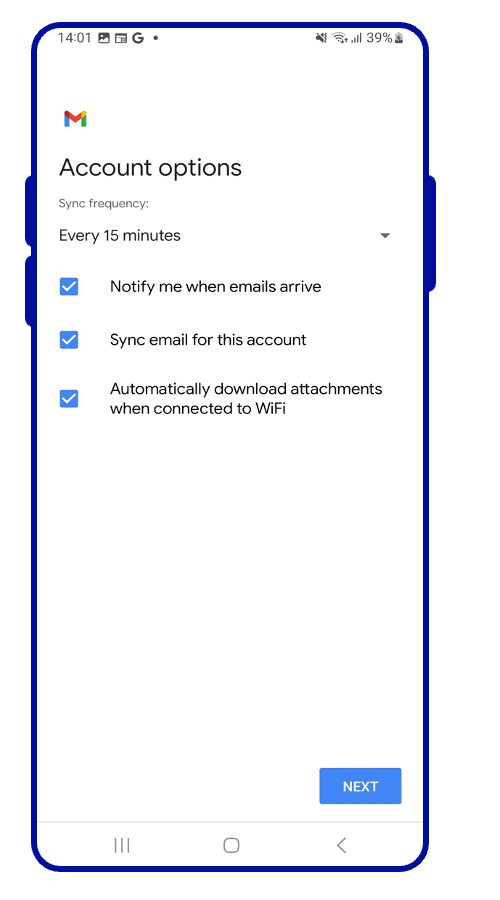
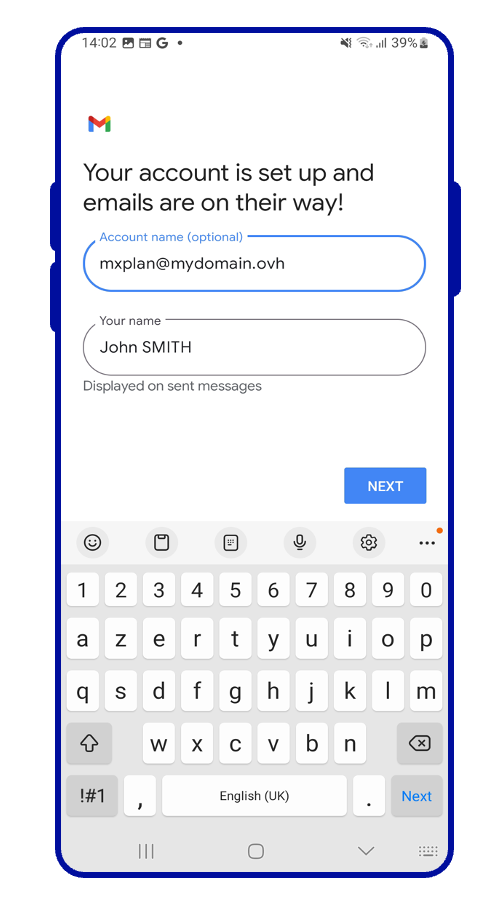
Once you have configured your email address, you can start using it! You can now send and receive messages from your Gmail application.
OVHcloud offers a web application that allows you to access your email address from a web browser, at Webmail. You can log in using your email credentials.
POP, IMAP and SMTP settings
When you choose your account type, we recommend using IMAP to receive emails. However, you can select POP. To understand how they work, please refer to our section "POP or IMAP, what is the difference?"
- For POP configuration
- For IMAP configuration
For sending emails, if you need to enter the SMTP settings manually in your account preferences, you will find the settings below:
- SMTP configuration
POP or IMAP, what's the difference?
When you set up your email address manually, your email client asks if you want to use POP (Post Office Protocol) or IMAP (Internet Message Access Protocol). To understand this properly, you will need to configure your email address to include POP and IMAP protocols.
When you configure your mail client, you must enter the information from the incoming server to receive the emails, and the outgoing server to send the emails. To send emails, there is no choice, the SMTP (Simple Mail Transfer Protocol) is used. For the reception, you will have the choice between POP or IMAP.
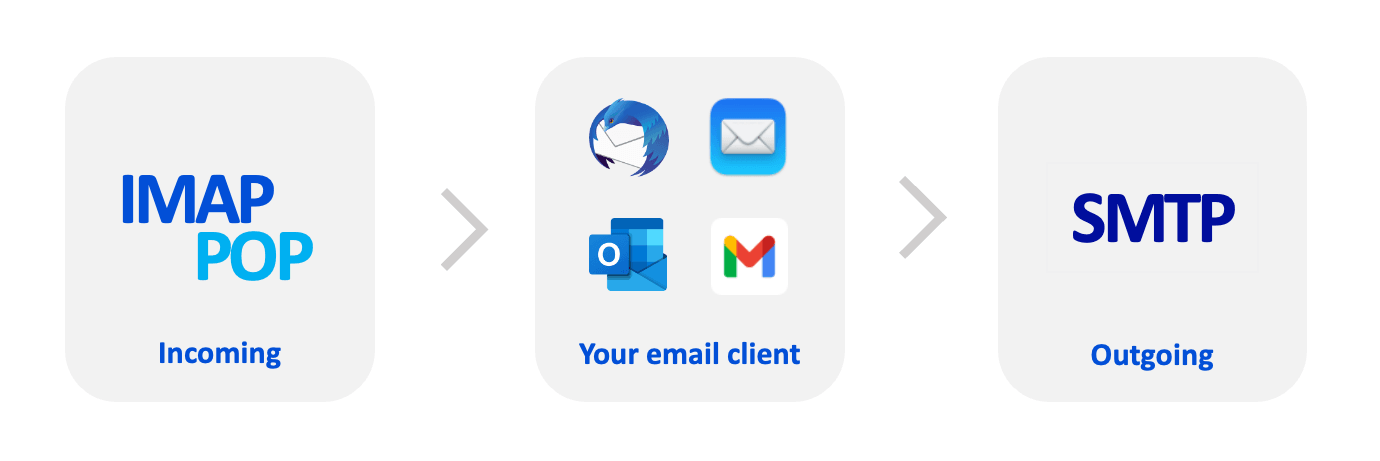
To understand the difference between POP and IMAP, we will break down the elements that make up the processing of your incoming emails:
-
Your device: a computer, smartphone or tablet. This is your consultation support.
-
Your email client: software or application dedicated to managing your emails. Your choice will determine the level of usability and functionality you will need to view your emails.
-
The receiving protocol: a choice that determines how you check emails on your device. This affects other devices that access the same email account.
- IMAP: Your email client queries the email server and downloads the emails to your device. When you view an unread email, the server marks it as "read" by default. Other devices configured in IMAP will be able to check this status and view this email until it has been deleted on one of the devices.
- POP: Your email client requests the email server and downloads the emails to your device. By default, once the email is downloaded to your device, the message is deleted from the server. As a result, other devices connected to this email address will not be able to view this email.
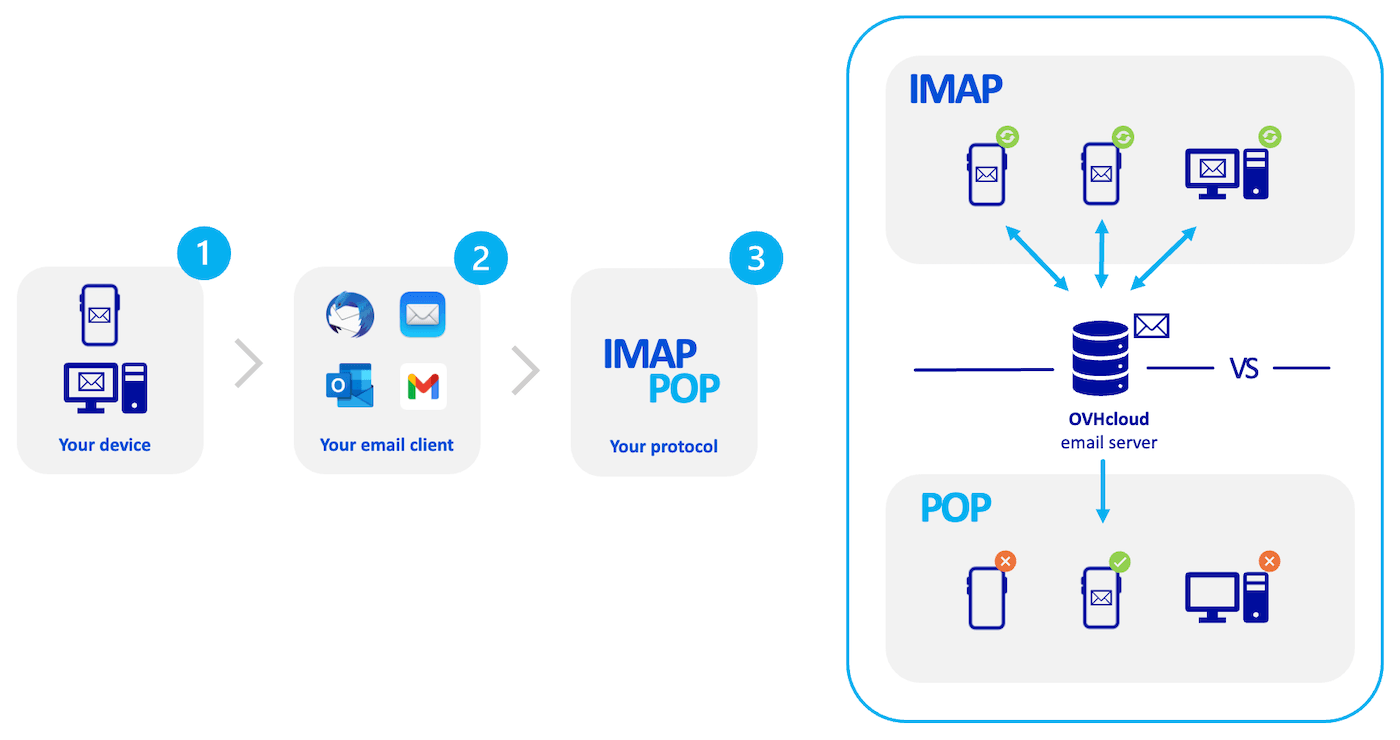
This description is a summary, it represents the standard operation of these two protocols. You can configure the POP so that emails are not deleted when you check your emails. The goal here is to describe how these two protocols work natively and avoid any additional steps to match your needs.
Go further
For more information on setting up an email address from the Gmail app on Android, see the Google Help Center.
Configuring an Email Pro account on Android via the Gmail app
Configuring an Exchange account on Android via the Gmail app
Join our community of users.