Editing an OVHcloud DNS zone
Find out how to edit an OVHcloud DNS zone via the OVHcloud Control Panel
Objective
DNS means Domain Name System and is a set of elements (DNS servers, DNS zones, etc.) that map a domain name to an IP address.
For further explanation, please refer to our guides “Everything you need to know about DNS servers” and “Everything you need to know about DNS zone”
This guide explains how to edit your OVHcloud DNS zone via the OVHcloud Control Panel.
Requirements
- OVHcloud DNS servers in use for the domain name concerned
OVHcloud Control Panel Access
- Direct link:
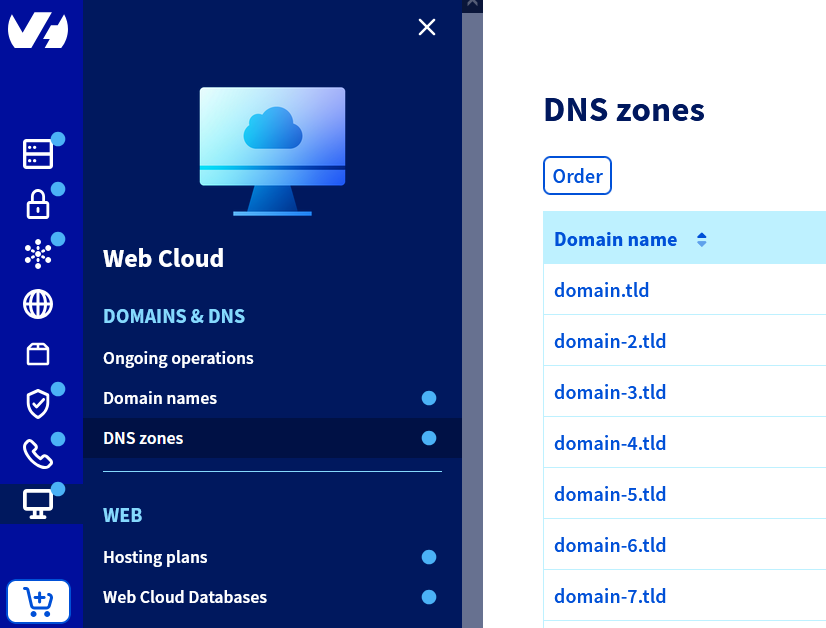
- Navigation path:
Web Cloud>DNS zones> Select your domain name
-
If your domain name does not use OVHcloud DNS servers, you will need to edit the configuration using the interface of your service provider that manages your domain name.
-
If your domain name is registered with OVHcloud, you can check if it uses our configuration. If needed, refer to our guide on Modifying the DNS servers for an OVHcloud domain name.
In both of the above cases, be careful when making your DNS server changes. The old configuration that can be applied to your domain name will no longer be active if you have not previously reconfigured and customised the new DNS zone present at OVHcloud. You can only have one active DNS zone per domain name at a time.
Instructions
Access the area for managing an OVHcloud DNS zone
Unlike domain names, a DNS zone has no "holder", but is managed at OVHcloud through the contact management. If you wish to assign the management of your DNS zone to another OVHcloud customer account, follow our guide Managing contacts for your services.
To manage an OVHcloud DNS zone, click on the tabs below to view each of the 2 steps.
Go to the page, then choose the domain name concerned.
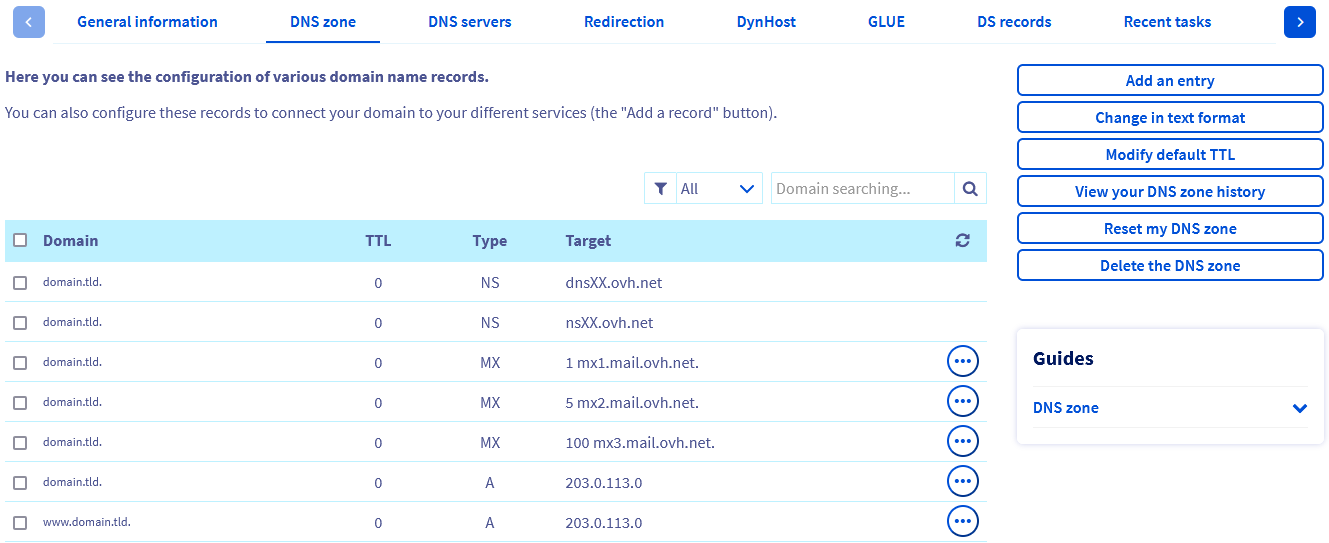
Edit your domain name’s OVHcloud DNS zone
Editing a DNS zone is a sensitive procedure: An inappropriate change could, for example, make your website unavailable, or prevent your email addresses from receiving new emails.
By learning more about these records, you can get a better understanding of the changes you will make if you edit your domain name’s DNS zone.
Read our guide on DNS records to get a better understanding of your DNS changes.
See also our guide to subdomains for more information on this topic.
You can edit your domain name’s OVHcloud DNS zone by adding, modifying, or deleting a DNS record. To do this, you can either manually edit the zone in text mode, or use our configuration assistants.
Manually edit the zone in text mode
For informed users only. Be careful with syntax when you make changes.
To edit an OVHcloud DNS zone in text mode, click on the tabs below to view each of the 2 steps.
Go to the page, then choose the domain name concerned.
Use our configuration assistants
From this point onwards, this guide will only cover configuration using our configuration assistants.
In order to modify your OVHcloud DNS zone successfully, make sure to gather all the required information first. If you are making this change at the request of a service provider, the service provider must provide you with a list of the items to change.
Click on the four headings below to see the explanations.
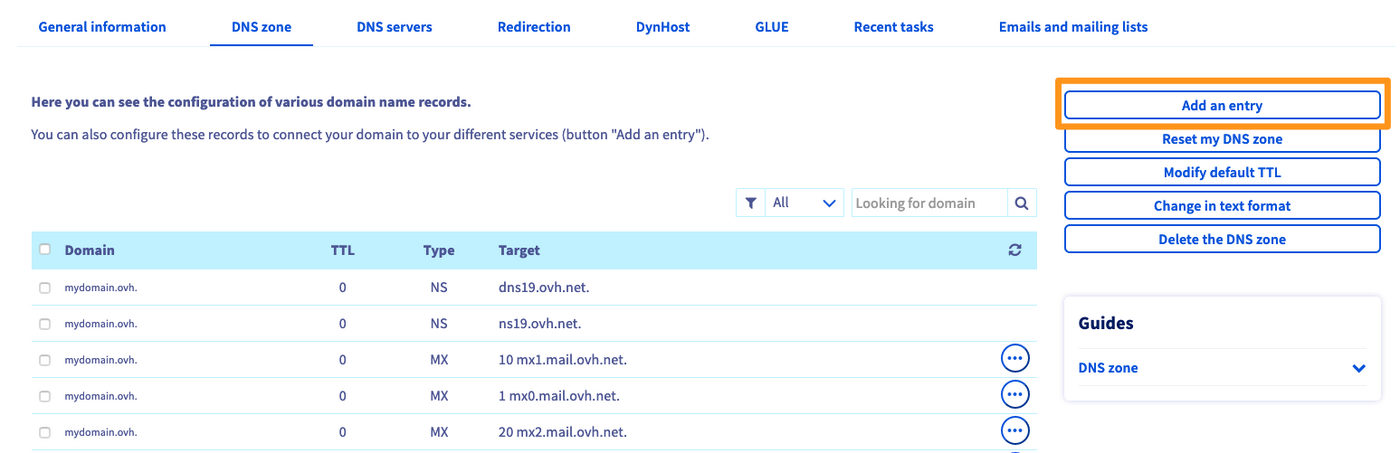
Add a new DNS record
To add a new DNS record, click on the tabs below to view each of the 2 steps.
Go to the page, then choose the domain name concerned.
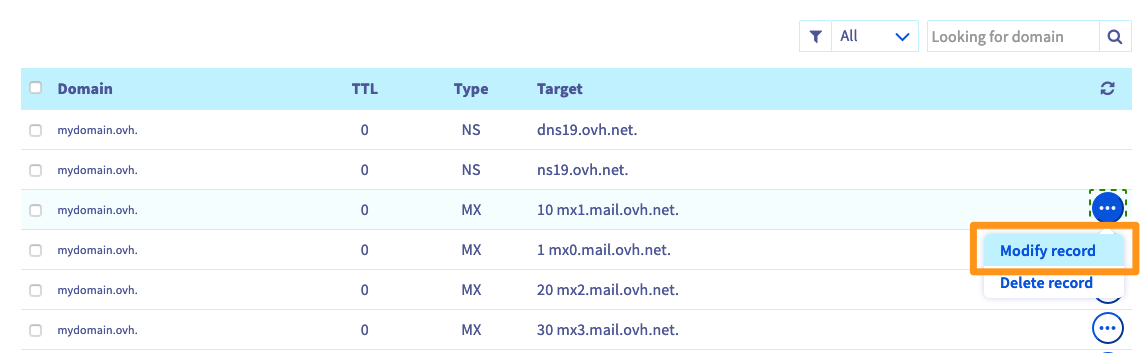
Modify an existing DNS record
To modify a DNS record, click on the tabs below to view each of the 2 steps.
Go to the page, then choose the domain name concerned.
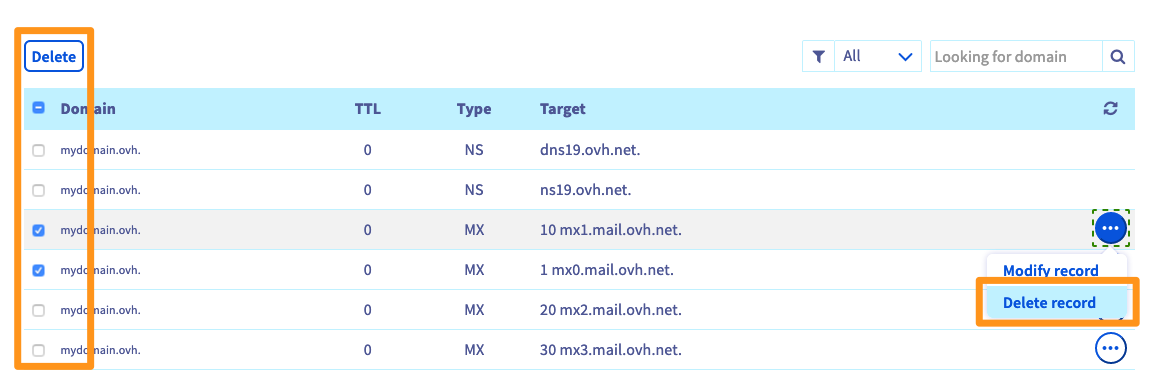
Delete a DNS record
To delete a DNS record, click on the tabs below to view each of the 2 steps.
Go to the page, then choose the domain name concerned.
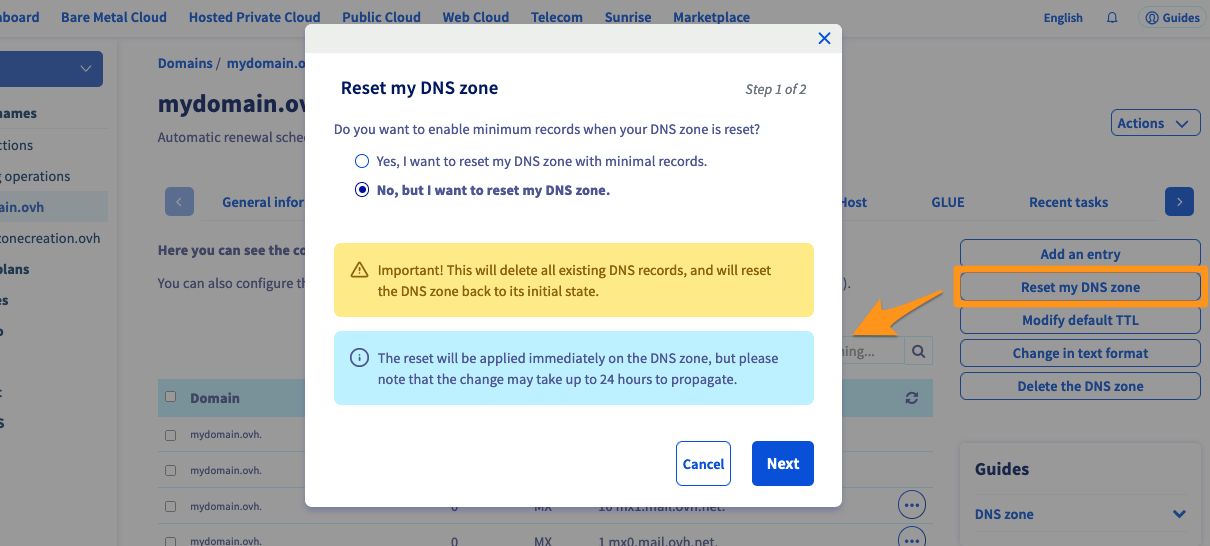
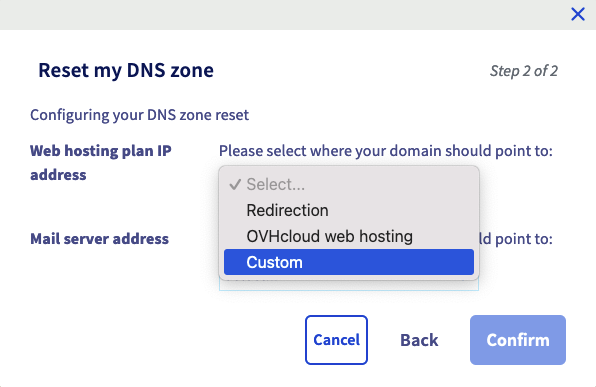
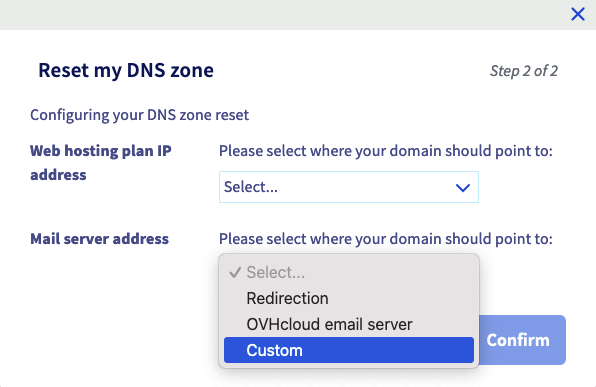
Reset the DNS zone
By resetting your DNS zone, you can revert back to a minimal configuration, with OVHcloud default records, or your services’ records. You can also point your domain name to custom web hosting and email services.
Before you reset your DNS zone, ensure that your domain name is not attached to services that are in use, such as a website or email addresses.
To reset your DNS zone, click on the tabs below to view each of the 4 steps.
Go to the page, then choose the domain name concerned.
Propagation time
Once you have modified your domain name’s DNS zone, you will need to allow a maximum of 24 hours for the changes to propagate fully, and be effective.
If you would like to reduce this delay for the next edits of your OVHcloud DNS zone, you can do so to a certain extent by adjusting the TTL (Time To Live), which will apply to all of the records in the DNS zone. To do that, click on the tabs below to view each of the 2 steps.
Go to the page, then choose the domain name concerned.
Go further
Everything you need to know about DNS servers
Everything you need to know about DNS zone
Everything you need to know about DNS records
Adding a SPF record to your domain name’s configuration
Securing your domain name with DNSSEC
For specialised services (SEO, development, etc.), contact OVHcloud partners.
If you would like assistance using and configuring your OVHcloud solutions, please refer to our support offers.
Join our community of users.