
Importing an Additional IP
Find out how to import an Additional IP address into your Public Cloud project
Since October 6th, 2022 our service "Failover IP" is named Additional IP. This renaming has no effect on its technical features.
Objective
You might need to configure an Additional IP address on your instances because:
- You have multiple websites on your instance.
- You host international projects.
- You want to migrate from a Dedicated Server to a Public Cloud instance.
Instead of buying more public IP addresses, you can import an Additional IP address that is linked to a different OVHcloud service.
This guide explains how to import Additional IP addresses into your OVHcloud Public Cloud project.
Requirements
- A Public Cloud project in your OVHcloud account
- An Additional IP address
OVHcloud Control Panel Access
- Direct link:
- Navigation path:
Public Cloud> Select your project >Public IPs
This feature is not currently available for Metal instances.
Instructions
In the left-hand menu, open Public IPs under Network.
Open the Additional IP tab and click on the Actions button. Select Import an Additional IP to display all the IP addresses that can be imported into your Public Cloud project.
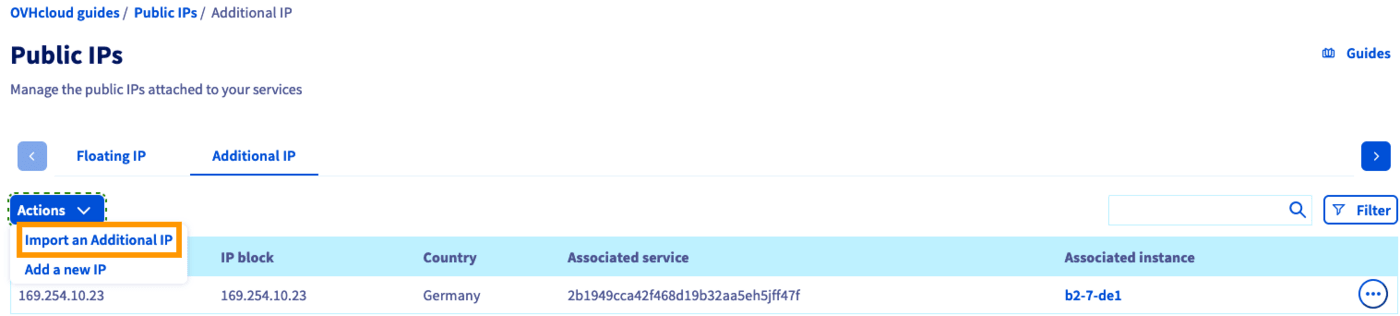
If you do not currently have an Additional IP on your Public Cloud project, the option to import one will be displayed on the homepage.
Click on ... next to the IP address you would like to import and click Import this Additional IP.

Confirm by clicking on Import.
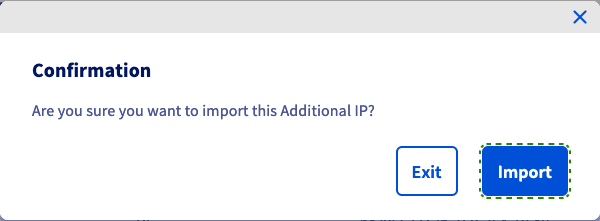
Allow a few minutes for the import process to complete. Open the Additional IP tab to find the imported Additional IP address. Refresh the page if necessary.
Click on ... on the right and select Update attached instance.
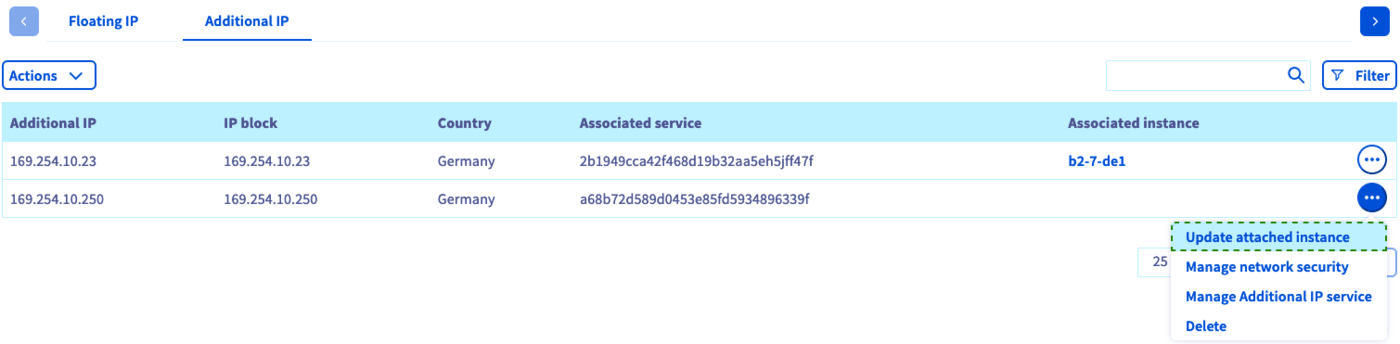
A popup window will appear to choose the instance to which your IP address should be attached.
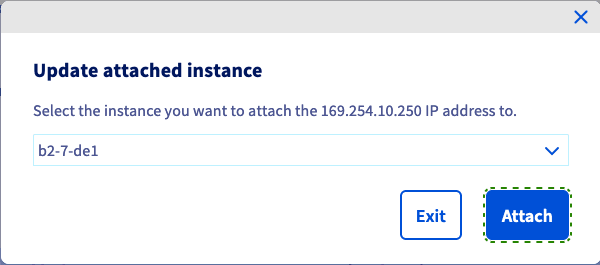
Click on Attach to confirm. The page will display a modification message.
An Additional IP cannot be moved between different zones. For example, an IP located in the SBG data centre can be moved to GRA or RBX, but cannot be moved to BHS.
The IP address is now associated with your instance. The next step will be the IP configuration in your OS; please refer to our guide.
Go further
For training or technical assistance implementing our solutions, contact your sales representative or visit our Professional Services page to request a quote and have your project analysed by our experts.
Join our community of users.