
How to create a Minecraft server on a VPS
Find out how to install your own Minecraft server
Objective
Minecraft is a popular sandbox video game. It needs to be hosted on a server if you wish to play in multiplayer.
You can rent a pre-built Minecraft server or you can set it up yourself on a VPS or on a dedicated server. This will reduce the cost and give you full control over your game instance.
This tutorial explains how to launch a Minecraft Java Edition server on an OVHcloud VPS and test its connectivity.
Information regarding OVHcloud service administration and how to find appropriate assistance
When using OVHcloud guides, please be aware of the following conditions:
- User instructions aim to provide as many details as possible but cannot cover individual use cases. You might need to adapt the pertinent actions to your requirements.
- The OVHcloud ecosystem is built for flexibility and freedom of choice. Customers are therefore responsible for the secure and proper configuration of their services. To prevent data loss, we strongly recommend to apply backup strategies to all your important data.
- Our guides and tutorials may reference third-party software or services in combination with OVHcloud solutions. The technical support provided by OVHcloud does not include the configuration of systems or products outside of our responsibility. This includes but is not limited to:
- Operating systems and user interfaces (Windows, Debian, Plesk, etc.).
- Any other third-party software (FTP clients, email software, etc.).
- Services offered by other providers (DNS, APIs, user interfaces, etc.).
To receive the appropriate assistance for any issues you might experience, follow these guidelines:
- You seek personalized advice or you would like to discuss a topic that is not covered in detail by our documentation?
Join the OVHcloud Community to search for your topic and reach out to other users. - You need to report an incident regarding your OVHcloud service or you are experiencing difficulties in the OVHcloud Control Panel?
Create a support request in our Help Centre. - You require professional assistance for your project or you need help with tasks outside our support scope?
Visit our partner portal to search for experts who are familiar with OVHcloud solutions. - You are looking for more detailed information regarding our support levels and Professional Services?
Please visit our web pages for OVHcloud support levels and OVHcloud Professional Services.
You can participate in improving our documentation:
- You would like to share feedback to improve a guide page or you want to report insufficient information on a specific page?
Use the "Was this page helpful?" buttons at the bottom of the page to let us know. - You would like to propose a specific documentation update?
Use the "Edit this page" function, available at the bottom of the page and in the sidebar.
Requirements
- A Virtual Private Server in your OVHcloud account
- A GNU/Linux distribution installed on the server
- Administrative access (sudo) via SSH to your server
- A basic understanding of GNU/Linux administration
Instructions
This tutorial is based on version "1.21" of Minecraft Java Edition and OpenJDK version "24.0.1".
Step 1: Prepare the server
The first step is to set up your VPS for a Minecraft installation.
It is recommended to order a new VPS or reinstall an existing one from your , using the latest available release of Ubuntu or Debian. Please refer to our Getting started guide if necessary.
Once the OS is installed, connect to your VPS with SSH as described in the Getting started guide.
First update the packages to their latest versions:
Use the following command to ensure all required packages are installed.
Install the Java package:
To avoid security vulnerabilities on your system, create a user named "minecraft" who will carry out the server actions:
Simply press the Enter key to skip filling in the usual account information.
The user is now created. Note that no password was specified for this user. This is normal because the account is only accessible when already connected via SSH with your own user account.
Switch to the new user:
The following commands need to be executed by the user "minecraft".
To complete the setup preparations, create a folder named server.
Step 2: Install your Vanilla Minecraft server
A "Vanilla" server is an instance without any add-ons or plugins. You will experience the game the way it was created by the developers.
First you will need to copy/paste the download link for the server software. On the official Minecraft website, right-click on the download link and select Copy Link from the context menu.
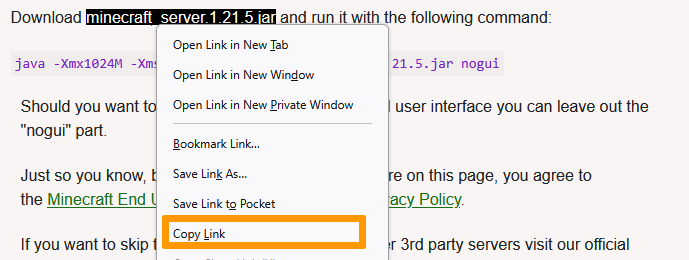
Back in your command line terminal, make sure you are still in the server folder and use wget to download the file. Replace download_link with the actual URL from your clipboard.
Before launching the server, you need to agree to the End User License Agreement. To achieve this, enter the following command.
A file named eula.txt is now located at the root level of your server, containing the line eula=true. This will tell the software that you accept the Minecraft EULA. We invite you to review the terms and conditions on the Minecraft website.
Your server can now be started.
During step 1, we installed the screen package which allows opening multiple sessions of the terminal (shell). We will start Minecraft in a new session that can run in the background. Using screen can be very handy since it gives you the possibility to launch multiple Minecraft servers simultaneously.
First, we will create a new shell named minecraft1:
The active terminal window will switch to a new shell session. You can create multiple shells; list them with this command:
To detach from the shell (and keep it running), press Ctrl, then a, then d on your keyboard.
To switch from one shell to another, use this command:
You can also press Ctrl, then a, then n on your keyboard.
In the previously created minecraft1 shell, launch the Minecraft server with the following command. (Use ls to verify the filename in case it differs.)
Xmx1024M: This sets the server to start up with 1024 MB or 1 GB of RAM. This limit can be increased if you want your server to start up with more RAM.Xms1024M: This sets the server to use a maximum of 1024M RAM. You can increase this limit if you want your server to run with more RAM, to accommodate more players, or if you have the impression that your server is running slowly.jar: Specifies which server jar file to run.nogui: This instructs the server not to launch a GUI, since it's a server and you don't have a GUI.
Alternatively, you can use the command below instead:
Once the server is operational, you will get the following result:
To shut down your server, enter the command stop.
Step 3: Connect to the server
Your server instance is now functional. To play the game, download the Minecraft client from the official Minecraft website.
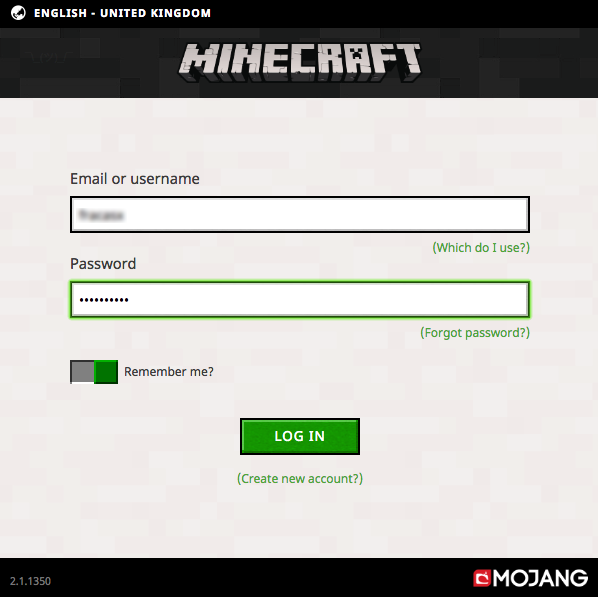
Install and launch the client for your operating system and sign in.
On the next screen, enter the server name in the field Server Name, and the IP address of the server in the field Server Address.
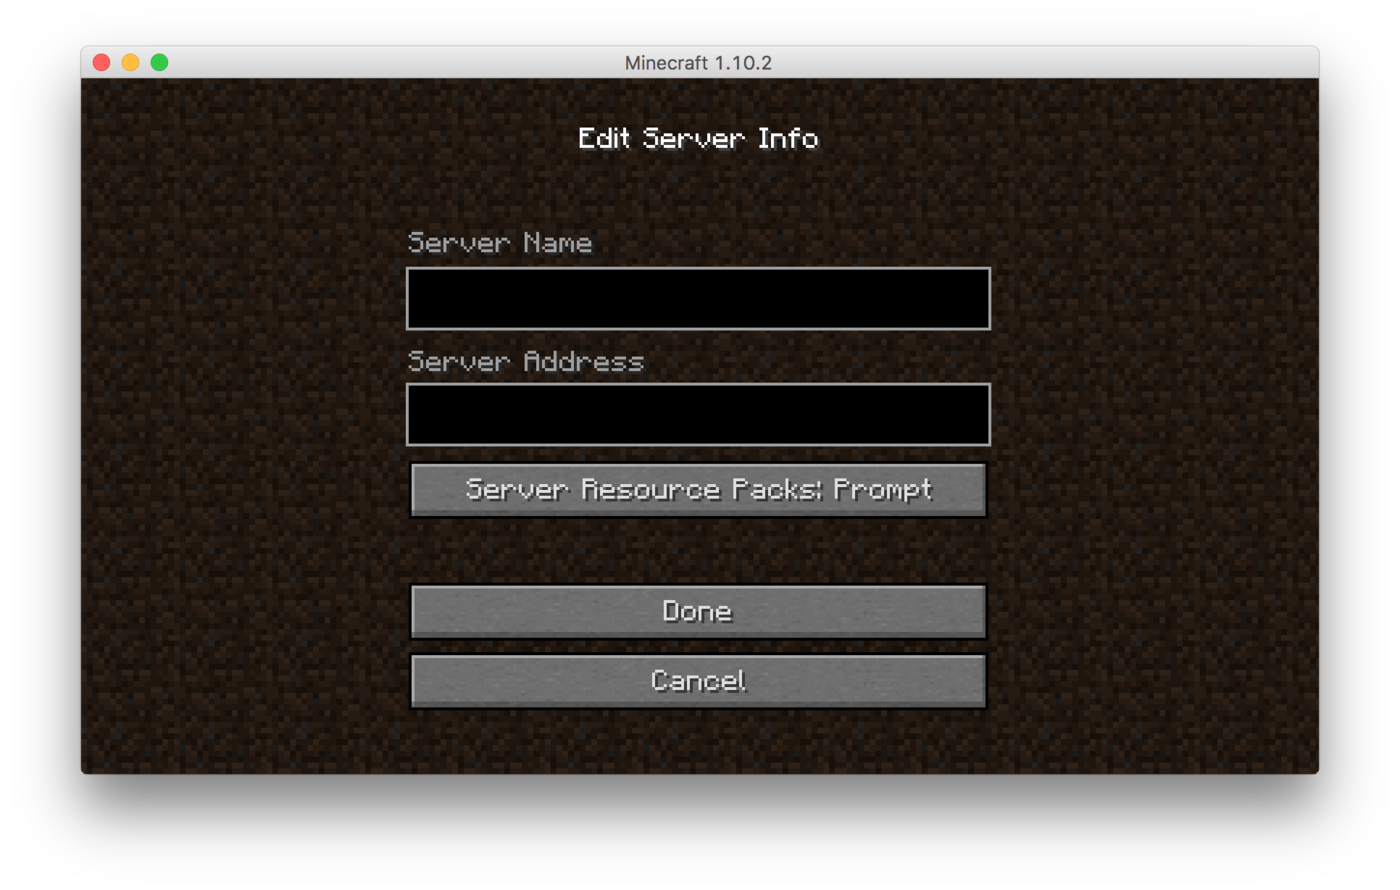
By default, no port needs to be specified.
Conclusion
Your Vanilla Minecraft server is now installed on your VPS.
Please note that this installation guide should also work on an OVHcloud dedicated server or a Public Cloud instance. With those services, you will have the advantage of better stability since the hardware is dedicated.
Go further
For add-ons, mods and to personalise your Minecraft experience, please consult this official documentation: https://help.mojang.com/.
Join our community of users.