
Tutorial - Getting started with WordPress
Find out how to create a website with the WordPress CMS
Objective
This tutorial will help you create your first content, organise it, put it online and change the theme of your website with the Content Management System (CMS) WordPress. You can build your website without any particular knowledge of programming, with a wide range of topics such as a company website, a blog, or even a website to publicise your activity or passion.
Information regarding OVHcloud service administration and how to find appropriate assistance
When using OVHcloud guides, please be aware of the following conditions:
- User instructions aim to provide as many details as possible but cannot cover individual use cases. You might need to adapt the pertinent actions to your requirements.
- The OVHcloud ecosystem is built for flexibility and freedom of choice. Customers are therefore responsible for the secure and proper configuration of their services. To prevent data loss, we strongly recommend to apply backup strategies to all your important data.
- Our guides and tutorials may reference third-party software or services in combination with OVHcloud solutions. The technical support provided by OVHcloud does not include the configuration of systems or products outside of our responsibility. This includes but is not limited to:
- Operating systems and user interfaces (Windows, Debian, Plesk, etc.).
- Any other third-party software (FTP clients, email software, etc.).
- Services offered by other providers (DNS, APIs, user interfaces, etc.).
To receive the appropriate assistance for any issues you might experience, follow these guidelines:
- You seek personalized advice or you would like to discuss a topic that is not covered in detail by our documentation?
Join the OVHcloud Community to search for your topic and reach out to other users. - You need to report an incident regarding your OVHcloud service or you are experiencing difficulties in the OVHcloud Control Panel?
Create a support request in our Help Centre. - You require professional assistance for your project or you need help with tasks outside our support scope?
Visit our partner portal to search for experts who are familiar with OVHcloud solutions. - You are looking for more detailed information regarding our support levels and Professional Services?
Please visit our web pages for OVHcloud support levels and OVHcloud Professional Services.
You can participate in improving our documentation:
- You would like to share feedback to improve a guide page or you want to report insufficient information on a specific page?
Use the "Was this page helpful?" buttons at the bottom of the page to let us know. - You would like to propose a specific documentation update?
Use the "Edit this page" function, available at the bottom of the page and in the sidebar.
If you experience any difficulties, contact WordPress support.
This tutorial explains how to create a website with WordPress CMS.
Requirements
- An OVHcloud web hosting plan that contains at least one database
- A domain name
- WordPress installed on your web hosting plan
Instructions
If one is not already installed, add an SSL certificate for the domain name associated with your website before you continue.
When you installed your 1-click CMS, you received an email containing the information you need to follow this tutorial:
- The access link to the administration interface
- The administrator's username
- A link to get the administrator password
Retrieve these items before continuing.
Log in to the administration interface
Go to the admin interface access link sent by email when you installed the CMS. By default, the URL ends with wp-admin. If you have not logged in to your admin interface, WordPress will automatically redirect you to a URL ending with wp-login:
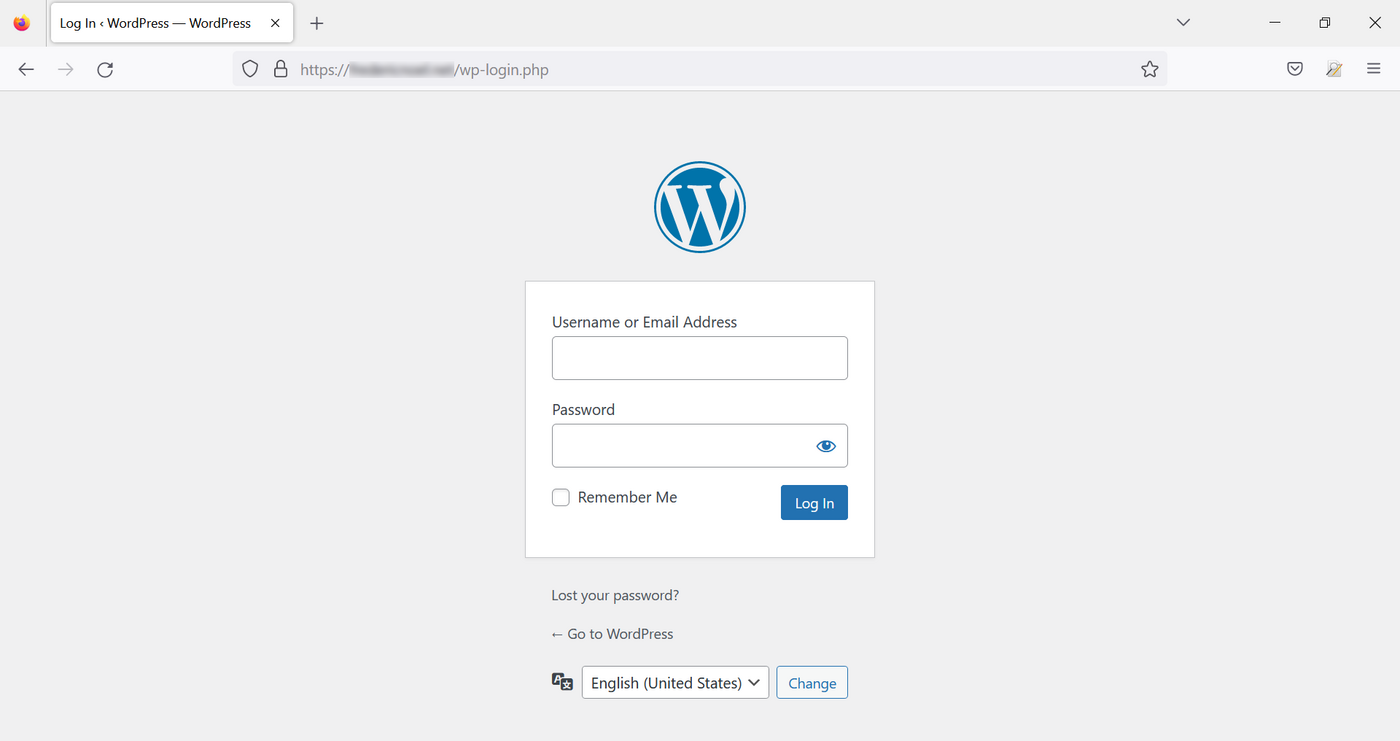
On this homepage, you can change the default language of the WordPress interface. Go to the dropdown menu at the bottom of the page, select the language, then confirm by pressing the Change button. The language can be changed anytime.
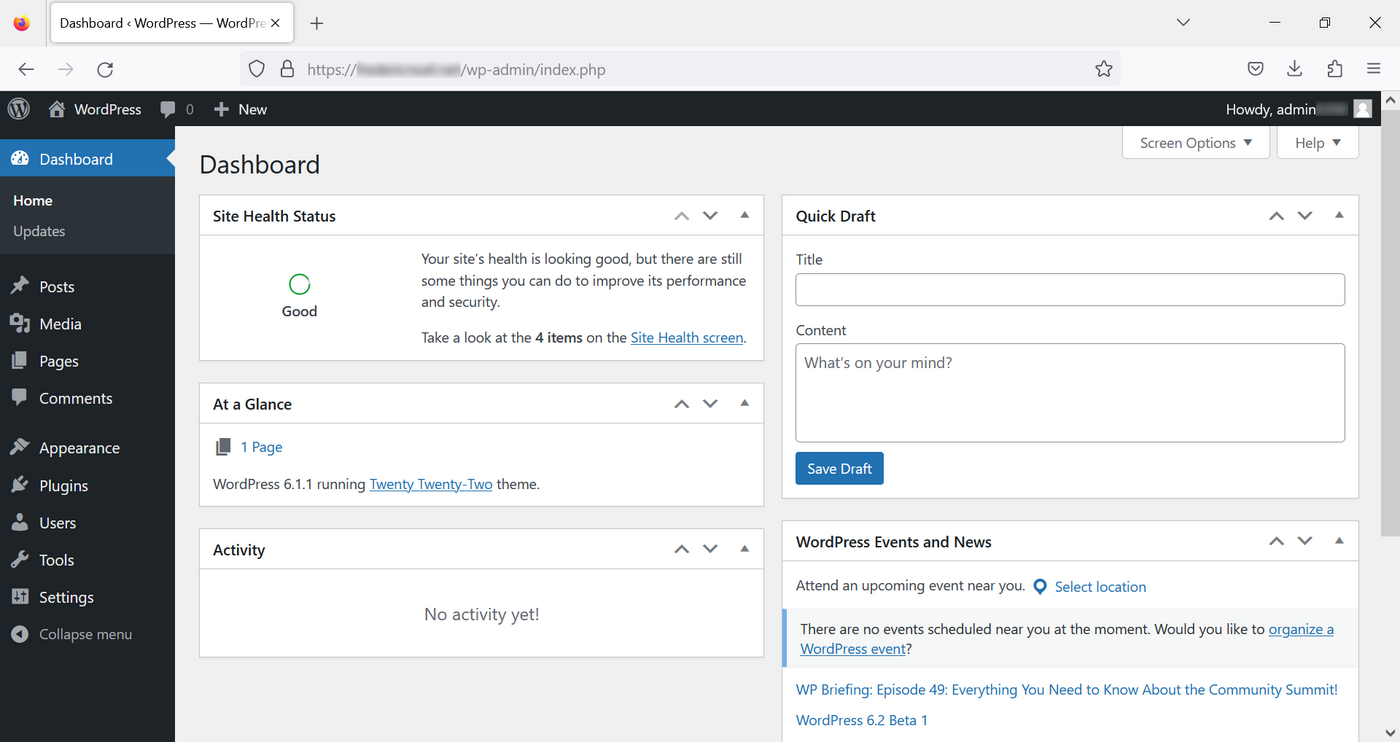
Enter the login (Administrator's username) that was provided to you by email and the WordPress password indicated in the same email. You will then land on your dashboard:
Change the theme of your WordPress website
WordPress themes are sets of files that allow you to modify the presentation of your website without modifying its content. There are many themes available on the Web, free and paid, with different styles (websites, blogs, e-commerce, online press, etc.).
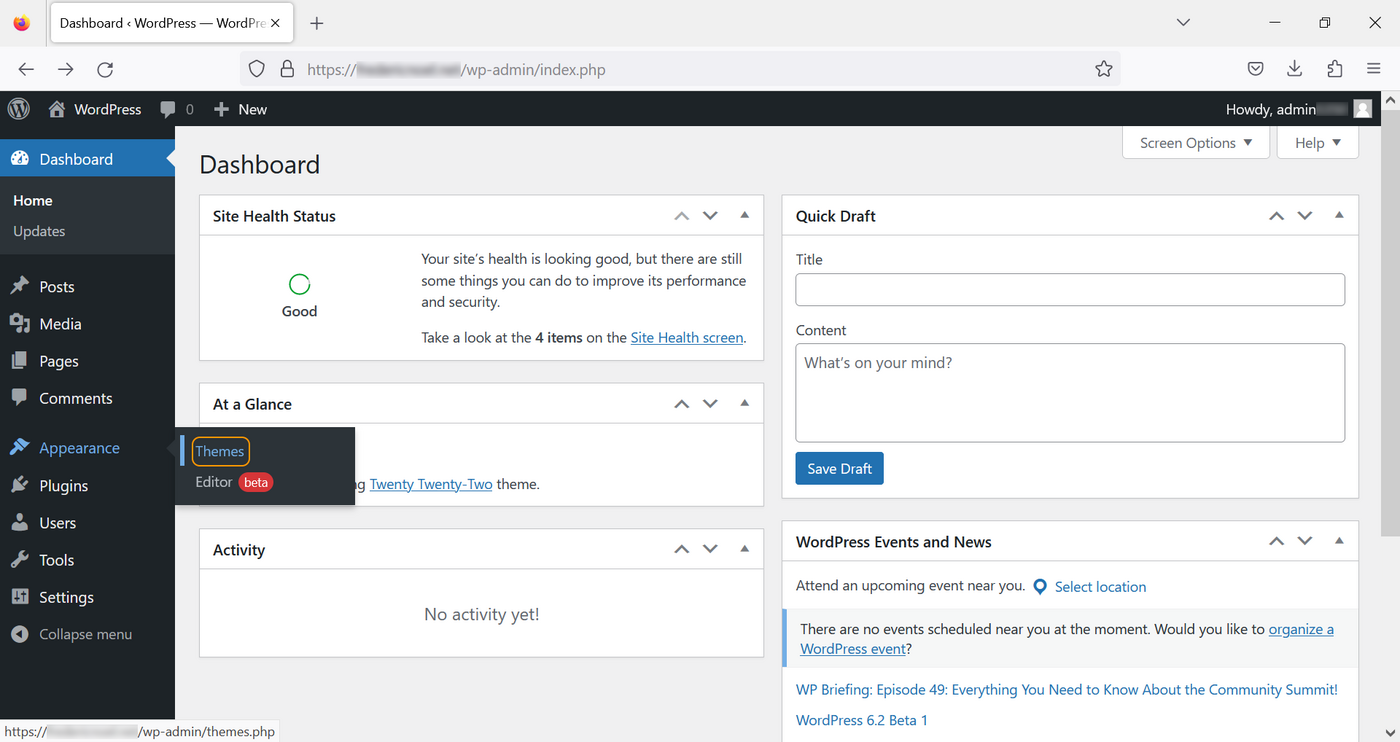
To change your theme, go to the left-hand menu in your Dashboard, click on Appearance then Themes:
Choose a theme from the list and click on Activate:
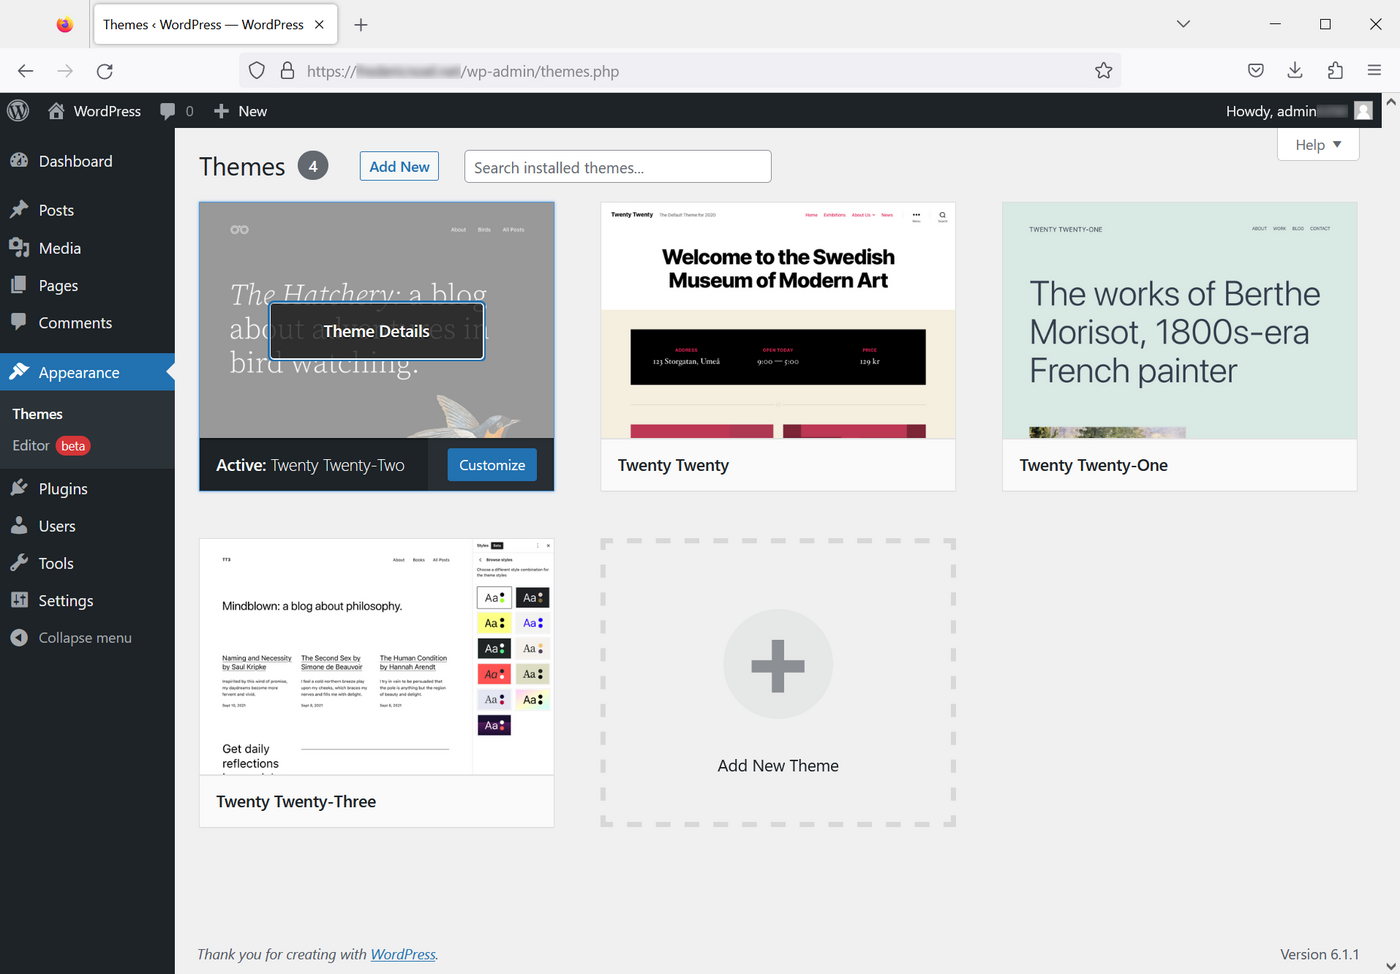
You can view the result by opening your website in a browser via your domain name.
Write an article
WordPress allows you to easily create content without having any web development knowledge.
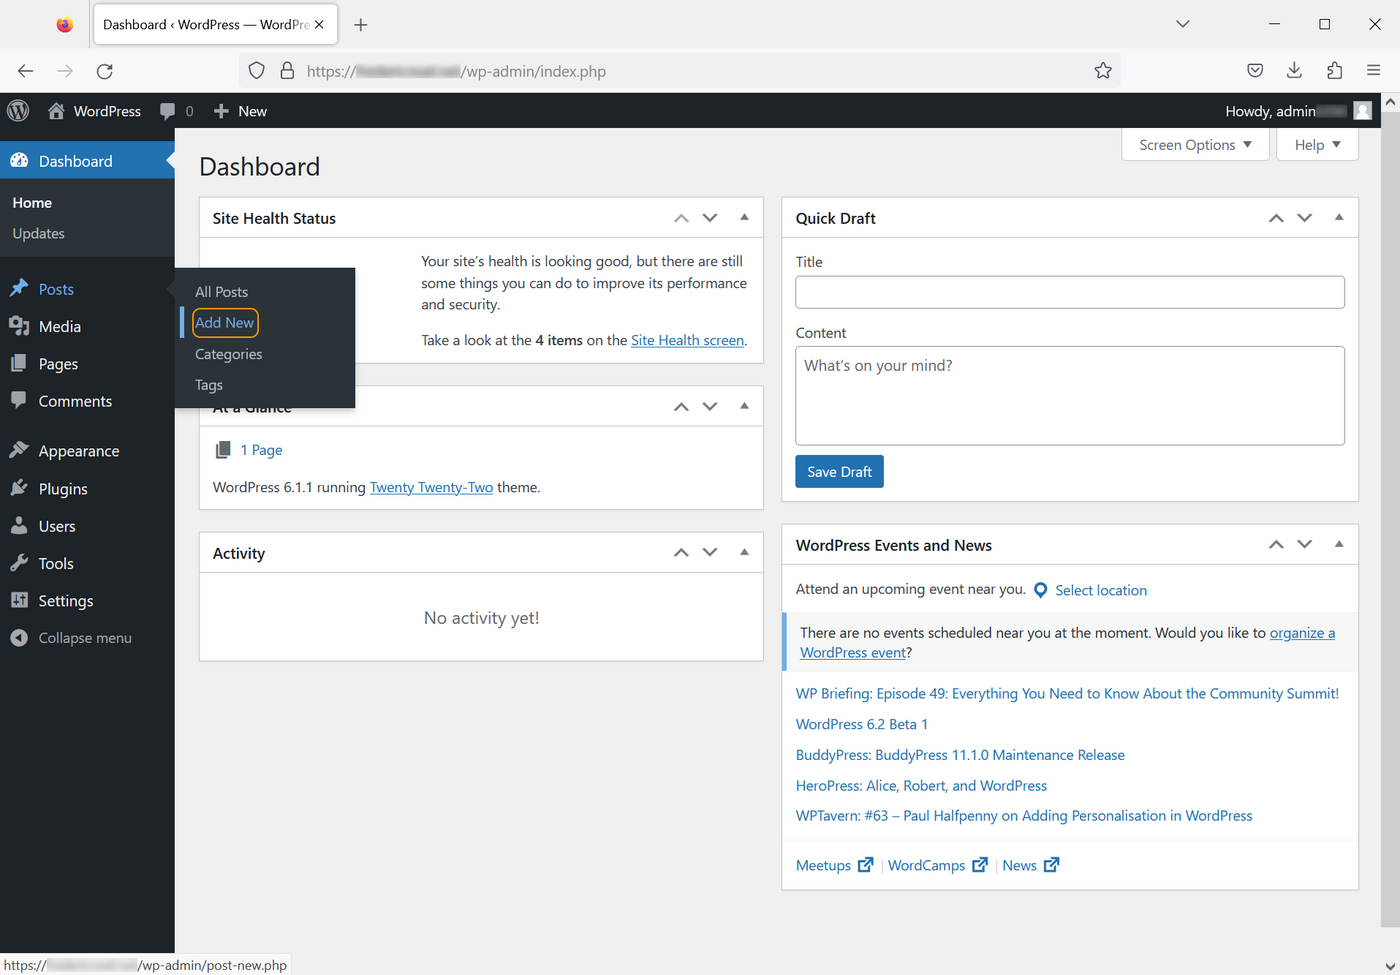
To create an article, go to the Posts section on the left-hand menu, then click on Add new:
Since version 5, WordPress offers an interface to simplify the writing and formatting of articles: Gutenberg. This is a WYSIWYG editor ("what you see is what you get"). It allows you to compose your page directly by adding items such as titles, paragraphs, lists, images, etc.:
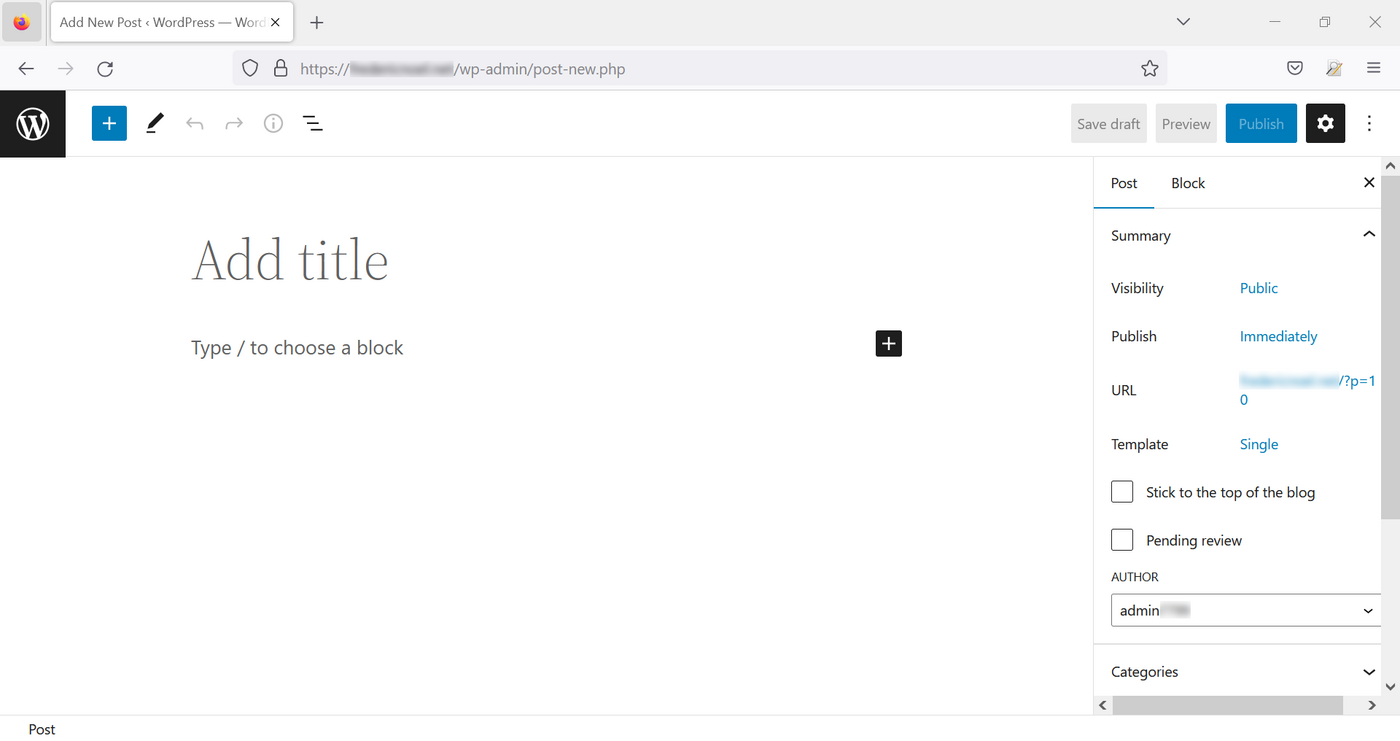
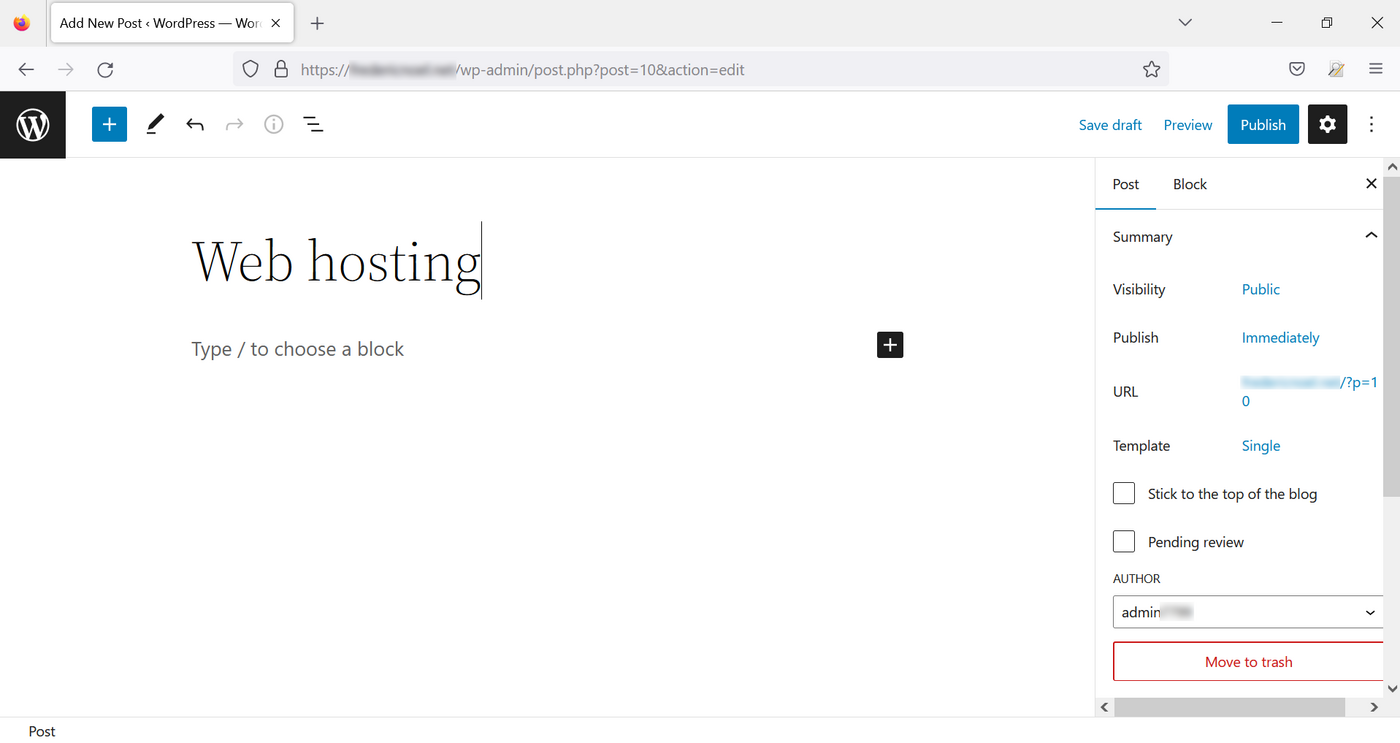
Click Add title to add a title to your page:
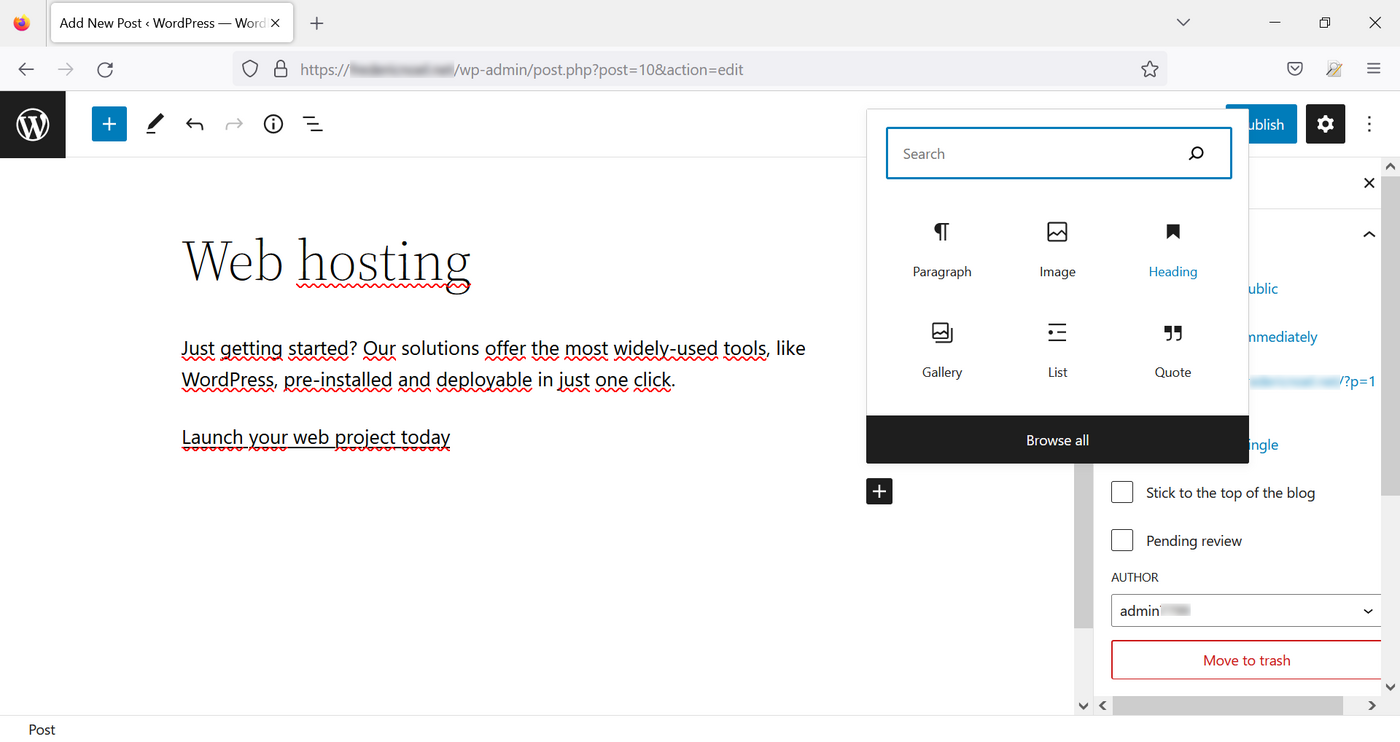
To add content, click the + symbol and choose what you want to insert:
On the right side of your page, you can find three links to do the following:
Save draft, an action you can also do with theCtrl+S(orcmd+Sin macOS) key combination-
Preview Publishto your website
Click on Preview, then Preview in New Tab. Choose the type of device to render on (PC, tablet or smartphone).
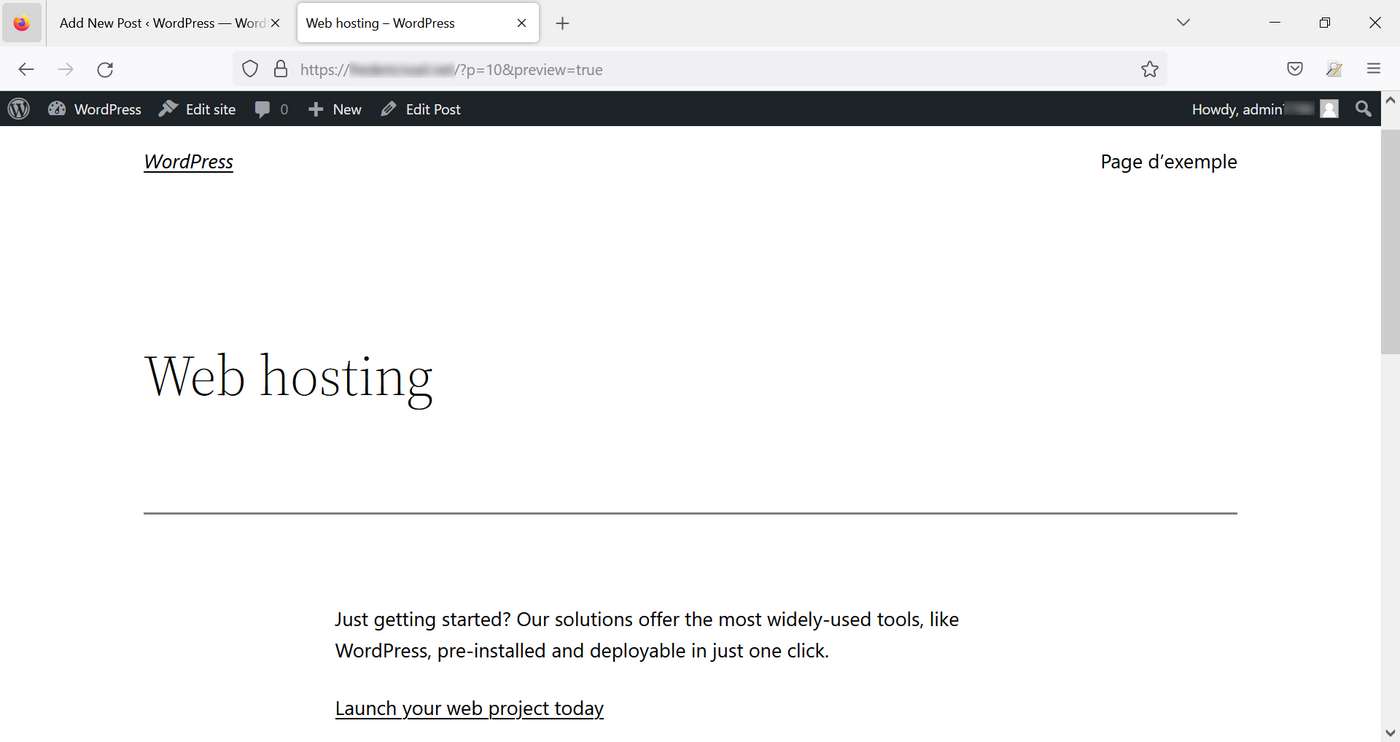
To return to the WordPress administration interface, click on the icon in the top left-hand corner.
Manage categories
WordPress allows you to define categories and associate your articles with one or more of them. To manage categories for your website, go to the Posts section, then to the Categories section:
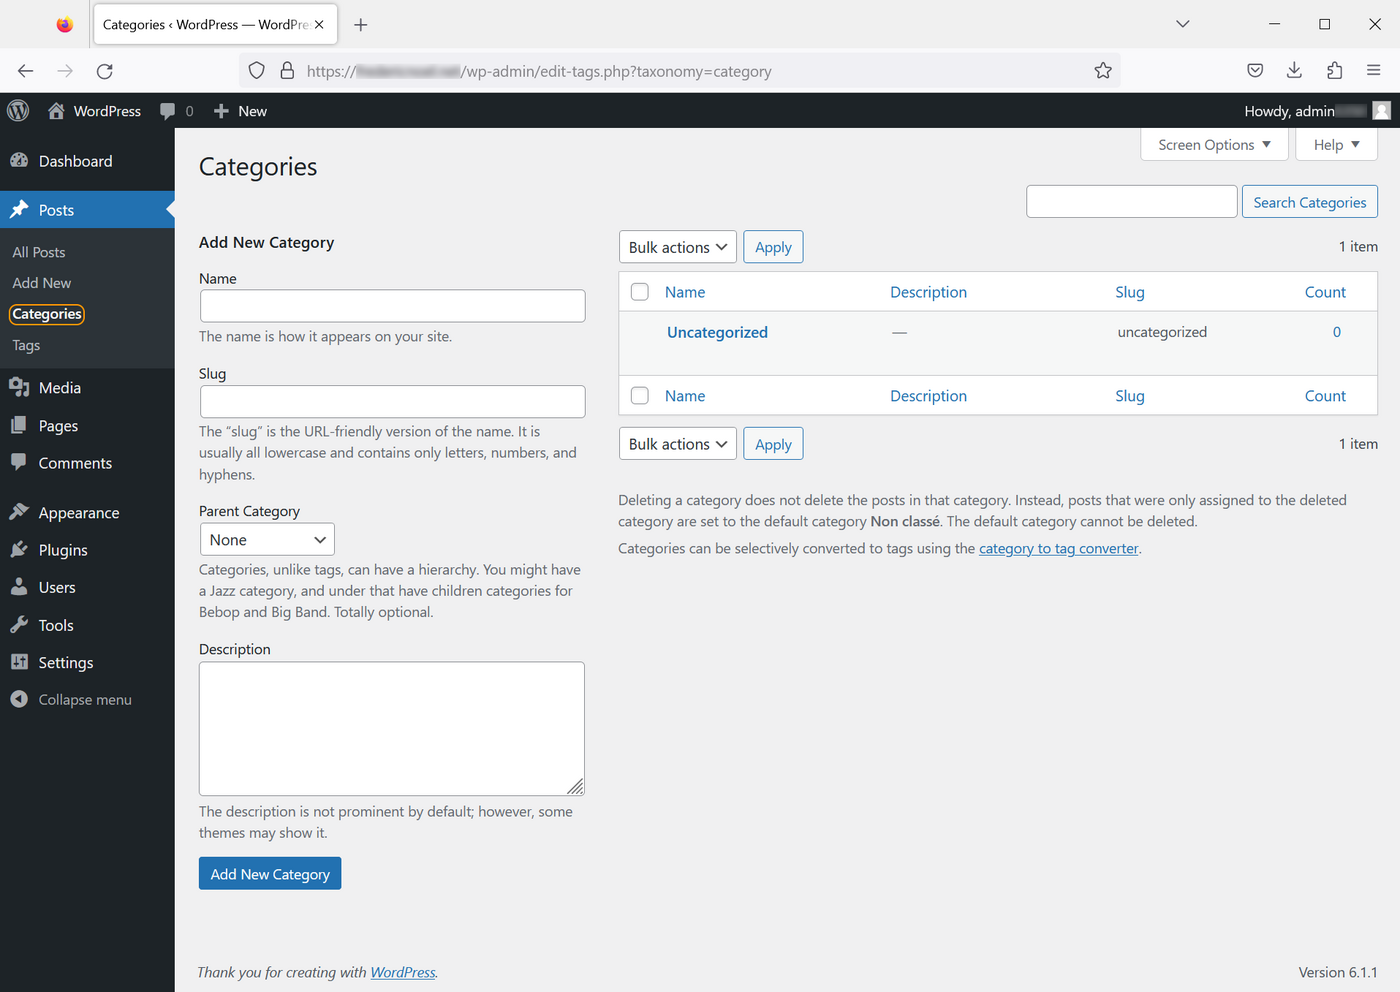
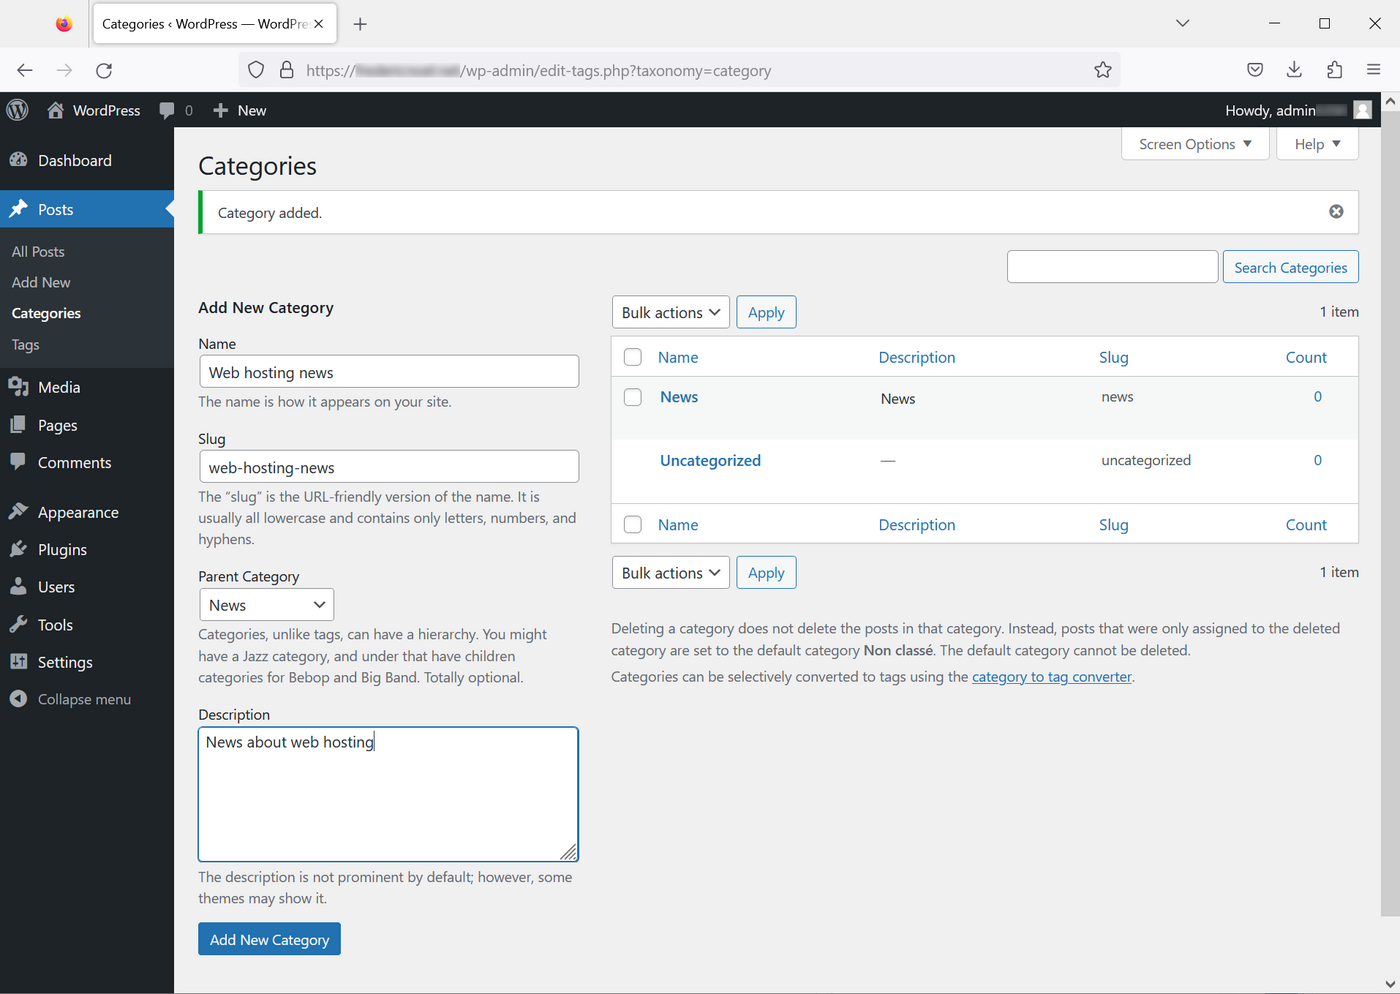
Now fill in the form to add a new category:
- Name: The name of your category as it will appear on your website.
- Slug: Element that will appear at the end of your URL (useful for improving your SEO).
- Parent category: Allows you to prioritise your categories (the category you create can be a subcategory of an existing category).
- Description: Not visible by default, however, the description of your category can be made visible by certain themes.
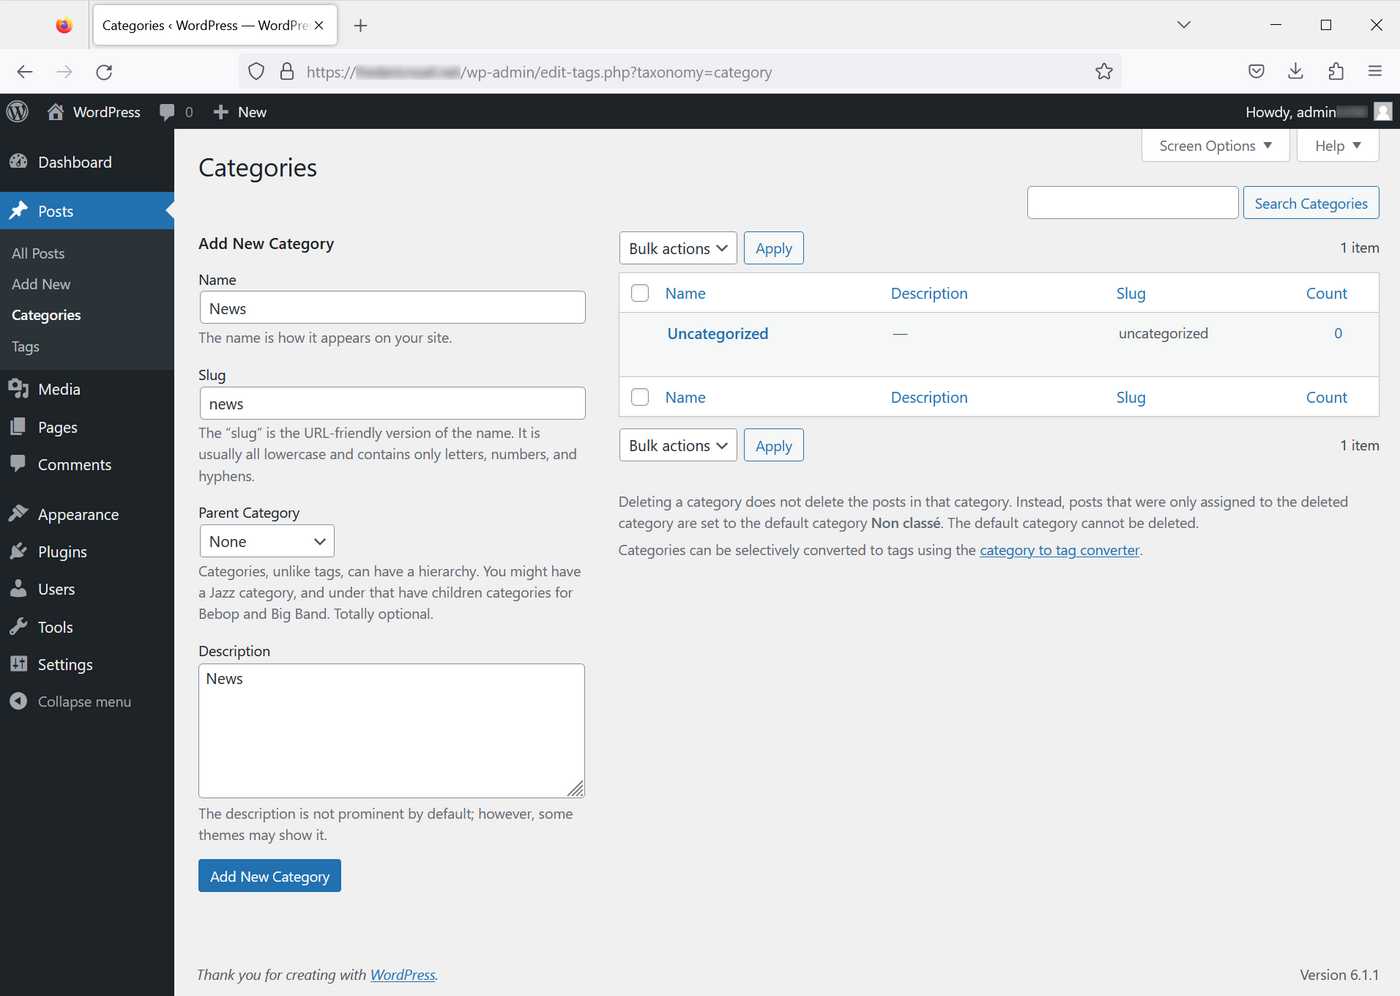
Once you have entered this information, click the Add new category button:
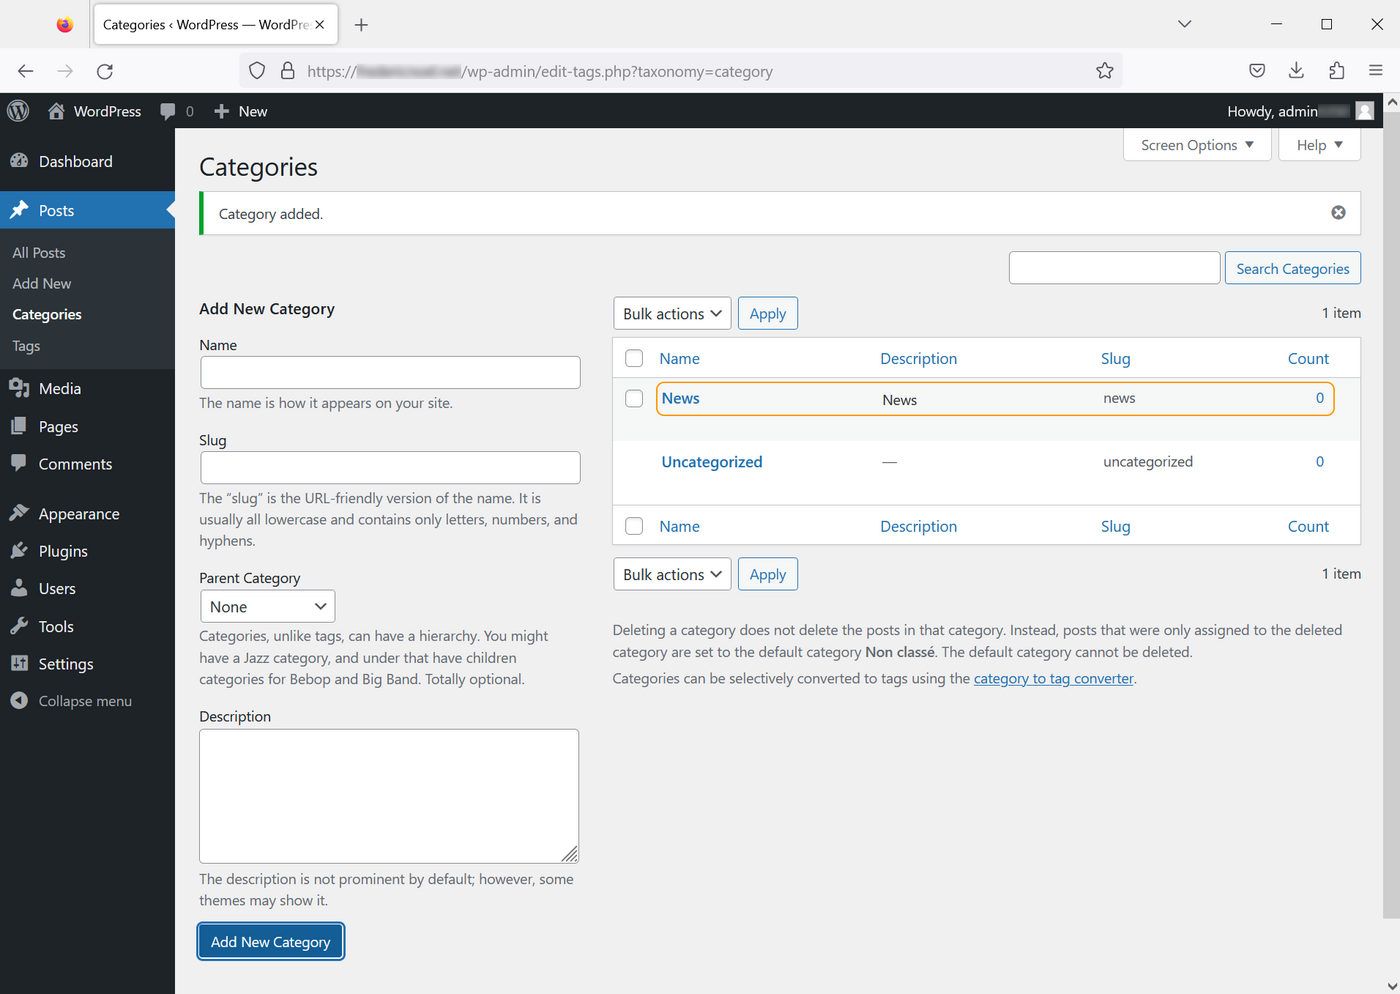
You can manage the hierarchy of your categories. A new category can be linked to an existing category:
Assign a category to an item
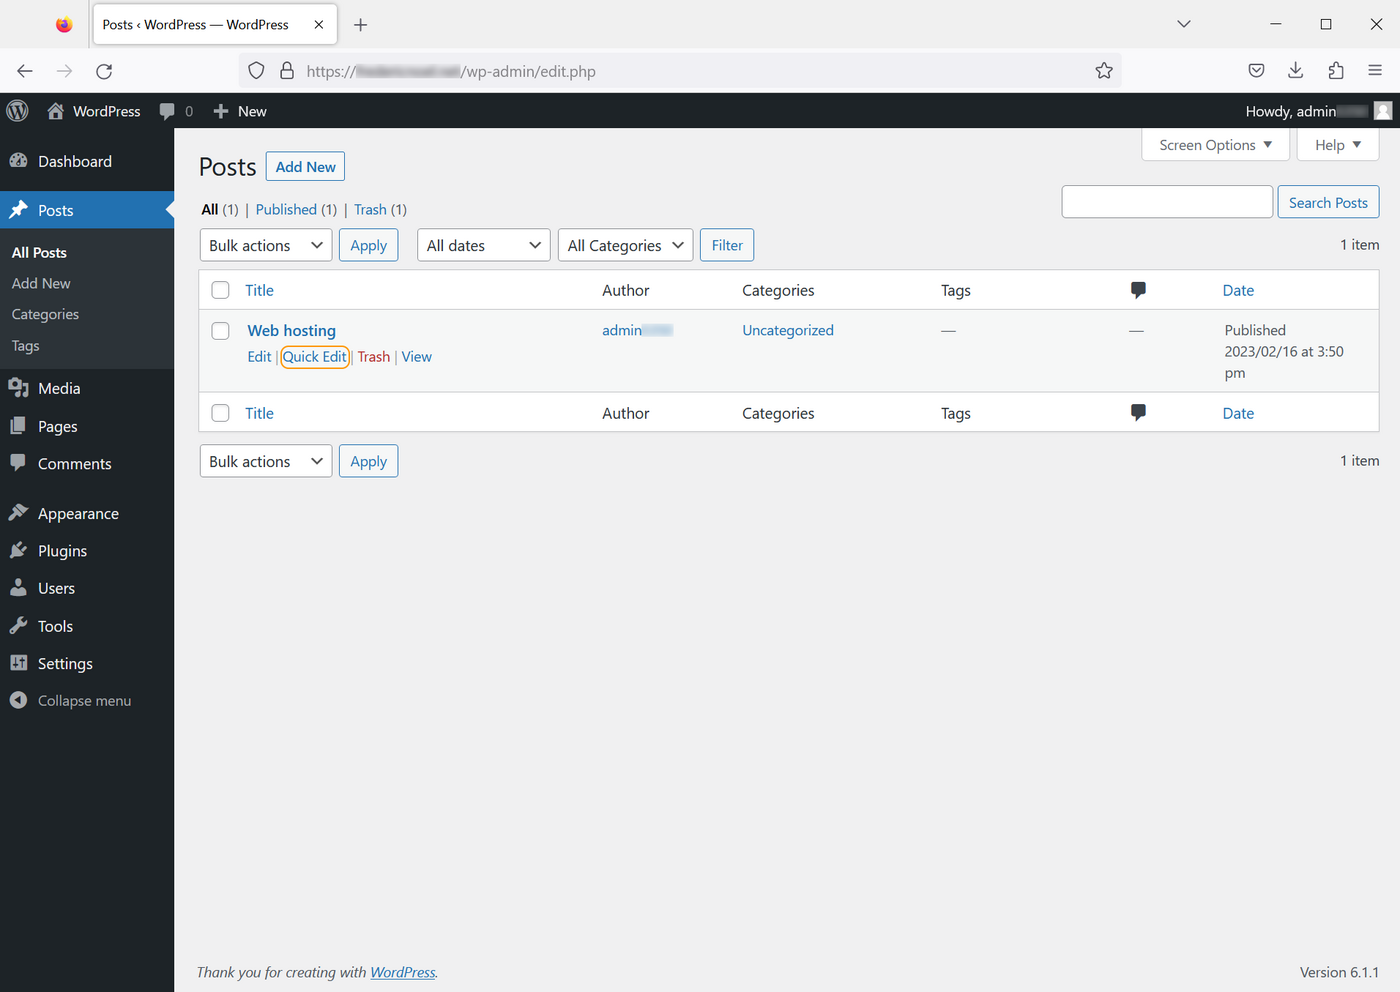
To assign an item to one or more categories, click Posts. You will have the list containing all the articles and their statuses. Hover over the title of the item you want to classify and click Quick Edit:
You can then edit the categories by checking or unchecking the items listed in the Categories column:
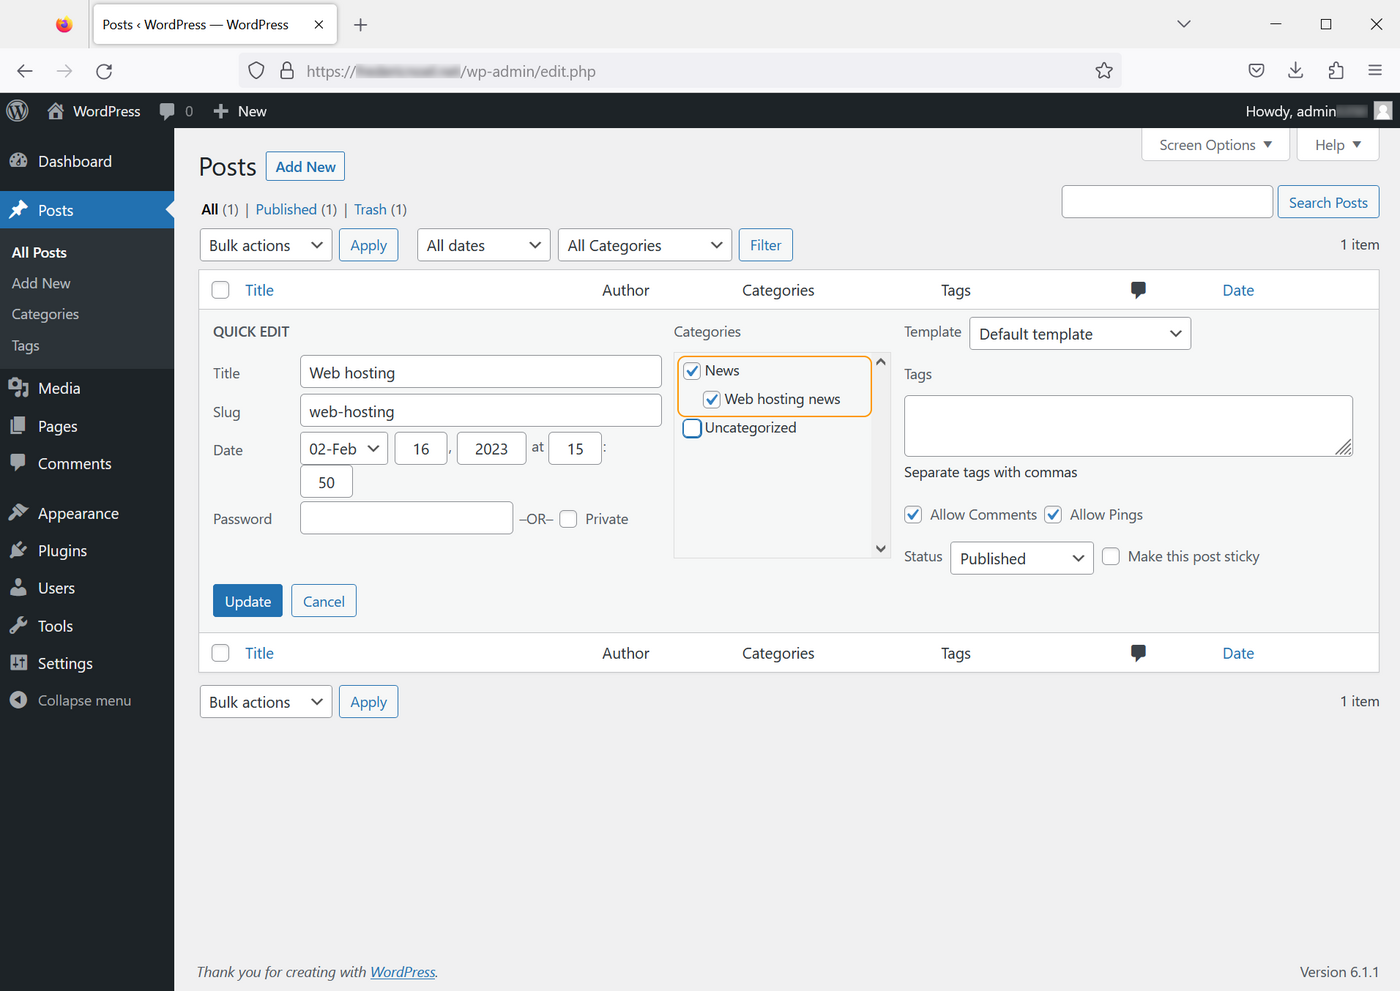
Selecting a subcategory does not automatically select the parent category.
Create pages
Pages are to be distinguished from articles. They are mainly used to publish content that will not evolve over time, such as legal notices, general conditions of use, etc.
Go to the Pages page:
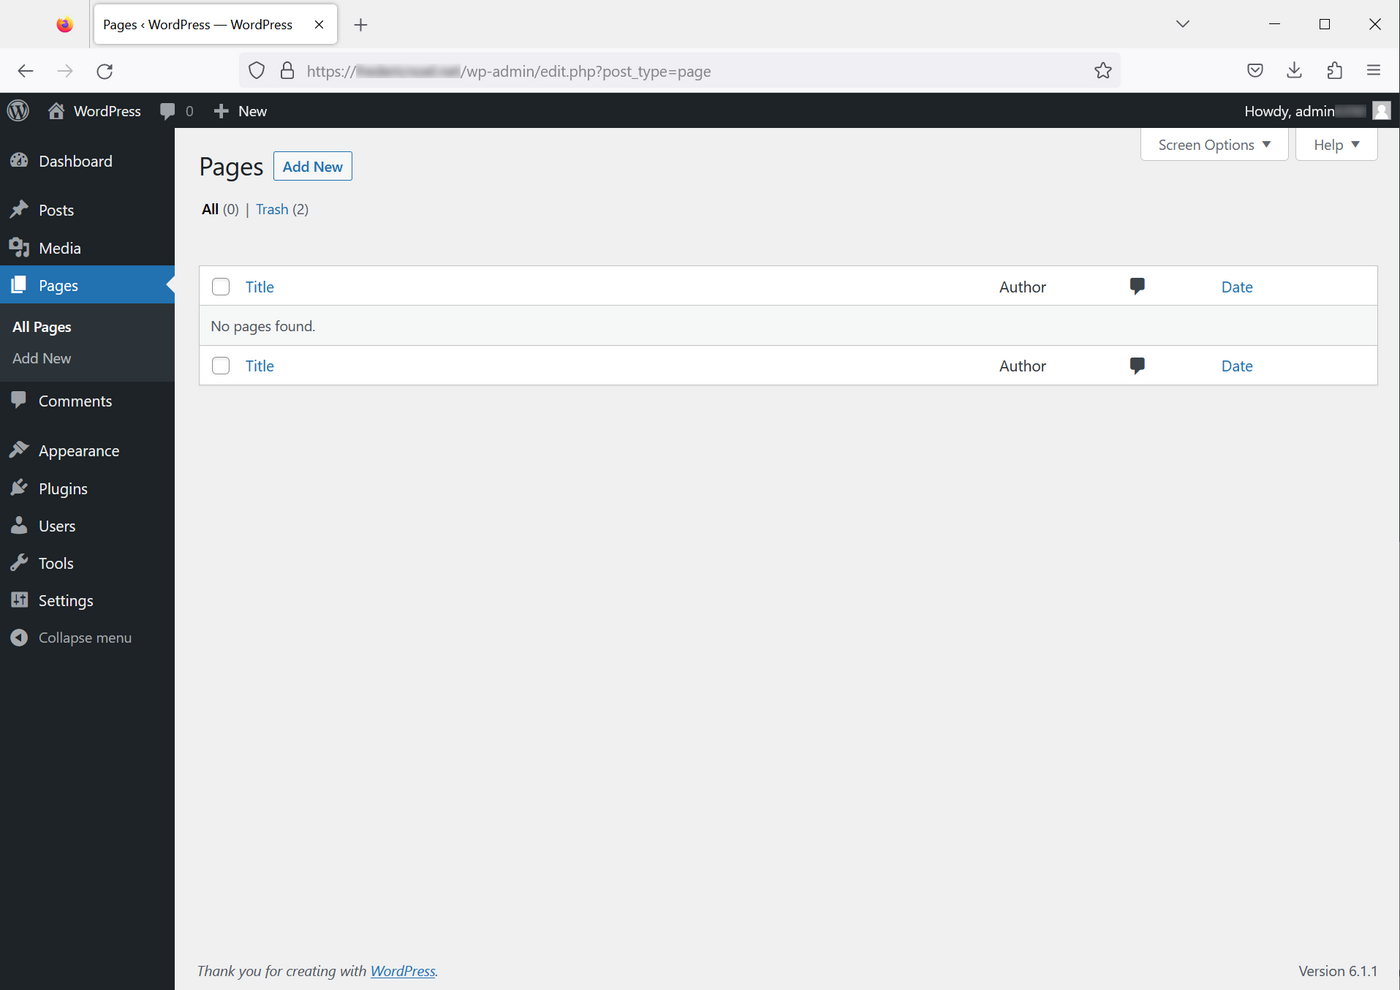
A default page is generated when you install WordPress. For readability, this page was removed from the example.
Click Add new. You will see the Gutenberg editor:
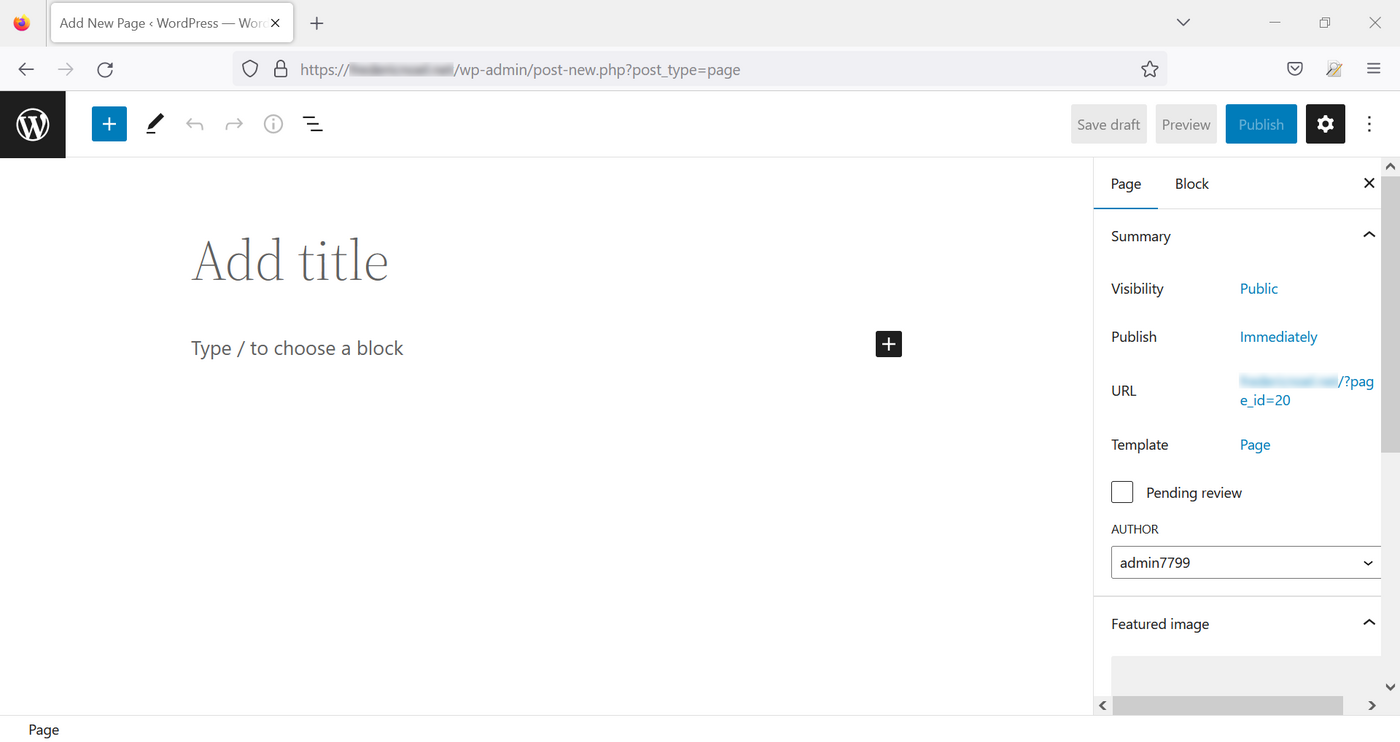
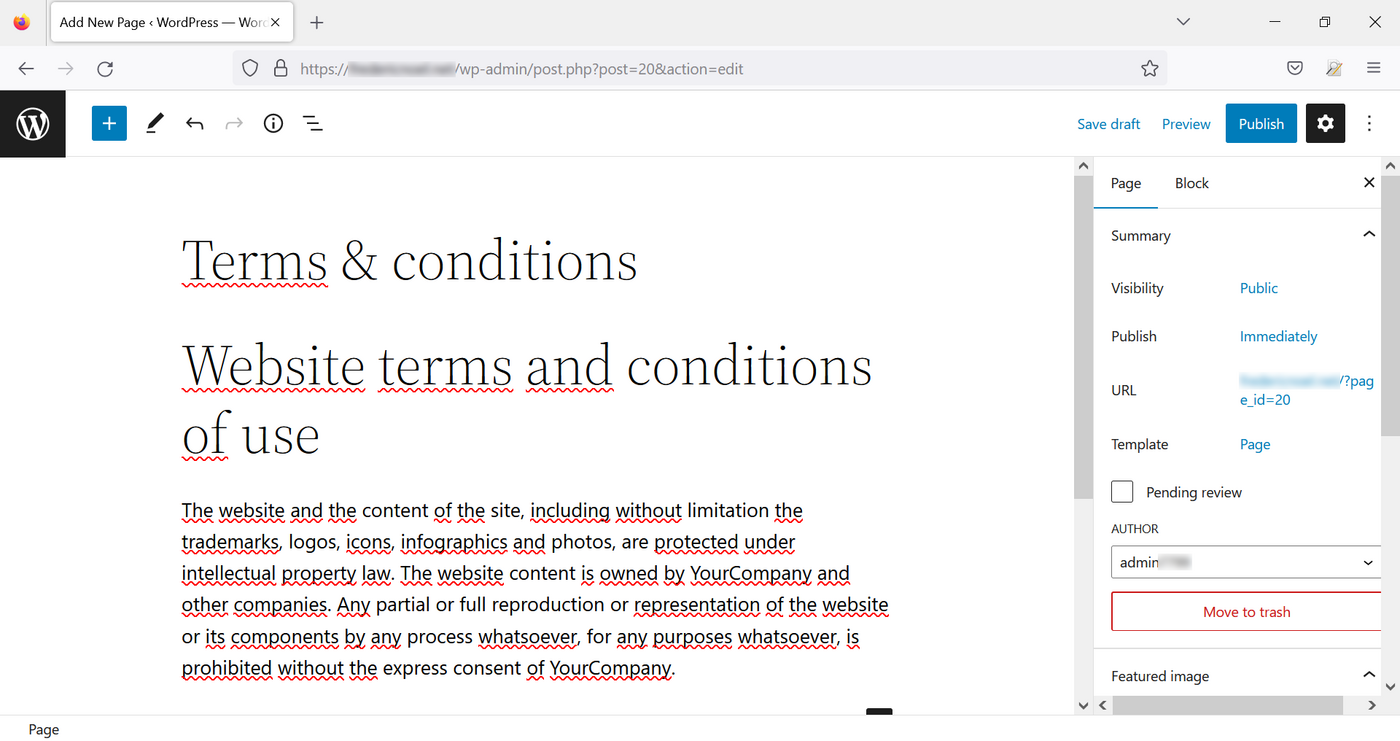
Create and publish your page content:
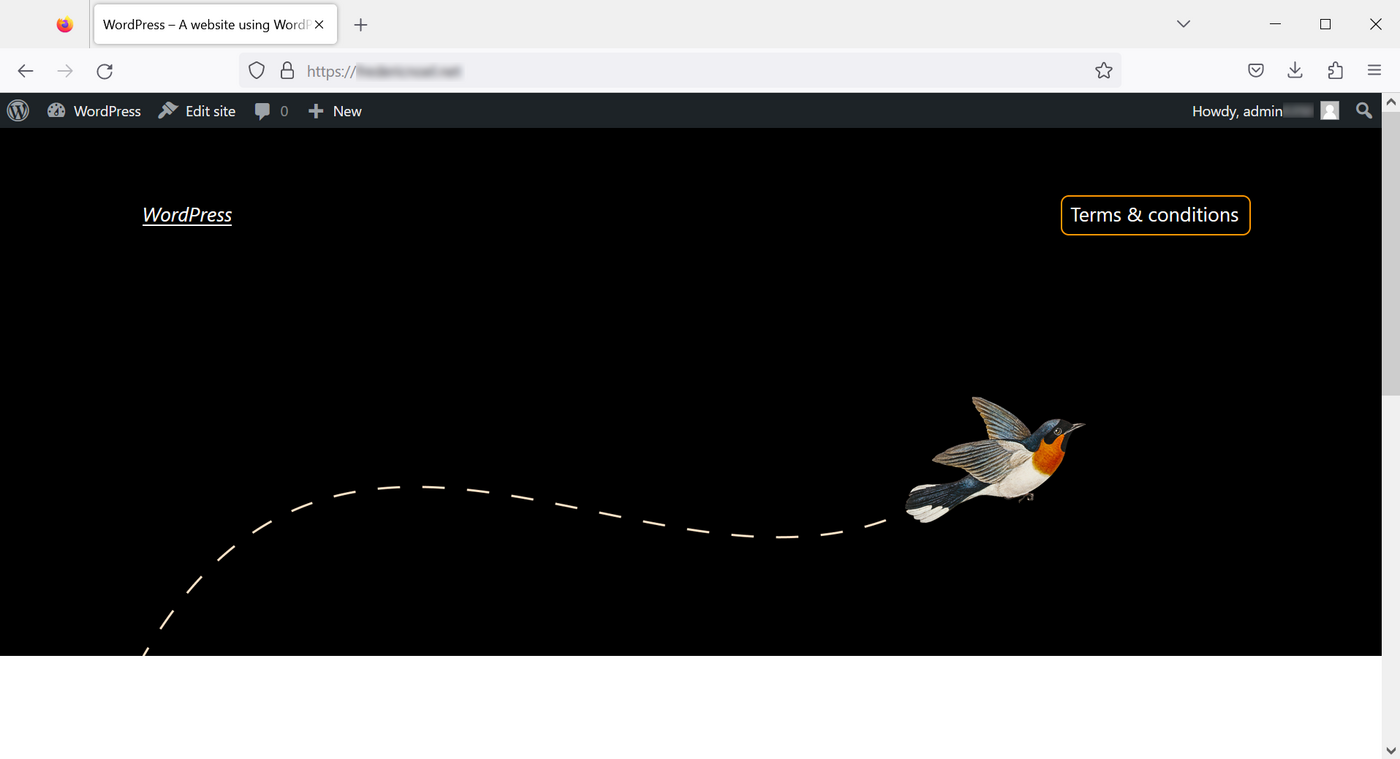
If you go back to your website's homepage, you will see a link to your new page:
Improve permalinks
By default, links on your WordPress pages are written with a syntax of the type parameter=value, where value is an integer without explicit meaning. Modifying the syntax of permalinks allows URLs with a more readable format. Your URLs will be easier to interpret and improve your website's SEO.
On the dashboard home page, go to Settings then Permalinks:
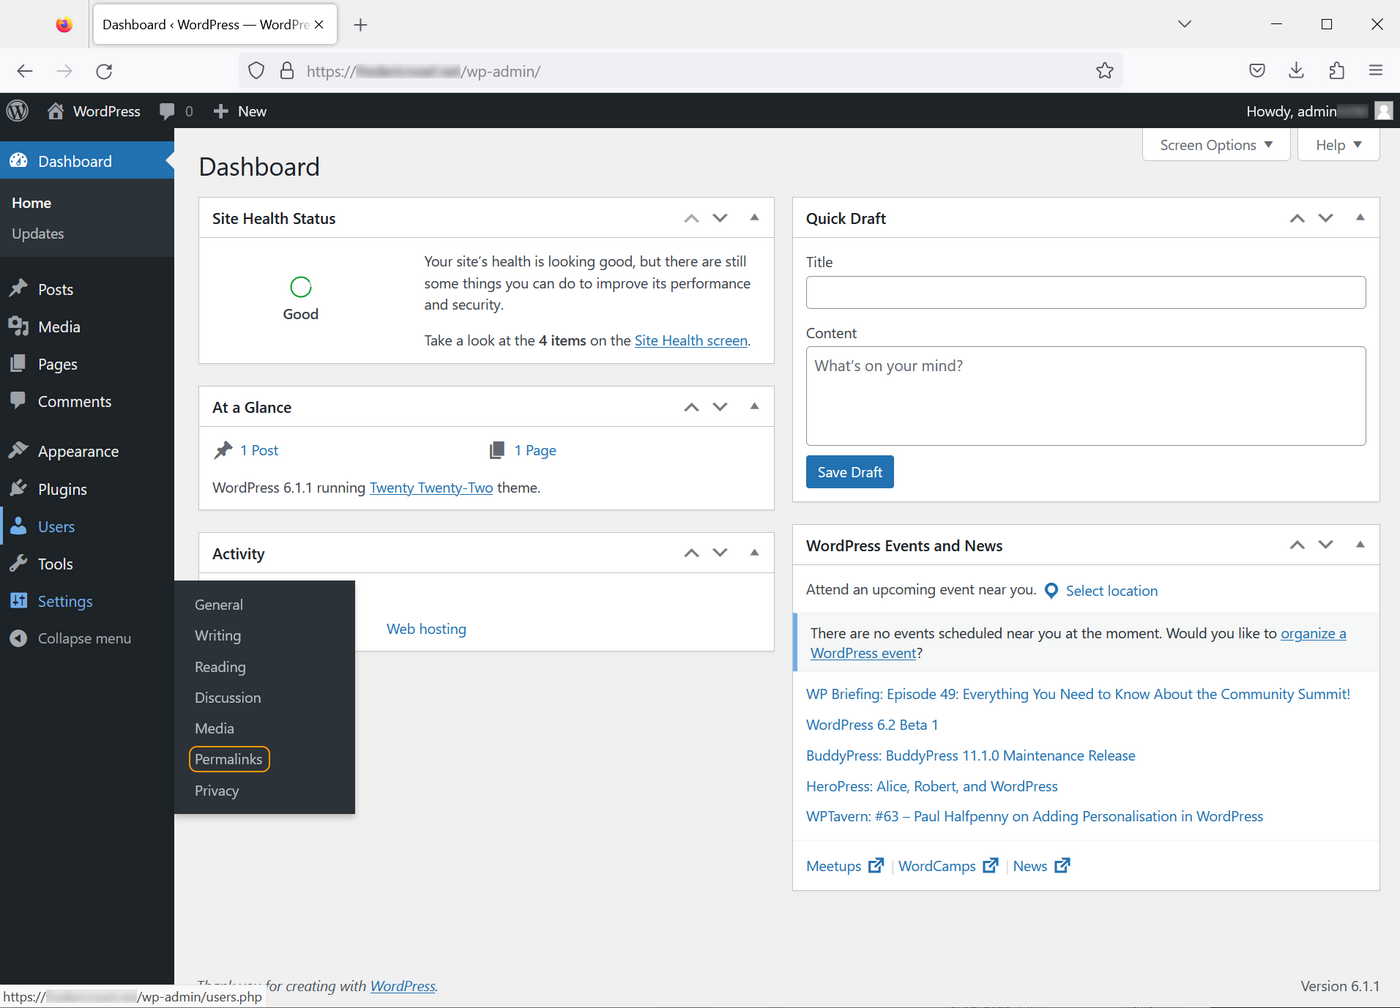
You can choose between several types of permalinks. Select the "Publication title", then confirm at the bottom of the page:
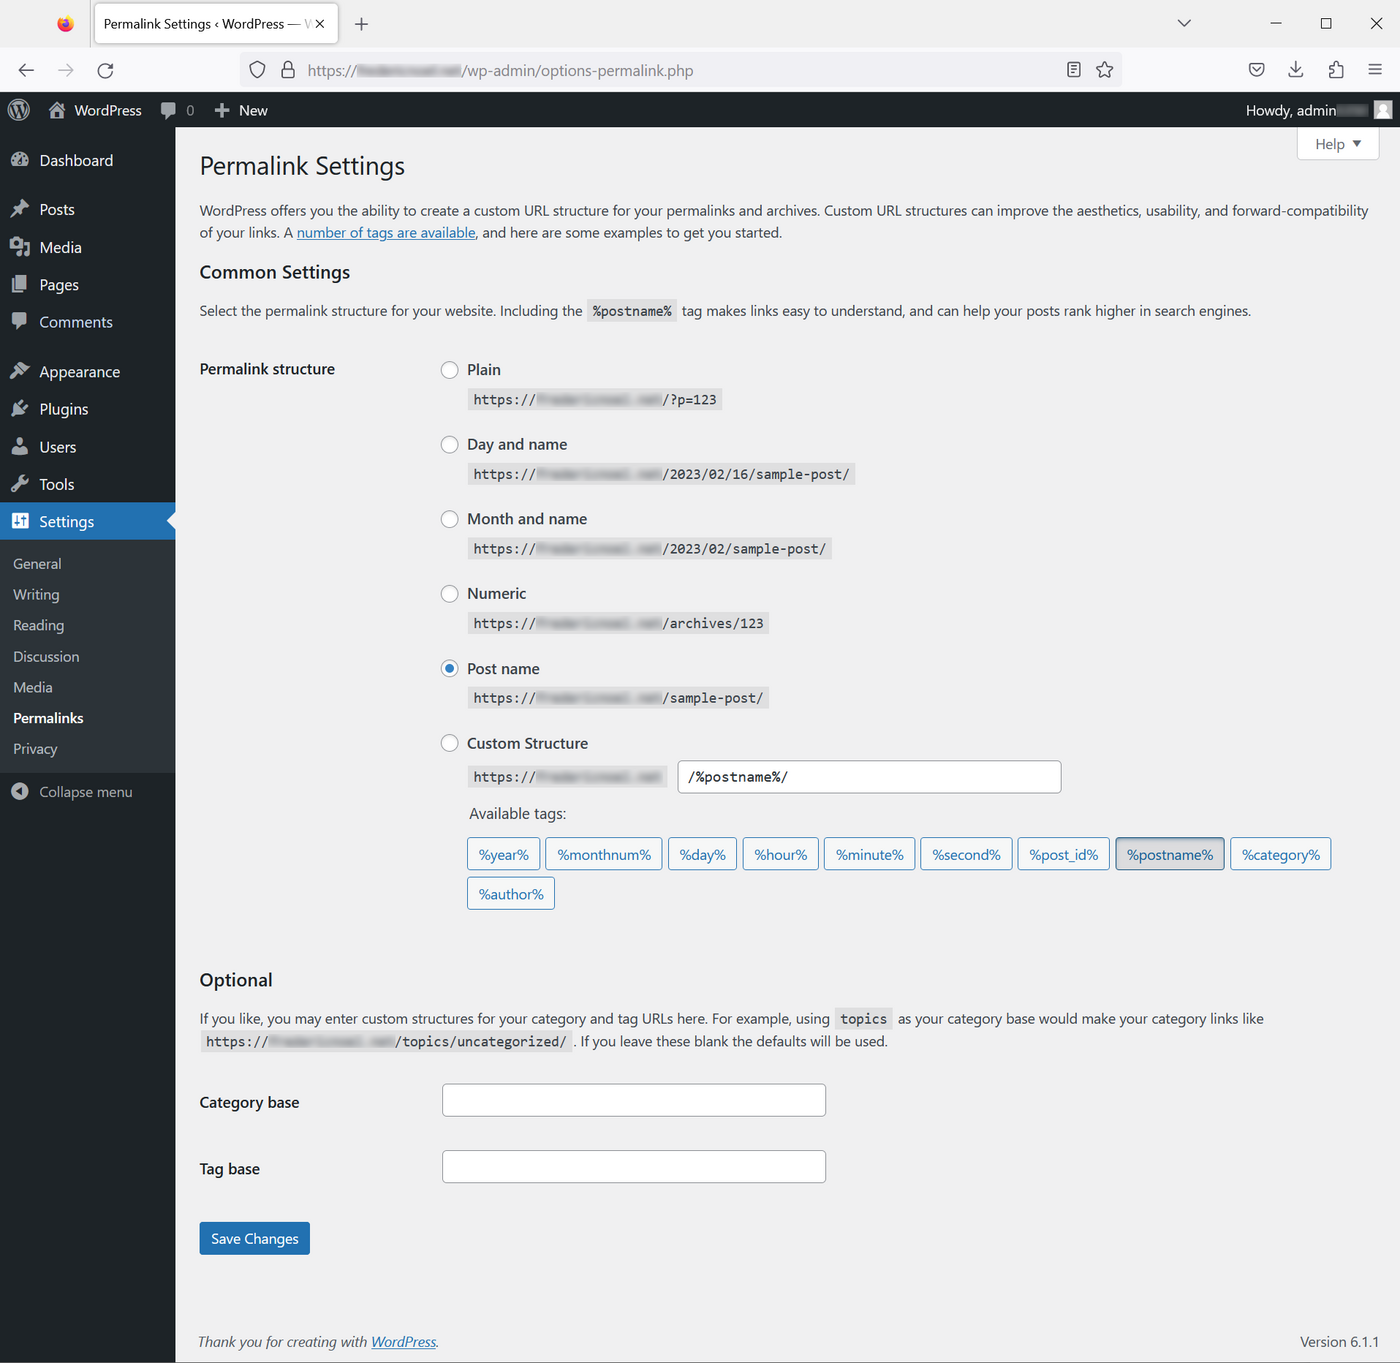
Your links will then be built from the slug you entered when you edited your articles and pages.
Go further
- Store your credentials in a password manager like KeePass.
- Test online the default editor Gutenberg.
- Some resources where to find WordPress themes:
- WordPress Themes
- TemplaMonster
- Elegant Themes, editor of the theme builder Divi
- Elementor, another theme editor
- Find more resources on the official [WordPress] website (https://wordpress.org/).
- Use SFTP to transfer files or pages to your WordPress.
For specialised services (SEO, development, etc.), contact OVHcloud partners.
If you would like assistance using and configuring your OVHcloud solutions, please refer to our support offers.
Join our community of users.