Using automated tasks on a Web Hosting plan
Find out how to configure scheduled jobs on your Web Hosting
Objective
On your OVHcloud web hosting, you can use scripts to automate certain operations. A scheduled task ("cron job") runs your scripts at specific times, automatically.
This guide explains how to create cron jobs to automate scheduled tasks on a web hosting plan.
OVHcloud provides services that you are responsible for with regard to their configuration and management. It is therefore your responsibility to ensure that they function properly.
This guide is designed to help you with common tasks. However, we recommend contacting a specialist provider or reach out to the OVHcloud community if you encounter any difficulties. We will not be able to assist you. You can find more information in the Go further section of this guide.
Requirements
OVHcloud Control Panel Access
- Direct link:
- Navigation path:
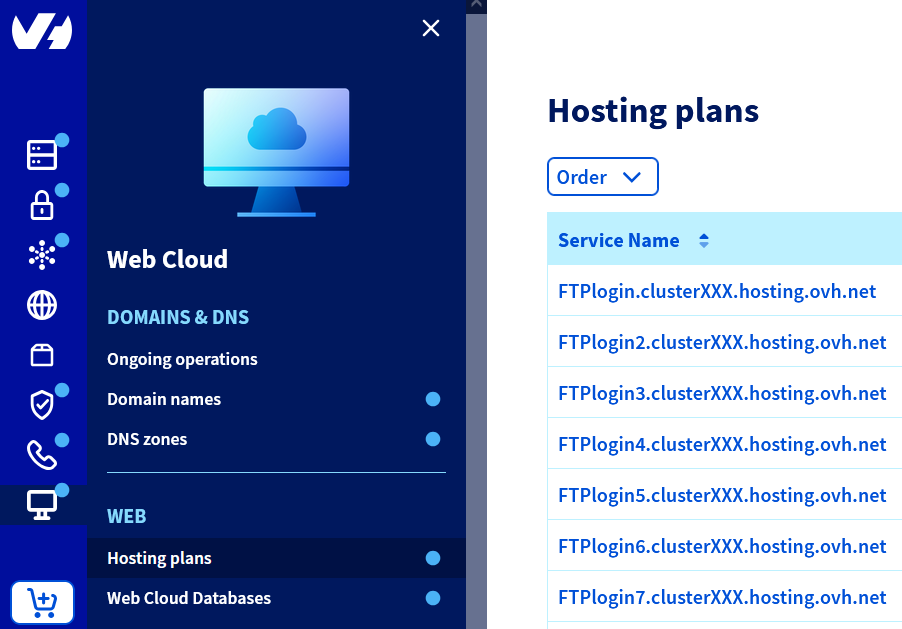
Web Cloud>Hosting plans> Select your web hosting plan
Instructions
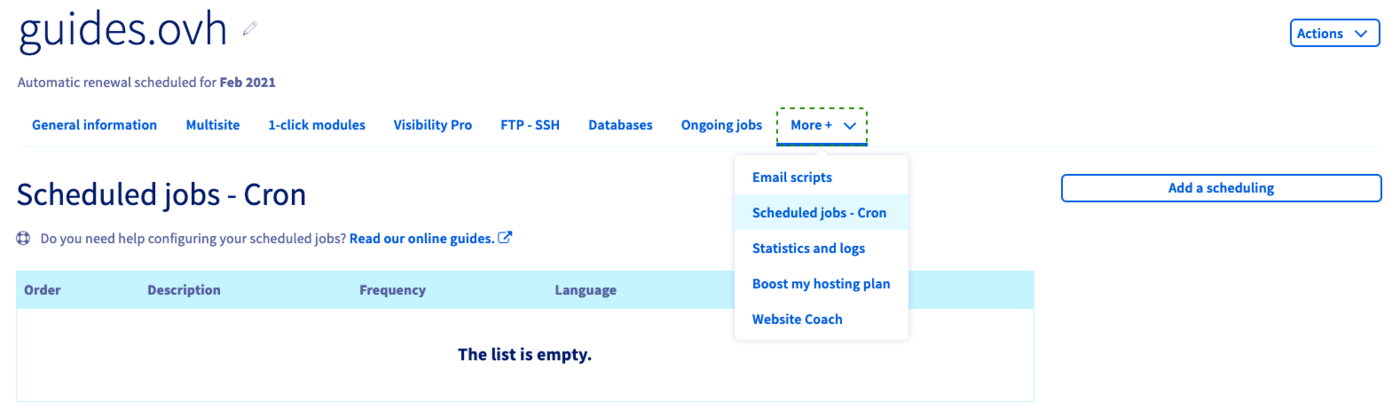
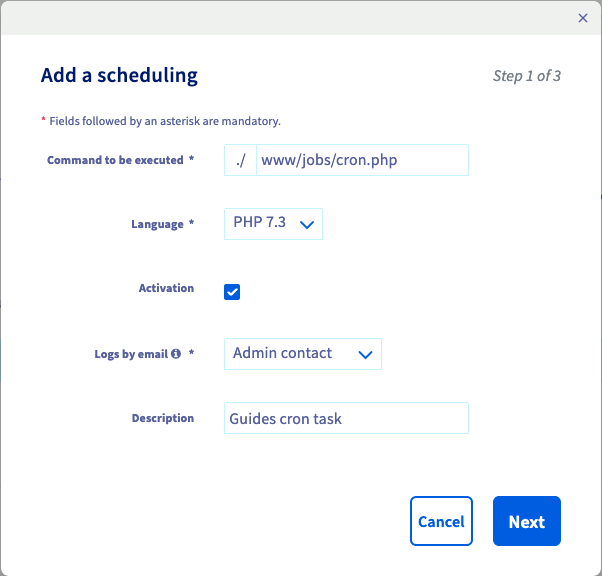
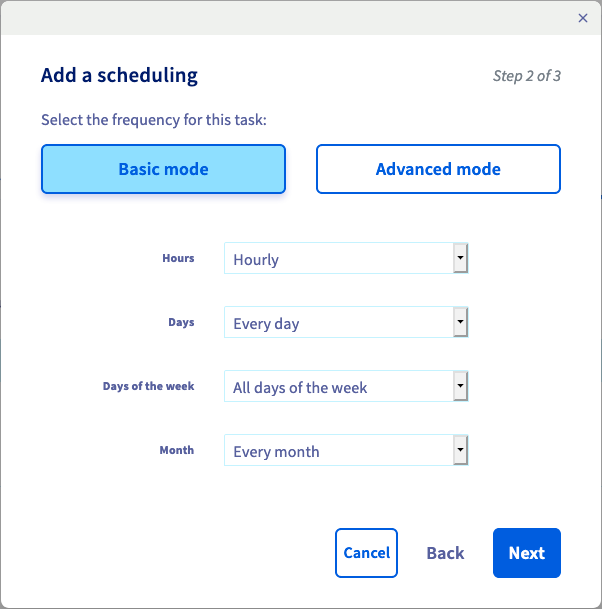
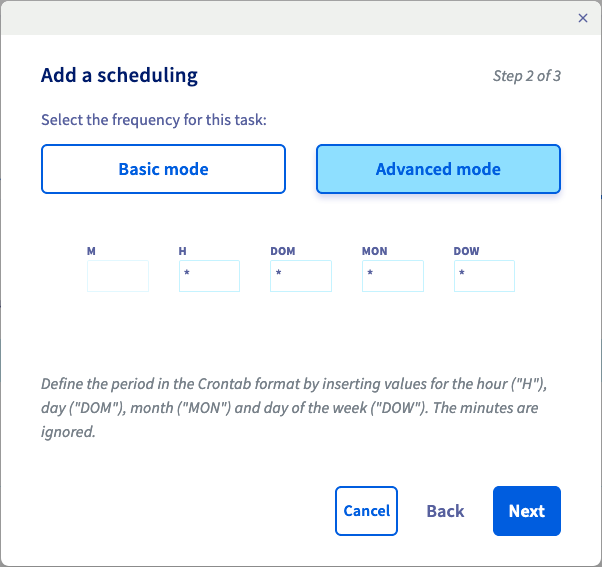
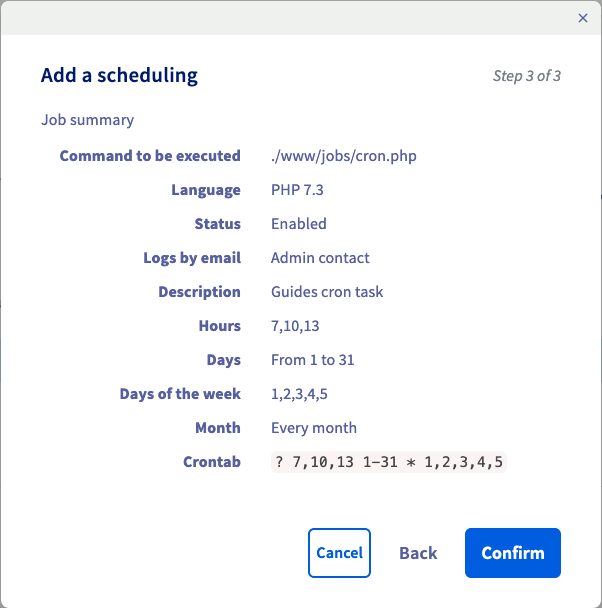
Creating an automated task
Click on the tabs below to view each of the 5 steps.
Go to the page, then select the web hosting plan concerned.
Modify or delete a scheduled task
Click on the tabs below to view each of the 3 steps.
Go to the page, then select the web hosting plan concerned.
Limitations of web hosting tasks
Troubleshooting
Testing your script with a web browser
A simple test to see if your script will produce an error is to run it in a web browser. For example, if the file path of your script is "www/cron.php" and your hosting domain is "mypersonaldomain.ovh", you would use the URL "http://mypersonaldomain.ovh/cron.php". If no error is showing up but the script is not performing as expected, follow up with the suggestions below.
Verifying the usage of absolute paths
Always make sure to use absolute paths to files in your scripts. The "DIR" constant, for example, can help to receive the current path in PHP scripts (PHP documentation).
Checking your execution logs
In your web hosting's logs, accessible from the , you will see the log category labelled "cron".
Please refer to this guide for details.
Example logs
- Example of a successfully finished execution output
[2026-03-30 00:36:01] ## OVH ## START - 2026-03-30 00:36:01.524384 executing: /usr/local/php7.2/bin/php /homez.161/myftpusername/www/myscript.sh
[2026-03-30 00:36:01]
[2026-03-30 00:36:01] ## OVH ## END - 2023-08-10 22:39:44.086166 exitcode: 0
- Example of a failed execution output due to exceeded execution time
[2026-03-30 00:36:01] ## OVH ## START - 2026-03-30 00:36:01.524384 executing: /usr/local/php7.2/bin/php /homez.161/myftpusername/www/sleep.sh
[2026-03-30 01:36:01] ## OVH ## ERROR - CRON TASK INTERRUPTED BY OVH - reason: your script duration exceeded the maximum permitted (3600 seconds)
[2026-03-30 01:36:01] ## OVH ## END - 2026-03-30 01:36:01.086166 exitcode: 0
- Example of a failed execution output because the script file was not found in the specified path
[2026-03-30 00:36:01] ## OVH ## START - 2026-03-30 00:36:01.524384 executing: /usr/local/php7.2/bin/php /homez.161/myftpusername/www/noscript.sh
[2026-03-30 00:36:01] ## OVH ## ERROR command '/homez.161/myftpusername/www/noscript.sh' not found
[2026-03-30 00:36:01] ## OVH ## END - 2026-03-30 00:36:01.086166 exitcode: 255
- Example of a failed execution output because of a permissions error (chmod) or incorrect configuration of the .ovhconfig file
[2026-03-30 18:07:10] ## OVH ## Your job could not be initiated for an unknown reason.
[2026-03-30 18:07:10]
[2026-03-30 18:07:10] ## OVH ## END - 2026-03-30 18:07:10.969840 exitcode: 255
Go further
Configuring the .ovhconfig file of your Web Hosting plan
Using SSH on a Web Hosting plan
For specialised services (SEO, development, etc.), contact OVHcloud partners.
If you would like assistance using and configuring your OVHcloud solutions, please refer to our support offers.
Join our community of users.