Install mods and plugins on your Minecraft server
Install mods and plugins on a PaperMC, Fabric, or NeoForge Minecraft server hosted on the OVHcloud Game Panel to customise your gameplay.
Objective
The OVHcloud Game Panel lets you customise your Minecraft server by installing mods and plugins, depending on the server software you use.
This guide explains how to install mods and plugins on your Minecraft server hosted on the OVHcloud Game Panel.
Requirements
- A VPS or a dedicated server in your OVHcloud account with the Game Panel feature enabled.
- A Minecraft server running one of the following software variants: PaperMC, Fabric, or NeoForge.
- Access to the Game Panel. Refer to Log in to the Game Panel.
Instructions
Understanding the difference between PaperMC, Fabric, and NeoForge
While all three platforms allow you to customise your Minecraft server, they work differently.
- PaperMC is a high-performance Minecraft server software that supports plugins. Plugins are lightweight additions that can add new commands, gameplay mechanics, permissions systems, economy systems, and much more without requiring players to install anything on their game client.
- Fabric is a lightweight and modern mod loader. It supports a wide range of mods and is known for its fast updates and excellent performance. Both the server and, in most cases, connected players must have the required mods installed.
- NeoForge is a powerful and modern mod loader designed for larger and more advanced modpacks. It offers extensive modding capabilities and is commonly used for heavily modded Minecraft experiences with complex gameplay additions.
In short:
- PaperMC → Plugins
- Fabric → Mods
- NeoForge → Mods
Step 1 — Download your plugins or mods
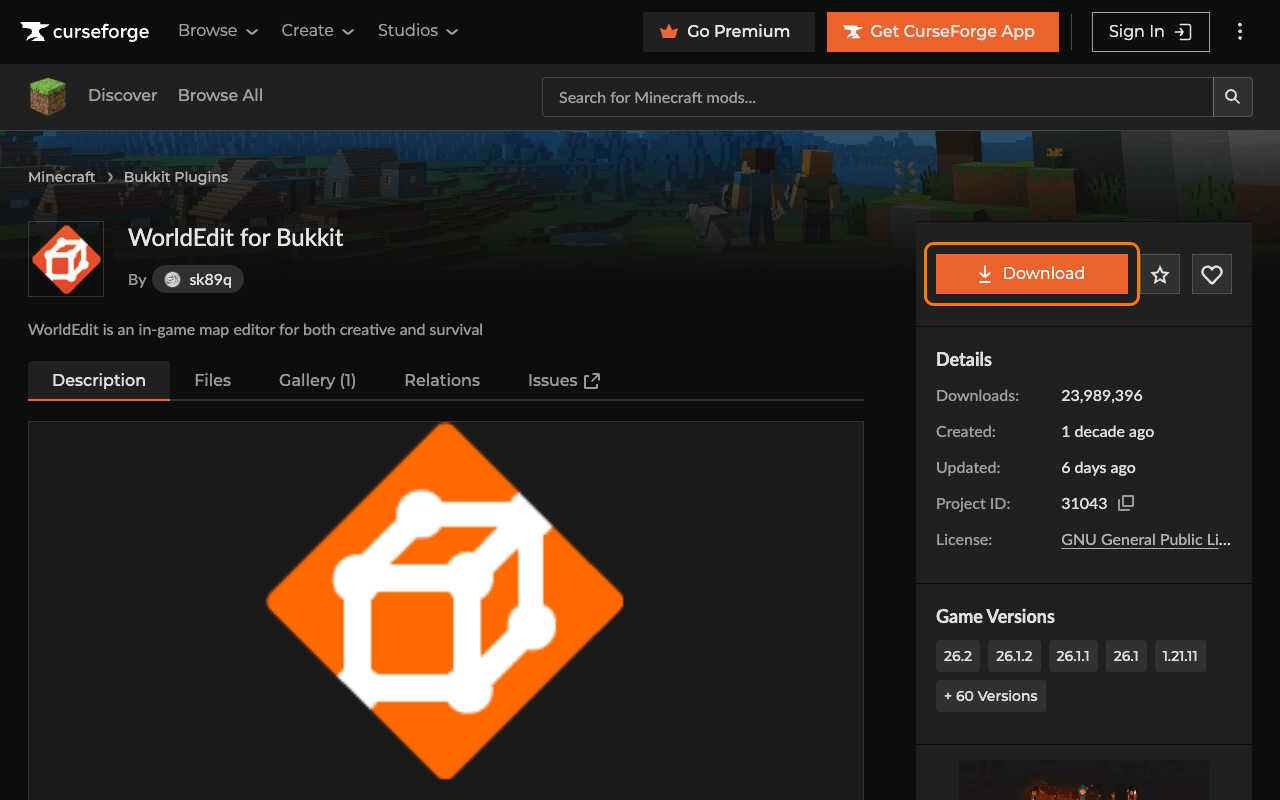
You first need to download the plugin or mod you want to install. Many websites provide Minecraft plugins and mods, but one of the most popular is CurseForge.
- Search for the plugin or mod you want.
- Open its page.
- Click
Download. - Make sure to select the correct Minecraft version and the correct Plugin/Mod Loader (Paper, Fabric, or NeoForge).
This ensures the plugin or mod is compatible with your server.
Step 2 — Stop the server
Before installing any plugin or mod, stop your Minecraft server.
- Open your server in the Game Panel.
- Click
Stop.
Installing files while the server is running may cause issues or prevent them from loading correctly.
Step 3 — Upload the plugin or mod
- Open your server in the Game Panel.
- Navigate to
Settings. - Open the
Game Configtab. - Select either the
PluginsorModstab, depending on your server software.
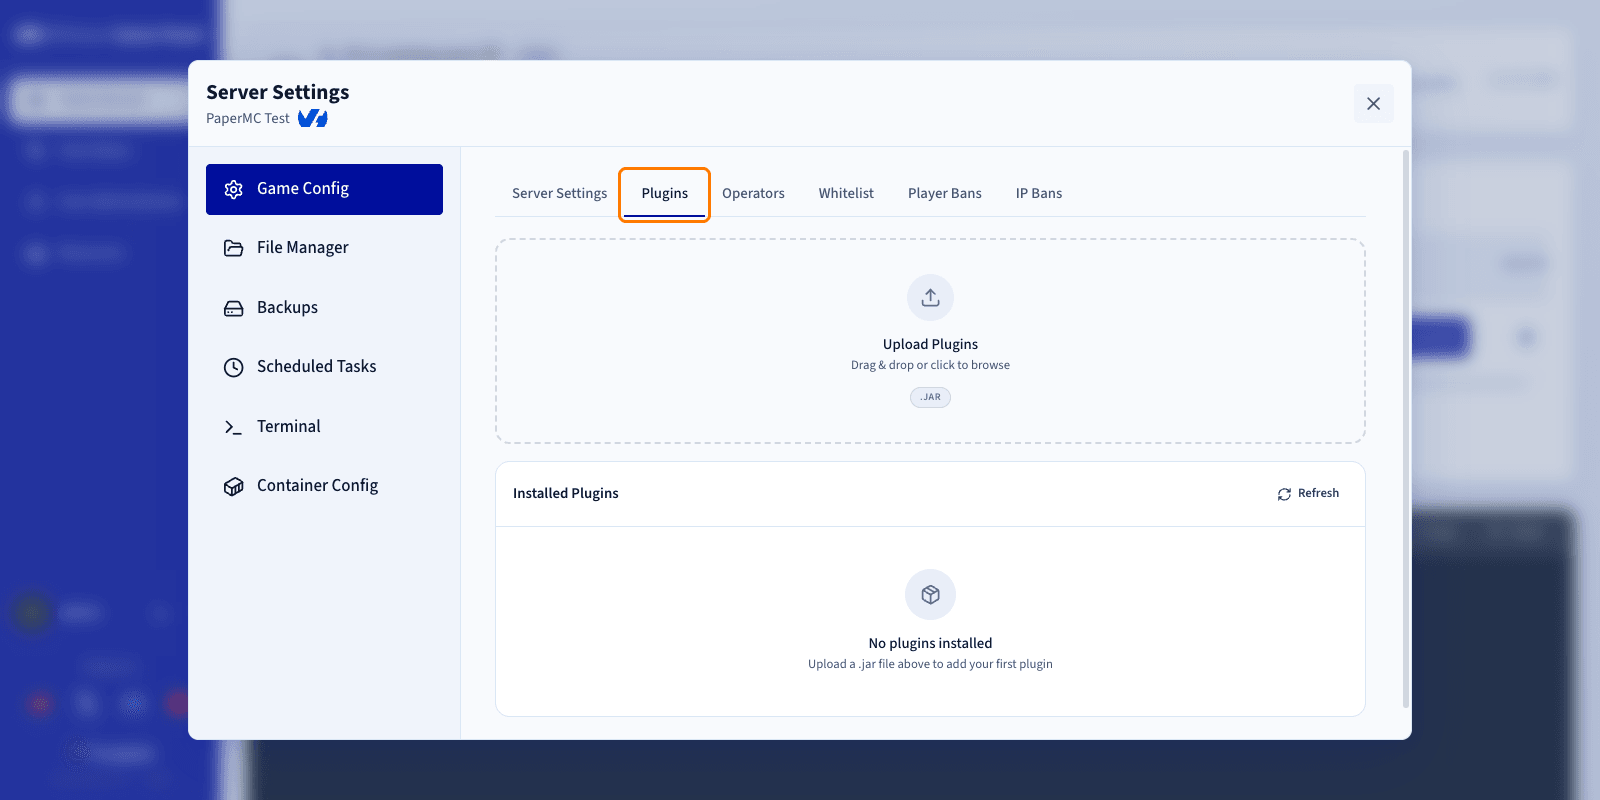
Then upload the file:
- Locate the plugin or mod file you downloaded on your computer.
- Drag and drop the file into the upload area.
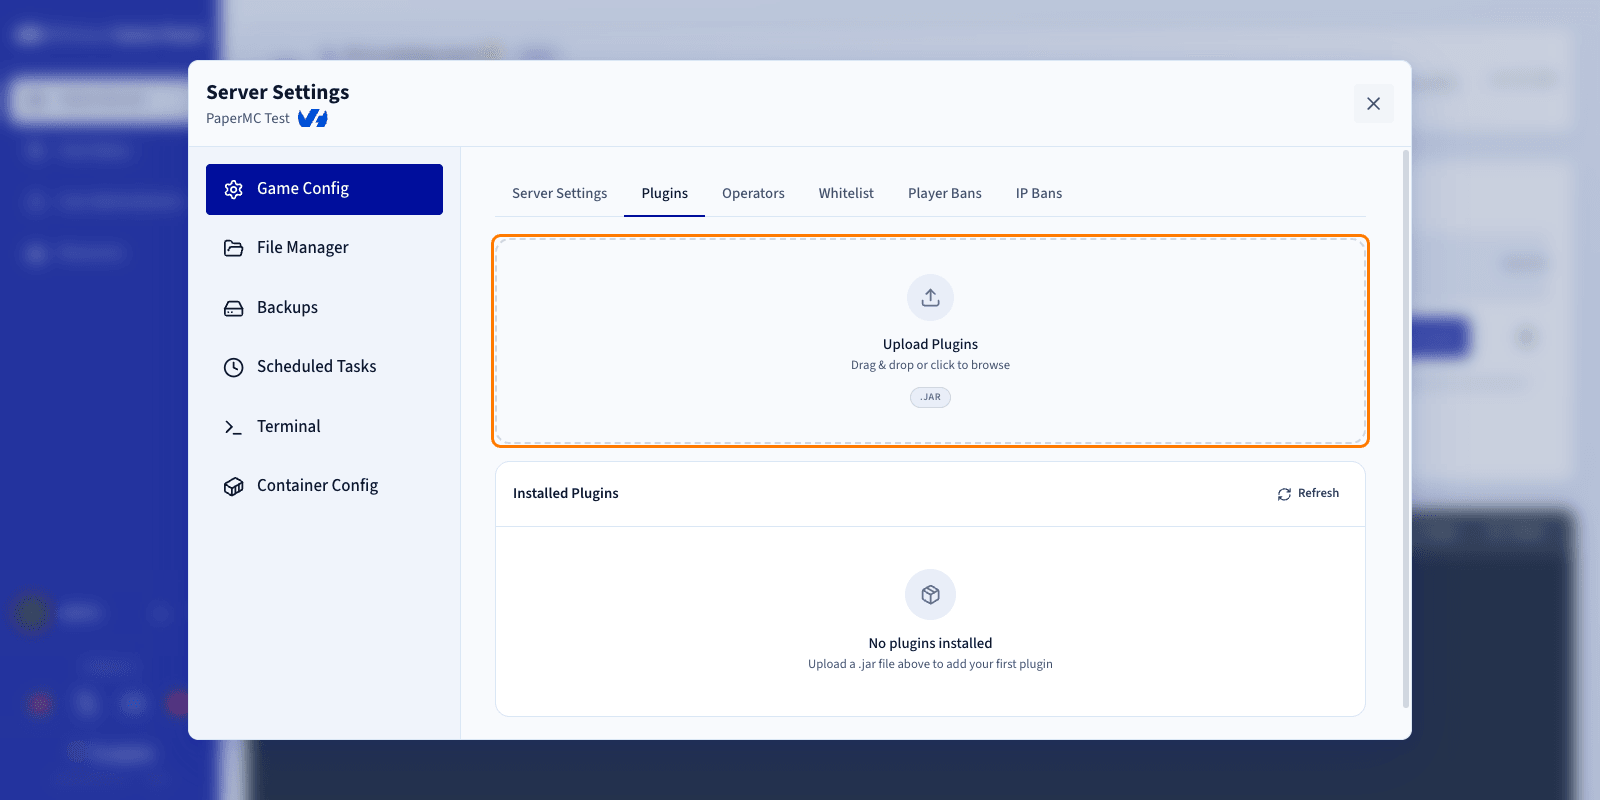
Once the upload is complete, the plugin or mod appears in the list.
Step 4 — Start the server
After uploading your plugin or mod:
- Start your Minecraft server.
- Open the server logs.
Monitor the logs during startup to confirm that the server starts successfully, that no errors are reported, and that the installed plugins or mods are loaded correctly.
If everything loads without errors, your installation is complete. Repeat this process whenever you want to add content to your server.
Go further
Join our community of users.