
Configuring the firewall on Windows
Find out how to configure your firewall on Windows
Objective
To best protect your system, your Windows Server dedicated server has its own built-in firewall. By configuring it, you can increase security levels, which guarantees the availability and integrity of all elements hosted on the server, such as roles, services and shared folders.
This guide will show you how to apply firewall rules on Windows.
Information regarding OVHcloud service administration and how to find appropriate assistance
When using OVHcloud guides, please be aware of the following conditions:
- User instructions aim to provide as many details as possible but cannot cover individual use cases. You might need to adapt the pertinent actions to your requirements.
- The OVHcloud ecosystem is built for flexibility and freedom of choice. Customers are therefore responsible for the secure and proper configuration of their services. To prevent data loss, we strongly recommend to apply backup strategies to all your important data.
- Our guides and tutorials may reference third-party software or services in combination with OVHcloud solutions. The technical support provided by OVHcloud does not include the configuration of systems or products outside of our responsibility. This includes but is not limited to:
- Operating systems and user interfaces (Windows, Debian, Plesk, etc.).
- Any other third-party software (FTP clients, email software, etc.).
- Services offered by other providers (DNS, APIs, user interfaces, etc.).
To receive the appropriate assistance for any issues you might experience, follow these guidelines:
- You seek personalized advice or you would like to discuss a topic that is not covered in detail by our documentation?
Join the OVHcloud Community to search for your topic and reach out to other users. - You need to report an incident regarding your OVHcloud service or you are experiencing difficulties in the OVHcloud Control Panel?
Create a support request in our Help Centre. - You require professional assistance for your project or you need help with tasks outside our support scope?
Visit our partner portal to search for experts who are familiar with OVHcloud solutions. - You are looking for more detailed information regarding our support levels and Professional Services?
Please visit our web pages for OVHcloud support levels and OVHcloud Professional Services.
You can participate in improving our documentation:
- You would like to share feedback to improve a guide page or you want to report insufficient information on a specific page?
Use the "Was this page helpful?" buttons at the bottom of the page to let us know. - You would like to propose a specific documentation update?
Use the "Edit this page" function, available at the bottom of the page and in the sidebar.
Requirements
- A Virtual Private Server with Windows installed in your OVHcloud account
- Administrative access via remote desktop to your server
Instructions
Step 1: Access Windows Firewall
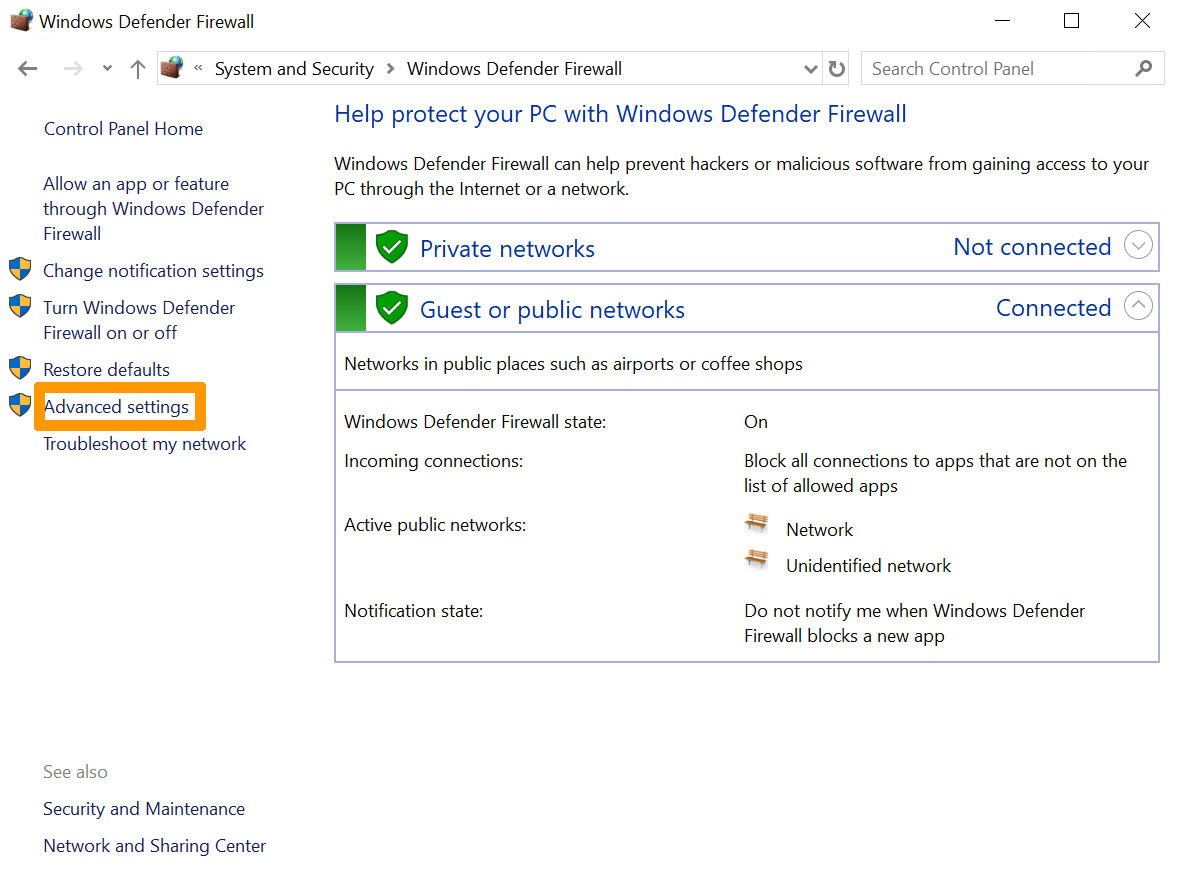
To access Windows Firewall, you can follow this order:
- Click
Start. - Click
Search. - Search for "Windows Firewall" in the search bar.
- Click
Windows Firewall.
Then click Advanced settings.
Step 2: Enable an inbound rule
In the window that appears, you will see settings such as:
- Inbound and Outbound Rules
- Connection Security Rules
- Server Firewall Monitoring Options
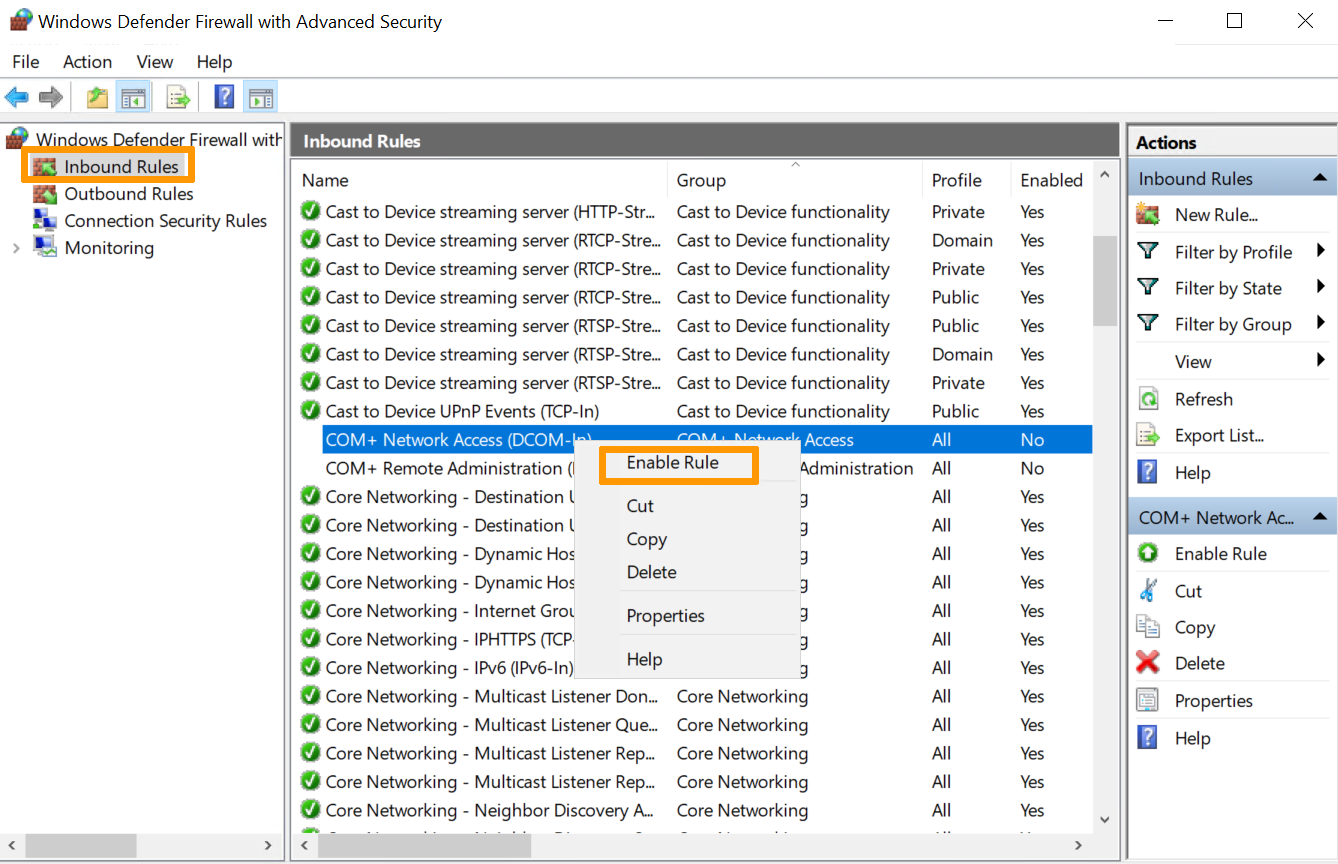
Selecting Inbound Rules displays all preconfigured Windows Server rules associated with network connections and incoming packets. Some of these rules are not enabled by default. If you want to enable them, right-click the rule and select the Enable rule option.
Step 3: Create a new rule
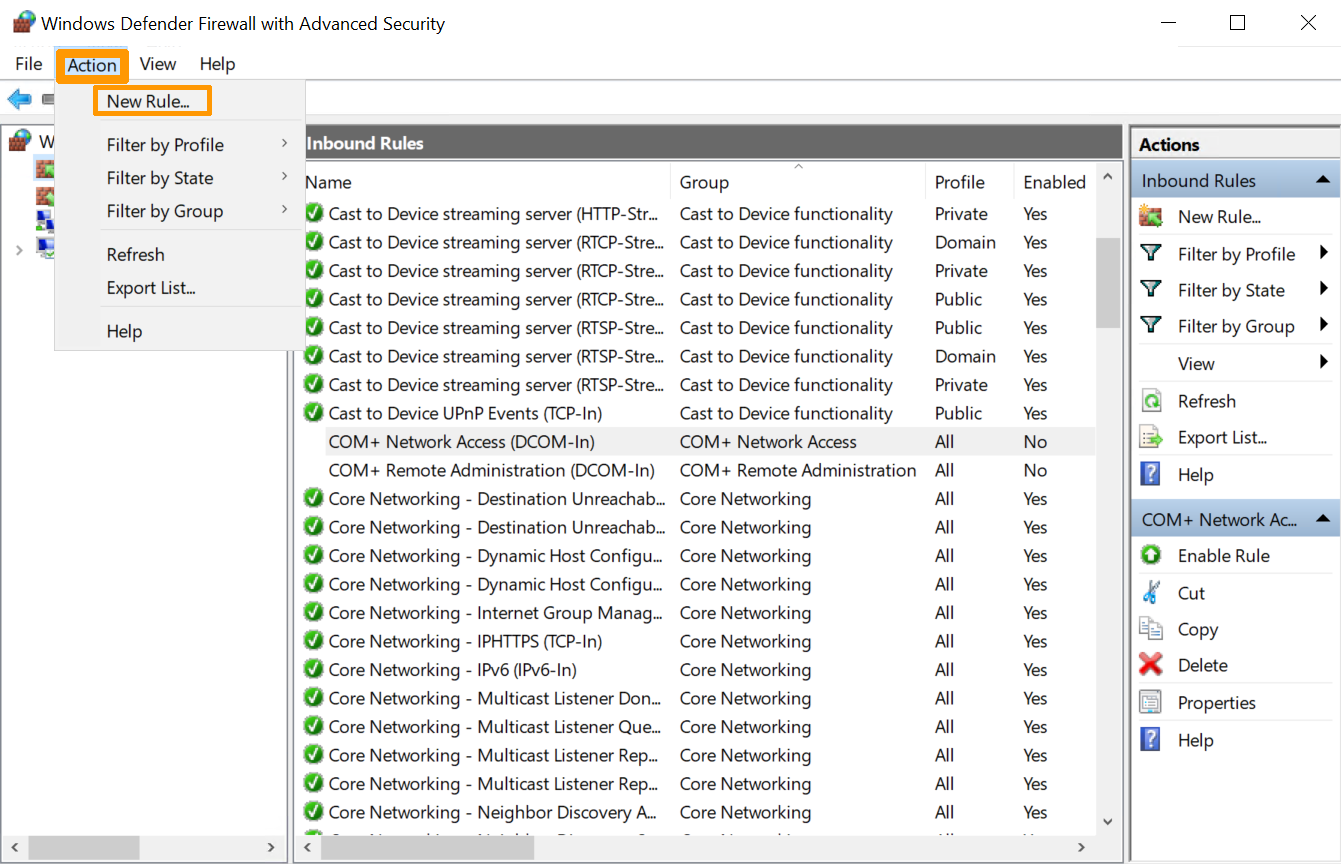
To create a new rule, go to the Action menu and select New Rule.
Click the New Rule option in the right-hand pane.
Step 4: Define the type of rule to activate
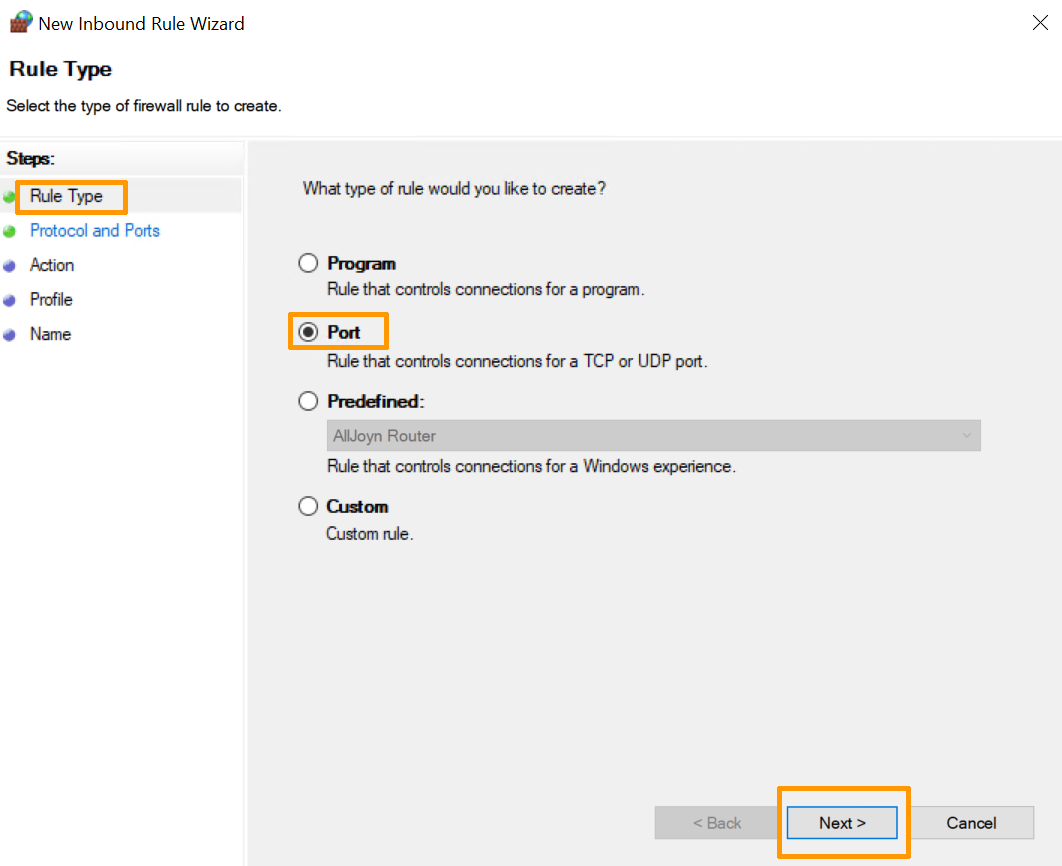
The Rule Wizard provides options to define the type of rule to create. Select the Port check box.
Step 5: Define the port type to activate
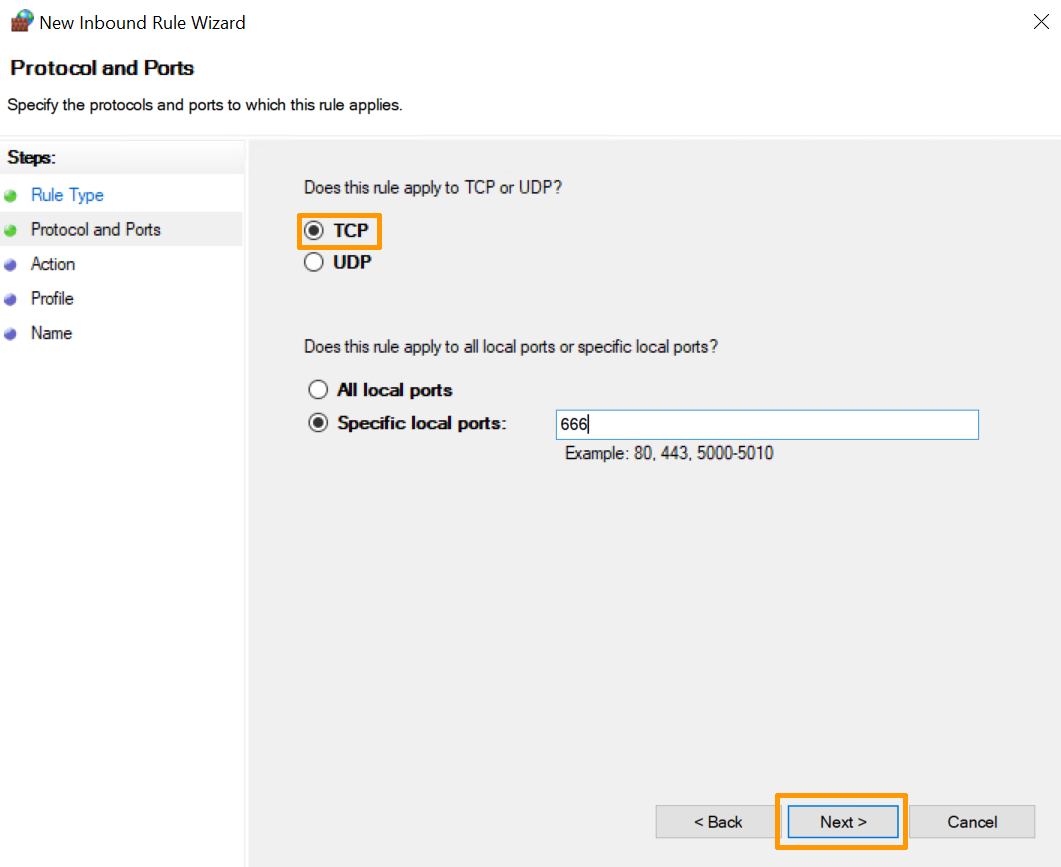
In the next step, define the port type to enable:
-
TCP (Transmission Control Protocol) It is a connection-orientated protocol, i.e. with TCP, it will be possible to create connections between them in order to send data streams. This protocol ensures that data is delivered to the recipient in the same order and in the same error-free manner.
-
UDP (User Datagram Protocol) This is a non-connection-orientated protocol. Its development is based on the exchange of datagrams and facilitates the sending of datagrams across the network. You will need to have established a connection to the destination beforehand.
You can also select the All local ports checkbox to enable all TCP or UDP ports on a non-secure server. You can also select the Specific local ports check box to determine which port should be allowed.
Step 6: Allow or block the connection
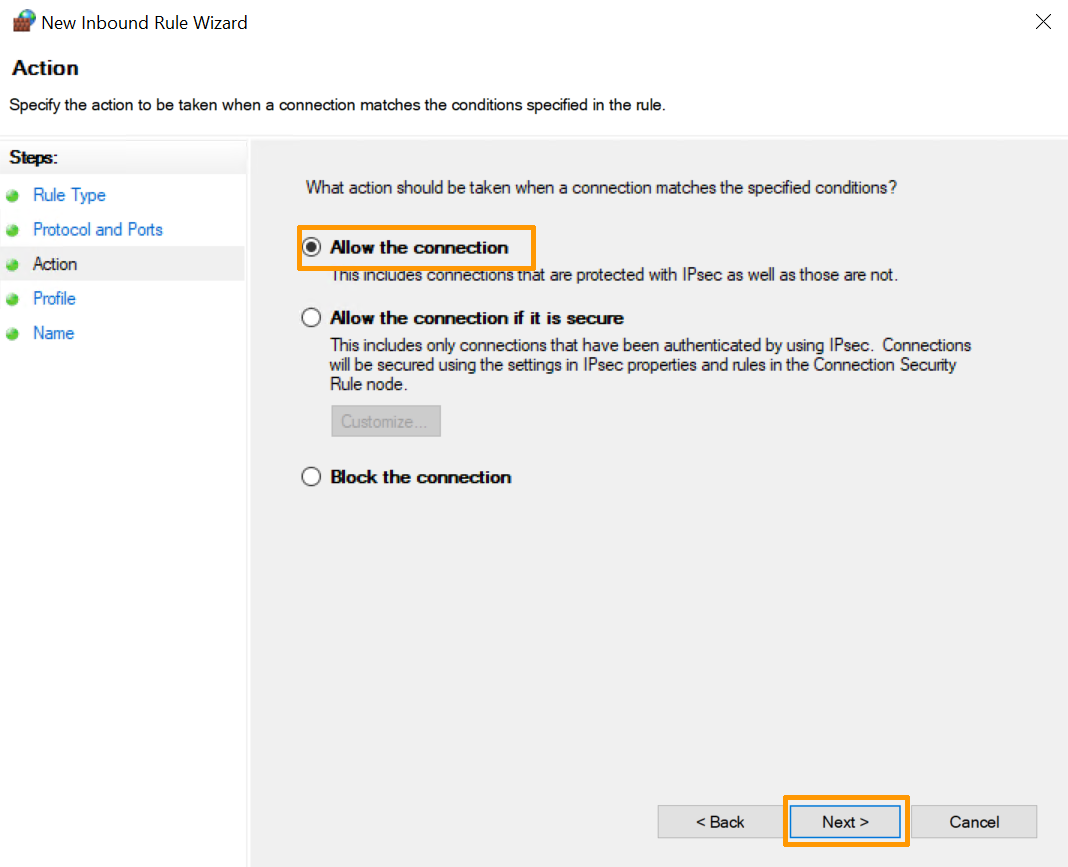
To define the action this rule will trigger, the following options are available. Select the one that works for you.
- Allow the connection. This option allows full communication through this port.
- Allow the connection if it is secure. This option allows data to be transmitted only if the connection is authenticated via IPsec.
- Block the connection. This option prevents data from being routed through this port.
Select the Allow Connection option and click Next.
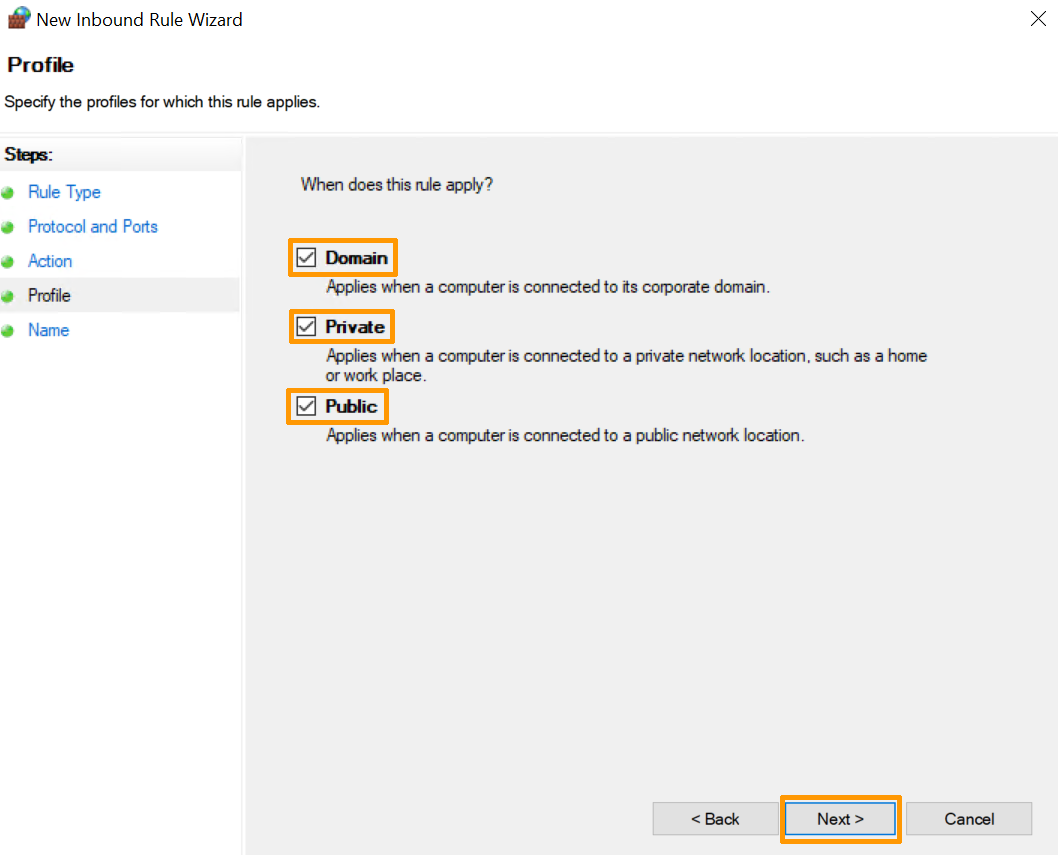
Step 7: Define the firewall profile and name to apply
Finally, you must choose which profiles the rule should apply to, from public, domain or private profiles. You can enable them all if you want.
Give the new rule a name and description (optional) to make it easier to use:
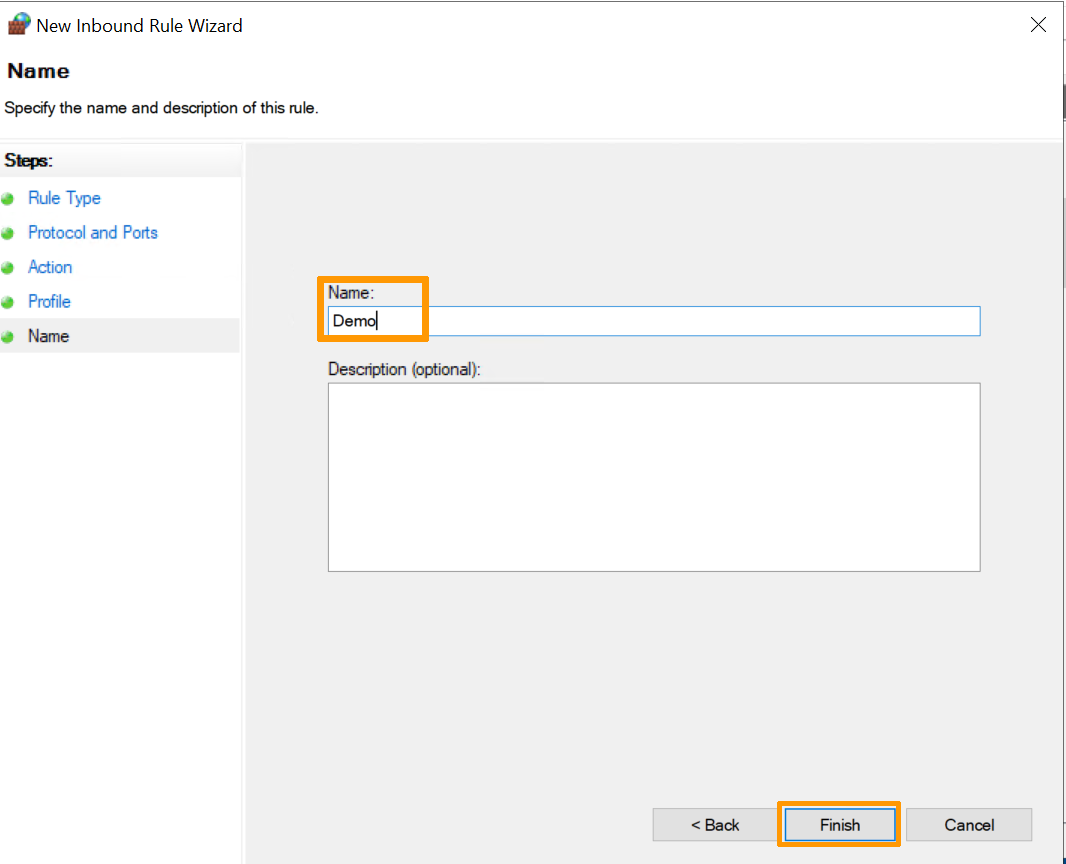
Click the Finish button to complete the process and create the new rule.
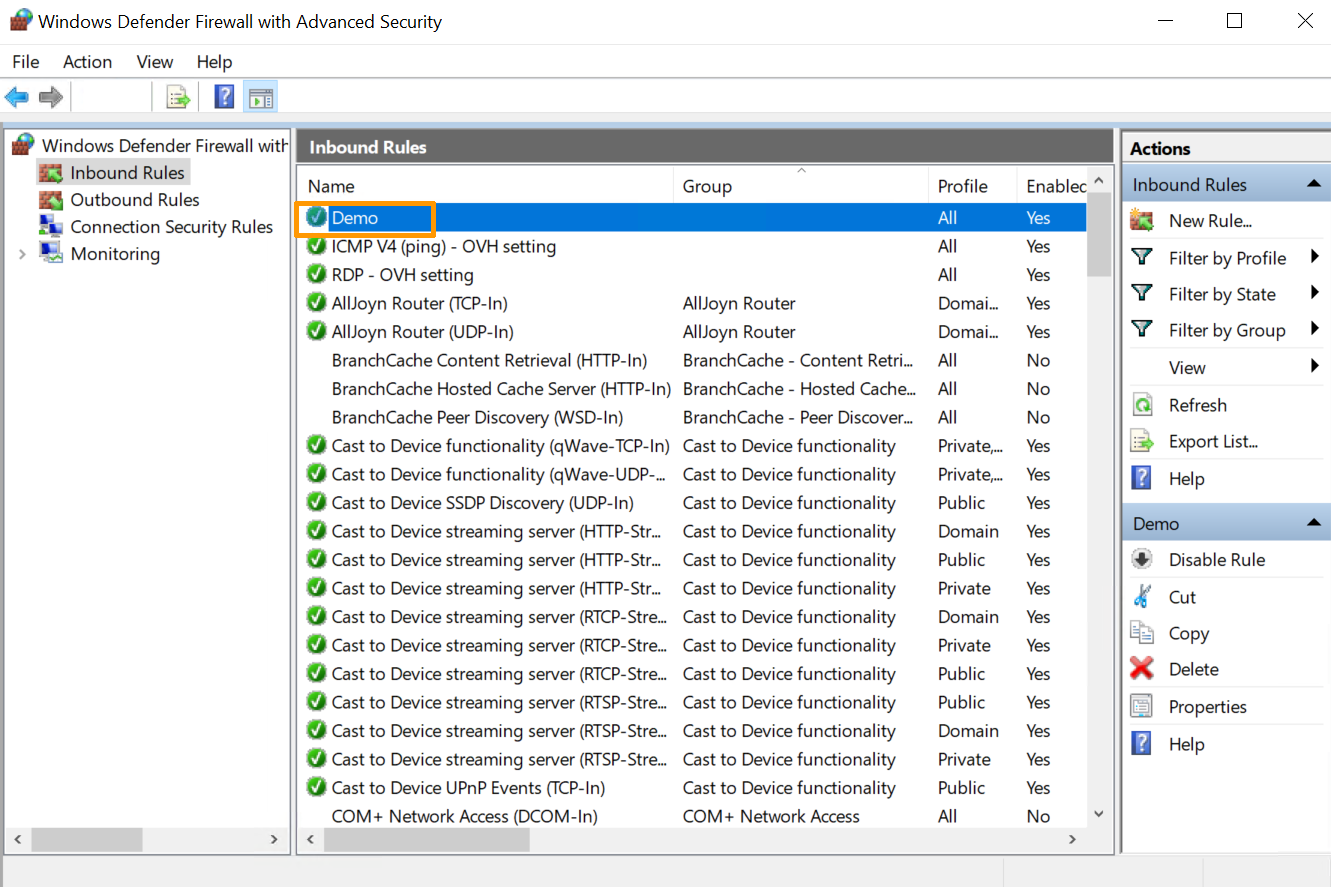
You can then make changes to the settings of the new rule you have created.
Go further
Join our community of users.