Installing Camaleon CMS on your Cloud Web hosting plan
Find out how to install Camaleon CMS on Cloud Web
Objective
Camaleon CMS is a Content Management System (CMS) written in Ruby and based on the Ruby on Rails web framework. OVHcloud Cloud Web hosting allows you to use Ruby as a runtime engine for your websites, and therefore to install and host Camaleon CMS or any other web application built in Ruby. In this tutorial, we will install a website with Camaleon CMS on an OVHcloud Cloud Web hosting plan and make it available through your domain name.
Find out how to install Camaleon CMS on Cloud Web
Requirements
- A OVHcloud Cloud Web hosting plan.
- Access to your , in the
Web Cloudsection. - What you should know:
- The basics of the Ruby ecosystem.
- How to connect via SSH.
- How to edit a file from the command line using Vim, Emacs or Nano, for example.
Instructions
Step 1: enabling Ruby as a runtime engine
To access the runtime engines of your Cloud Web hosting plan, log in to your . Click Hosting in the services bar on the left, then choose the name of the relevant Cloud Web hosting plan. Finally, go to the Runtime engines tab.
The table that appears displays the runtime engines currently added. Make sure that the Ruby runtime engine is enabled. If it is, proceed to Step 2 Associating Ruby with a multisite.
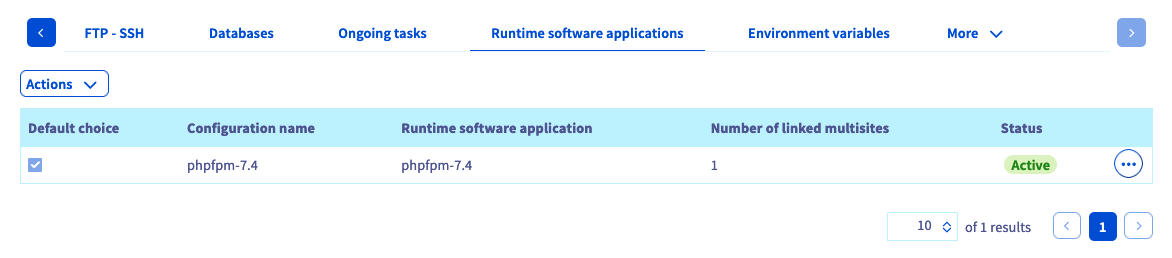
If it is not, add a new one (if your plan allows it) or modify the existing runtime engine.
- If you want to add an engine: click
Actionsabove the table, thenAdd a runtime engine. - If you want to modify an engine: click the
...button to the right of the relevant engine, thenEdit.
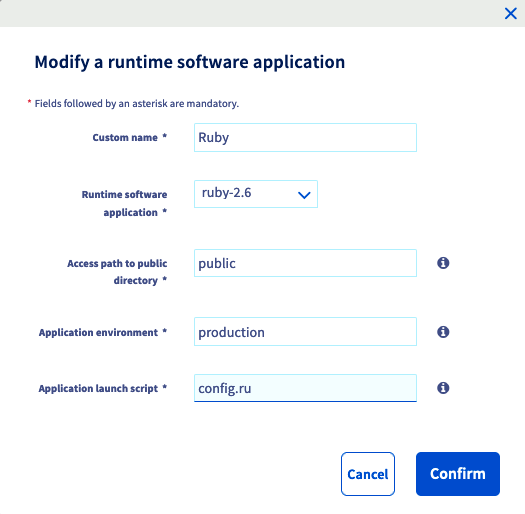
In the window that appears, fill in the requested information with the following values from our example, or adapt them to your own situation.
Once the information is filled in, click Confirm. If you would like more information about managing runtime engines, refer to our guide Managing the runtime engines of Cloud Web.
Step 2: associating Ruby with a multisite
Now that Ruby is enabled as a runtime engine, you must associate it with one of your multisites. To do this, go to the Multisite tab. The table that appears contains all the domain names that have been added as a multisite.
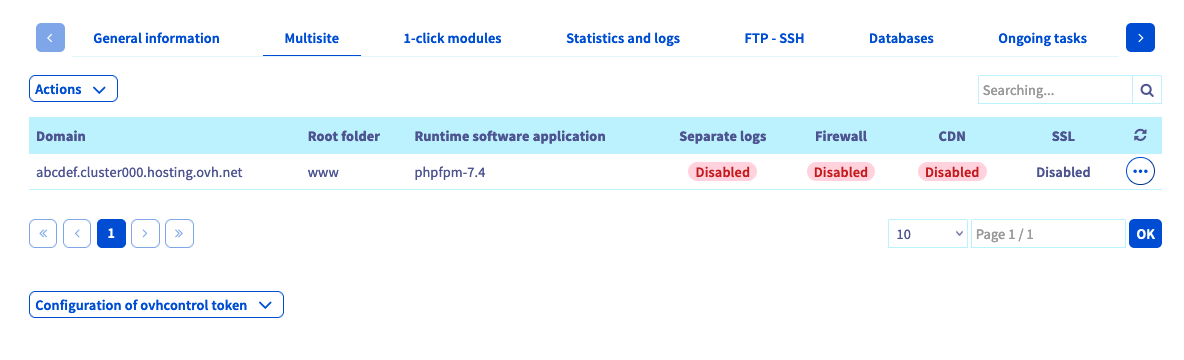
Two columns should draw your attention in the table above. Check that the Ruby runtime engine is properly linked to the relevant domains and that the root folder is correct. Use the information below if needed. If it is, proceed to Step 3 Connecting to your Cloud Web via SSH.
If it is not, add a new multisite or modify the existing one.
- If you want to add a multisite: click
Actions, thenAdd a domain or subdomainto the right of the table. - If you want to modify a multisite: click the
...button to the right of the relevant domain name, thenEdit.
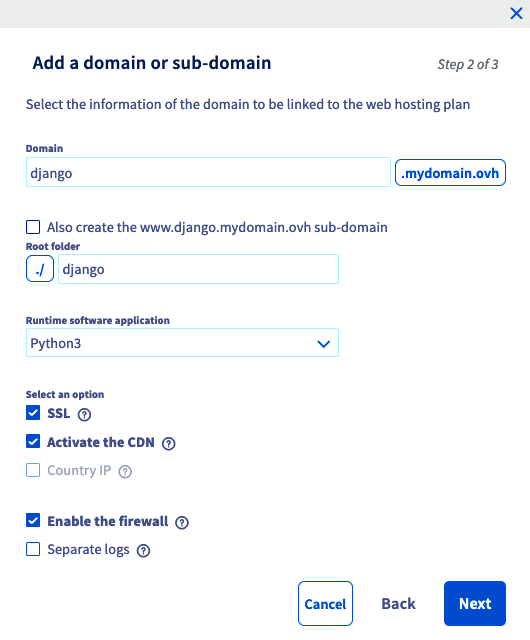
In the window that appears, fill in the requested information according to your own situation. The table below shows the values used for this tutorial.
As for the additional options, choose the ones you want to enable. Once the information is filled in, click Next, then finalise the operation. This addition can take up to one hour. However, the change to the DNS configuration can take up to 24 hours to become fully effective. If you would like more information about managing multisites, refer to our guide "Sharing your hosting plan between several websites".
Step 3: connecting to your Cloud Web via SSH
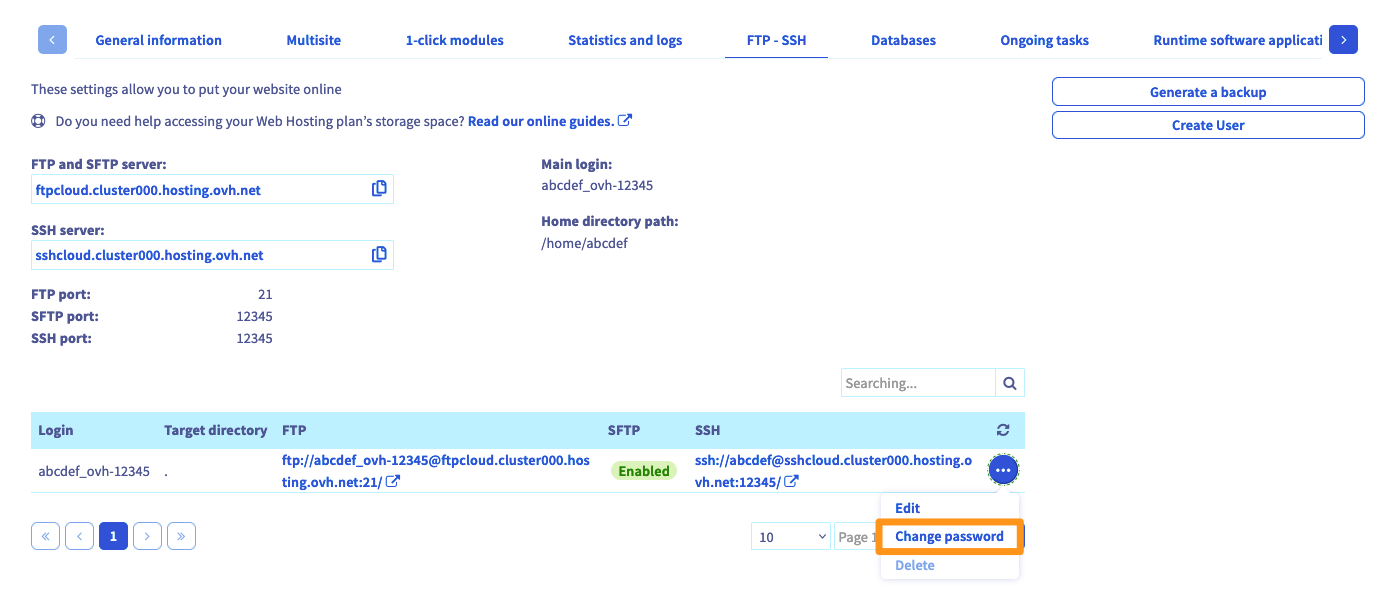
First, retrieve the information you need to connect. To do this, go to the FTP - SSH tab. If it does not appear in the list, first click the button with three bars. The information related to your storage space then appears. Locate the details listed in the table:
- SSH: The element that appears lets you retrieve two pieces of information.
- the server address: it starts after
ssh://and ends before the: - the connection port: the number is shown after the
:For example, you might find:ssh://sshcloud.cluster000.hosting.ovh.net:12345, sosshcloud.cluster000.hosting.ovh.netas the server address and12345as the connection port.
- the server address: it starts after
- Login: This is the main SSH username created on your hosting plan.
If you no longer know the password of the SSH user, click the ... button to the right of the relevant user in the table, then Change password.
Now, to connect via SSH, you need to use a terminal. This tool is installed by default on macOS and Linux. A Windows environment will require the installation of software such as PuTTY or the addition of the "OpenSSH" feature. As this procedure is specific to the operating system you use, we cannot detail it in this documentation.
Here is an example of a command line you can use. Replace the "sshlogin", "sshserver" and "connectionport" elements with the ones matching your own situation. Once the command is sent, you will be prompted to enter the password of the SSH user.
Step 4: preparing the Ruby environment
We will now prepare the Ruby environment needed to host our Camaleon CMS application. From the SSH connection opened on your Cloud Web, define the PATH and GEM_HOME environment variables.
You can make these changes persistent by adding the exports to the ~/.profile file:
Install the Ruby on Rails framework.
You can now move into the camaleon folder and create your project:
Step 5: installing and configuring Camaleon CMS
Edit the Gemfile to install Camaleon CMS (source: https://github.com/owen2345/camaleon-cms).
Install the prerequisites and dependencies.
Camaleon CMS uses execjs, which requires a JS runtime engine. We will use NodeJS 8 as the JS runtime engine.
Install Camaleon CMS (for the demo, we will use an SQLite database).
Step 6: restarting the Ruby daemon
To restart the Ruby daemon, go back to your . Go to the Multisite tab, click the ... button to the right of the relevant domain name, then click Restart.
Once this is done, the application will be accessible through the domain name chosen in your multisite configuration.
Congratulations, your website using Camaleon CMS is now available! All that is left is to configure it.
Step 7: using HTTPS
For added security on your website, you can set up an automatic HTTP to HTTPS redirection. To do this, while still in the camaleon folder, create a .htaccess file with the following content:
Conclusion
We have seen how to install a Ruby application on a Cloud Web hosting plan by following the various steps. All that is left is to use Camaleon CMS and publish your first content! You will find more documentation specific to Camaleon CMS and its features in the project's official documentation.
Go further
Migrating my website to OVHcloud
Installing your website with 1-click modules
Sharing your hosting plan between several websites
For specialised services (SEO, development, etc.), contact the OVHcloud partners.
If you would like assistance using and configuring your OVHcloud solutions, we invite you to consult our various support offers.
Join our community of users.