
Deploy a Palworld server on the Game Panel
Learn how to deploy a Palworld server on the OVHcloud Game Panel, monitor the installation, and connect from the game to start playing.
Objective
The OVHcloud Game Panel lets you deploy a Palworld server with automated installation and port configuration.
This guide explains how to deploy and connect to a Palworld server on the OVHcloud Game Panel.
Requirements
- A VPS or a dedicated server in your OVHcloud account with the Game Panel feature enabled.
- Access to the Game Panel. Refer to Log in to the Game Panel.
Our recommendations
Instructions
Step 1 — Access the Game Panel
Log in to your OVHcloud Game Panel. From the left-hand menu, go to the Game Servers section and click Add Game Server.
Step 2 — Create a Palworld server
Select Palworld from the game list. A configuration window opens.
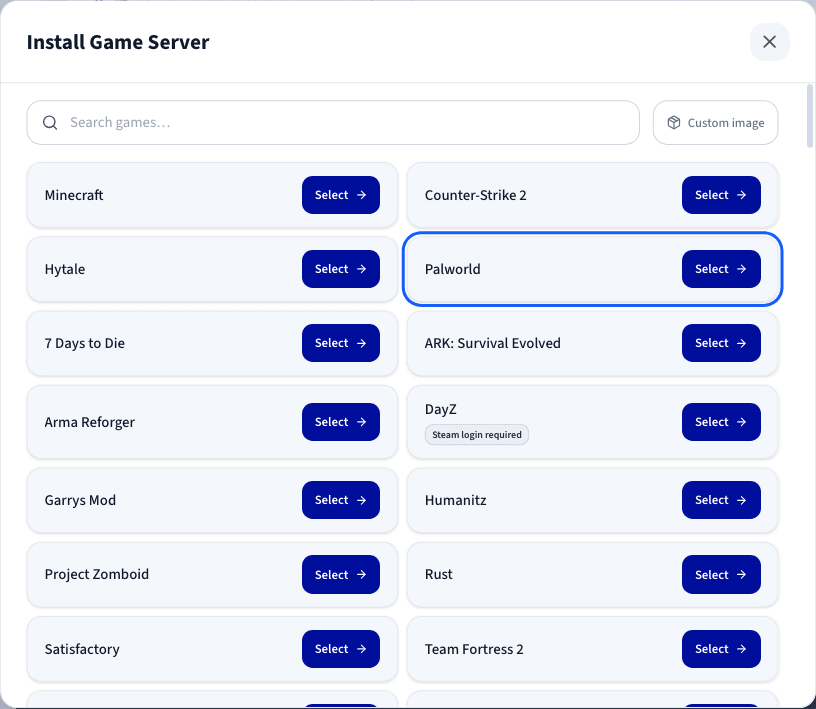
Step 3 — Configure the Palworld server
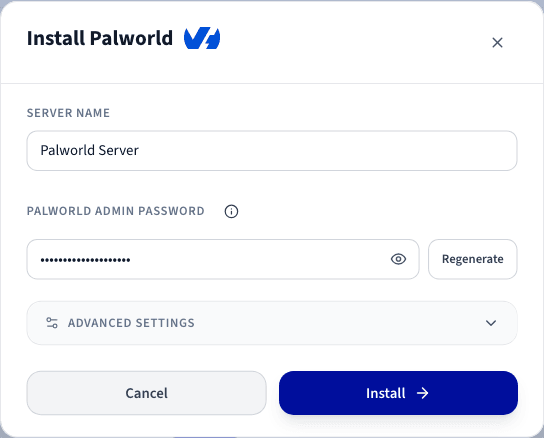
In this section, you can set a name for your server. An administrator password is also generated automatically. It can be used directly in the game to obtain administrator rights and run the associated commands.
Make sure you keep this administrator password in a secure place.
You can expand Advanced settings to adjust options such as ports binding and resource limits. The defaults are suitable for most game servers.
Step 4 — Launch the installation
Click Install to launch the installation. The deployment starts.
Step 5 — Monitor the installation
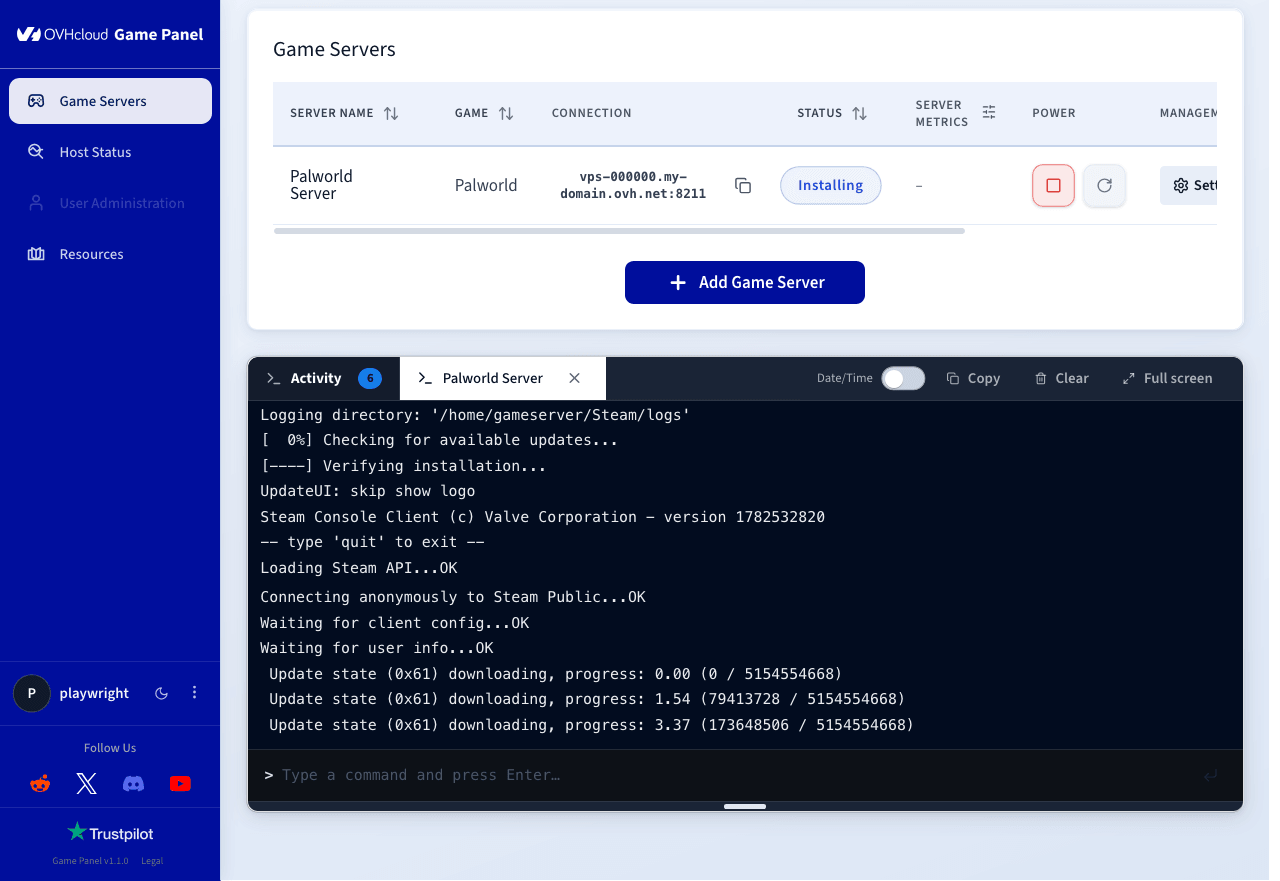
Click Log/Console to follow the installation progress in real time.
While the server is installing, the status displays Installing. You can track detailed progress in the logs panel.
Step 6 — Verify the server is running
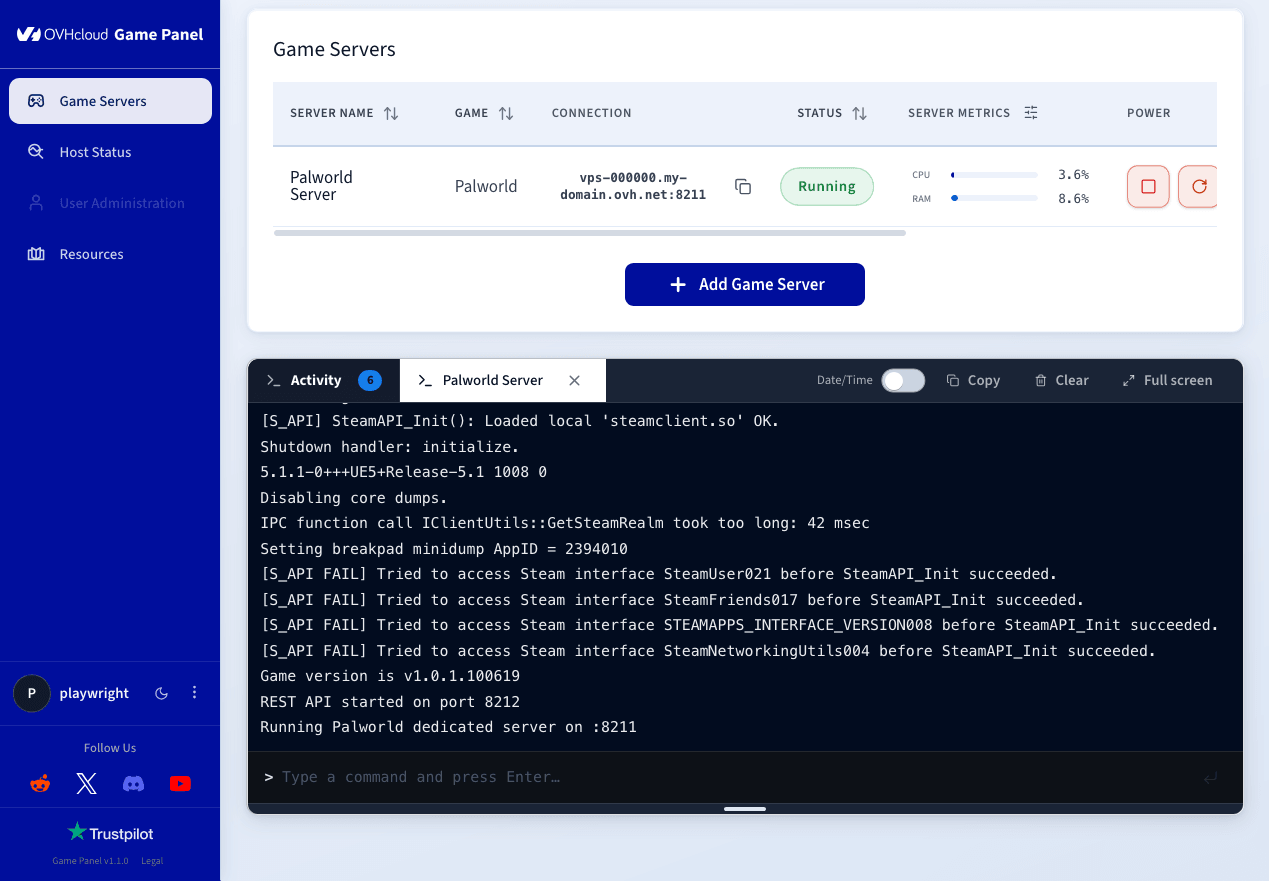
Confirm the server status is Running and that CPU and RAM activity is visible. You can use the Log/Console and Settings controls to manage the server.
Step 7 — Confirm installation is complete
Once the installation is finished, the server status changes to Running.
Step 8 — Retrieve connection information
Once your server status is Running, copy the IP address and port from the Connection column of the Game Servers list.
Step 9 — Join your server in Palworld
To join your server from the Palworld client:
- Open Palworld and click Join Multiplayer Game.
- In the input field at the bottom centre, paste the IP address and port from the Connection column.
- Click Connect.
Commands available with Palworld
With a Palworld server, you can run various commands directly from the input field at the bottom of the logs. Here are some of the available commands:
Forgotten the in-game administrator password? Click Settings, open the Game Config section, and change the password at the bottom of the page.
Update the server to a new game version
By default, the server does not update automatically when a new version is available, to avoid potential compatibility issues or interrupting ongoing games.
To enable automatic updates, click Settings, open the Game Config section, then enable the Update on start option at the bottom of the page (disabled by default). Save, then restart the server to apply the changes. The server will then automatically apply any new update that becomes available.
Go further
- Getting started with the Game Panel
- Manage users on the Game Panel
- Create and restore backups on the Game Panel
Join our community of users.