
How to modify the root folder of an existing website?
Find out how to modify the root folder declared for an existing website on your web hosting plan from your OVHcloud Control Panel
Objective
You can host several websites on the same web hosting plan, even if the domain names are not registered with OVHcloud. You can also associate one or more domain names or subdomains with the same website.
When using your services, you may need to:
- Replace the entire content of an existing website, without removing it from your web hosting plan. All done without any access interruption and in complete transparency for your website visitors.
- Install a 1-click module or another CMS to replace the content of an existing website, without deleting the old content from your web hosting plan. In this case, you then need to build the different pages of your new website via your web browser.
- Reorganise the root folder names of your websites in your web hosting plan's storage space without cutting access to your different websites.
Find out how to modify the root folder declared for an existing website on your web hosting plan from your OVHcloud Control Panel.
If you have not yet created the website concerned on your web hosting plan, refer directly to this guide.
If your website has a Git configuration, first refer to our guide on Configuring and using Git with your OVHcloud web hosting plan to remove the Git association before continuing. The root folder modification is unavailable if your website is configured with Git. If that were the case, changing the root folder would disrupt the Git association.
Requirements
- A compatible OVHcloud web hosting plan.
- One or more domain names.
OVHcloud Control Panel Access
- Direct link:
- Navigation path:
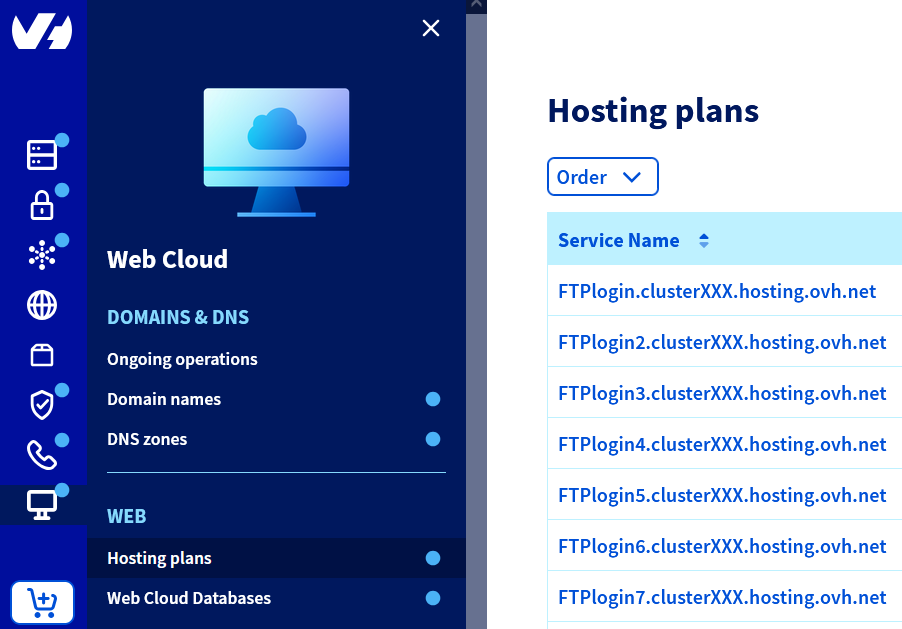
Web Cloud>Hosting plans> Select your web hosting plan
Instructions
This guide exclusively covers the actions to perform from your .
Except in the case where you want to install a 1-click module to build the website gradually, you will first need to:
- Create the new root folder in the storage space of your web hosting plan.
- Place the entire new content of your website inside this new folder.
- If the new content of your website uses a database, you will also need to create a database, then import the content related to this database into it.
- Place the database access credentials in the file containing the database connection information. This file must already be present in the new root folder.
Without these actions, your website display will be interrupted.
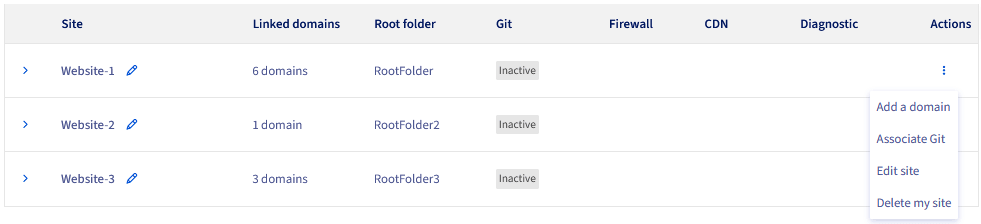
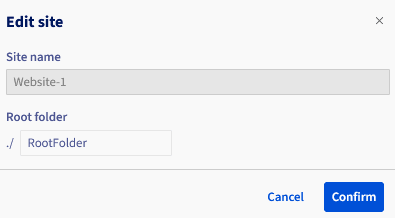
This guide only describes the procedure for modifying, from your OVHcloud Control Panel, the root folder initially defined for your website. This action is required so that the website displays the content of the new folder, replacing the old one.
Click on the tabs below to view each of the 4 steps.
Go to the page, then select the web hosting plan concerned.

Go further
For specialised services (SEO, development, etc.), contact OVHcloud partners.
If you would like assistance using and configuring your OVHcloud solutions, please refer to our support offers.
Join our community of users.