Restoring your Web Hosting plan’s storage space
Find out how to restore a file or an entire storage space from your Web Hosting plan
Objective
With an OVHcloud Web Hosting plan, you get a storage space to host your websites on. A range of actions (e.g. deleting or editing a file) could make your website inaccessible. As a result, you may find that you need to restore all of the data stored on your storage space, or simply a file stored on it.
Backups offered by OVHcloud for shared hosting are non-contractual. We offer them in addition to your services to help you in urgent situations. We recommend that you regularly perform your own security backups to avoid any data loss.
When you do a security backup for your site and you are using a database, also create a backup of your database. Please refer to our guide on retrieving the backup of a Web Hosting plan’s database.
Find out how to restore a file or an entire storage space from your Web Hosting plan.
Requirements
- A Web Hosting plan (please note that this does not work with Cloud Web).
- Depending on which method you use, you must be able to manage the Web Hosting plan from the , or have the FTP user password required to access your storage space.
OVHcloud Control Panel Access
- Direct link:
- Navigation path:
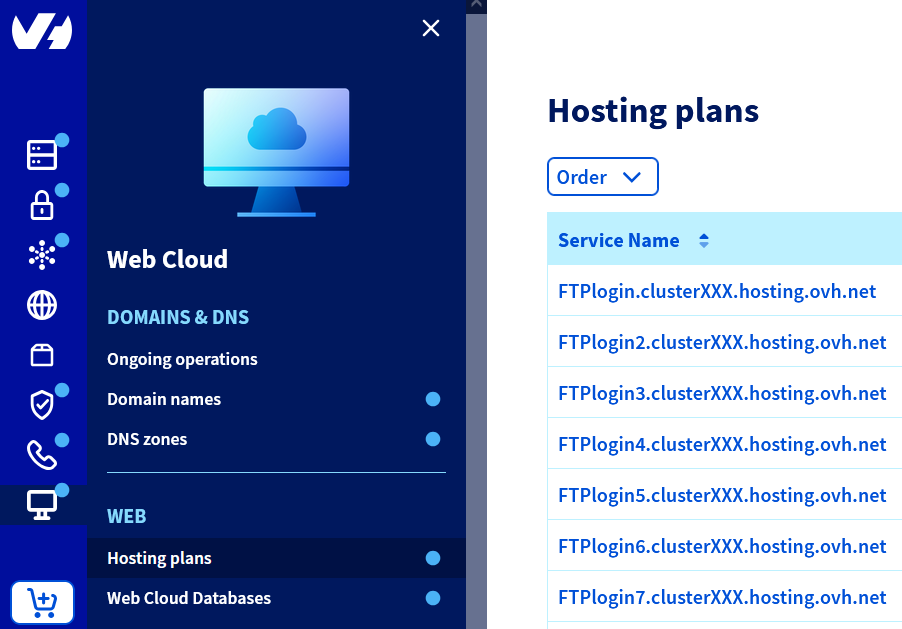
Web Cloud>Hosting plans> Select your web hosting plan
Instructions
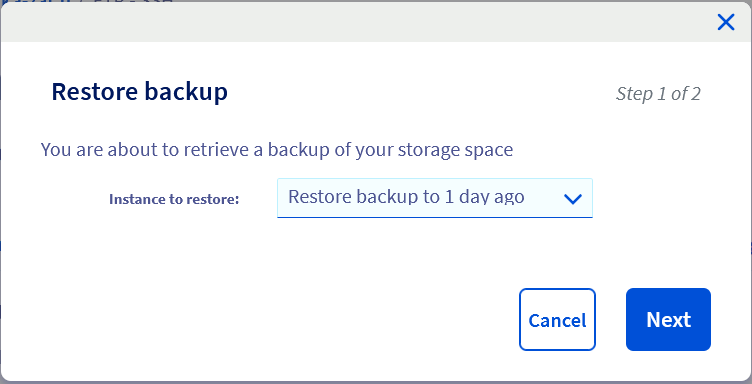
Before you begin, ensure that you can use the restore dates offered to restore your Web Hosting plan’s storage space back to your chosen date:
- Same day, at 00:01 (UTC+1)
- One day ago, at 00:01 (UTC+1)
- Two days ago, at 00:01 (UTC+1)
- Last Sunday, at 01:00 (UTC+1)
- Sunday two weeks ago, at 01:00 (UTC+1)
If you want to retrieve a backup from an earlier period, OVHcloud will not be able to provide you with this. We advise taking personal backups of your website in advance, and using those if you would like an earlier backup.
You also need to decide which restore method you will use:
Once you are ready to do so, carry on reading the section of this guide that is relevant to the restore method you have chosen.
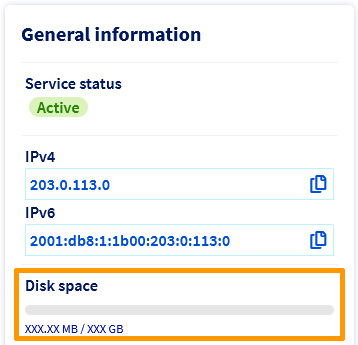
Regarding the restore from OVHcloud Control Panel method, check that at least half of the total FTP storage space included with your hosting plan is still available. For example, if you have a Performance hosting plan, 250 GB must still be available out of the 500 GB provided.
This is because our robots install the backup on your hosting before deleting the FTP content which will be replaced by the restoration.
To check the quota used on your web hosting, click on the tabs below to view each of the 2 steps.
Go to the page, then select the web hosting plan concerned.
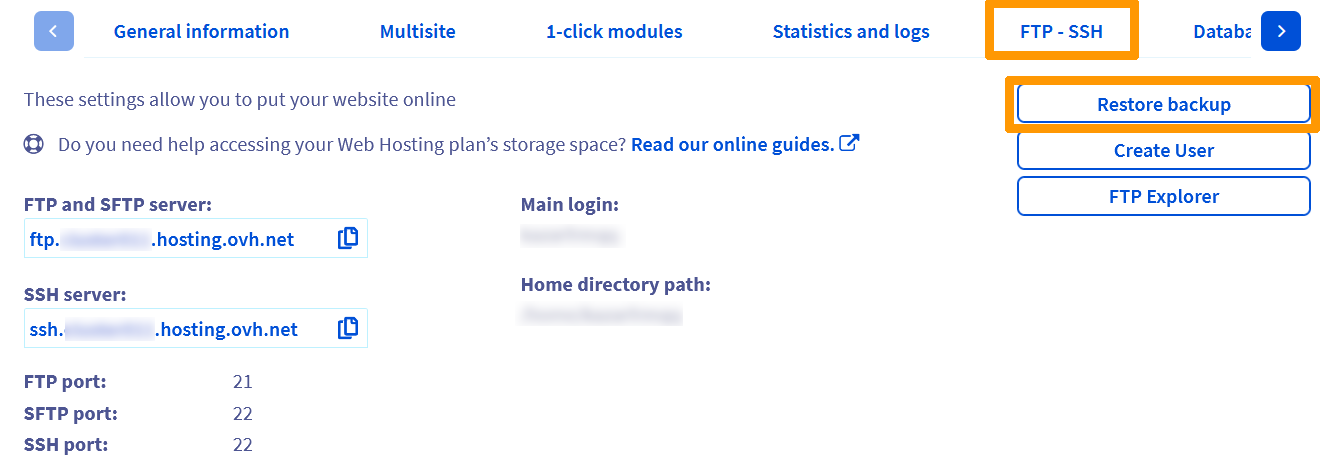
Restore the storage space via the OVHcloud Control Panel
This restoration method is unavailable if your hosting plan has been placed in "maintenance" mode by our administrators, or if it does not have FTP access rights (chmod rights) following an action on your part.
This method only works if you have chmod root access for your hosting plan in 705.
Website in maintenance mode
To determine whether your website has been placed in "maintenance" mode, please refer to our guide What do I do if I have a 403 forbidden page?.
In this case:
- Our teams send an email to the hosting administrator contact.
- The “maintenance” status will appear in your .
- The hosted site(s) will display a "403 Forbidden" page.
Click on the tabs below to view each of the 5 steps.
Go to the page, then select the web hosting plan concerned.
Automatic restoration can take from a few minutes to a few hours. If it takes more than 24 hours, contact OVHcloud support.
Restore a file using a software program or interface
There are several stages to this procedure. Ensure that you have your FTP user password, which provides you with access to yout storage space.
This solution requires knowledge of the software or interface you would like to use. We have provided general information below on how to proceed. We recommend contacting a specialist provider and/or getting in touch with the publisher of the interface or software if you encounter any difficulties. We will not be able to assist you ourselves.
1 - Decide on the software or interface you want to use
First of all, decide which software or interface you would like to use in order to connect to your storage space backup. If you have already decided on one, you can move straight to step 2. Otherwise, we recommend using one of the following two solutions:
-
Using FileZilla software. You will need to download the software in advance, from the publisher’s website. You can learn how to use it by reading our guide on Using FileZilla. Please note that our guides cannot be used as a substitute for the publisher’s official documentation.
-
Using Cyberduck software. You will need to download the software in advance, from the publisher’s website. You can learn how to use it by reading our guide on Using Cyberduck. Please note that our guides cannot be used as a substitute for the publisher’s official documentation.
Once you are ready to start making changes, continue to the next step.
2 - Connect to your backup
To access the backup data you would like to restore, you will need to log in to your storage space via the interface or software you have selected. To do this, you will need to have the FTP username, its password and your FTP server’s host name.
You can find this information in our guide "Logging in to your web hosting plan's FTP storage space".
If you no longer have the FTP user password, please refer to our guide "Changing an FTP user password".
You will need to enter your primary username (or FTP login) with a suffix determining the backup you want to connect to. Please use the information below to find out how to access the backup you want:
Please ensure that you replace ‘ftpuser’ with your own primary FTP username in the above examples. Keep the suffix defining the backup date you would like to access.
The method for connecting to your storage space will differ depending on the interface or software you are using.
Backups are only accessible via an FTP connection.
3 - Gather the files you want to restore
Once you have connected, gather the files you want to restore. To do this, explore the content until you find them, then retrieve them. The method you need to use will differ depending on the software or interface you are using.
Before you move on to the next step, ensure that you have gathered all the files you would like to restore, then disconnect from your storage space.
If you use a program to log in to your FTP storage space, we recommend that you consult the official documentation for your program to make the changes correctly.
4 - Restore the files
Once you have got the files you need to restore, connect to your storage space again. This time, however, do not add the suffix to connect but write only the FTP username. By not entering this suffix, you will connect to the current content on your storage space, and not a backup from an earlier date.
Once you have connected, you can now restore the files you want. To do this, explore the content of your storage space until you find them, then download them, overwriting the old files.
If you use a program to log in to your FTP storage space, we recommend that you consult the official documentation for your program to make the changes correctly.
Go further
Using FileZilla software with your Web Hosting plan
Retrieving the backup of a Web Hosting plan’s database
For specialised services (SEO, development, etc.), contact OVHcloud partners.
If you would like assistance using and configuring your OVHcloud solutions, please refer to our support offers.
Join our community of users.