---
title: "MX Plan - Configure your email account on Gmail for Android"
description: "Find out how to configure an MX Plan email address on Android, via the Gmail app"
url: https://docs.ovhcloud.com/en/guides/web-cloud/email-and-collaborative-solutions/mx-plan/how-to-configure-android
lang: en
lastUpdated: 2024-10-01
---
# MX Plan - Configure your email account on Gmail for Android
## Objective
You can configure MX Plan email addresses on email clients, if they are compatible. By doing so, you can use your email address through your preferred device. In this guide, we will detail the process of configuring an MX Plan email address in the Gmail application on Android devices.
**Find out how to configure an MX Plan email address on Android, via the Gmail app.**
:::warning
OVHcloud provides services which you are responsible for with regard to their configuration and management. You are therefore responsible for ensuring they function correctly.
We have provided you with this guide in order to help you with common tasks. Nevertheless, we recommend contacting a [specialist provider](https://partner.ovhcloud.com/en-gb/directory/) and/or the service’s publisher if you encounter any difficulties. We will not be able to assist you ourselves. You can find more information in the “Go further” section of this guide.
:::
## Requirements
- an MX Plan email address (included in the MX Plan solution, or in an [OVHcloud web hosting plan](https://www.ovhcloud.com/en-gb/web-hosting/)).
- You need to have the Gmail app installed on your device. You can install it from the Google Play Store if it is not already present.
- the required credentials for the email address you would like to configure
:::info
This guide was written using a device that uses Android version 13.
:::
## Instructions
### How to add your email account
On your device’s homepage, open the `Gmail
` app.
Adding an account will be done differently **if no account is set** up, or **if an account has already been set up**. Select the tab corresponding to one of the two situations mentioned:
**First configuration**
| | |
| ----------------------------------------------------------------------------------------------------------------------------------------------------------------------------- | -------------------------------------------------------- |
| 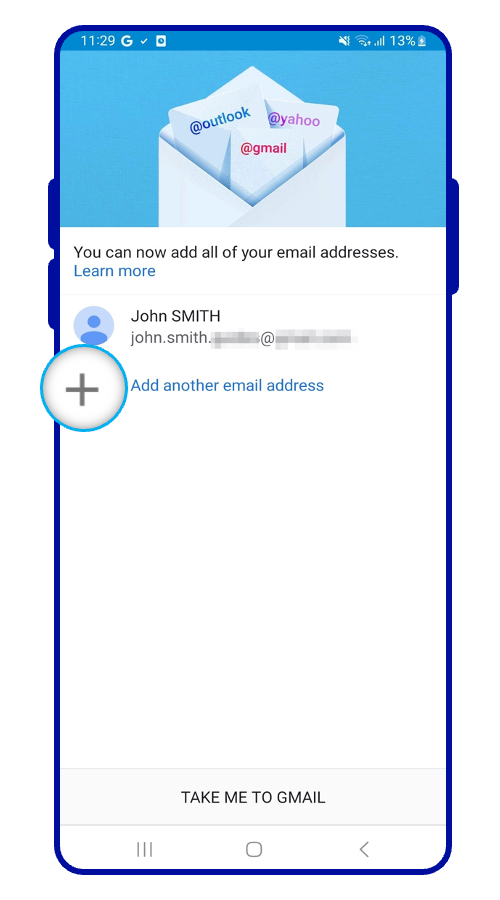 | Select
 Add Email Address |
**Existing configuration**
| | |
| -------------------------------------------------------------------------------------------------------------------------------------------------------------------------------- | ---------------------------------------------------------------------------------------------------------------------------------------------------------------------------- |
| 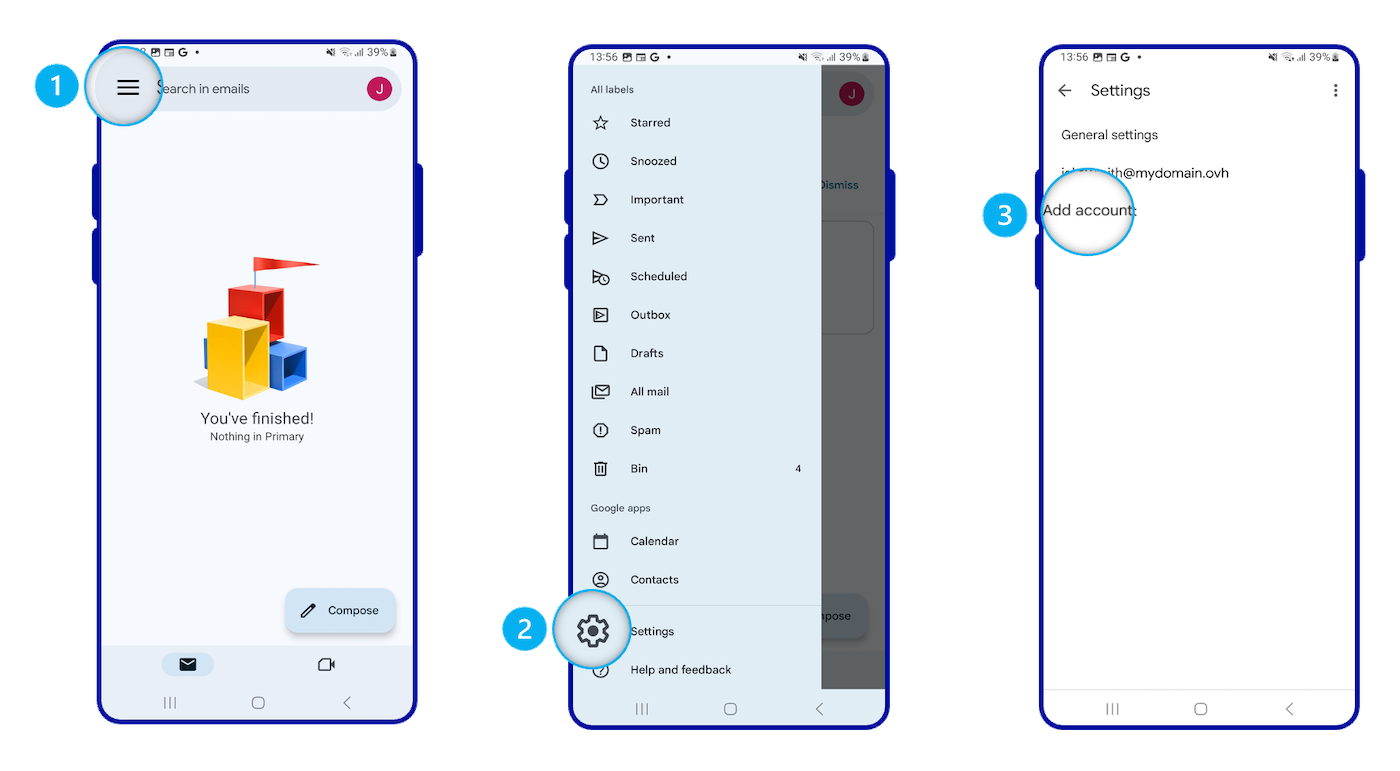 | 1. Go to the menu at the top left of the screen
2.Select Settings
3.Select Add Account |
Follow the next steps in the configuration process by browsing the tabs below:
**Step 1**
| | |
| -------------------------------------------------------------------------------------------------------------------------------------------------------------------------- | ----------------------------------------------------------------------------------- |
| 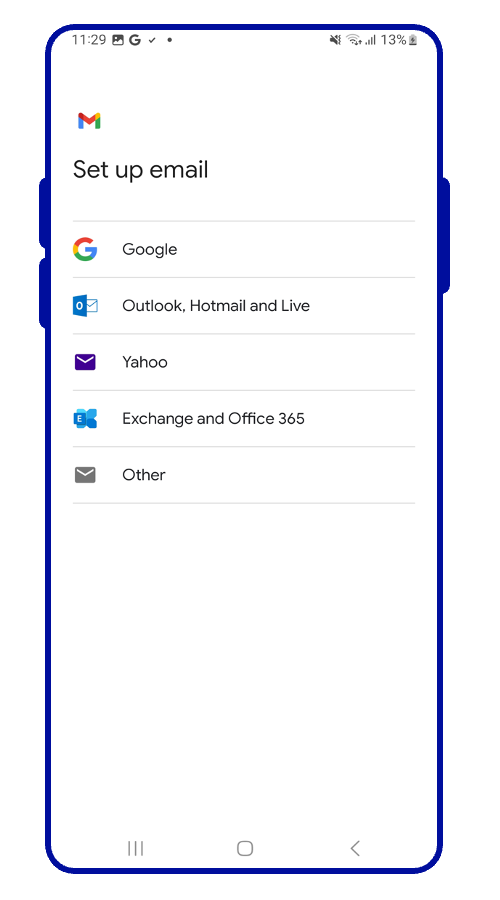 | From the menu of email account types, select
 Other. |
**Step 2**
| | |
| -------------------------------------------------------------------------------------------------------------------------------------------------------------------------- | ------------------------- |
| 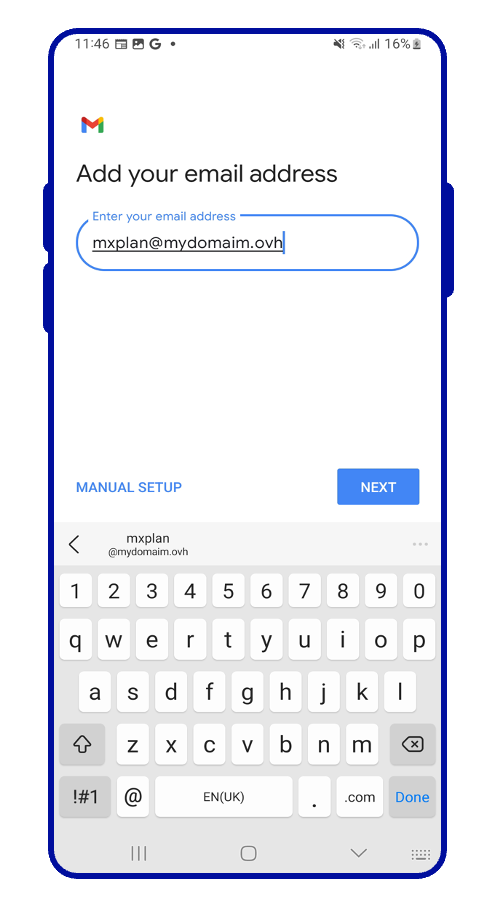 | Enter your email address. |
**Step 3**
| | |
| -------------------------------------------------------------------------------------------------------------------------------------------------------------------------- | ----------------------------------------------------------------------------------------------------------------------------------------------------------------------------------------------------------------------------------------------------- |
|
| Enter your email address. |
**Step 3**
| | |
| -------------------------------------------------------------------------------------------------------------------------------------------------------------------------- | ----------------------------------------------------------------------------------------------------------------------------------------------------------------------------------------------------------------------------------------------------- |
| 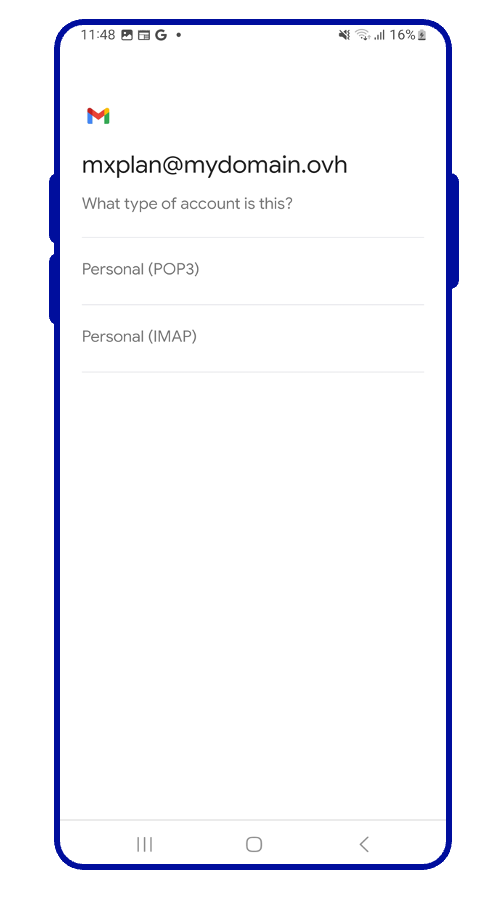 | Select the protocol for receiving emails. We recommend selecting
 Personal (IMAP)
You can find [more details on POP and IMAP](#popimap) protocols at the end of this guide to understand their differences. |
**Step 4**
| | |
| -------------------------------------------------------------------------------------------------------------------------------------------------------------------------- | ------------------------------------------ |
| 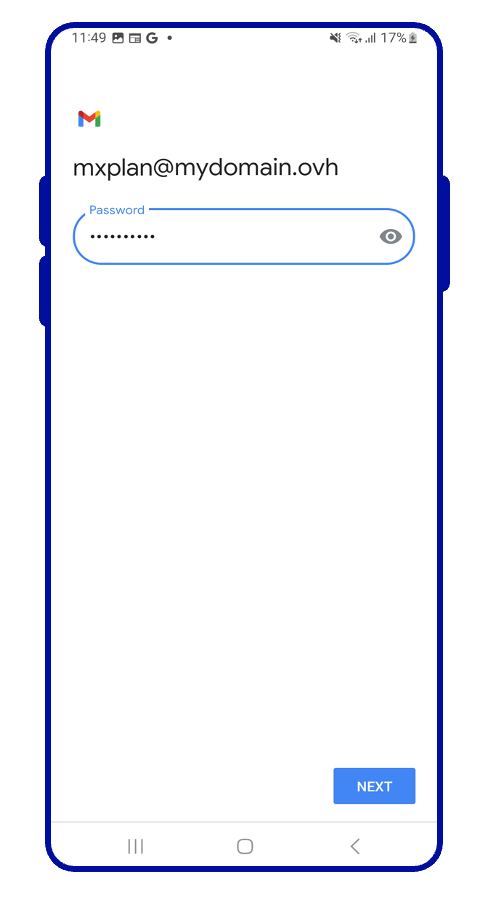 | Enter the password for your email address. |
**Step 5**
| | |
| -------------------------------------------------------------------------------------------------------------------------------------------------------------------------- | --------------------------------------------------------------------------------------------------------------------------------------------------------------------------------- |
|
| Enter the password for your email address. |
**Step 5**
| | |
| -------------------------------------------------------------------------------------------------------------------------------------------------------------------------- | --------------------------------------------------------------------------------------------------------------------------------------------------------------------------------- |
| 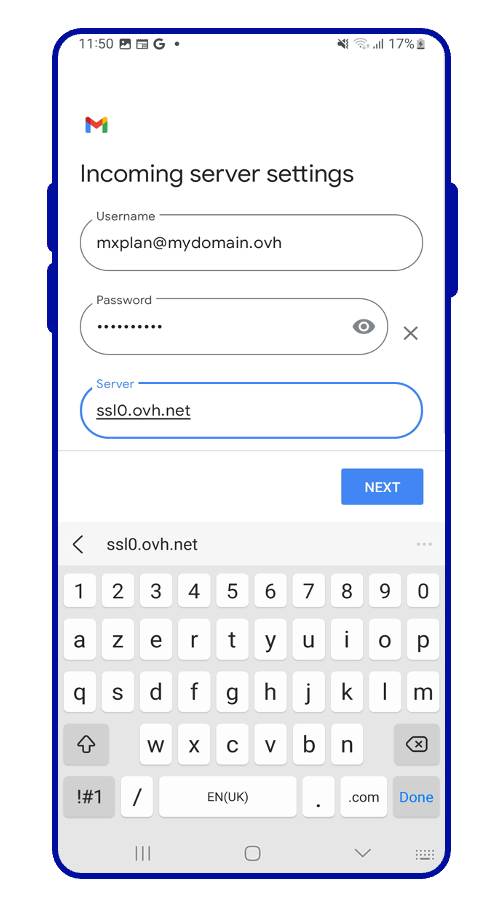 | Complete the "**Incoming server settings**"
- **Username**: Your full email address
- **Password**: Your email password
- **Server**: enter **ssl0.ovh.net** |
**Step 6**
| | |
| -------------------------------------------------------------------------------------------------------------------------------------------------------------------------- | -------------------------------------------------------------------------------------------------------------------------------------------------------------------------------------- |
| 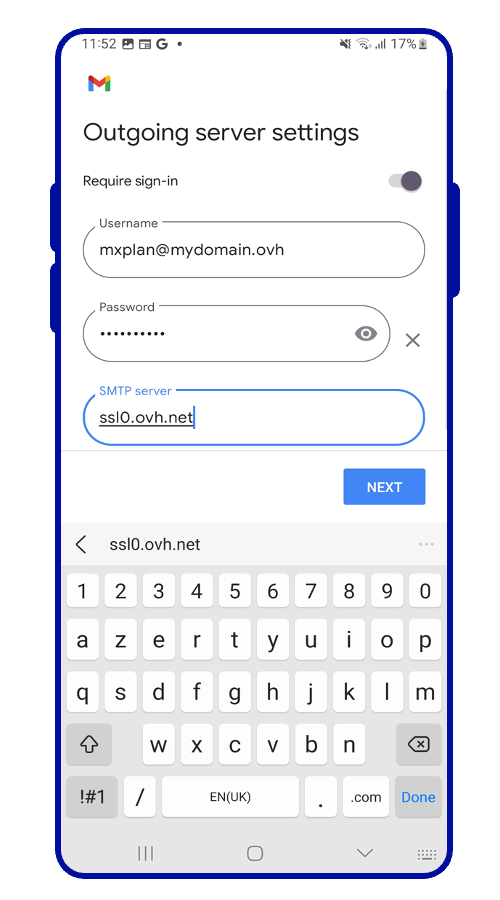 | Complete the "**Outgoing server settings**"
- **Username**: Your full email address
- **Password**: Your email password
- **SMTP server**: enter **ssl0.ovh.net** |
**Step 7**
| | |
| -------------------------------------------------------------------------------------------------------------------------------------------------------------------------- | --------------------------------------------------------- |
| 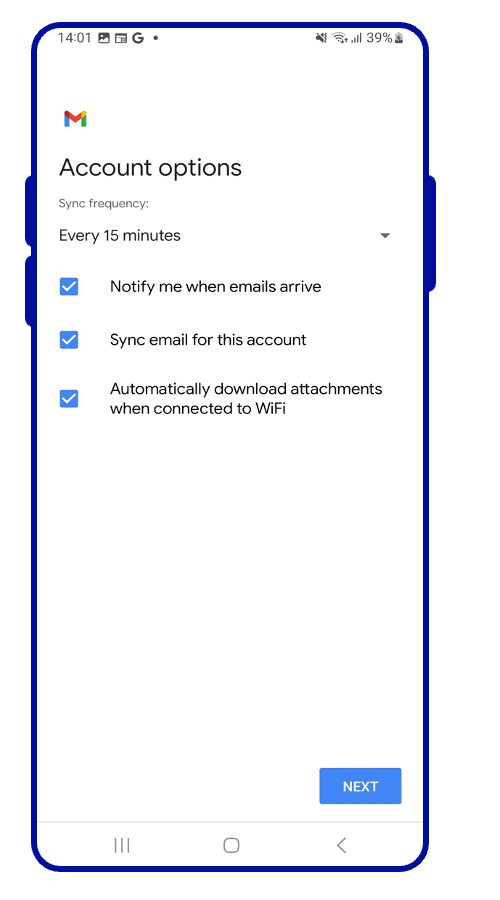 | Choose how often you want your emails to be synchronized. |
**Step 8**
| | |
| -------------------------------------------------------------------------------------------------------------------------------------------------------------------------- | ---------------------------------------------------------------------------------------------------------------- |
|
| Choose how often you want your emails to be synchronized. |
**Step 8**
| | |
| -------------------------------------------------------------------------------------------------------------------------------------------------------------------------- | ---------------------------------------------------------------------------------------------------------------- |
| 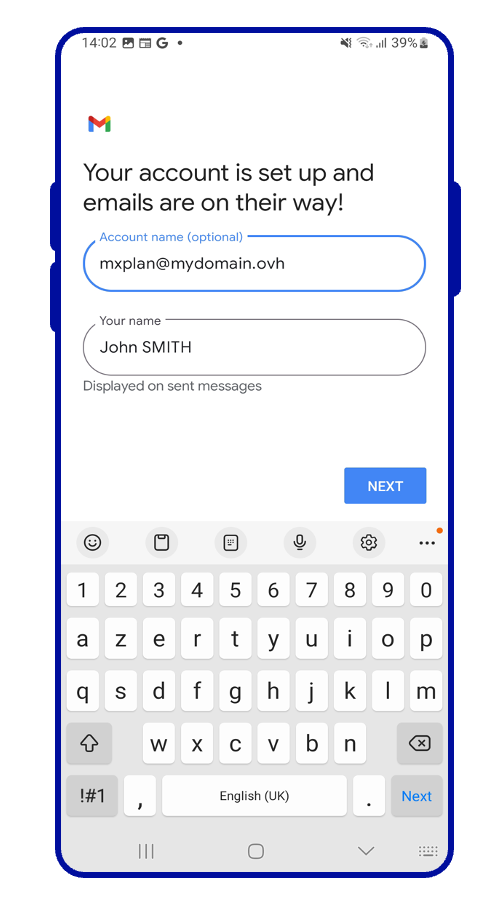 | Determine the display name of your email address in the Gmail app, then tap
 Next |
Once you have configured your email address, you can start using it! You can now send and receive messages from your Gmail application.
:::tip
OVHcloud offers a web application that allows you to access your email address from a web browser, at [Webmail](https://www.ovhcloud.com/en-gb/mail/). You can log in using your email credentials.
:::
### POP, IMAP and SMTP settings
When you choose your account type, we recommend using **IMAP** to receive emails. However, you can select **POP**. To understand how they work, please refer to our section [“POP or IMAP, what is the difference?”](#popimap)
- **For POP configuration**
| Information | Description |
| ------------- | ---------------------------------------- |
| Username | Enter the **full email address** |
| Password | Enter the password for the email address |
| POP server | ssl0.ovh.net |
| Port | 995 |
| Security type | SSL/TLS |
- **For IMAP configuration**
| Information | Description |
| ------------- | ---------------------------------------- |
| Username | Enter the **full email address** |
| Password | Enter the password for the email address |
| POP server | ssl0.ovh.net |
| Port | 993 |
| Security type | SSL/TLS |
For sending emails, if you need to enter the **SMTP** settings manually in your account preferences, you will find the settings below:
- **SMTP configuration**
| Information | Description |
| ------------- | ---------------------------------------- |
| Username | Enter the **full email address** |
| Password | Enter the password for the email address |
| POP server | ssl0.ovh.net |
| Port | 465 |
| Security type | SSL/TLS |
### POP or IMAP, what's the difference? [](#)
When you set up your email address manually, your email client asks if you want to use **POP** (**P**ost **O**ffice **P**rotocol) or **IMAP** (**I**nternet **M**essage **A**ccess **P**rotocol). To understand this properly, you will need to configure your email address to include POP and IMAP protocols.
When you configure your mail client, you must enter the information from the **incoming server** to receive the emails, and the **outgoing server** to send the emails. To send emails, there is no choice, the **SMTP** (**S**imple **M**ail **T**ransfer **P**rotocol) is used. For the reception, you will have the choice between **POP** or **IMAP**.
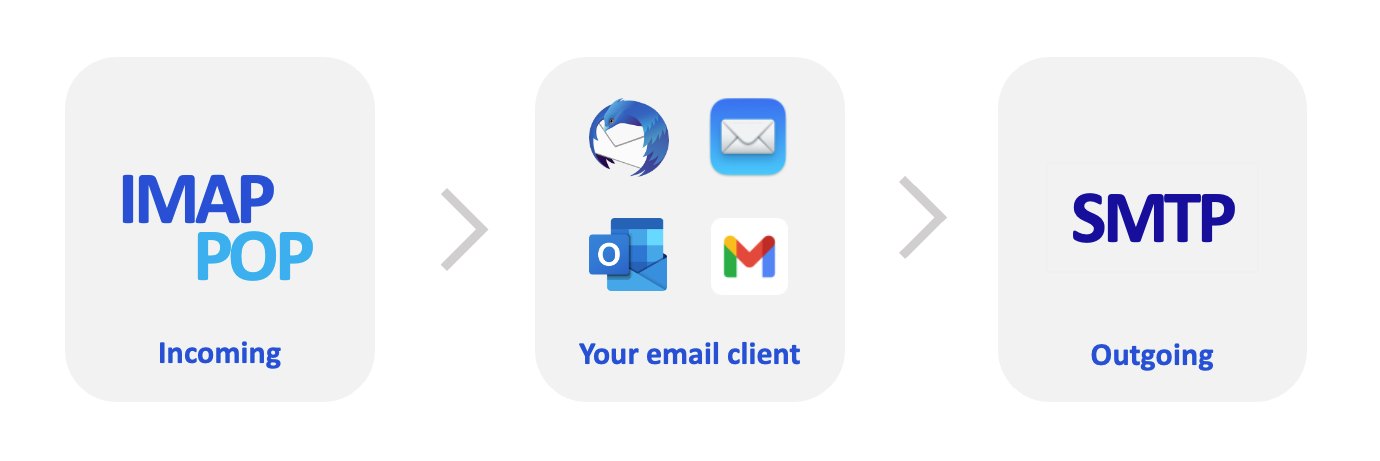
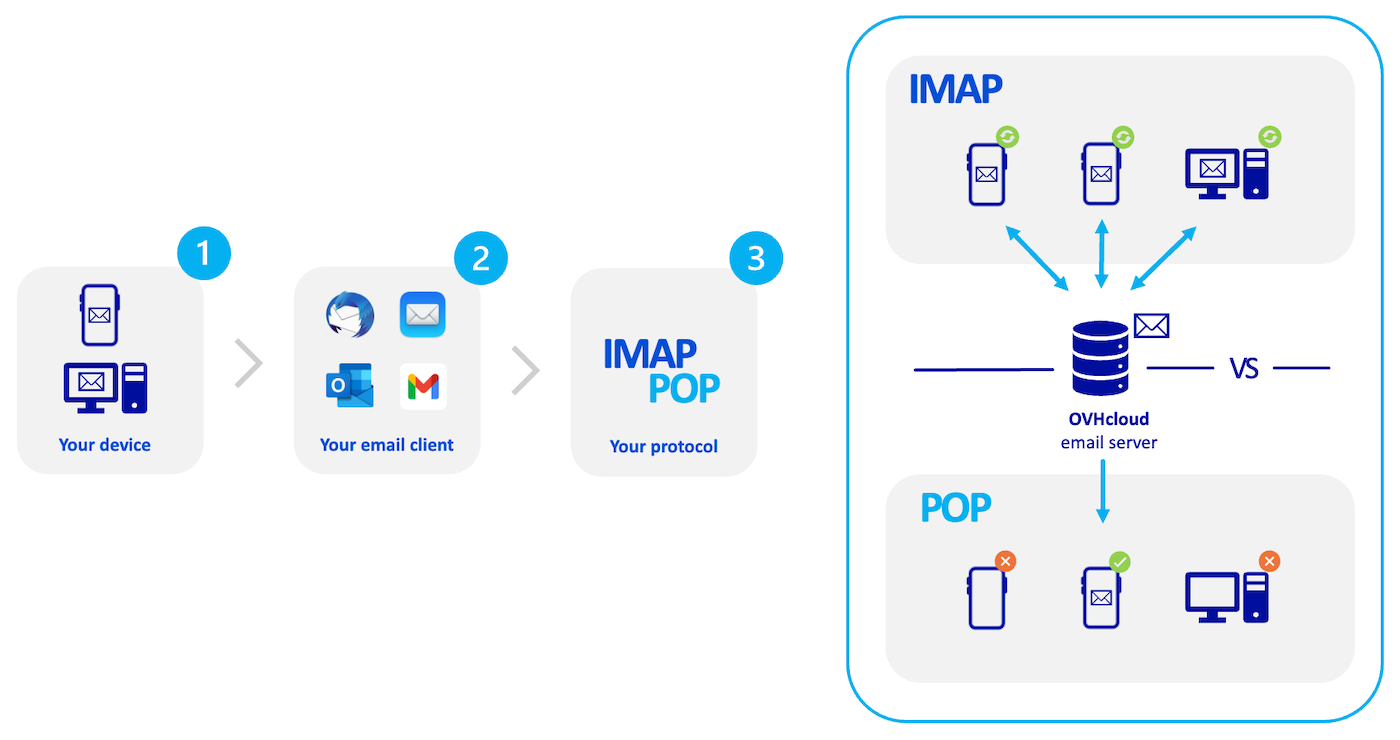
To understand the difference between POP and IMAP, we will break down the elements that make up the processing of your incoming emails:
1. **Your device**: a computer, smartphone or tablet. This is your consultation support.
2. **Your email client**: software or application dedicated to managing your emails. Your choice will determine the level of usability and functionality you will need to view your emails.
3. **The receiving protocol**: a choice that determines how you check emails on your device. This affects other devices that access the same email account.
- **IMAP**: Your email client queries the email server and downloads the emails to your device. When you view an unread email, the server marks it as “read” by default. Other devices configured in IMAP will be able to check this status and view this email until it has been deleted on one of the devices.
- **POP**: Your email client requests the email server and downloads the emails to your device. By default, once the email is downloaded to your device, the message is deleted from the server. As a result, other devices connected to this email address will not be able to view this email.
:::info
This description is a summary, it represents the standard operation of these two protocols. You can configure the POP so that emails are not deleted when you check your emails. The goal here is to describe how these two protocols work natively and avoid any additional steps to match your needs.
:::
## Go further
:::info
For more information on setting up an email address from the Gmail app on Android, see the [Google Help Center](https://support.google.com/mail/answer/21289?hl=en\&co=GENIE.Platform%3DAndroid\&oco=1#zippy=%2Cadd-an-account).
:::
[Configuring an Email Pro account on Android via the Gmail app](/en/guides/web-cloud/email-and-collaborative-solutions/email-pro/how-to-configure-android.md)
[Configuring an Exchange account on Android via the Gmail app](/en/guides/web-cloud/email-and-collaborative-solutions/microsoft-exchange/how-to-configure-android.md)
Join our [community of users](https://community.ovhcloud.com/community/en).