Getting started with the Web Cloud Databases service
Objective
The Web Cloud Databases solution provides a database instance with dedicated and guaranteed resources, offering performance and flexibility. By default, your Web Cloud Databases solution is linked to the OVHcloud web hosting network. You can also link it to any other network via a list of authorised IP addresses.
Find out how to get started with the Web Cloud Databases service.
Requirements
- A Web Cloud Databases instance (included in a Performance web hosting plan).
OVHcloud Control Panel Access
- Direct link: Web Cloud Databases
- Navigation path:
Web Cloud>Web Cloud Databases> Select your database service
Instructions
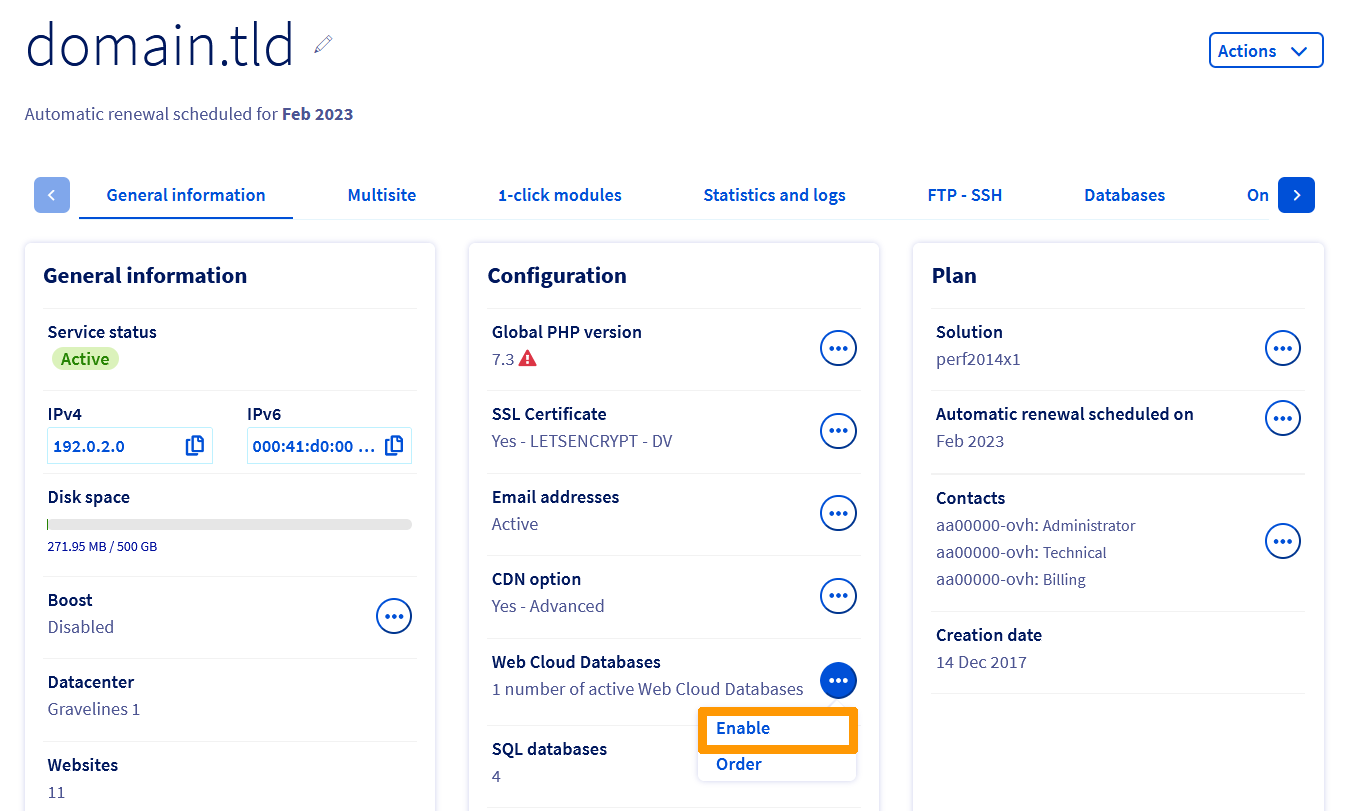
Activating your Web Cloud Databases server included with your web hosting plan
If your hosting plan includes the Web Cloud Databases option, click on the tabs below to view each of the 3 steps.
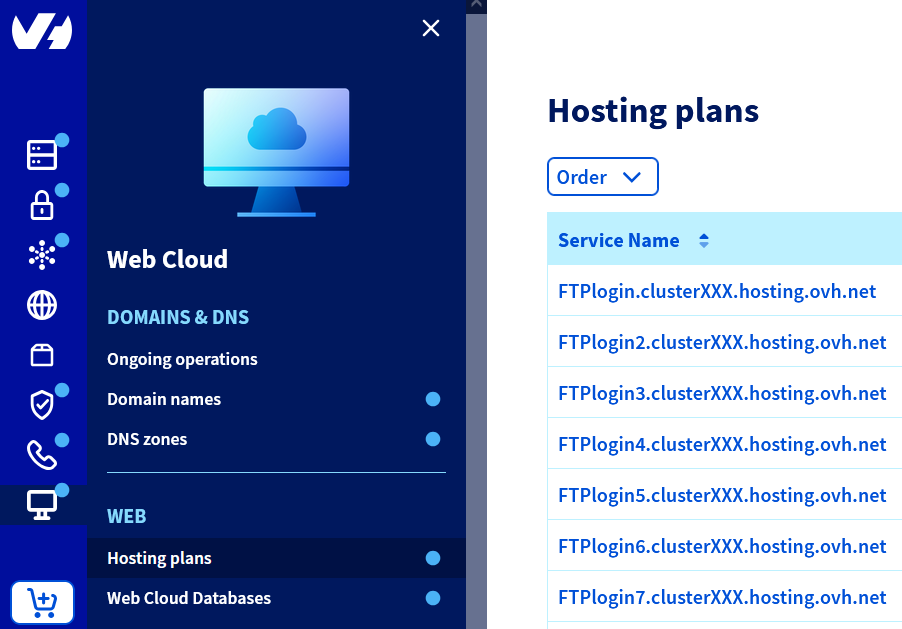
Go to the Hosting plans page, then select the web hosting plan concerned.
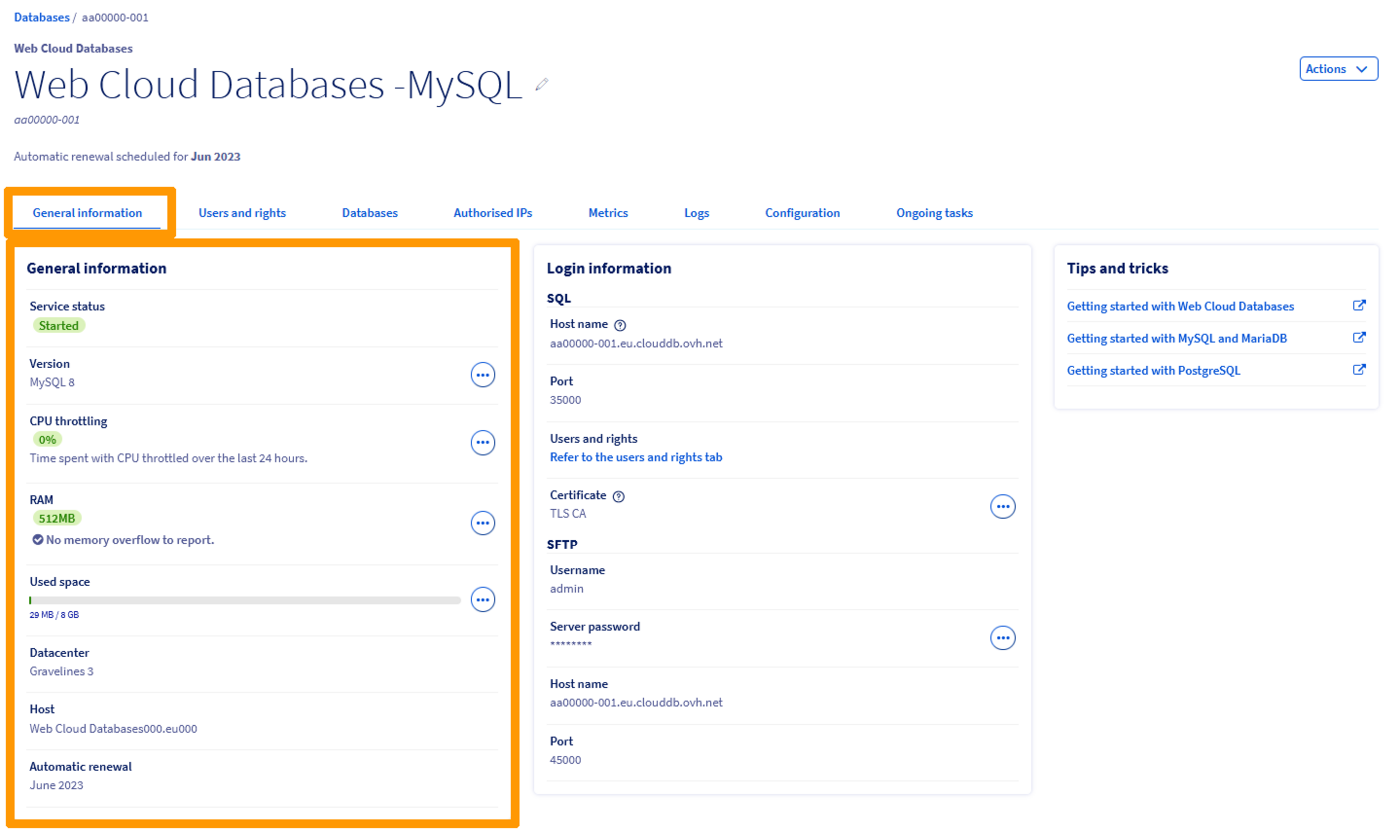
Viewing the general information of the instance
Click on the tabs below to view each of the 2 steps.
Go to the Web Cloud Databases page, then select the solution concerned.
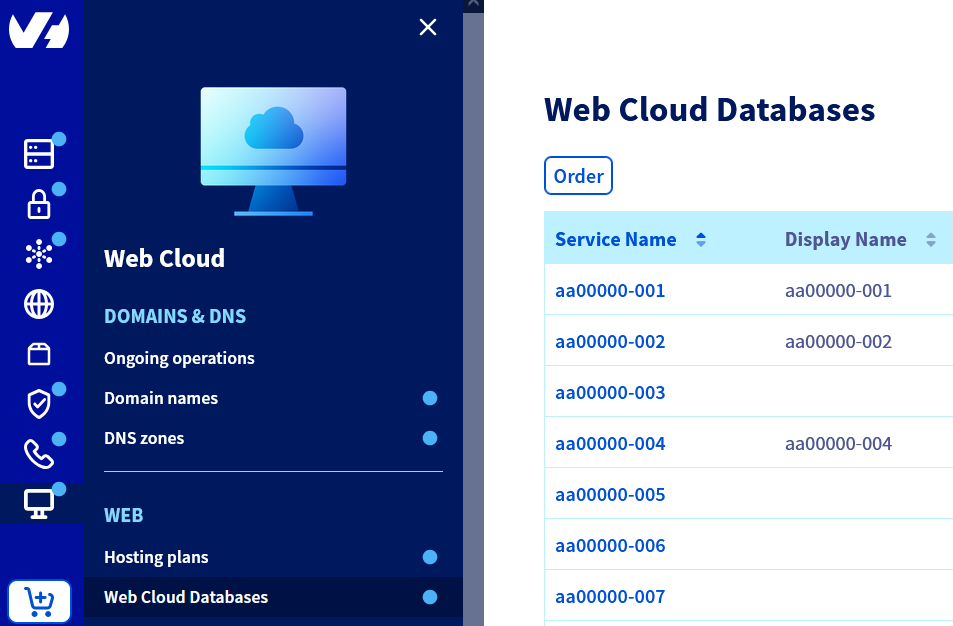
The name of the Web Cloud Databases service in your OVHcloud Control Panel contains part of your customer reference and ends with three digits (001 for the first Web Cloud Databases service installed, 002 for the second, etc.).
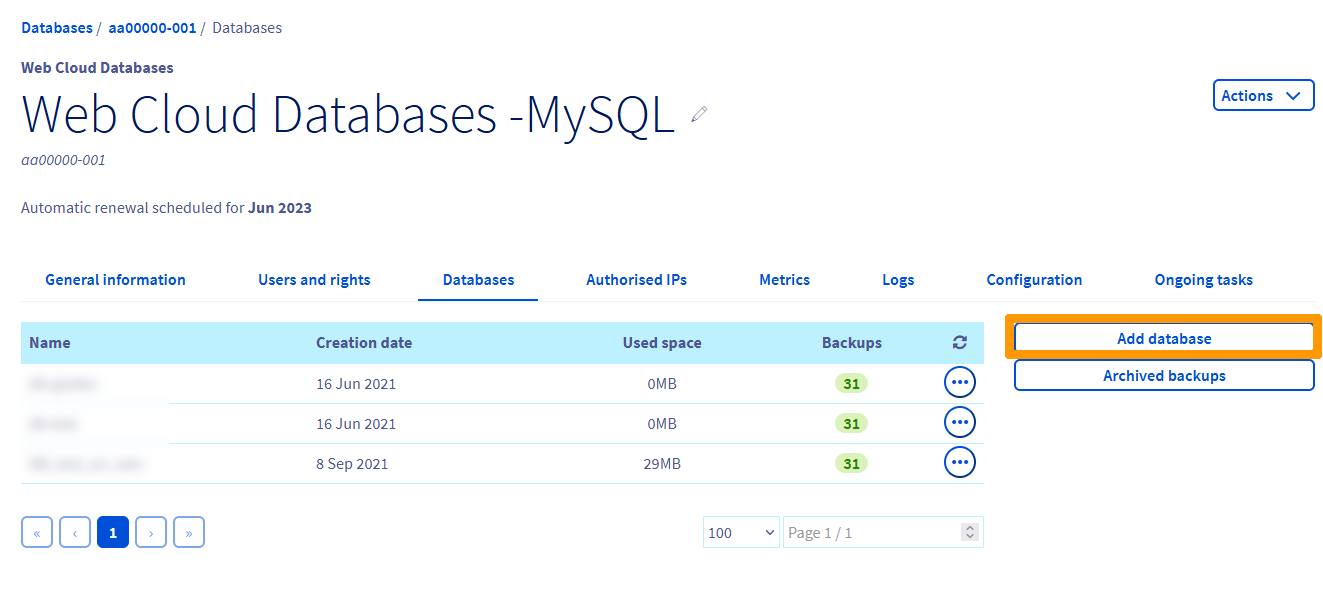
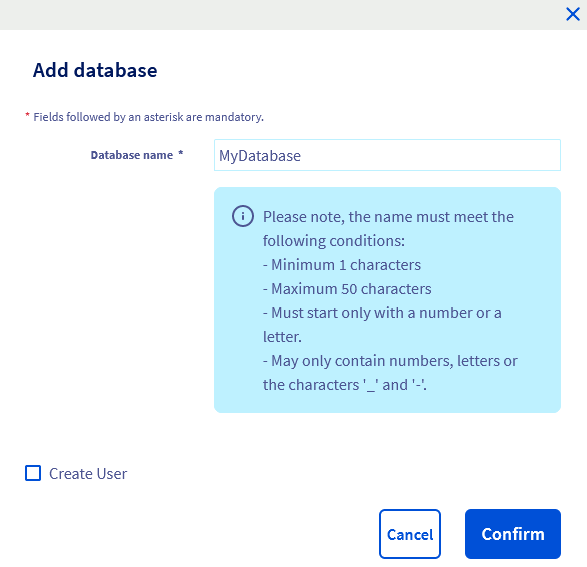
Creating a database
This step does not apply to the Redis database system.
Click on the tabs below to view each of the 4 steps.
Go to the Web Cloud Databases page, then select the solution concerned.
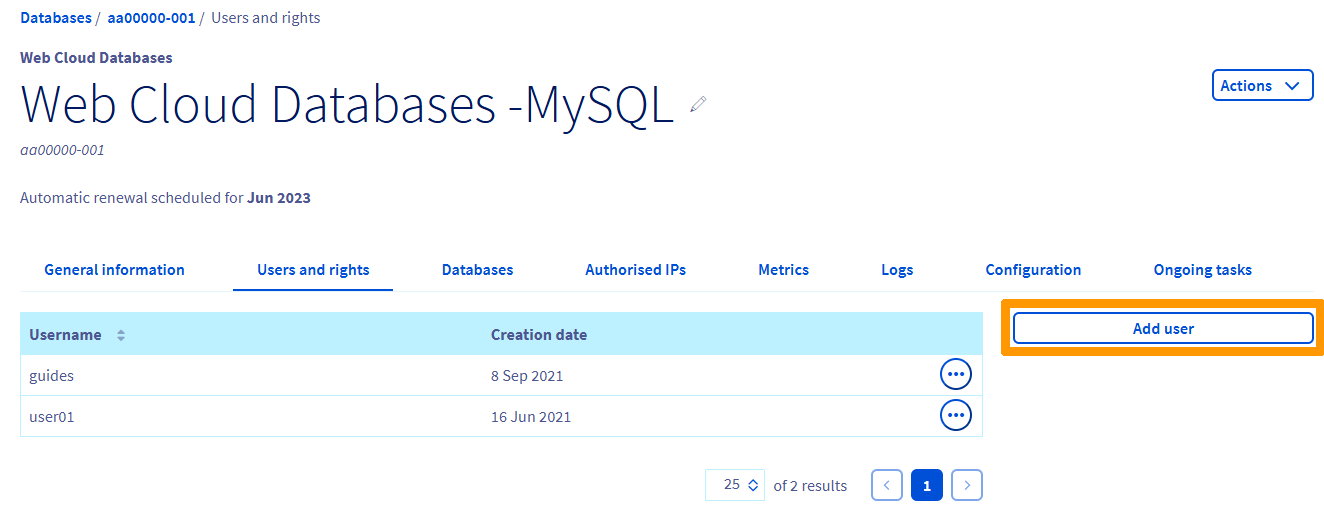
Creating a user
This step does not apply to the Redis database system.
If you created the user at the same time as your database in the previous step, this step is optional. However, a project may require several users with different rights (for example, read/write for one and read-only for another).
If your project does not require an additional user, you can skip to the next step. Otherwise, click on the tabs below to view each of the 4 steps.
Go to the Web Cloud Databases page, then select the solution concerned.
If you need to modify an existing user's rights, refer to our guide "Web Cloud Databases - Modifying a user's rights".
Importing a database
This step applies if you want to import a backup of an existing database. If not, skip to the next step.
To import a database, refer to our guide "Restoring and importing a database to your database server".
Several import methods are described there.
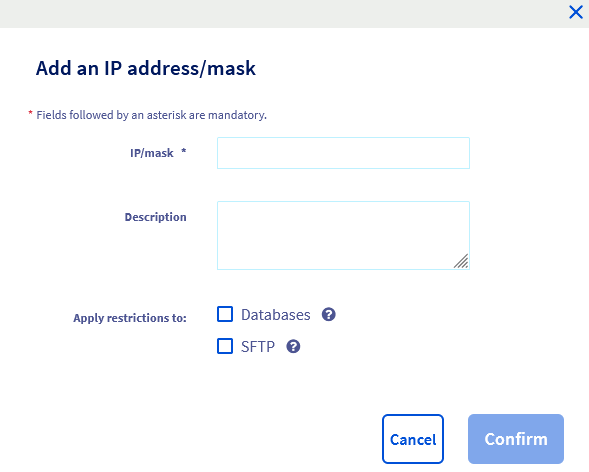
Authorising an IP address
For your Web Cloud Databases instance to work, you must specify the IPs or IP ranges that are allowed to connect to your databases.
To do this, click on the tabs below to view each of the 4 steps.
Go to the Web Cloud Databases page, then select the solution concerned.

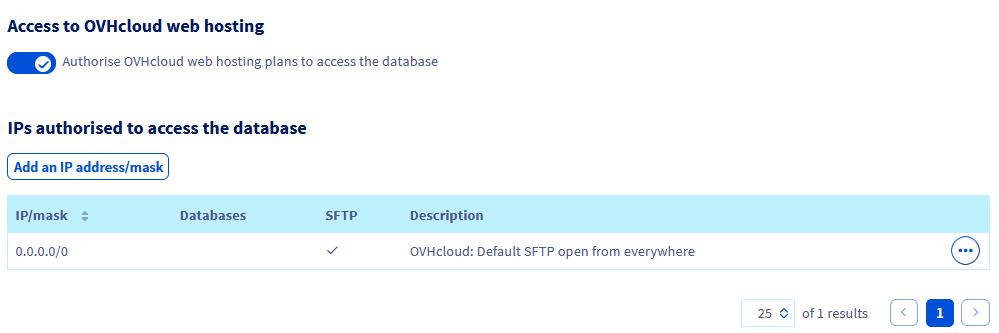
Authorising connections from an OVHcloud web hosting plan
By default, your Web Cloud Databases solution is automatically linked to OVHcloud web hosting plans. If you wish, you can disable access from OVHcloud web hosting plans to your Web Cloud Databases.
To do this, refer to the specific cases in our guide "Web Cloud Databases - How to authorise an IP address?" to enable or disable access from OVHcloud web hosting plans to your Web Cloud Databases.
Linking your website to the database
Now that your database is created, one or more users have rights on it, and at least one IP address or OVHcloud web hosting plans have been authorised on your Web Cloud Databases instance, all that remains is to link your website to your database. This step can be done in several ways, depending on the website or CMS (WordPress, Joomla!, etc.) used, and the stage you are at if you are installing a website.
To do this, you need the following 5 pieces of information:
To find them, click on the tabs below to view each of the 2 steps.
Go to the Web Cloud Databases page, then select the solution concerned.
The port field may not be available in your website's configuration. You must add this field after the server hostname, separated by a :.
For example, for the hostname aaXXXXX-XXX.eu.clouddb.ovh.net with SQL port 12345, you would enter aaXXXXX-XXX.eu.clouddb.ovh.net:12345 in the "Host" / "Hostname" section.
Retrieving the logs for your Web Cloud Databases server
To access the logs for your Web Cloud Databases solution, refer to our guide "Web Cloud Databases - How to manage logs".
Go further
Creating databases and users on your database server
Connecting to a database on your database server
Backing up and exporting a database on your database server
Restoring and importing a database to your database server
Configuring your database server
For specialised services (SEO, development, etc.), contact OVHcloud partners.
If you would like assistance using and configuring your OVHcloud solutions, please refer to our support offers.
Join our community of users.