Using Visio in OVHai Workspace
Find out how to start, schedule, prepare and join a video meeting, and find its summary, in the Visio application of OVHai Workspace
Objective
Visio is the video conferencing application of OVHai Workspace. It shows your meetings of the day, lets you start or schedule new ones, and keeps the summaries of those that have taken place.
Find out how to start, schedule, prepare and join a video meeting in OVHai Workspace.
Requirements
- An OVHai Workspace account.
- Being signed in to your workspace.
- A microphone and a camera to take part in a meeting.
Instructions
Opening the application
From the home page of your workspace, click Get started on the Visio card, or click Visio in the application bar on the left of the screen.
Finding your way around
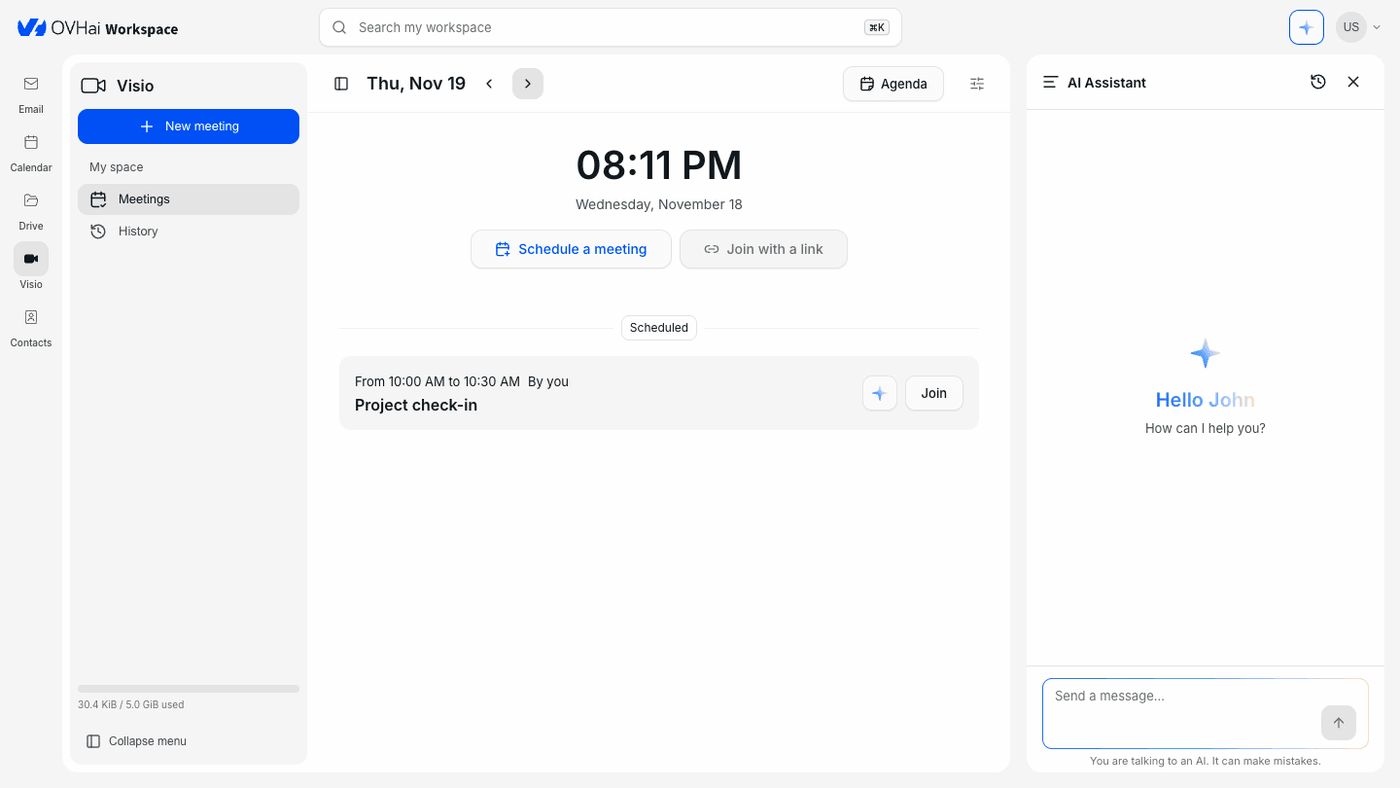
Under My space, Meetings shows the schedule of the day: the time, the Schedule a meeting and Join with a link buttons, then your Scheduled meetings. The arrows next to the date move to the previous or next day. History keeps the summaries of your past meetings.
Each scheduled meeting offers Join, the sparkle button (Prepare the meeting, see What the assistant can do with your meetings) and an icon that copies the meeting link.
Starting a meeting now
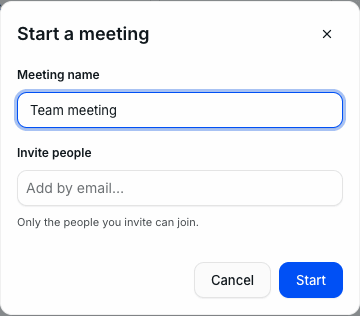
- Click
New meetingat the top of the left-hand panel. - Enter the Meeting name.
- Under Invite people, add the email addresses of the participants.
- Click
Start.
Only the people you invite can join.
Scheduling a meeting
Click Schedule a meeting. The event form of Calendar opens, with the video link already turned on ("Video meeting link will be created"): fill in the title, the date, the time and the attendees, then click Create.
Any event created in Calendar with the Add a video link option shows up in Visio the same way.
Joining a meeting
Click Join on the meeting card.
Your account can only be present once in the same meeting: joining from a second device replaces the first connection.
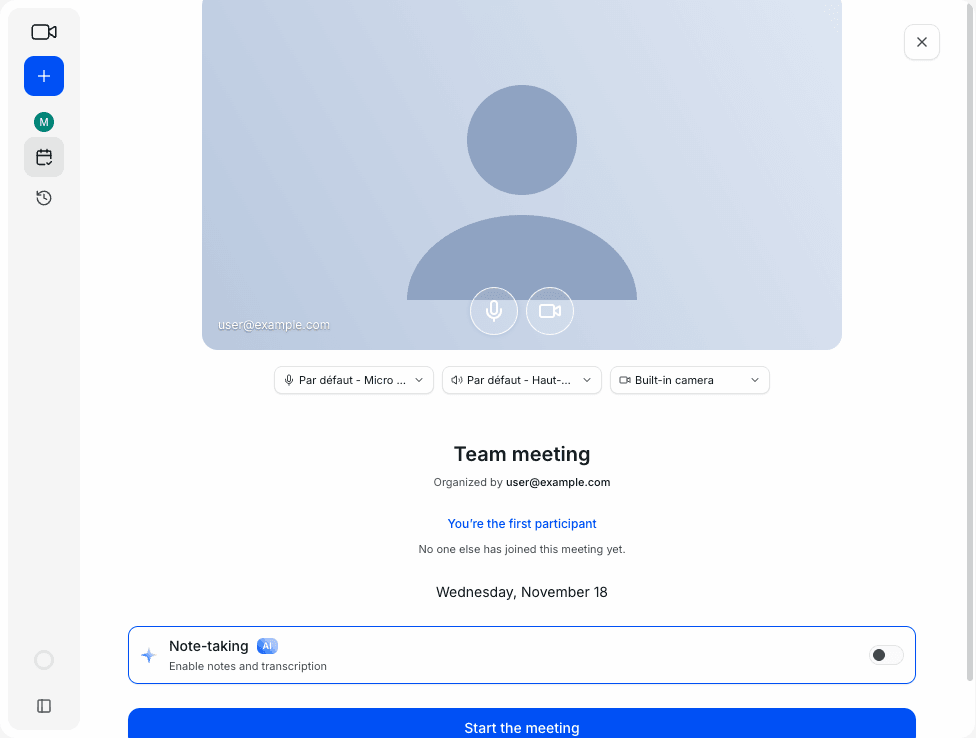
A preparation screen appears before you join. It shows your preview, with the microphone and camera buttons, and lets you choose the microphone, the audio output and the camera. It also shows who organises the meeting and who has already joined.
This is where the Note-taking switch ("Enable notes and transcription") is, turned off by default. Then click Start the meeting.
Check the state of your microphone and camera when you enter the meeting: they may turn on depending on your settings (see Configuring Visio) and on the permissions given to your browser.
During the meeting
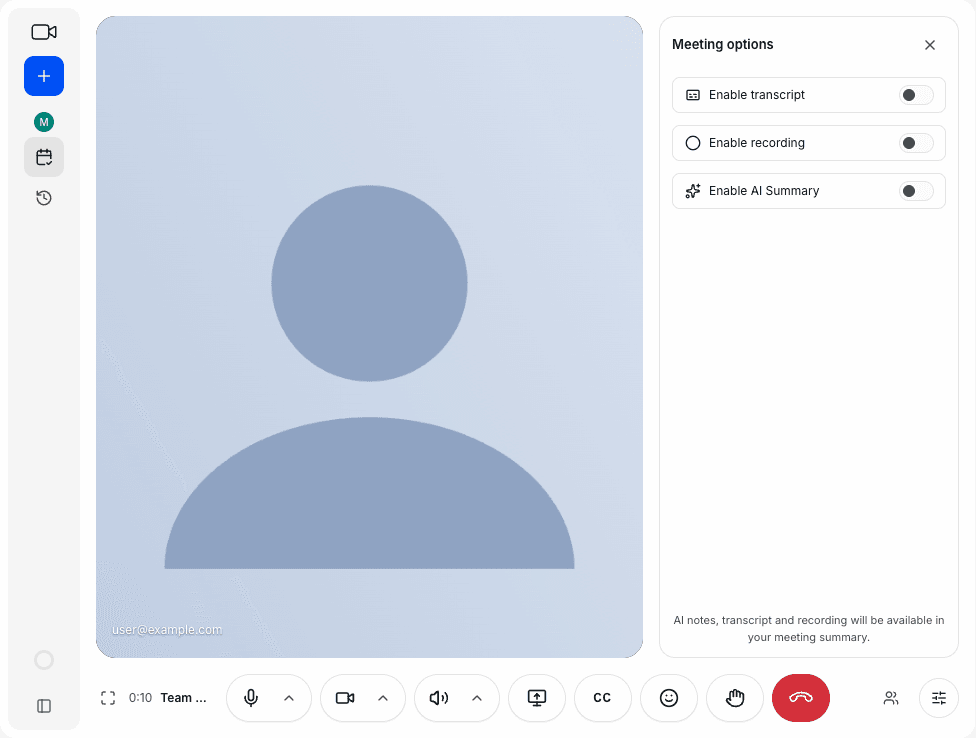
The bottom bar contains:
- full screen;
- the meeting duration;
- the microphone, the camera and the speaker (the arrow next to each of the three lets you choose the device);
- screen sharing;
- the
CCsubtitles; - reactions;
- raising your hand;
- the red button that leaves the meeting.
Two panels open on the right of the meeting:
- Participants, with
Add peopleto invite someone during the meeting; - Meeting options, with three switches:
Enable transcript,Enable recordingandEnable AI Summary. The AI notes, the transcript and the recording are then available in the meeting summary.
Leaving a meeting
Click the red button. If you are alone in the meeting, Visio asks you to choose:
Keep meeting open: others can still join later;End meeting: the meeting is deleted.
Finding a summary
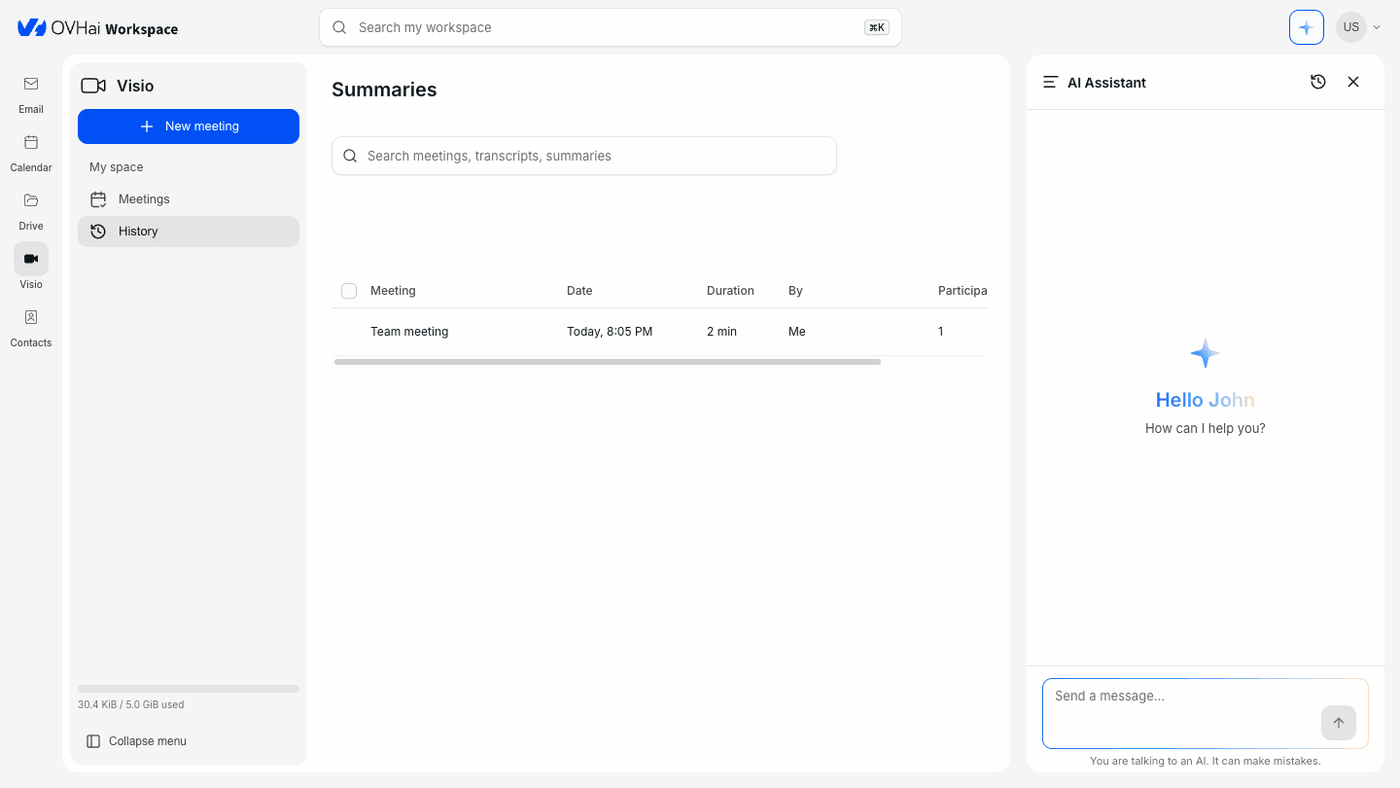
Click History in the left-hand panel. The Summaries page lists your past meetings, with their date, duration, organiser and number of participants. The Search meetings, transcripts, summaries field also searches the transcripts and summaries.
The Search my workspace field, at the top of the screen, searches all the applications at once instead.
What the assistant can do with your meetings
The sparkle button of a scheduled meeting (Prepare the meeting) asks the assistant to prepare the meeting. The assistant reads the meeting details and the matching event in your calendar, then looks through your emails and your Drive for anything related. It gives you a recap and flags points to watch, for example a meeting with no invitee.
You can also ask the assistant questions during the meeting. When you join a meeting that has already started, a notification may offer to summarise what has been said so far (see Configuring Visio).
Help me prepare this meeting: search the workspace for what I need to know beforehand.
I've just joined, what has been said so far?
Configuring Visio
Open your account menu, then Settings, and choose the Visio tab:
- Record meetings by default and Enable AI Summary by default: start the recording or the summary automatically in the meetings you organise.
- Default background effect (None, Blur or Office background), Blur intensity and Mirror my camera.
- Enable microphone on join and Enable camera on join.
- Enable subtitles automatically on join, and Subtitle translation language: English, French, Spanish, German, Italian or Portuguese.
- Offer an AI summary on join after this many captions, and Catch-up toast frequency: the notification that offers to summarise a meeting already under way.
Go further
Using Calendar in OVHai Workspace
If you would like assistance using and configuring your OVHcloud solutions, please refer to our support offers.
Join our community of users.