Using Calendar in OVHai Workspace
Find out how to create events, organise your calendars and change views in the Calendar application of OVHai Workspace
Objective
Calendar is the scheduling application of OVHai Workspace. It shows a mini calendar and the list of your calendars on the left, and the selected period in the middle.
Find out how to create events, organise your calendars and navigate your schedule in OVHai Workspace.
Requirements
- An OVHai Workspace account.
- Being signed in to your workspace.
Instructions
Opening the application
From the home page of your workspace, click Get started on the Calendar card, or click Calendar in the application bar on the left of the screen.
Finding your way around
The left-hand panel holds the mini calendar and the My calendars list. The selected period is shown in the middle, with the arrows, the Today button and the choice of view above it. The AI assistant sits in the side panel, on the right by default.
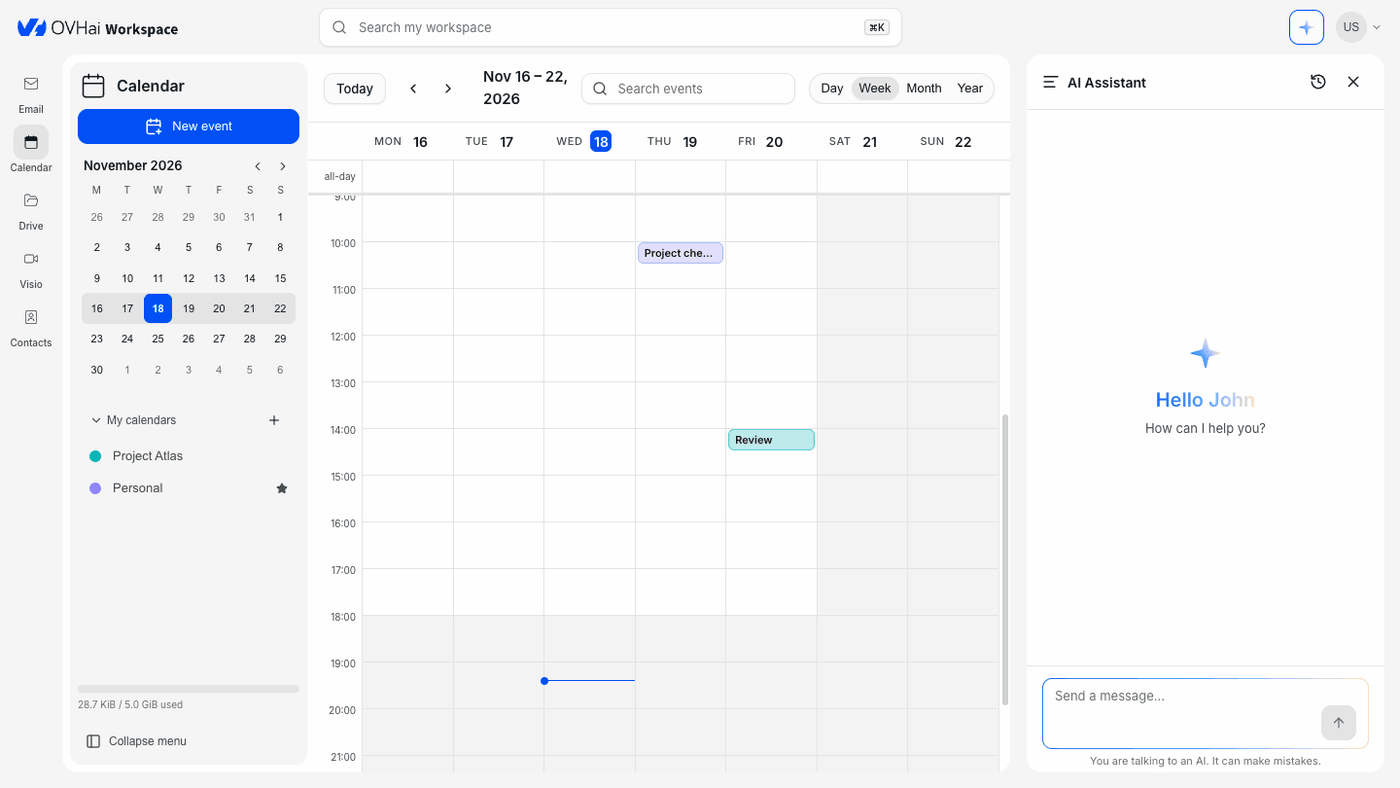
Creating an event
- Click
New eventat the top of the left-hand panel. - Enter the title of the event.
- Enter the start date and time on the Start line, then the end date and time on the End line. Turn on All-day for an all-day event.
- For a recurring event, replace Does not repeat with Daily, Weekly, Monthly, Yearly or Custom….
- In Add attendees, enter the people to invite.
- Add a Description if needed, and turn on Add a video link to attach a Visio meeting to the event.
- Click
Create.
The button at the top right of the form shows the calendar of the event, Personal (the default calendar) until you choose another one: click it to change it.
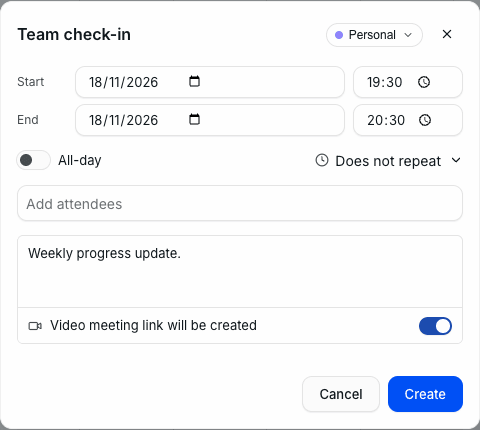
To close a menu of the form (recurrence, calendar), pick an option: the Esc key closes the whole form, and what you entered is lost.
Viewing and editing an event
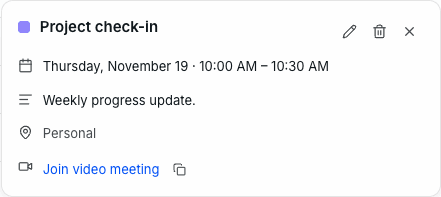
Click an event to show its details: date and time, description, calendar and, if it has one, the Join video meeting link. The icon next to this link copies it, so you can send it to someone outside your organisation.
The pencil icon (Edit) reopens the form of the event; click Save to confirm your changes. The bin icon deletes it.
Changing the view
Four views are available at the top right of the calendar: Day, Week, Month and Year. The week view opens by default; you can change this in the settings (see Configuring Calendar).
To move through time, use the arrows next to the period shown, or click Today to go back to the current date. The mini calendar in the left-hand panel offers the same navigation: click a date to show it, and use its own arrows to change month.
Organising your calendars
The My calendars section, under the mini calendar, lists your calendars. Each event belongs to one of them, so you can, for example, separate personal and project appointments. The star marks the default calendar.
To create a calendar, click the plus sign next to My calendars, enter the Calendar name, choose a colour, then click Create.
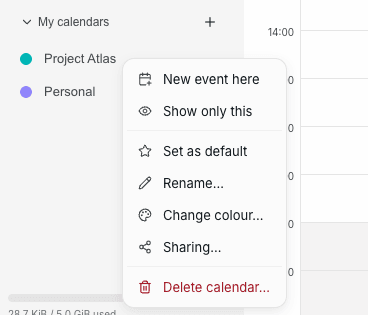
Right-click a calendar to show its actions:
New event herecreates an event directly in this calendar;Show only thishides the others;Set as defaultmakes it the calendar offered when you create an event;Rename…andChange colour…change the name and colour of the calendar;Sharing…(see Sharing a calendar);Delete calendar….
Sharing a calendar
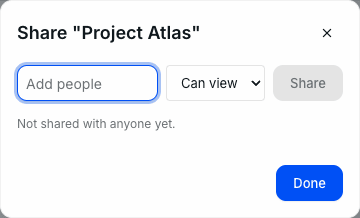
- Right-click the calendar, then click
Sharing…. - In Add people, enter the people to share it with.
- Choose their access: Can view or Can edit.
- Click
Share, thenDone.
Searching for an event
The Search events field, at the top of the calendar, looks through your events: the results are listed with their calendar, date and time. The Search my workspace field, at the top of the screen, searches all the applications at once instead.
Configuring Calendar
Open your account menu, then Settings, and choose the Calendar tab:
- Default view: the view shown when the calendar opens (Day, Week, Month or Year).
- Week starts on, Working days, and Hide non-working days in week view.
- Working hours start and Working hours end: the hours outside this range are shaded in the day and week views.
- Time zone: it takes your browser's time zone on first start. Check it if you organise meetings with people in another time zone.
- Notification sound: the sound played when an invitation, an update or a reply arrives, or None.
- Declining a video meeting removes my access: if this option is on, declining an invitation that includes a video meeting removes your access to that meeting.
What the assistant can do with your calendar
Describe the event in one sentence, naming the calendar if you have several:
Create a Review event on 20 November at 2 PM for 30 minutes in the Project Atlas calendar.
Which one-hour slots are free on Thursday afternoon?
Move tomorrow's review to Thursday morning.
The assistant shows the operations it runs (looking for free slots, reading your calendars, creating the event). It asks for your approval before creating or changing an event: Approve, Decline or Always accept (see Staying in control of what it does). It then shows the event it created, with its calendar: check it in your schedule.
Go further
Using Email in OVHai Workspace
Using Visio in OVHai Workspace
If you would like assistance using and configuring your OVHcloud solutions, please refer to our support offers.
Join our community of users.