Managing your OVHai Workspace account
Find out how to create your OVHai Workspace account, sign in, secure it with two-factor authentication and recover access to your account
Objective
Your OVHai Workspace account gives you access to Email, Calendar, Drive, Visio and Contacts with a single identifier: your email address.
Find out how to create your account, sign in, manage and secure it, personalise the interface and recover your access if you have lost it.
Requirements
- An invitation to create your account (see Getting an account).
- A French mobile phone number, to receive a code by text message.
- An email address hosted outside OVHai Workspace, to use as your recovery address.
- Being at least 18 years old.
Instructions
Getting an account
During the test phase (alpha), OVHai Workspace is free and open by invitation. You create your account yourself.
- On the sign-in screen, click
Join the waiting list. Enter your email address, then clickJoin the list. - As soon as a place becomes available, you receive a link at this address to create your space. Remember to check your spam folder.
- Open the link. In OVHai email address, choose your address: it will be your identifier in every application. Click
Start. - Choose a Password of at least 8 characters and confirm it in Confirm the password, then click
Continue. - Enter your French mobile number in Mobile number, then click
Continue. Enter the code you received by text message in Verification code, then clickVerify the code. - Enter your Display name (your first and last name) and your Recovery email address, which must differ from your OVHai address.
- Tick the box confirming that you are at least 18 years old and accept the terms of use and the privacy policy, then click
Create my account.
Signing in
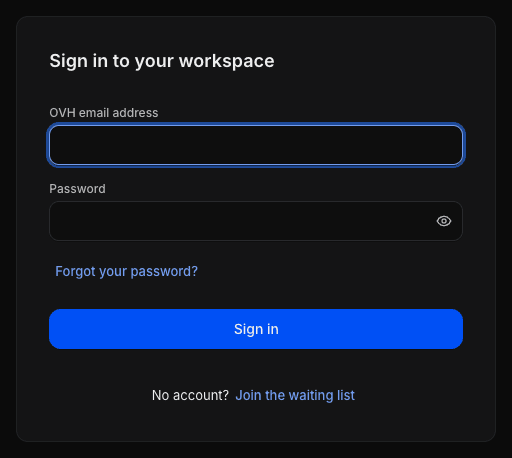
- Go to the address of your OVHai Workspace.
- Enter your email address in OVH email address, then your password in Password.
- Click
Sign in.
The eye icon in the password field shows what you have typed.
If you have turned on two-factor authentication, you are then asked for a code.
After too many sign-in attempts, signing in is blocked for a few minutes: the message shown tells you when to try again.
Opening the settings
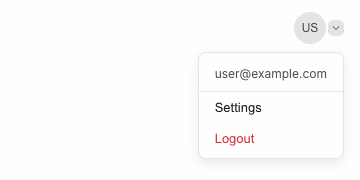
Click your account menu, your initials in the top right-hand corner, then Settings.
The menu also shows the address of the signed-in account.
Settings open in a window. The Account, Security and Preferences tabs apply to your whole workspace; the AI Chat, Email, Calendar, Visio and Markdown Editor tabs configure each of these applications.
Changing your name
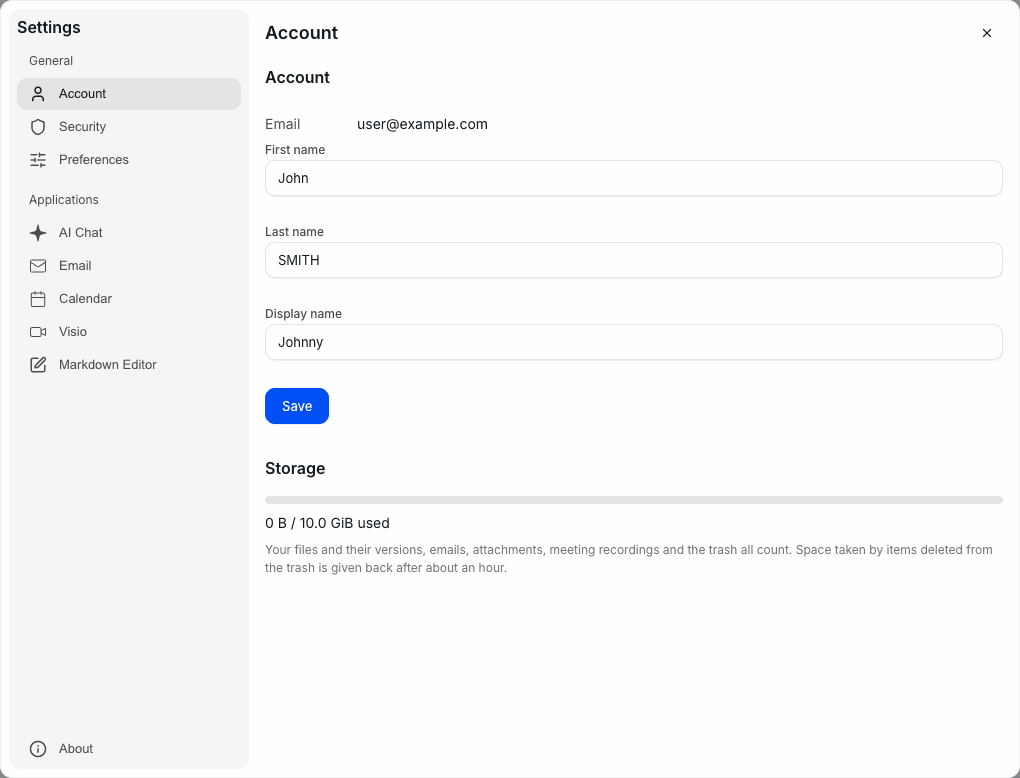
- In the settings, open the
Accounttab. - Change First name and Last name.
- If you wish, fill in a Display name: this is the name the AI assistant uses to address you.
- Click
Save.
The message "Profile updated." confirms the change. Your email address is shown above these fields; it cannot be changed.
Monitoring your storage space
The Storage section of the Account tab shows the space used and the total space of your account; the same gauge appears at the bottom of the left-hand panel of Email, Calendar, Drive and Visio.
Everything counts: your files and their versions, your emails, your attachments, your meeting recordings and the Email trash. Space taken by items deleted from this trash is given back after about an hour.
Securing your account
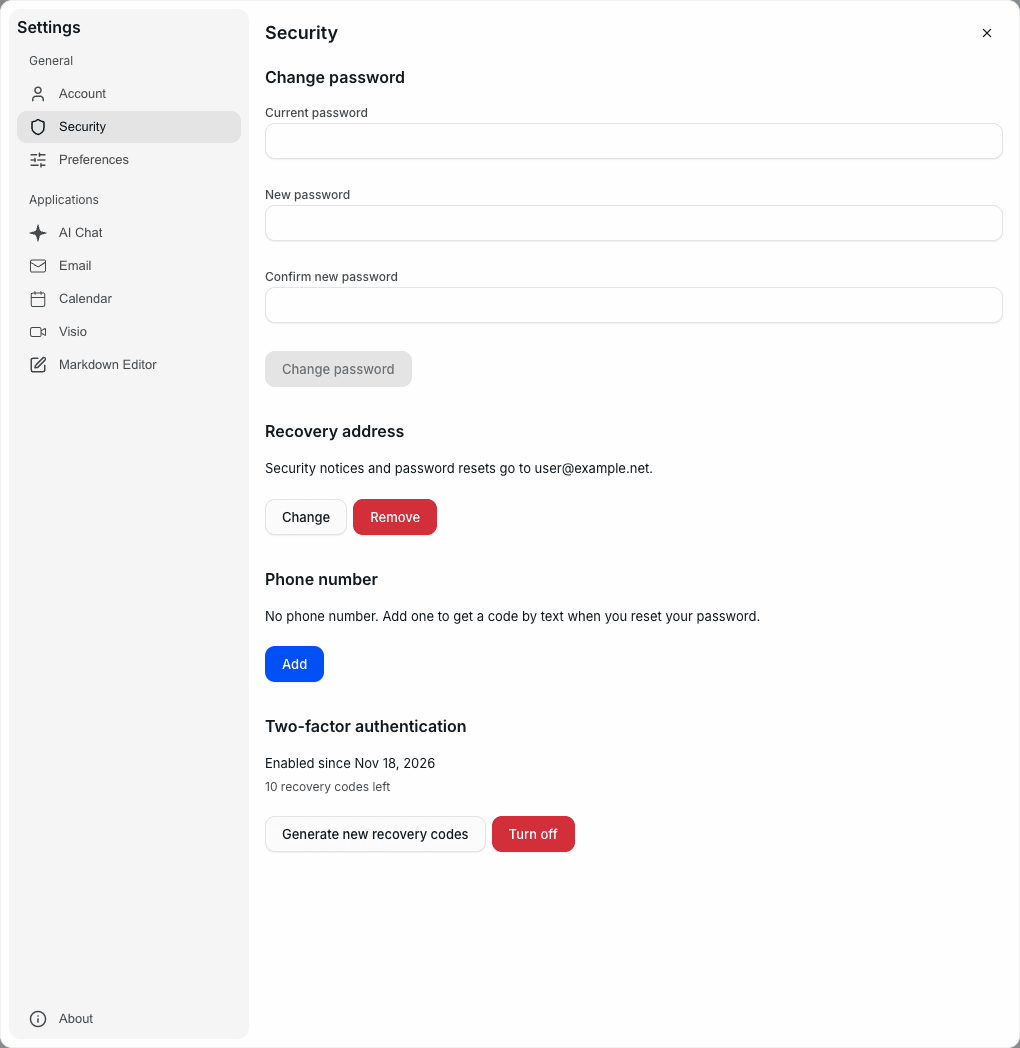
Open the Security tab of the settings. Every change asks for your current password.
Changing your password
- In the Change password section, enter your current password in Current password.
- Enter the new one in New password, then a second time in Confirm new password.
- Click
Change password.
The button stays greyed out while the fields are empty.
Setting a recovery address
The recovery address receives security notices and the password reset link; without it, you cannot recover access to your account if you forget your password. Choose an address you check regularly, hosted outside OVHai Workspace.
- In the Recovery address section, click
Set. - Enter the address in Recovery email, then your password in Current password.
- Click
Save.
The section then shows the address you chose, with the Change and Remove buttons.
No confirmation email is sent to this address: check it carefully before saving it.
Adding a phone number
The phone number receives a code by text message when you reset your password. The Phone number section shows the verified number.
- In the Phone number section, click
Add, orChangeto change the number. - Enter the number in Mobile number, in international format (+33 for France), then your password in Current password.
- Click
Send a code. - Enter the code you received by text message in Verification code, then click
Verify.
Turning on two-factor authentication
Two-factor authentication adds, to your password, a 6-digit code generated by an authenticator app installed on your phone.
- In the Two-factor authentication section, click
Turn on. - Enter your password in Current password, then click
Continue. - Scan the QR code shown with your authenticator app. If you cannot scan it, enter the key shown under Can't scan it? in the app.
- Enter the 6-digit code shown by the app, then click
Confirm. - 10 recovery codes are shown. Keep them somewhere safe, for example with
Copy codes, then clickI have saved these codes.
The recovery codes are shown only once. Each one signs you in once if you lose your authenticator app.
The section then shows the date two-factor authentication was turned on and the number of recovery codes left. To replace your codes, click Generate new recovery codes, then enter your password and a code from your app (or, with Use a recovery code instead, one of your codes). The old codes then stop working.
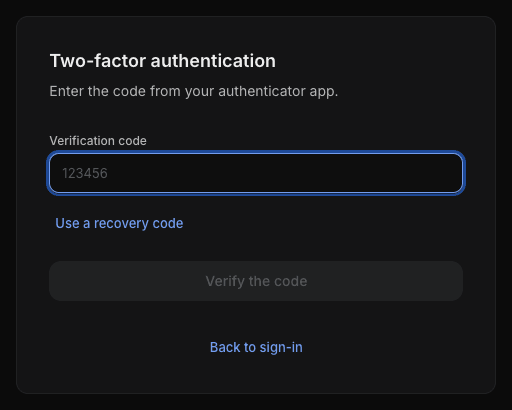
Signing in with two-factor authentication
- Enter your email address and your password, then click
Sign in. - In Verification code, enter the code shown by your authenticator app.
- Click
Verify the code.
Without your phone, click Use a recovery code and enter one of your recovery codes.
Personalising the interface
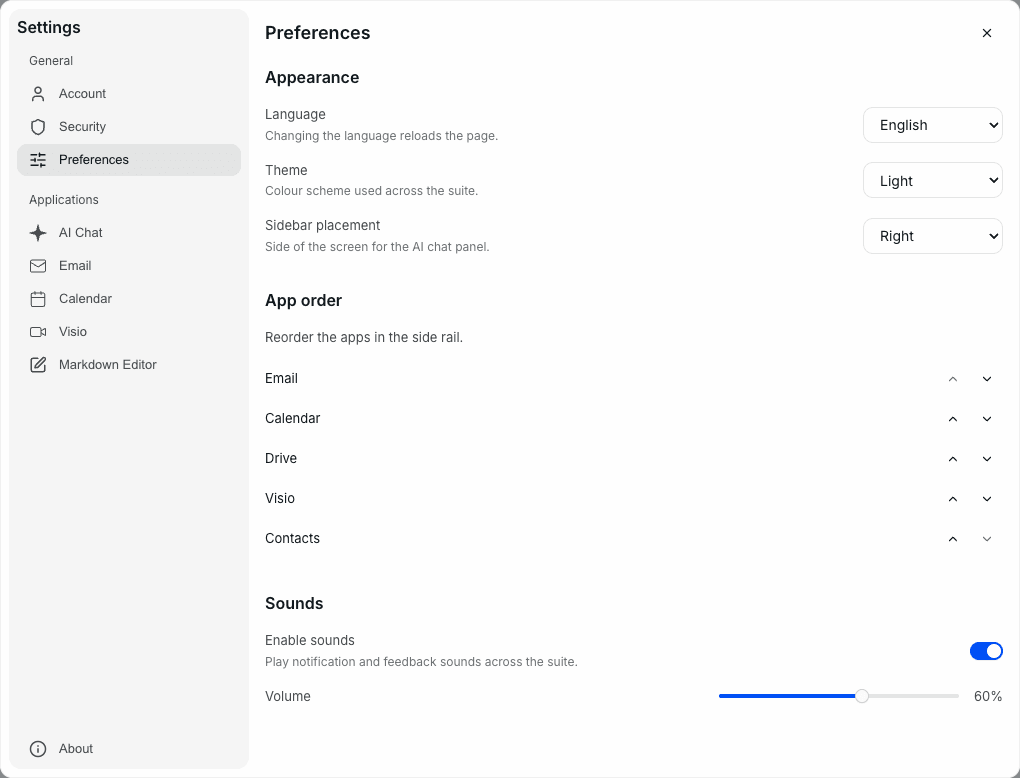
The Preferences tab of the settings sets the appearance of your whole workspace:
- Language: English or Français. The page reloads.
- Theme: Light or Dark.
- Sidebar placement: the side of the screen where the AI assistant is shown, left or right.
- App order: the arrows move an application up or down in the application bar.
- Sounds: turns notification sounds on or off, and sets their volume.
Signing out
Click your account menu, then Logout. On a shared computer, always sign out.
Recovering access to your account
If you have forgotten your password:
- On the sign-in screen, click
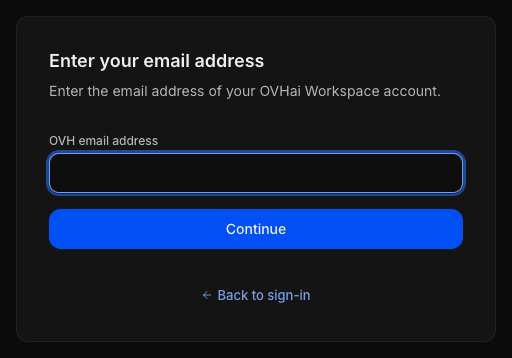
Forgot your password?. - Enter the email address of your OVHai Workspace account, then click
Continue. - Open the link sent to your recovery address. If it has expired, click
Ask for a new link. - Confirm your identity: enter the code sent by text message to your phone number, or the code from your authenticator app.
- Enter your new password, confirm it in Confirm the password, then click
Save and continue.
Without a recovery address, your password cannot be reset: set it while you still have access to your account.
Go further
Using Email in OVHai Workspace
If you would like assistance using and configuring your OVHcloud solutions, please refer to our support offers.
Join our community of users.