Using Email in OVHai Workspace
Find out how to read, write, organise and search your emails in the Email application of OVHai Workspace
Objective
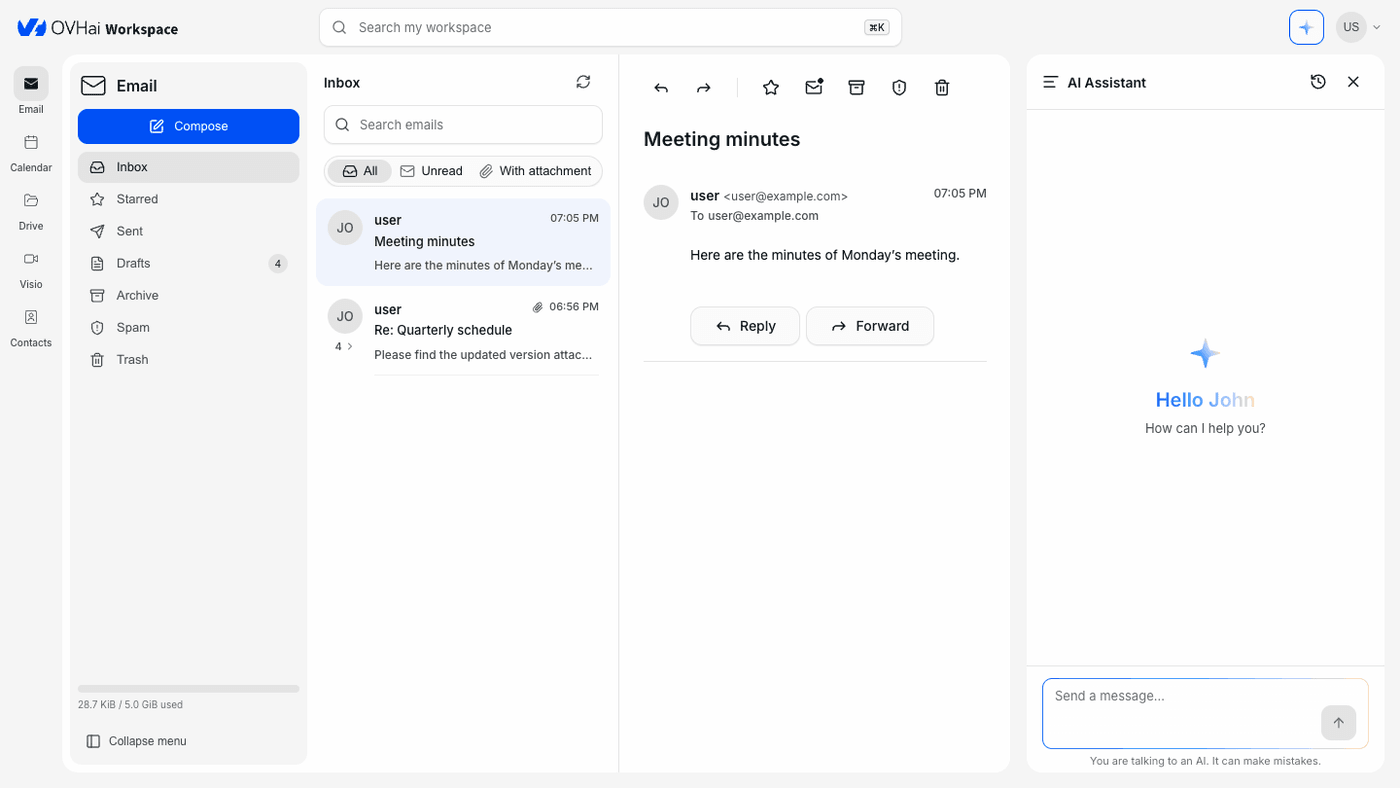
Email is the messaging application of OVHai Workspace. It shows your mailbox in three panels: your folders, the list of emails, and the email you are reading.
Find out how to read, write, organise and search your emails in OVHai Workspace.
Requirements
- An OVHai Workspace account.
- Being signed in to your workspace.
Instructions
Opening the application
From the home page of your workspace, click Get started on the Email card, or click Email in the application bar on the left of the screen.
Finding your way around
Your folders are on the left of the screen. The AI assistant sits in the side panel, on the right by default.
The folders are: Inbox, Starred, Sent, Drafts, Archive, Spam and Trash. An Outbox folder appears while an email is waiting to be sent. The number next to a folder counts unread emails or drafts.
Click Collapse menu, at the bottom of the folder panel, to give the email list more room. The gauge above it shows the storage space used by your account.
Writing an email
- Click
Composeat the top of the folder panel. - Enter the address of your recipients in To, then press
Enter. TheCcandBcclinks add recipients in copy and in blind copy. - Enter a subject in Subject.
- Write your text in the body of the email.
- Click
Send.
If you close the window without sending, the email is saved in Drafts.
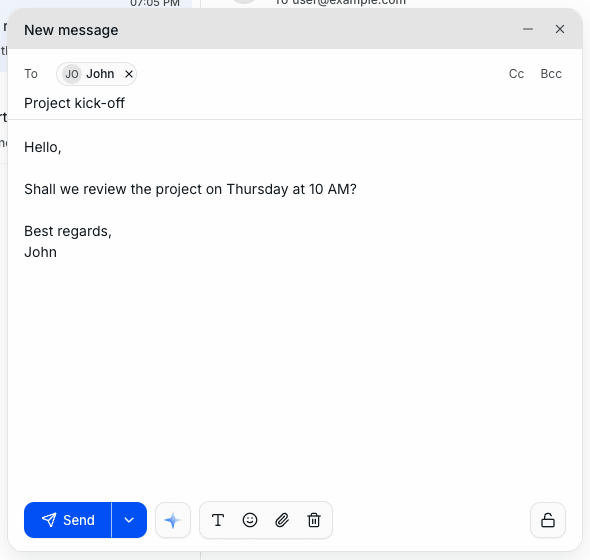
The toolbar at the bottom of the window formats the text (Rich text), inserts an emoji, attaches a file and discards the draft. The sparkle button asks the AI assistant to write the email (see What the assistant can do with your messages).
Cancelling a send
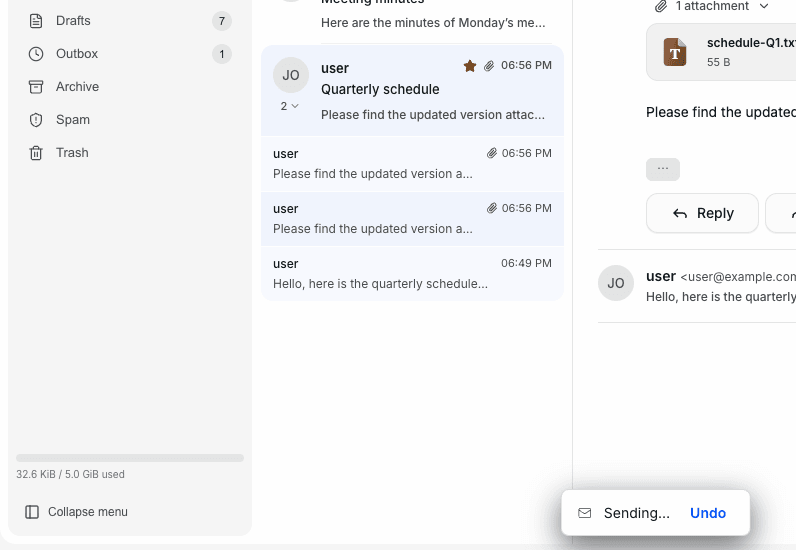
The email does not leave straight away: it waits 10 seconds by default in the Outbox folder. During this delay, the "Sending…" notification offers Undo: the email then goes back to Drafts.
You can adjust this delay in the settings (see Configuring Email).
Attaching a file
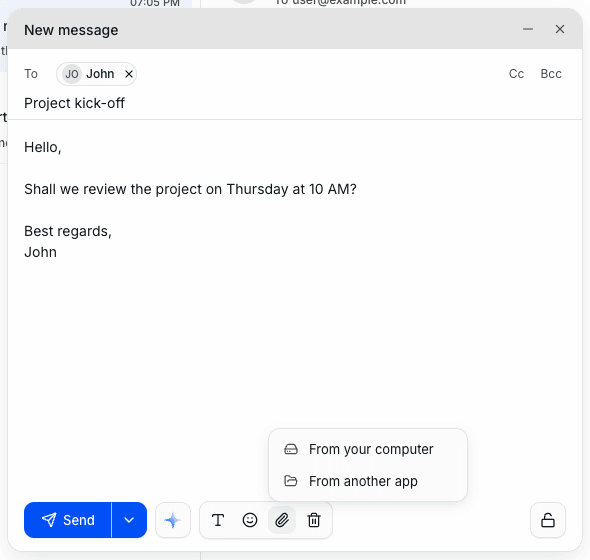
Click the paperclip icon (Attach), then choose:
From your computerto send a file from your device;From another appto pick a file from your Drive.
Each attachment is shown above the toolbar, with its size. Click the bin next to its name to remove it.
Scheduling an email
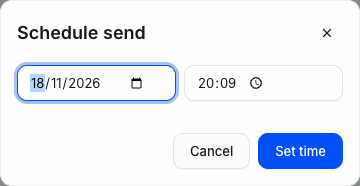
- Click the arrow next to the
Sendbutton (Send options), thenSchedule send…. - Pick the date and time of sending, then click
Set time. - The send button becomes "Send in …": click it to confirm.
The "Scheduled for …" notification confirms it and offers Undo. The email waits in Outbox until the time you chose.
Reading and sorting your emails
Click an email in the list to open it. Replies to the same email are grouped into a thread: the number under the sender shows how many emails it holds, and the arrow next to it expands the thread.
The bar above the open email offers, from left to right:
- Reply and Forward: a reply adds "Re:" to the subject; a forward adds "Fwd:" and keeps the attachments;
- Add star: marks the email with a star and places it in Starred; click again (Remove star) to take it out;
- Mark as unread;
- Archive: moves the email to Archive;
- Mark as spam;
- Move to Trash.
An attachment you receive is shown under the email. The button next to its name sends it to your Drive.
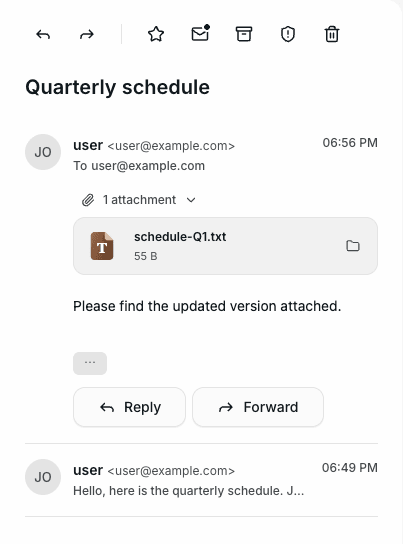
Above the list, the All, Unread and With attachment filters narrow it down without changing folder. The … button adds the With attachment filter, which is then shown as a tag; click its cross to remove it. The refresh icon fetches new emails immediately.
Searching your emails
Enter a word in the Search emails field above the list. The search covers all your folders, drafts included.
The Search my workspace field, at the top of the screen, searches all the applications at once instead.
Configuring Email
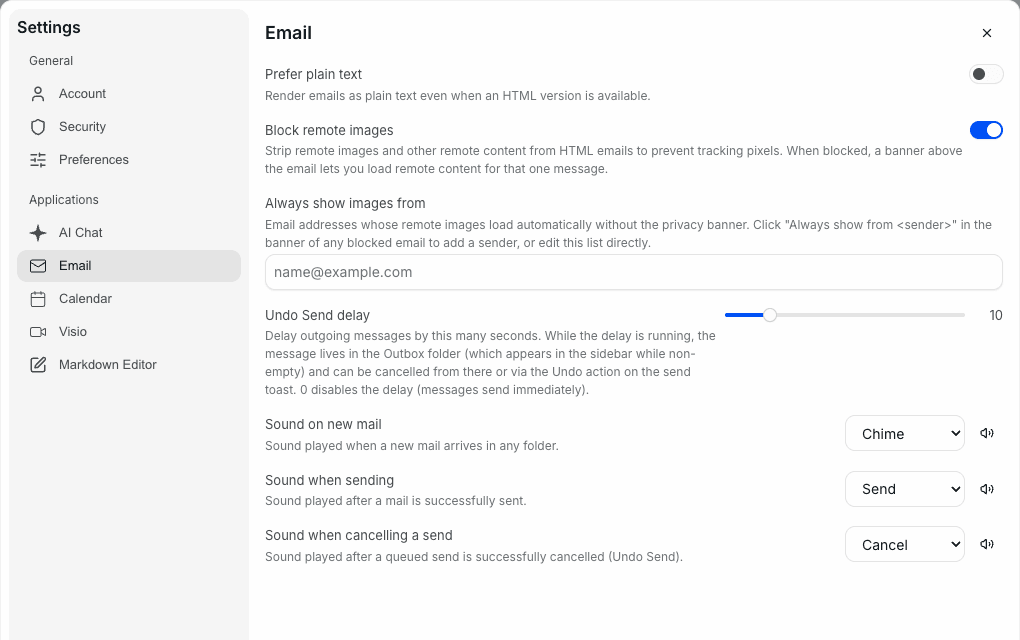
Open your account menu, then Settings, and choose the Email tab:
- Prefer plain text: shows emails as plain text, even when an HTML version exists.
- Block remote images: removes images loaded from the Internet, which are often used to find out whether you opened an email. A banner above the email then lets you show them for that email only.
- Always show images from: the list of senders whose images are shown without the banner.
- Undo Send delay: the number of seconds during which you can cancel a send (10 by default). The value
0sends emails immediately. - Sound on new mail, Sound when sending and Sound when cancelling a send: the sound played, or None.
What the assistant can do with your messages
The assistant has access to the mailbox you are viewing: you can hand it reading as well as writing.
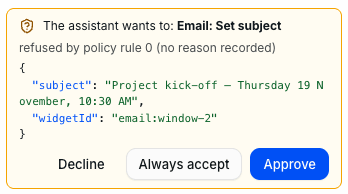
In the writing window, the sparkle button asks it to write the email in progress. The assistant reads the open email, then asks for your approval before changing the draft, unless you have always accepted the action. Approve runs the action once, Decline prevents it and Always accept lets it repeat the action without asking you (see Staying in control of what it does). It asks you for the recipient if it does not know it.
Summarise this thread and list what is expected of me.
Write a reply that confirms the date and asks for the agenda.
Turn this proposal into a calendar event.
The assistant also extracts the key points of a long thread, or prepares a follow-up for an email that has had no reply.
Go further
Managing your OVHai Workspace account
Using Calendar in OVHai Workspace
If you would like assistance using and configuring your OVHcloud solutions, please refer to our support offers.
Join our community of users.