
How to install ISPmanager on a VPS or Dedicated Server
Discover how to install ISPmanager on your OVHcloud VPS or Dedicated Server and manage your websites, databases, and associated services
Objective
ISPmanager is an all-in-one web hosting panel that simplifies the management of websites, databases, accounts, TLS/Let's Encrypt certificates, and associated services via a web interface. This guide explains how to install ISPmanager on a clean VPS or Dedicated Server and access the interface for initial configuration.
Discover how to install ISPmanager on an OVHcloud VPS or Dedicated Server.
Information regarding OVHcloud service administration and how to find appropriate assistance
When using OVHcloud guides, please be aware of the following conditions:
- User instructions aim to provide as many details as possible but cannot cover individual use cases. You might need to adapt the pertinent actions to your requirements.
- The OVHcloud ecosystem is built for flexibility and freedom of choice. Customers are therefore responsible for the secure and proper configuration of their services. To prevent data loss, we strongly recommend to apply backup strategies to all your important data.
- Our guides and tutorials may reference third-party software or services in combination with OVHcloud solutions. The technical support provided by OVHcloud does not include the configuration of systems or products outside of our responsibility. This includes but is not limited to:
- Operating systems and user interfaces (Windows, Debian, Plesk, etc.).
- Any other third-party software (FTP clients, email software, etc.).
- Services offered by other providers (DNS, APIs, user interfaces, etc.).
To receive the appropriate assistance for any issues you might experience, follow these guidelines:
- You seek personalized advice or you would like to discuss a topic that is not covered in detail by our documentation?
Join the OVHcloud Community to search for your topic and reach out to other users. - You need to report an incident regarding your OVHcloud service or you are experiencing difficulties in the OVHcloud Control Panel?
Create a support request in our Help Centre. - You require professional assistance for your project or you need help with tasks outside our support scope?
Visit our partner portal to search for experts who are familiar with OVHcloud solutions. - You are looking for more detailed information regarding our support levels and Professional Services?
Please visit our web pages for OVHcloud support levels and OVHcloud Professional Services.
You can participate in improving our documentation:
- You would like to share feedback to improve a guide page or you want to report insufficient information on a specific page?
Use the "Was this page helpful?" buttons at the bottom of the page to let us know. - You would like to propose a specific documentation update?
Use the "Edit this page" function, available at the bottom of the page and in the sidebar.
Requirements
- A VPS or a Dedicated Server in your with a recommended configuration for ISPmanager.
- Administrator access (sudo) via SSH to your server.
Instructions
Step 1 — Connect and update the system
Connect to the server
Open a terminal and connect to your VPS (or Dedicated Server) using the following command:
Replace:
userwith your username.IP_VPSwith your VPS's IP address.
Update the system
Update your operating system. This process may take several minutes.
To allow incoming and outgoing connections, consult the official ISPmanager documentation to determine which ports to open based on your needs.
Example of opening ports for Debian / Ubuntu
1. Install UFW:
2. Open the necessary ports (examples: SSH, ISPmanager panel, HTTP/HTTPS):
3. Enable UFW and check its status (the value "ALLOW" is expected):
Example of opening ports for AlmaLinux
1. Install firewalld:
2. Enable and start the service:
3. Open the necessary ports (examples: SSH, ISPmanager panel, HTTP/HTTPS):
4. Apply the configuration:
Step 3 — Install ISPmanager
1. Install wget:
2. Download the ISPmanager installation script:
3. Run the installer:
During installation:
- Choose the stable branch.
- Select the edition (Lite/Pro/Host) with recommended components.
- Choose your preferred web server and database.
- The installer installs necessary dependencies (this may take several minutes).
"Incorrect hostname" message during installation
If the following message appears during installation:
This means your server's hostname is not a fully qualified domain name (FQDN). To proceed, enter a valid domain name pointing to your server, for example:
If you do not yet have a domain name linked to your VPS, consult our guide "Edit an OVHcloud DNS zone" to point your domain name to your VPS's IP address.
Step 4 — First connection
Once installation is complete, enter the URL https://<IP_VPS>:1500/ispmgr in your browser, replacing <IP_VPS> with your VPS's IP address.
On first access, a self-signed certificate is used. Accept the browser warning to continue.
The following interface appears:
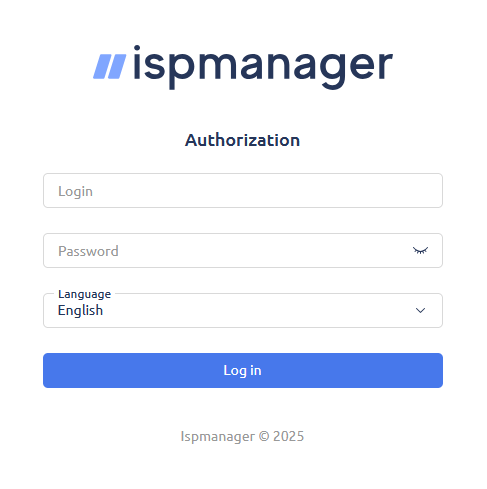
By default, the first connection to the ISPmanager interface uses the server's root system account. If you connect via SSH with a non-root user (e.g., almalinux, debian, ubuntu) and root has no password, run the following commands:
Switch to root:
Set a password for the root user:
On the ISPmanager login interface, enter the following:
- Username: root.
- Password: the password for the root account you just set.
Accept the license agreement that appears to continue. Installation is complete, and the ISPmanager administration interface is accessible at https://<IP_VPS>:1500/ispmgr.
Go further
For specialized services (SEO, development, etc.), contact OVHcloud partners
Join our community of users.