Getting started with the Web Cloud Databases service
Objective
With the Web Cloud Databases solution, you get a database instance with dedicated, guaranteed resources that gives you performance and flexibility. Your Web Cloud Databases solution is linked to the OVHcloud web hosting network by default. You can link it to any other network, via a list of authorised IP addresses.
Find out how to get started with a Web Cloud Databases service.
Requirements
- A Web Cloud Databases instance (included in Performance web hosting plans).
- Access to the OVHcloud Control Panel
Instructions
Web Cloud Databases server activation included with your Web Hosting plan
If your hosting plan includes the Web Cloud Databases option, click on the tabs below to view each of the 4 steps.
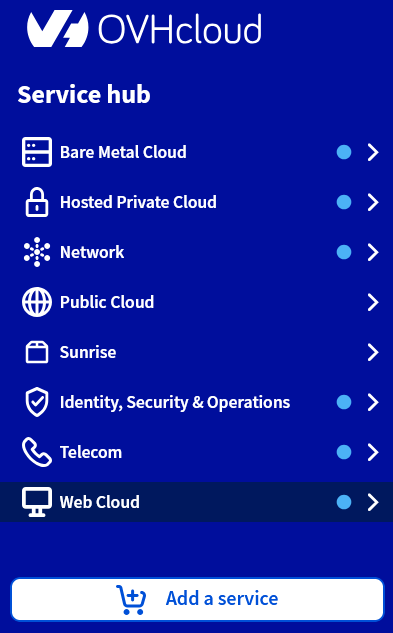
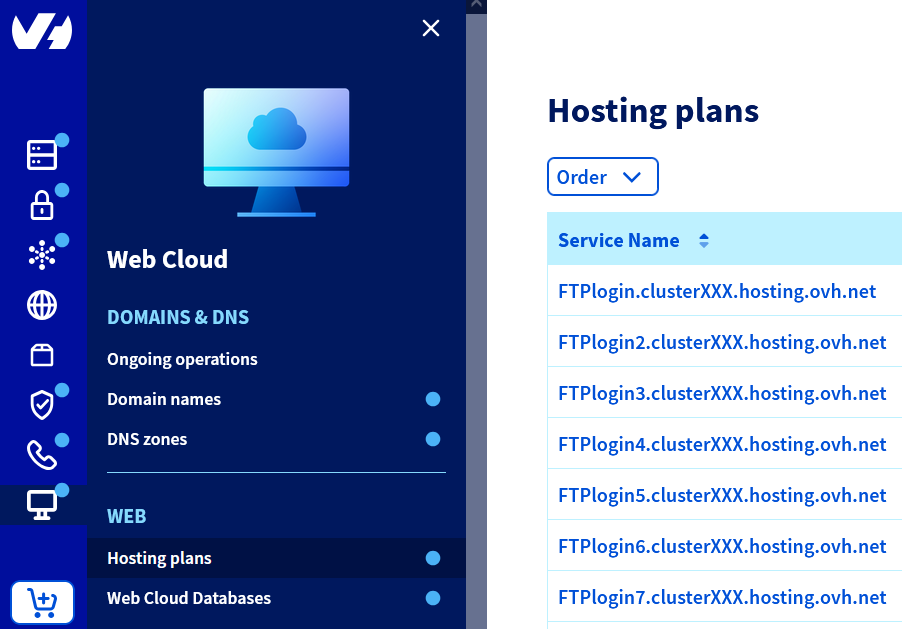
Log in to the OVHcloud Control Panel, then go to the Web Cloud section.
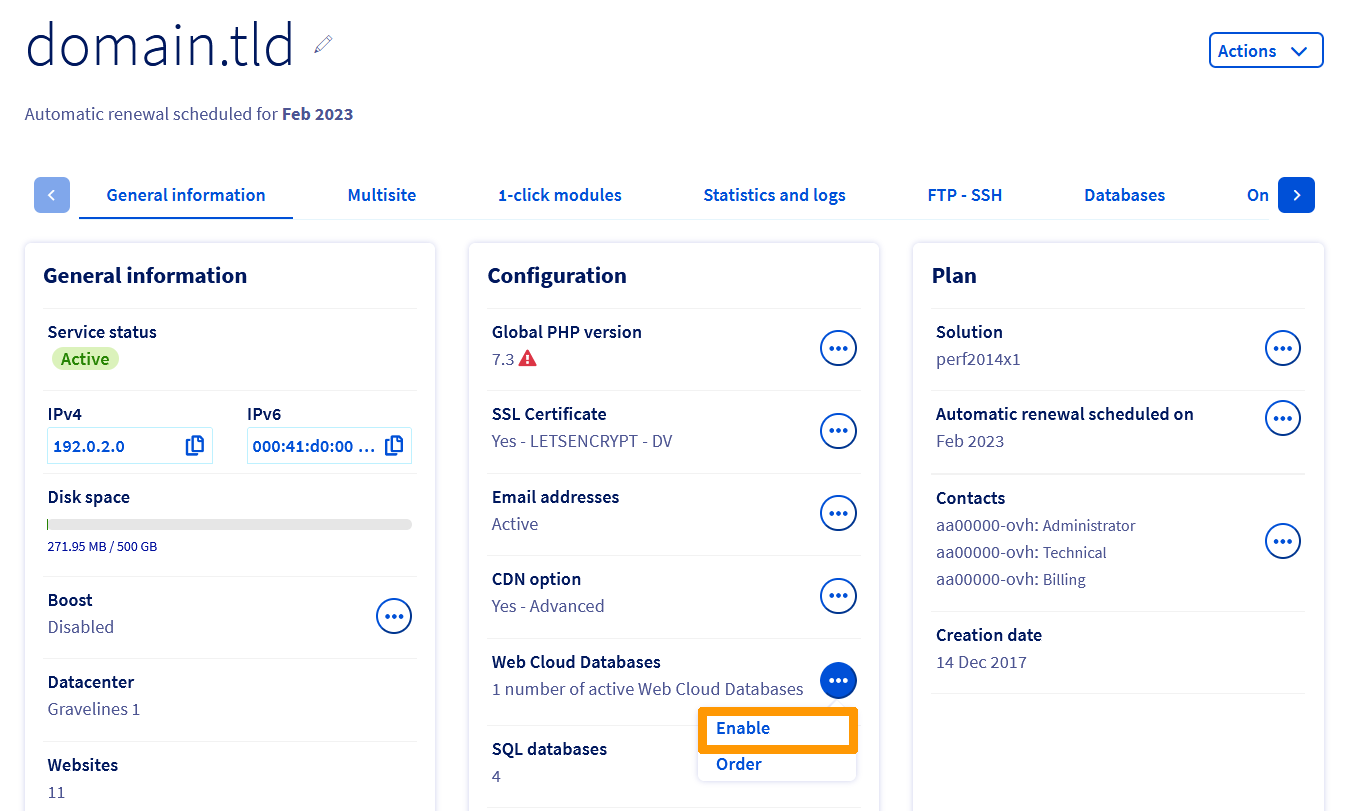
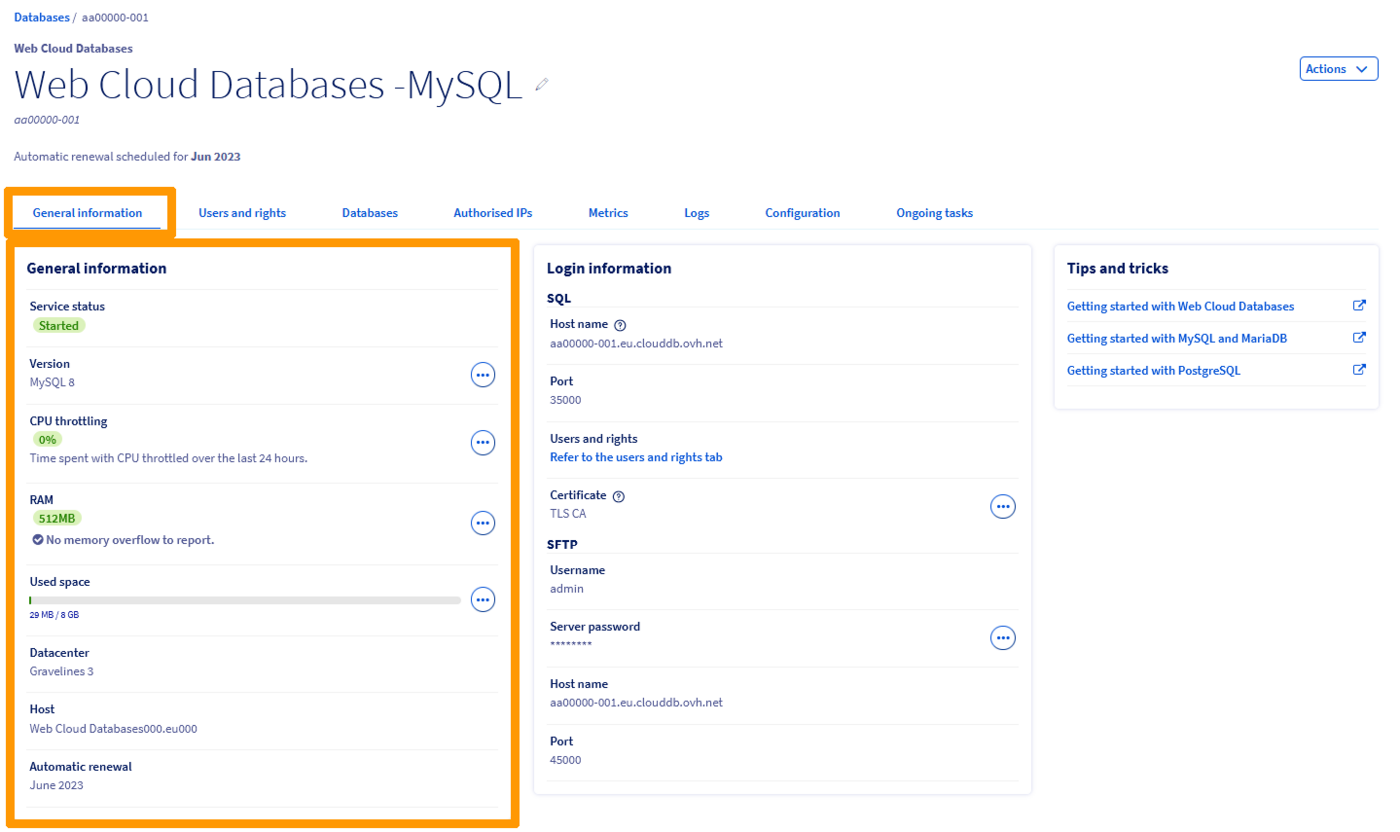
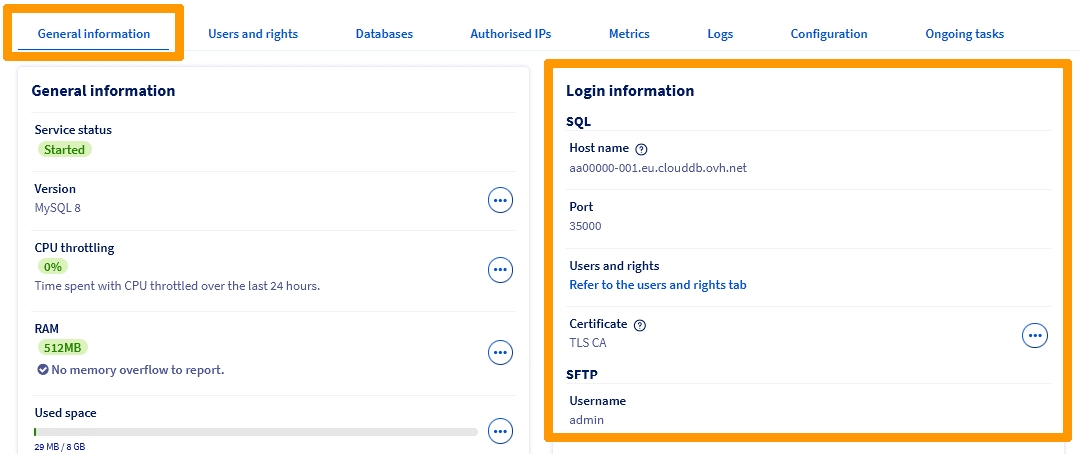
View general information about the instance
In the services bar on the left-hand side of the OVHcloud Control Panel, go to the Web Cloud Databases section, then to the instance. Click on the General information tab.
The name of the Web Cloud Databases service in your OVHcloud Control Panel contains part of your NIC handle (username), and ends with three figures (001 for the first Web Cloud Databases service installed, 002 for the second, etc.).
You can also view important information about your instance. Please take a few moments to ensure that the information displayed is correct, and corresponds to the instructions below.
Create a database
This step does not apply to the Redis database system.
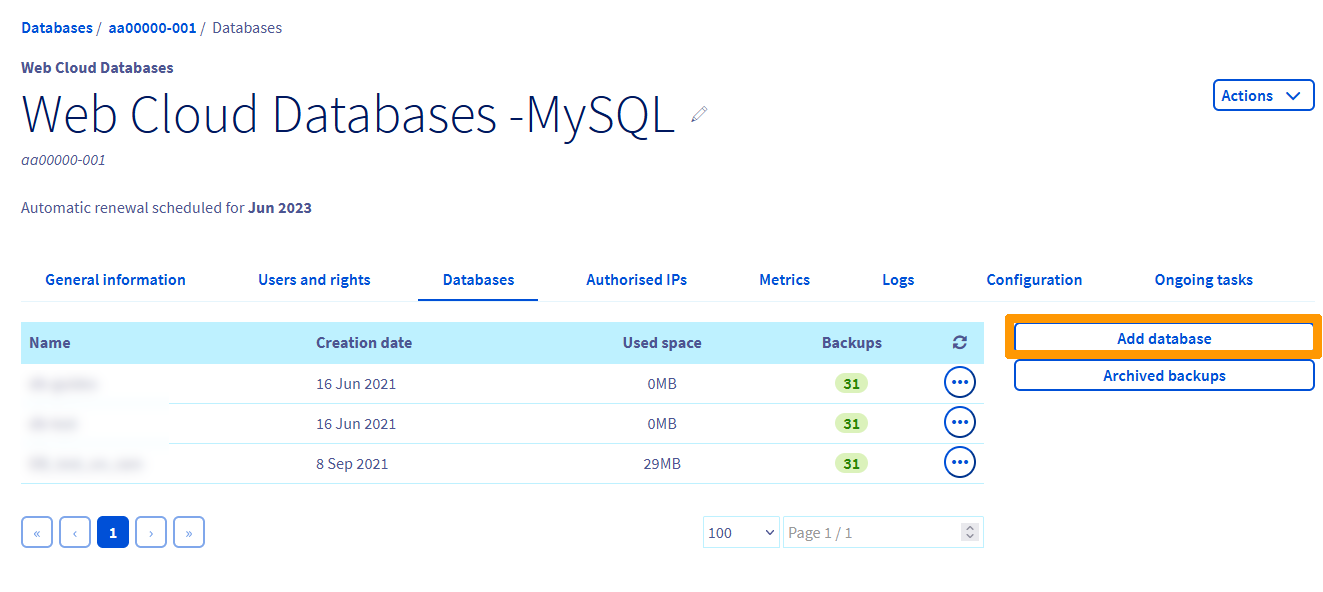
To create your first database on your Web Cloud Databases instance, click on the Databases tab, then on the Add a database button.
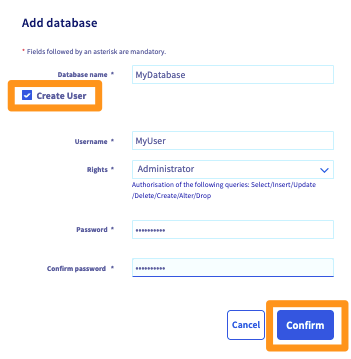
In the window that pops up, and at the same time as you create the database, you can choose to:
-
Create a user: this user will be able to submit requests to your database (such as reading, adding or deleting data).
-
Add an authorised IP address: requests coming from this address will be allowed to access your database.
Fill in the information requested depending on what you choose to do, and click Confirm.
For security reasons, please follow the conditions required when you enter information.
Create a user
This step does not apply to the Redis database system.
If you created a user whilst creating a database in the previous step, this step is optional. However, for more specific projects, you may need several users to be able to access your database. For example, one user associated with a database may need to have read and write permissions, whilst another may need only read permissions.
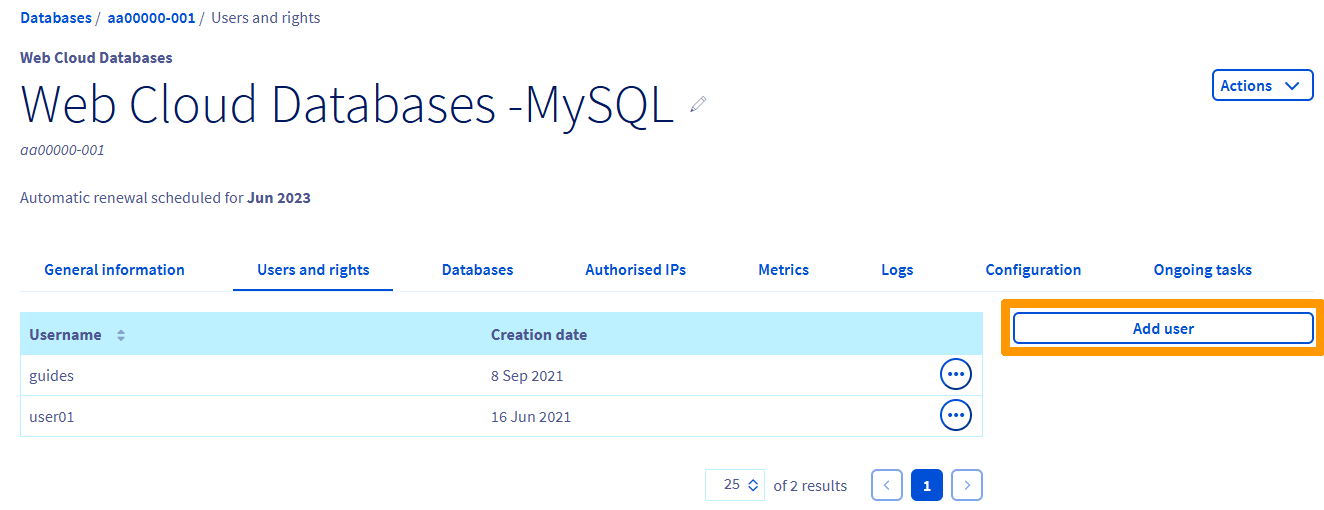
If you do not need an additional user for your project, you can move straight to the following step. If you do need to create a user in your Web Cloud Databases instance, you can click on the Users and permissions tab, then on the Add a user button.
In the window that pops up, fill in the information requested, and click Confirm.
For security reasons, please follow the conditions required when you enter information.

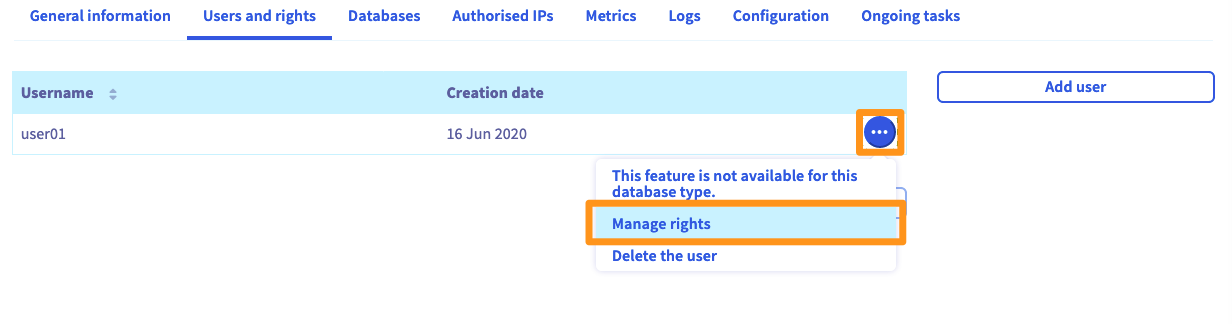
Once you have created a user, you will need to assign rights that allow them to perform actions on your database (such as reading, adding or deleting data). To do this, click on the cog wheel icon, then Manage rights. On the new page, select the right by clicking on it. For standard usage, select Administrator.
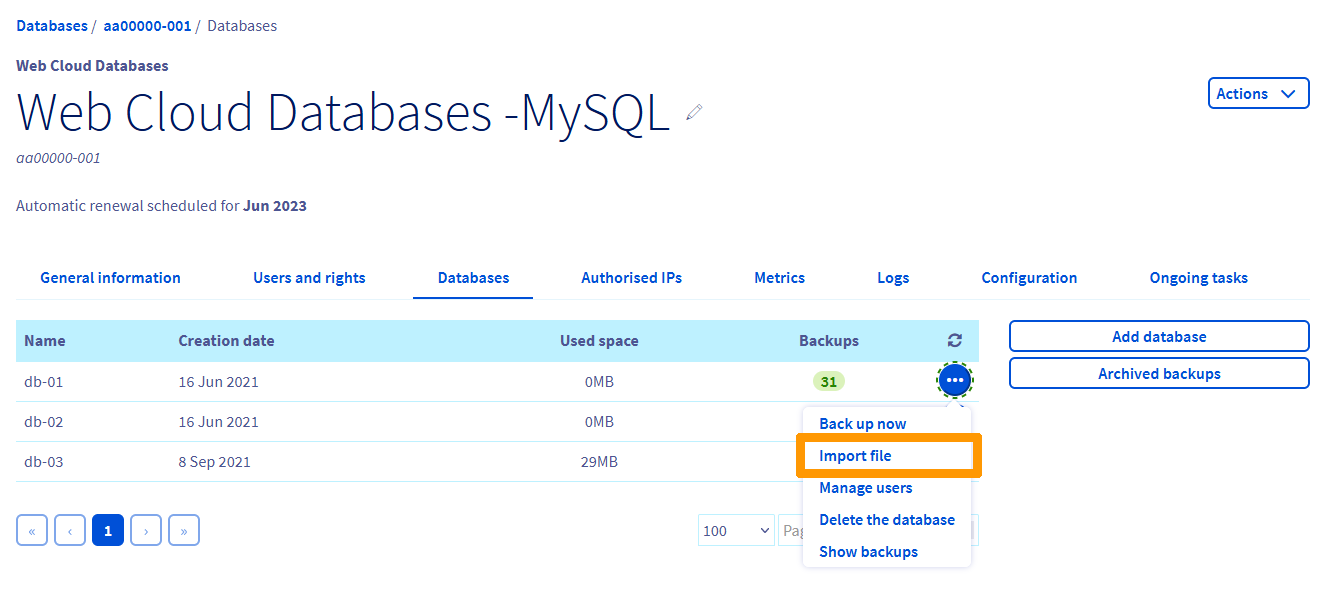
Import a database
This step applies if you want to import the backup of an existing database. Otherwise, please go to the next step.
There are several methods you can choose from to import a database. There is a tool available in your OVHcloud Control Panel, and we are going to focus on this method. However, you may of course use another method, if you prefer to do so and are familiar with it.
The steps below show how to import a database using the tool available in your OVHcloud Control Panel.
Step 1: Access the import interface.
Go to the Databases tab, click on the cog wheel icon, then Import a file. On the window that opens, tick the Import a new file box, then click Next.
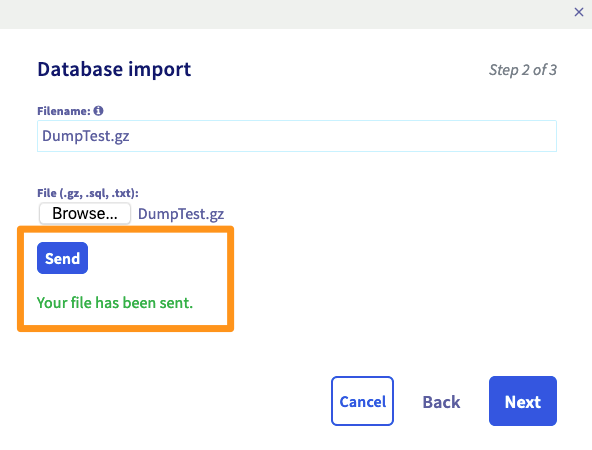
Step 2: Select and send the backup file.
Enter a filename that will allow you to identify this backup later, if you want to restore it again. Then, next to File, select the database backup file from your computer, and click Send. Wait until the interface confirms that the file has been sent successfully, then click Next.
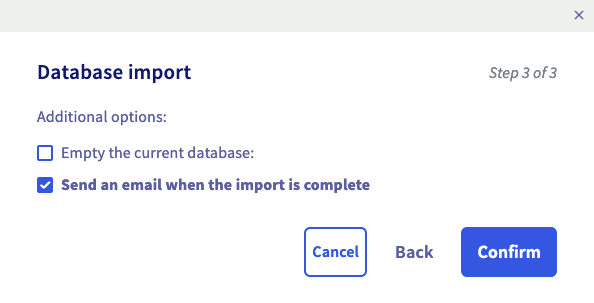
Step 3: Launch the database importation.
Finally, choose whether or not the additional options set out below should apply, and click Confirm.
Authorise an IP address
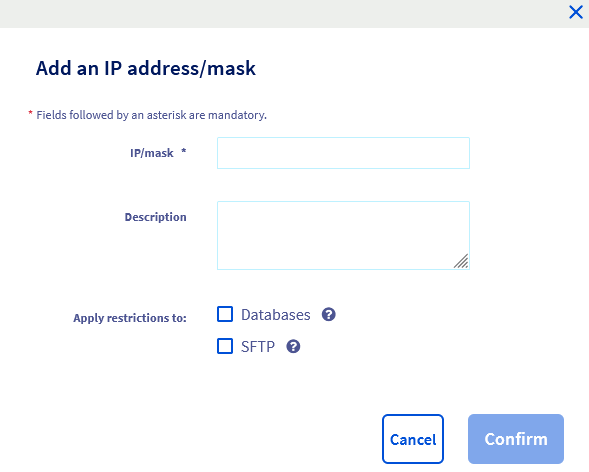
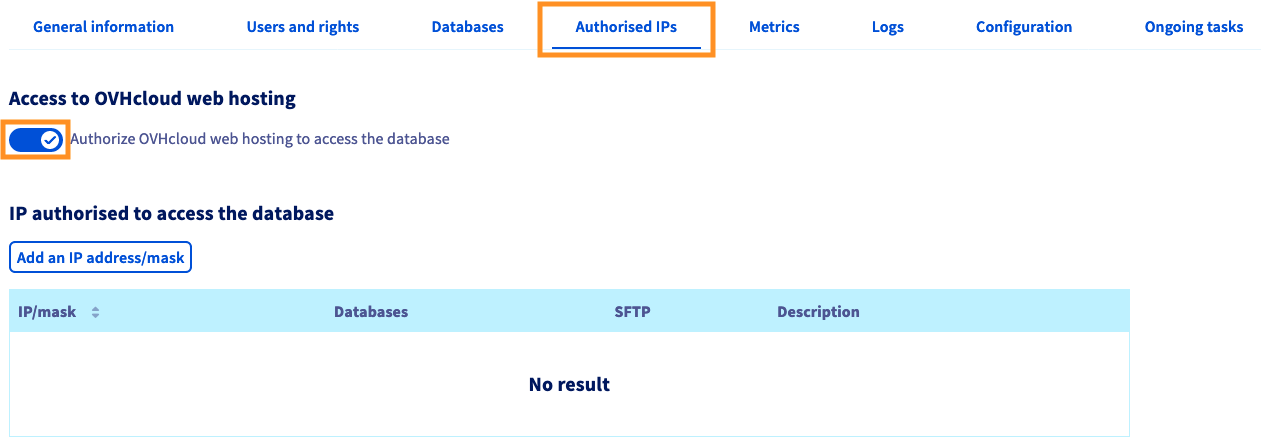
In order for your Web Cloud Databases instance to be accessible, you must enter the IP addresses or ranges that can connect to your database. To do this, click on the Authorised IPs tab, then click Add an IP address/mask.
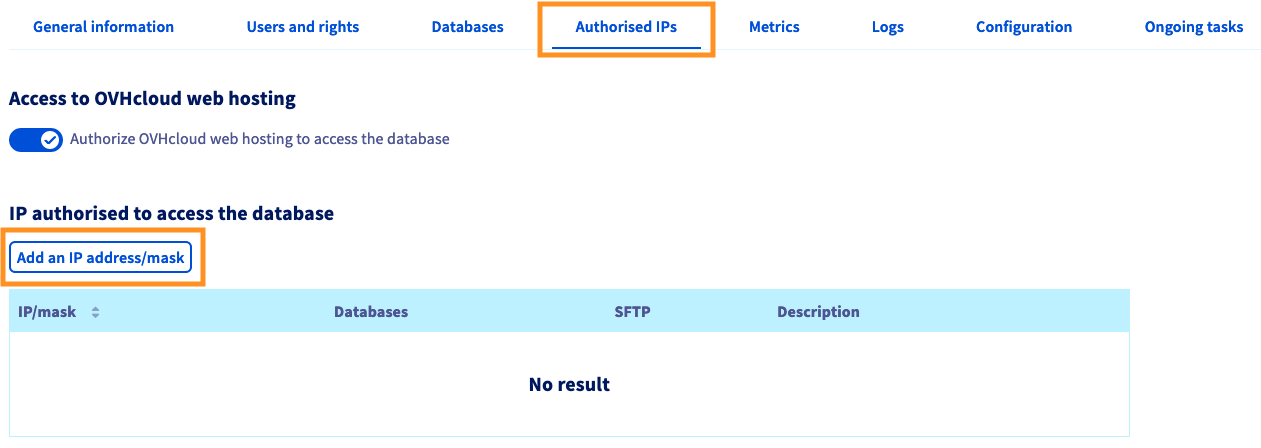
In the window that pops up, enter the IP address or mask that you wish to authorise in IP/mask together with a description if you wish. You can then decide if you want to grant access to the databases only, or to the SFTP as well. Finally, click Confirm.
Authorise the connection for an OVHcloud Web Hosting plan
By default, your Web Cloud Databases solution is automatically linked to OVHcloud web hosting plans. However, you can disable access to your Web Cloud Databases database for OVHcloud web hosting plans if you wish.
To do this, click on the authorised IPs tab then on the Access to OVHcloud web hosting plans button.
Link your website to the database
Now that you have created your database, created one or more users with access to it, and authorised at least one IP address or OVHcloud web hosting plans on your Web Cloud Databases instance, you just need to link your website to your database. You can use several methods to do this, depending on your website, the CMS you are using (WordPress, Joomla! etc.), or the stage you are at if you are setting up a website.
No matter which method you choose to follow, you must have the following five pieces of information to hand, to ensure that you do this successfully:
The field Server port may not be available in your site configuration. In this case, add this value after the hostname of your server, separated by a :.
For example, for the hostname zz1111111-002.eu.clouddb.ovh.net with SQL port 34567, you will need to enter zz1111111-002.eu.clouddb.ovh.net:34567 as the host/hostname ("Server hostname").
Retrieve your Web Cloud Databases server logs
To access the logs for your Web Cloud Databases solution, please refer to our guide "Web Cloud Databases - How to retrieve logs".
Go further
For specialised services (SEO, development, etc.), contact OVHcloud partners.
If you would like assistance using and configuring your OVHcloud solutions, please refer to our support offers.
Join our community of users.