AI Notebooks - Getting started with Public Cloud AI
Create, configure, and manage Jupyter and VSCode Notebooks on OVHcloud AI Notebooks via the OVHcloud Console, API, CLI, and Python SDK
Introduction
A Notebook is a document that integrates code, rich text elements, and multimedia, making it a convenient tool for data analysis, visualization, and Machine Learning tasks.
OVHcloud AI Notebooks is our managed solution for Jupyter and VSCode Notebooks. You can easily launch Notebooks with the required CPU and GPU resources while enjoying benefits like pre-installed dependencies and AI frameworks (e.g. TensorFlow, PyTorch, Hugging Face, Scikit-learn, ...), secure user access, and simplified data management.
The advantage compared to doing your own setup is that everything is already installed for you, and that you pay only for your AI Notebooks while they are running.
Objective
This guide demonstrates how to create, configure, access, stop, restart and delete AI Notebooks from multiple interfaces:
- The OVHcloud Console (UI) is user-friendly and ideal for beginners.
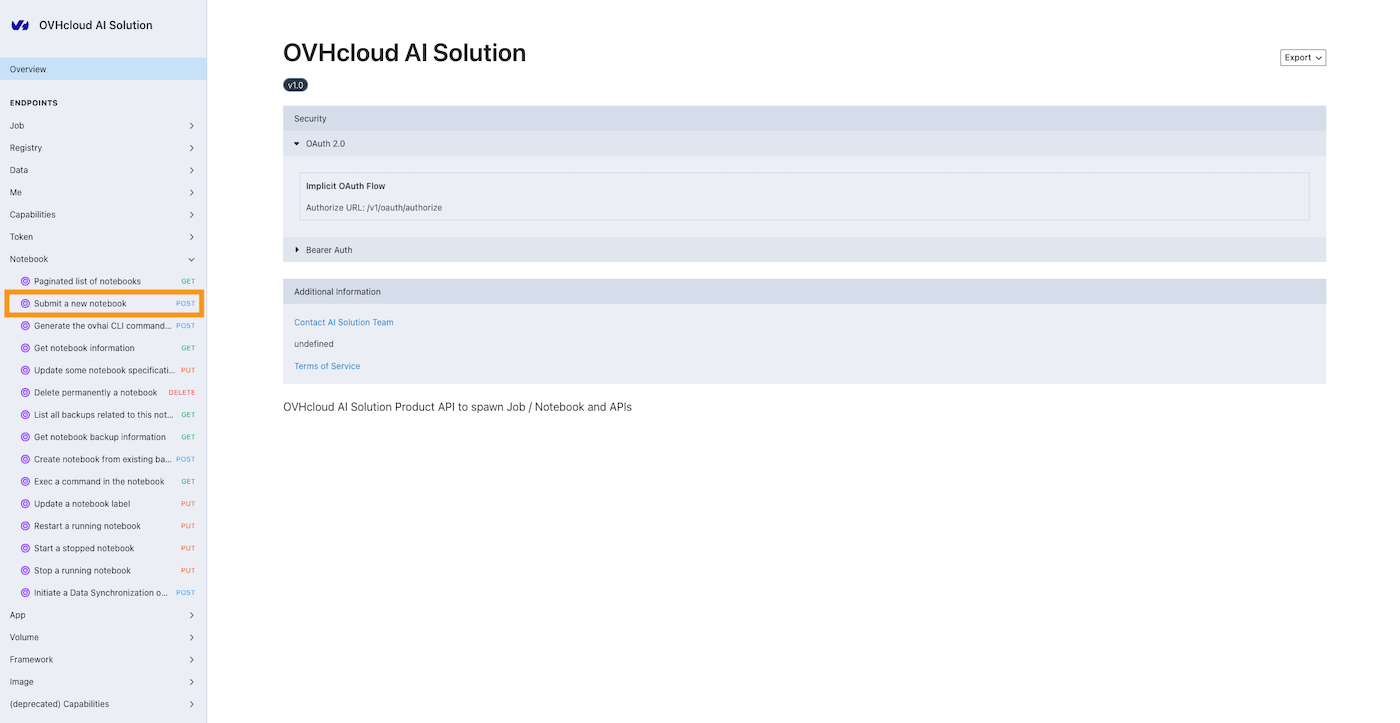
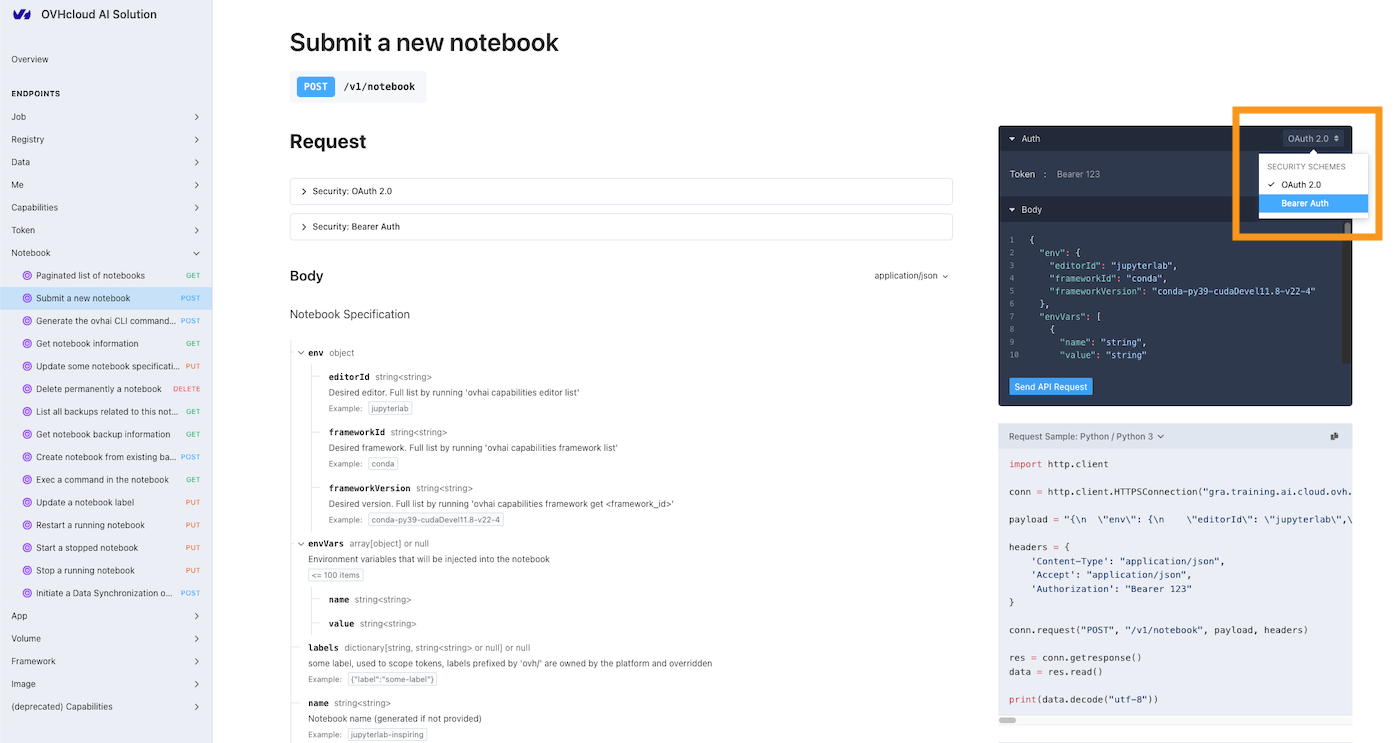
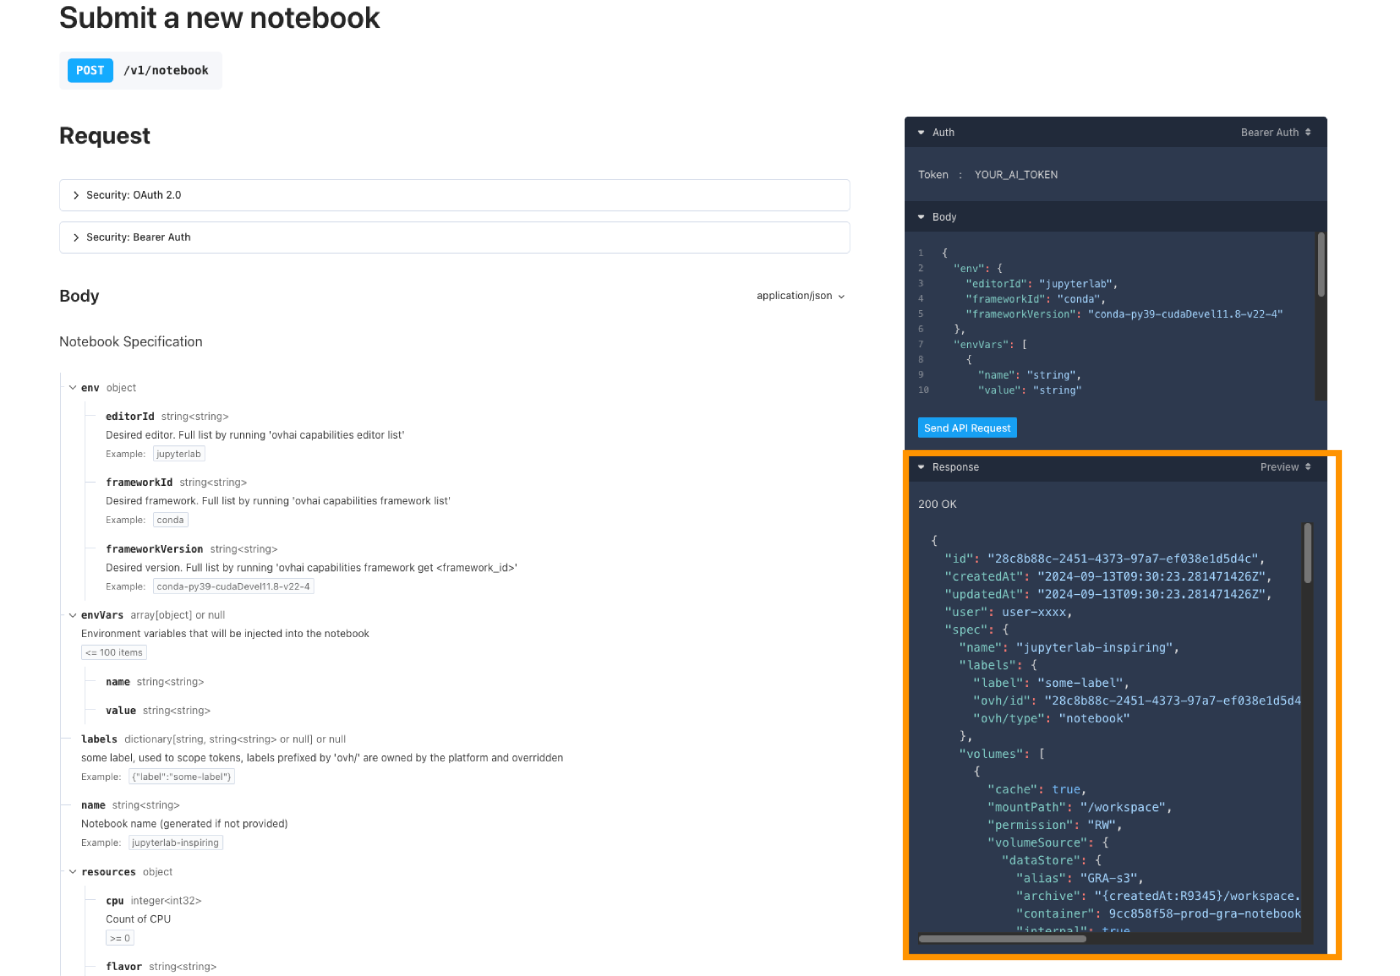
- The AI API
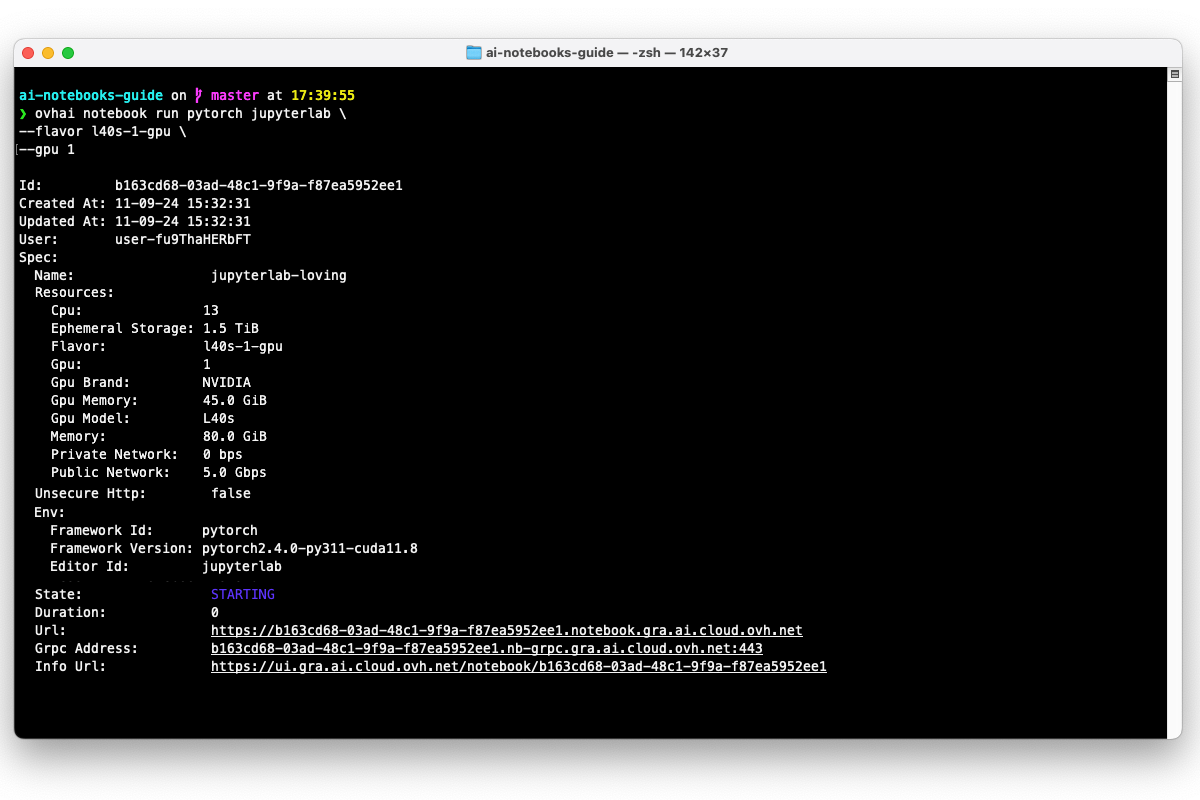
- The ovhai command-line interface (CLI)
- The ovhai Python SDK
Each method offers its distinct advantages, depending on your expertise and preferred workflow.
Requirements
- A Public Cloud project in your OVHcloud account
- A Public Cloud user with the Administrator or AI Operator & ObjectStore operator roles, see here for more information
OVHcloud Console Access
- Direct link:
- Navigation path:
Public Cloud> Select your project >AI>AI Notebooks
Instructions
OVHcloud AI Solutions Authorization Process
If you are using the UI, there is no separate step: if the project has not been authorised yet, the AI Notebooks page displays the Authorise this project for AI services banner. Click Authorise the project, then go to the next step which is the Notebook creation.
Launch your first AI Notebook
To create an AI Notebook, follow these steps:
The OVHcloud Console is the most intuitive way to launch an AI Notebook. To get started, follow these steps:
In the left-hand menu of your Public Cloud project, click AI Notebooks under AI.
Once there, you can create your first Notebook by clicking the Create a notebook button.
The Create a notebook page opens: provide the information that specifies the configuration of your AI Notebook (code editor, pre-installed framework, compute resources, etc.). A summary of your configuration and its estimated price per hour is displayed on the right-hand side.
1. Name
Give a name to your AI Notebook. This will make it easier to manage when you have multiple AI Notebooks created.
2. Region
Next, select the region where your notebook runs.
3. Flavor
Select the hardware your notebook runs on (CPU or GPU flavor) in the Flavor table, then adjust the Quantity of resources, depending on your needs.
4. Framework
Then, choose the AI framework you want to use, which will be pre-installed and ready to use when your AI Notebook is launched. A wide range of Machine Learning frameworks are available, in different versions. Select the Version that suits your needs. This guide will use PyTorch as an example.
5. Editor
Choose the code editor you want.
In this example, we use JupyterLab, but you have the option to choose Visual Studio Code as well. Both of them have their own pros and cons. Jupyter Notebook is generally considered easier to use for beginners.
6. Privacy
Next, select your privacy settings: Private (access requires a token) or Public (access without a token).
Public access will expose your data and code to anyone getting the AI Notebook link. Be careful and don't use it with sensitive data. On the other hand, Private access will ask a user and password combination or an AI token to access the Notebook content, ensuring a secure environment.
7. Expiration
Our main motivation is to keep the platform up-to-date in terms of security patches and new feature alignment. To achieve this, we need to update and restart hosts from time to time, which requires them to be free from any customer workload.
By default, your AI notebook will automatically shut down after 7 consecutive days of being in a RUNNING state. Rest assured that all your settings and data will be preserved. You have the option to turn on Automatically restart after timeout, which will automatically restart your notebook every 7 days, ensuring minimal disruption to your workflow. Alternatively, you can also contact our support to extend this period to 28 days.
8. Advanced configuration
This step is optional.
By default, your AI Notebook comes with ephemeral storage (local storage). But in this step, you can also link Object Storage containers (Volumes) and Git repositories (Git Public) to your AI Notebook, to easily access your remote data.
If you want to learn more about configuring containers and Git repositories in the Notebook, you can refer to this documentation. For now, we will launch a classic Notebook without any external volumes added to it.
After that, you have the option to set Labels. This lets you specify one of your AI tokens and apply it to this new AI Notebook. This AI token can then be shared with anyone who should have access to the Notebook, allowing them to access it without requiring your own Public Cloud project credentials. This is useful if you want to provide access to the AI Notebook outside your Public Cloud project. More information about tokens is available in the Manage access tokens documentation.
Finally, the SSH key option lets you access your Notebook remotely.
9. Launch the AI Notebook
At the end of the process, review the summary of your settings and click the Create the notebook button to confirm and launch the creation of your Notebook.
Click CLI equivalent to display the equivalent ovhai CLI command. This command allows you to run the exact same Notebook using the CLI.
When your Notebook is created, it will appear in the list of your AI Notebooks.
Accessing your AI Notebook
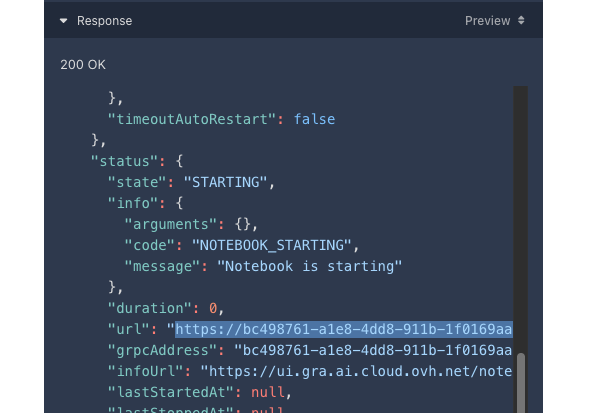
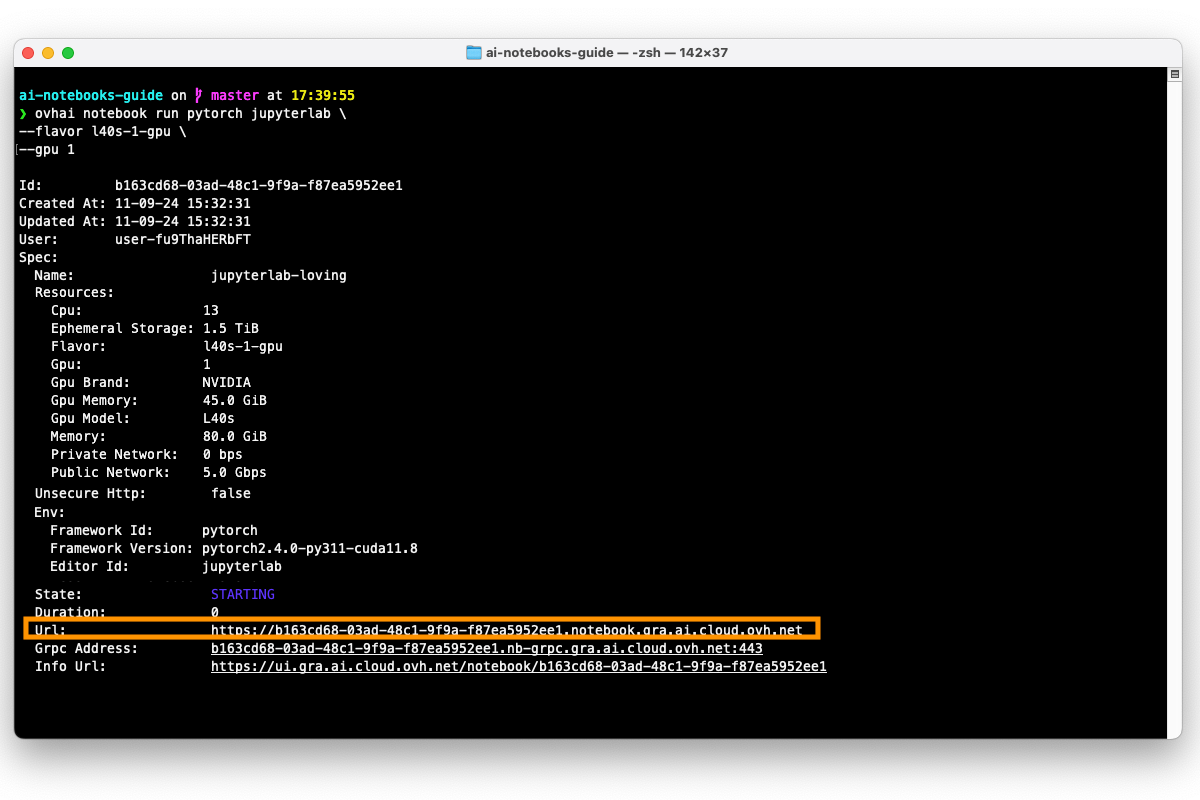
At this point your AI Notebook is created. You will need to wait a few seconds for the Notebook to start and reach the RUNNING status. Once it has, the Notebook URL will be accessible.
In the left-hand menu of your Public Cloud project, click AI Notebooks under AI. Then, click the name of the notebook to open its Overview tab.
In the Connection details card, click the Open JupyterLab button (the button is named after the editor you selected). The Editor URL field gives the same link.
On your Notebook page, you will find a lot of information about your Notebook (specifications, life cycle, attached data in the Containers tab, ...). The Monitoring Grafana link of the Connection details card allows you to view real-time metrics for your Notebook, such as the GPU average usage for example.
Connecting to your AI Notebook
Once you have clicked on the Notebook URL, you will be redirected to the corresponding Notebook page. For restricted access Notebooks, you will need to authenticate to ensure you have the required rights for accessing it.
For public access Notebooks, no authentication will be needed, so you will directly land on the notebook with your data and code exposed.
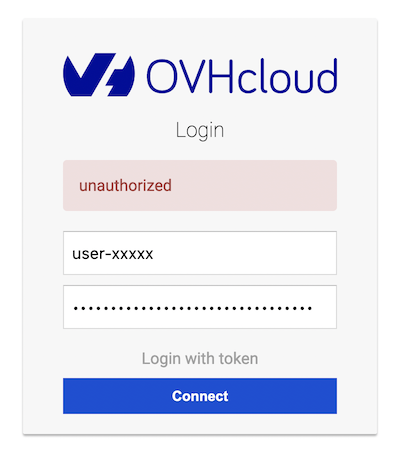
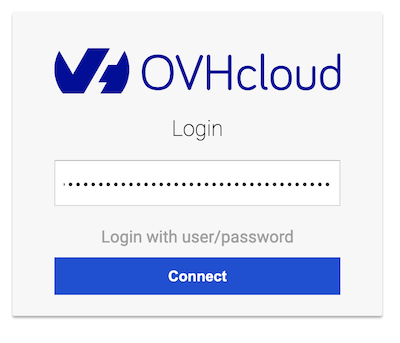
There are two methods of authentication for a restricted Notebook: using a username and password combination or using an access token.
To authenticate using a username and password, please follow these steps:
Enter one of your Public Cloud project user's username and password in the respective fields, as shown in the screenshot below. The user needs to belong to the same Public Cloud project you used to create the Notebook and must have sufficient permissions.
If you have not yet created a Public Cloud user for your project, or require more information on how to do so, please refer to the following guide.
Once you have entered your username and password, click the Connect button to log in to your AI Notebook.
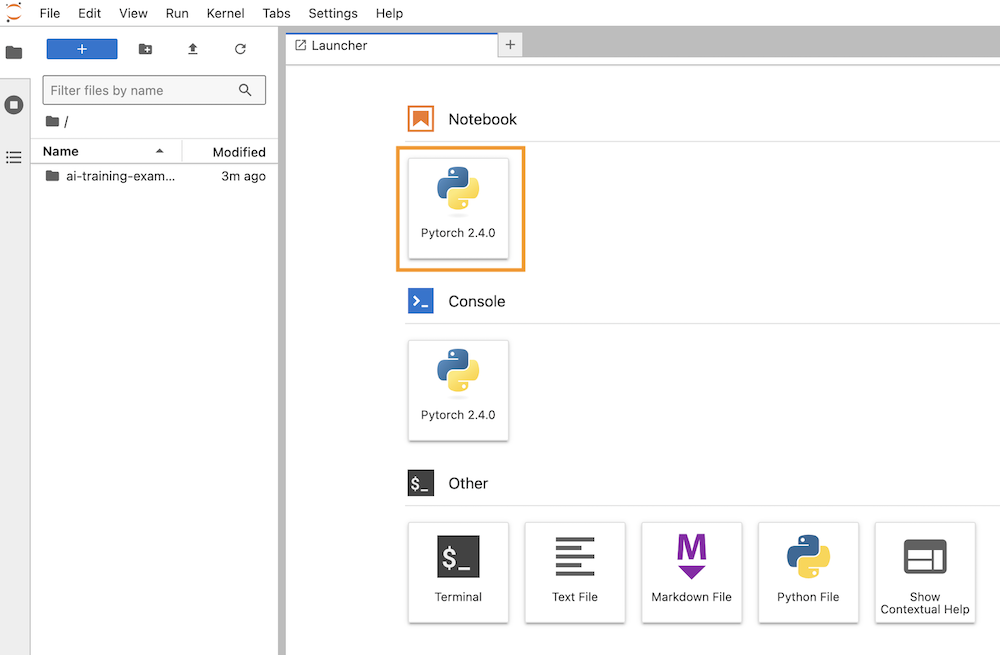
Once you have successfully reached JupyterLab, you can create your first Notebook by clicking on the Pytorch 2.4.0 button (or a similar button name depending on the framework you have selected).
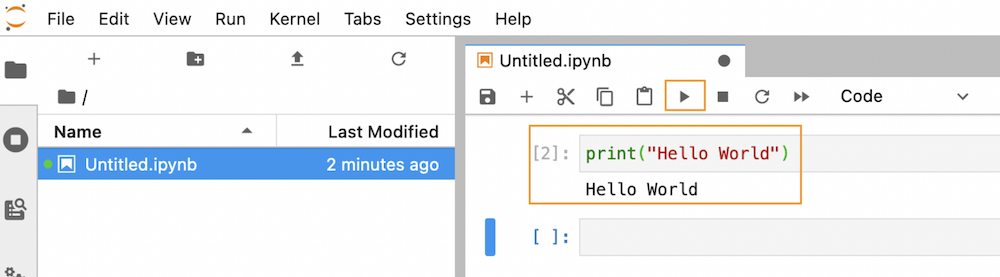
With your new Notebook open, enter some Python code in the first code cell. We can test it with a simple Hello World :
To execute the code, simply press the ▶️ button located in the toolbar above the code cell. You should then see the output:
Alternatively, you can use the keyboard shortcut Ctrl+Enter, or CMD+Enter, to save the Notebook quickly.
Your code is executed in your browser and will consume the CPU and GPU resources linked to your AI Notebook.
To save your Notebook, click on the sub-menu Save of the File menu. Alternatively, you can use the keyboard shortcut Ctrl+S, or CMD+S, to save the Notebook quickly.
Getting started with code examples
To help you get started with your AI Notebook, we provide a GitHub repository named ai-training-examples, containing code examples and tutorials. This repository is already cloned in your Notebook /workspace when you launch it, so you can start exploring the examples right away.
We currently provide a variety of tutorials, including for examples:
- Tensorflow tutorials as
ipython notebooks- Basic computation using single CPU or GPU: accessible on
notebooks/getting-started/tensorflow/basic_gpu_cpu_benchmark.ipynb. GitHub preview available here. - Basic computation using multiple GPUs: accessible on
notebooks/getting-started/tensorflow/multiple_gpus_computation.ipynb. GitHub preview available here.
- Basic computation using single CPU or GPU: accessible on
- A PyTorch version of this multi-GPU benchmarking tutorial, available here.
These tutorials demonstrate how to perform simple tensor computations and compare the performance of running them on CPU versus GPU.
In addition to these tutorials, we also provide examples for more advanced topics, including:
- Audio classification
- Image classification
- Image Generation
- Image Segmentation
- Object detection
You can also learn to compare AI models based on resource consumption, accuracy, and training time. Refer to this tutorial for more information.
Stopping an AI Notebook
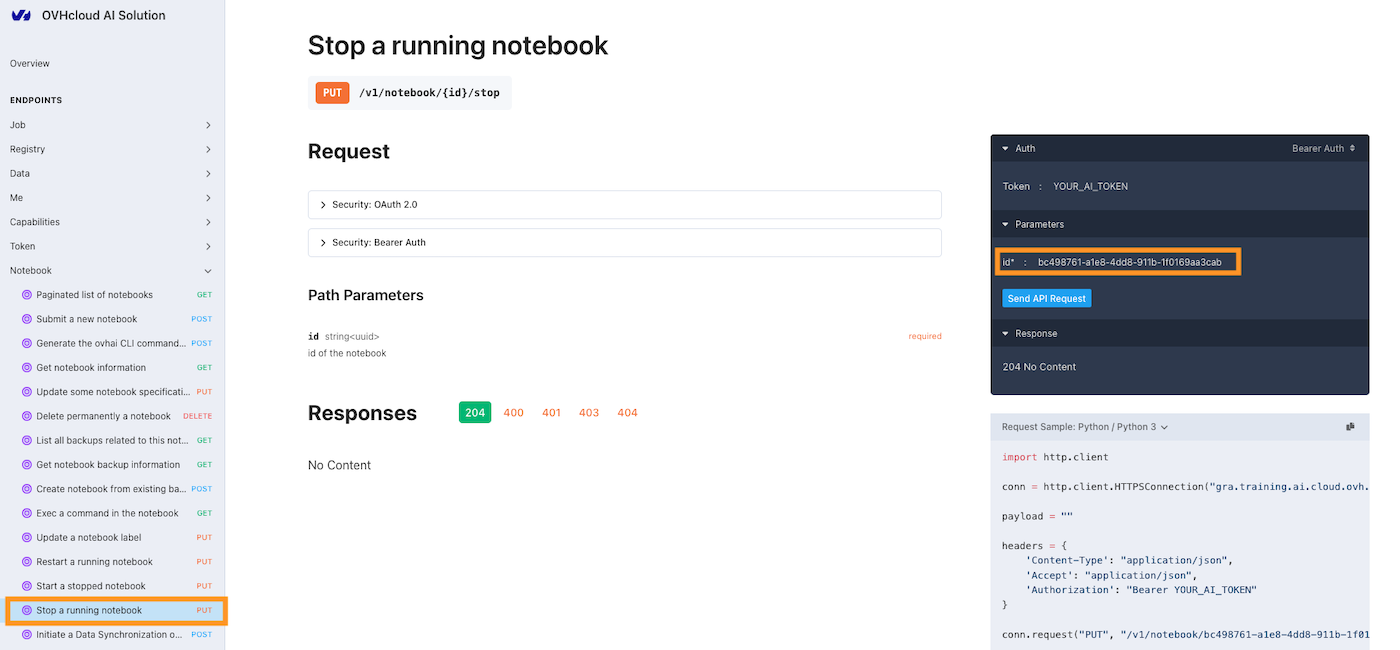
You can stop your AI Notebook at any time. This will release its compute resources but will keep your Notebook data and installed libraries. Therefore, you will not incur any further charges for compute unless you restart the Notebook. However, attached storage will be billed at the price of OVHcloud Object Storage. Consult the AI Notebooks Billing documentation for more information.
Indeed, when you stop a Notebook, it will be unavailable for a certain period while your data is synchronized to the Object Storage, so that you can retrieve your work later. Once the synchronization is complete, the Notebook will reach the STOPPED state, at which point you can either start it again or delete it.
In the left-hand menu of your Public Cloud project, click AI Notebooks under AI. Then, click the name of the notebook to open its Overview tab.
In the General information card, click Stop, then confirm with Stop. You can also use the ... button on the row of the notebook in the AI Notebooks list.
Starting a stopped Notebook
Once the Notebook has reached the Stopped state, you may be interested in starting it in order to continue your work.
In the left-hand menu of your Public Cloud project, click AI Notebooks under AI. Then, click the name of the notebook to open its Overview tab.
In the General information card, click Start, then confirm with Start. You can also use the ... button on the row of the notebook in the AI Notebooks list.
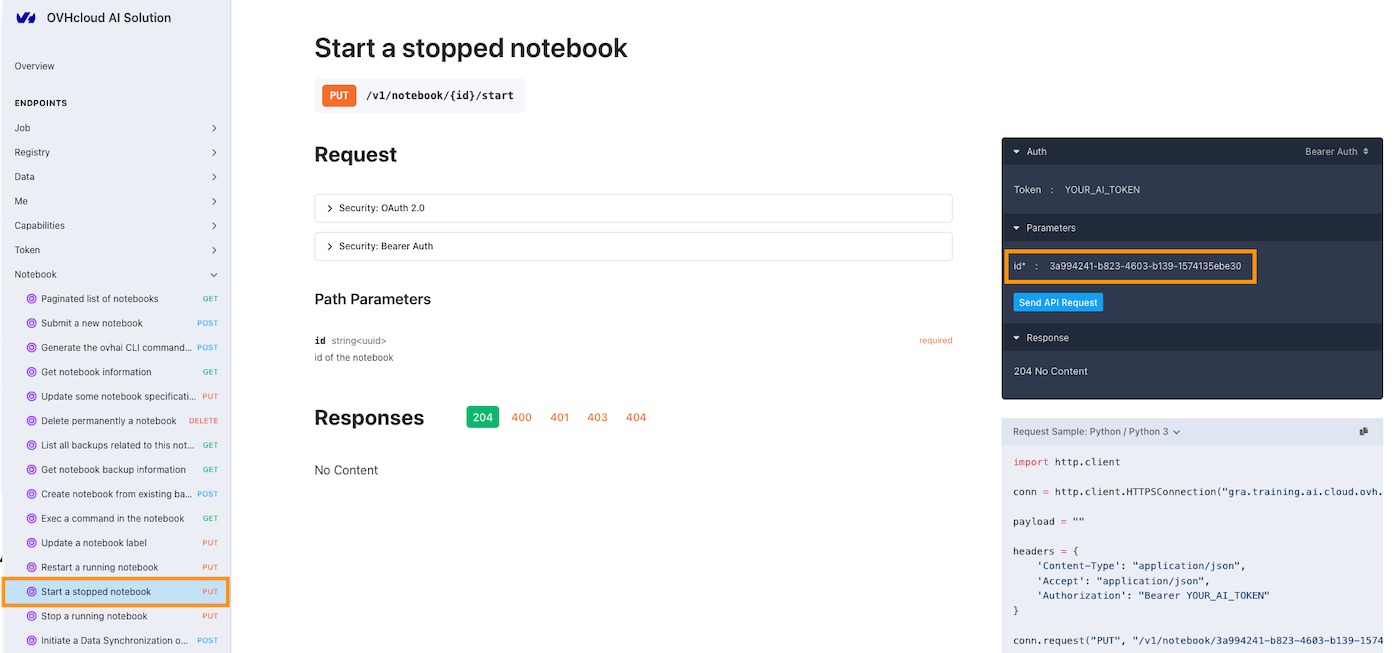
Starting a Notebook will transition its state to RUNNING, once the Notebook is started. However, there will be a short waiting period while your data synchronizes back to your Notebook (internal workspace and remotely mounted volumes if any). During this data synchronization, the Notebook's state will display as Pending or Starting before entering the RUNNING state.
Restarting a Notebook
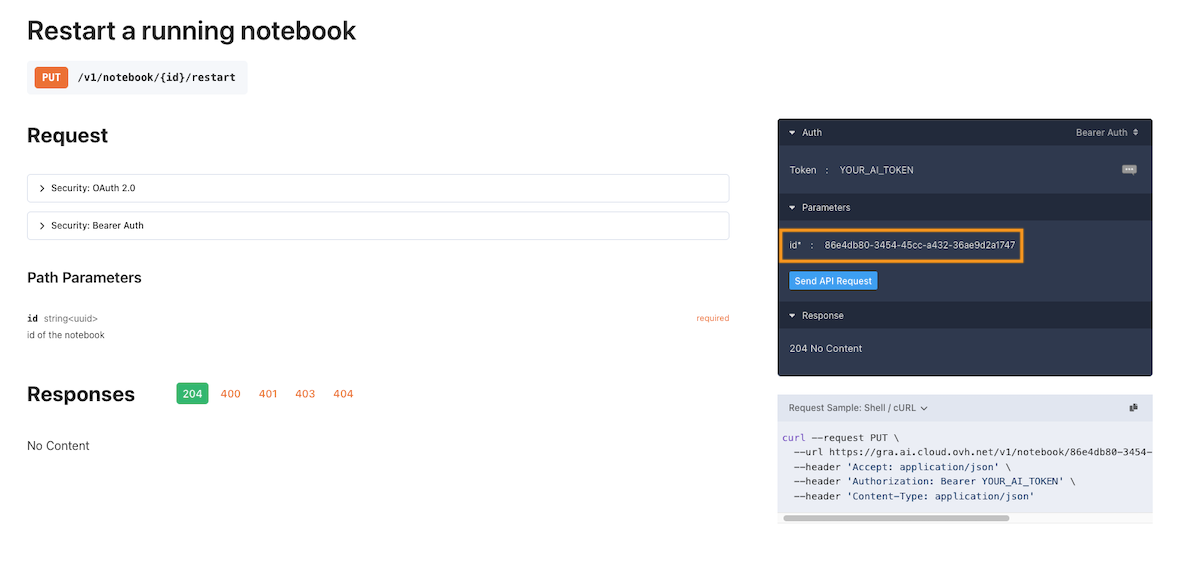
When your Notebook is in the RUNNING state, you may want to restart it to refresh the environment or apply updates while preserving all your data and settings.
The restart operation will not trigger a datasync process, which means your notebook's data and settings will be preserved without requiring the time consuming process of copying data.
If you have enabled the Automatic Restart feature, your Notebook will automatically restart every 7 days without requiring manual intervention. You also have the option to extend this period to 28 days by contacting our support.
In the left-hand menu of your Public Cloud project, click AI Notebooks under AI. Then, click the name of the notebook to open its Overview tab.
In the General information card, click Restart, then confirm with Restart. You can also use the ... button on the row of the notebook in the AI Notebooks list.
Deleting a Notebook
If you no longer need your Notebook, you can delete it.
Deleting a Notebook also means that you will delete the Notebook's local storage. This data cannot be recovered once the Notebook has been deleted. However, any remote Object Storage that was mounted on the AI Notebook during its creation will not be deleted.
If you want to completely delete your AI Notebook, click the ... button on the row of the notebook in the AI Notebooks list, then select Delete. You can also click Delete notebook in the General information card of the notebook. Confirm with Delete.
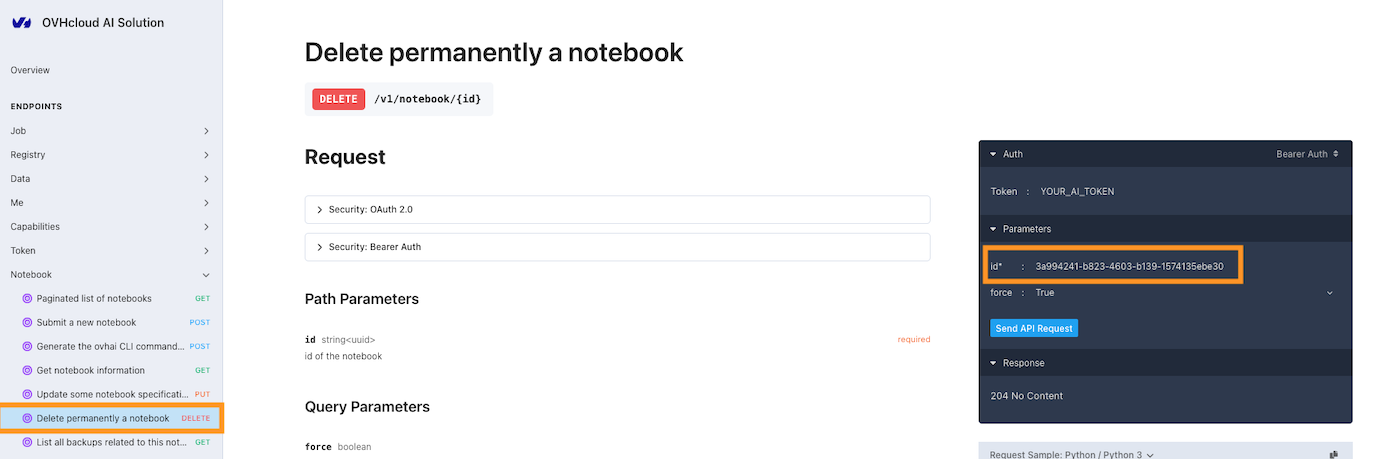
Once the AI Notebook has been deleted, you should no longer see it when listing your existing AI Notebooks.
Go further
-
Discover how to access your Object Storage data and Git repositories from your Notebooks using the UI here.
-
To learn about the technical features, capabilities, and limitations of the Public Cloud AI Notebooks offer, explore this guide.
-
To get some hints on how to debug your Notebooks if things go wrong, see the Troubleshooting documentation.
-
To discover the AI Notebooks lifecycle and billing, explore this guide.
For training or technical assistance implementing our solutions, contact your sales representative or visit our Professional Services page to request a quote and have your project analysed by our experts.
Feedback
Please feel free to send us your questions, feedback, and suggestions regarding AI Notebooks:
- In the #ai-notebooks channel of the OVHcloud Discord server, where you can engage with the community and OVHcloud team members.