Update a subnet properties
Find out how to update the properties of an existing subnet
Objective
This page explains how to update the properties of an existing subnet. This can be needed if you want to comply with the prerequisites to be able to use the Public Cloud Gateway: have a gateway IP defined in your subnet.
For this example, we will use a private network and a subnet with the following properties:
- CIDR 10.1.0.0/16
- DHCP enabled with allocation pool on the global range
- No gateway IP
We will see how to update it to have a gateway IP set to 10.1.0.1 and remove that IP from the allocation pool.
Requirements
You must have created a private network and a subnet as explained in this guide.
OVHcloud Console Access
- Direct link:
- Navigation path:
Public Cloud> Select your project >Network>Subnet
Instructions
Using the OVHcloud Console
In the left-hand menu of your Public Cloud project, click Subnet under Network. The list shows each subnet with its private network, region, CIDR, gateway and IP pool range.
From the Console, you can:
- Create a subnet: click
Create a subnet. - Attach or detach a Gateway: click the
...button on the subnet's row, thenAttach a gatewayorDetach gateway. - Delete a subnet: click the
...button on the subnet's row, thenDelete.
Click the name of a subnet to open its details: the Overview tab shows its network properties (CIDR, gateway IP, DNS, DHCP and IP pool range), and the Instances and Load Balancers tabs list the resources connected to it.
The Console does not let you change the gateway IP or the allocation pools of an existing subnet. To do so, use Horizon or the OpenStack CLI.
Using Horizon
Connect to Horizon & choose the region where the subnet is defined as explained in this guide.
Click on Project > Network > Networks. The page will display the list of networks available which contain an OVHcloud managed network for public connectivity (Ext-Net) as well as your network.
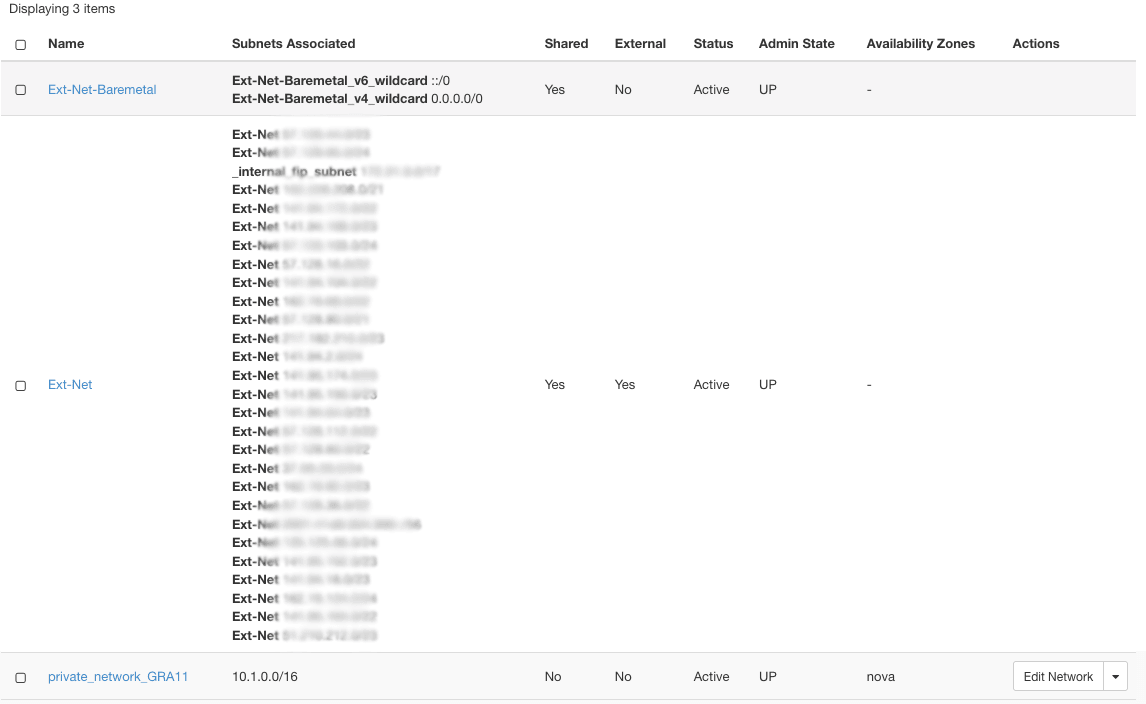
In that list, click on your network name ("private_network_GRA11" in this example). The network detail page is then displayed.
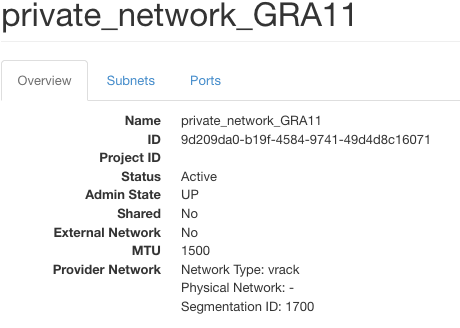
Click the Subnets tab: the subnets from the private network are listed.
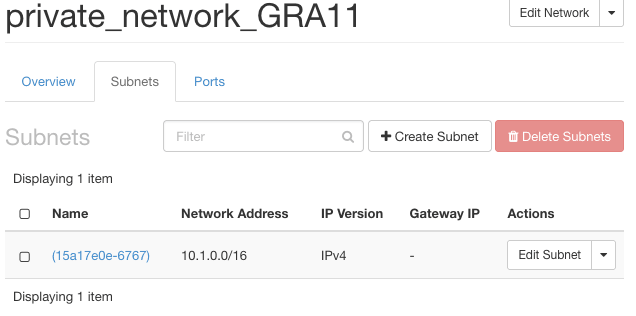
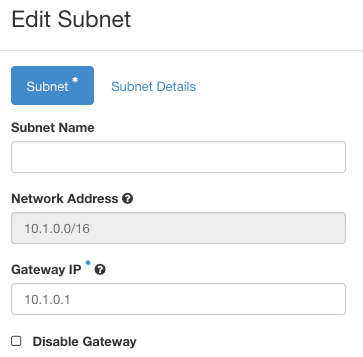
Click on your Edit Subnet. For this guide, our target is to add a gateway IP:
- Untick the
Disable Gateway. The fieldGateway IPwill appear. Fill it in with an IP within your CIDR (usually the first IP of the range is used). In our case,10.1.0.1.
- Click on
Subnet Details. Update theAllocation Poolsto remove the gateway IP that you entered in the previous step. In our case, we need to update from10.1.0.1,10.1.255.254to10.1.0.2,10.1.255.254
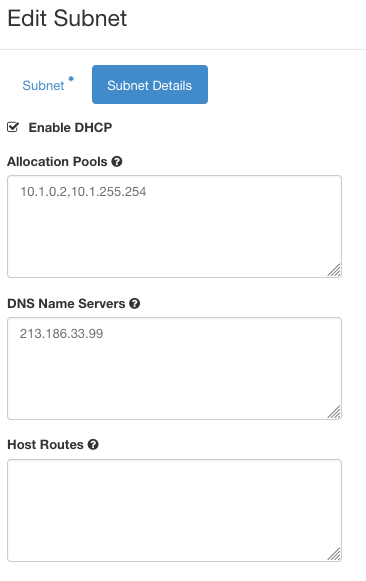
Click on Save and your subnet is updated with a gateway IP!
Using the OpenStack Command Line Interface
You need to have your CLI environment set up and your variables defined.
Run the following command (replace private_network_GRA11 by the name of your private network):
In this output, the subnets line provides the UID of your subnet.
You can check your subnet detail by running the following command (update the UID according to your value!):
Now let's update the gateway_ip and the allocation_pool:
You can check that the subnet has been updated:
Go further
For training or technical assistance implementing our solutions, contact your sales representative or visit our Professional Services page to request a quote and have your project analysed by our experts.
Join our community of users.