
Deploying a GPU application on OVHcloud Managed Kubernetes Service
Find out how to deploy a GPU application on OVHcloud Managed Kubernetes
Objective
In this tutorial we will show you how to deploy a GPU application on an OVHcloud Managed Kubernetes cluster.
GPUs provide compute power to drive AI/ML & Deep Learning tasks with intensive calculations such as image recognition, natural language processing (NLP), as well as other compute-intensive tasks such as video transcoding and image processing.
Using GPUs with Kubernetes allows you to extend the scalability of Kubernetes to AI/ML applications.
Before you begin
This tutorial presupposes that you already have a working OVHcloud Managed Kubernetes cluster, and some basic knowledge of how to operate it. If you want to know more on those topics, please look at the OVHcloud Managed Kubernetes Service Quickstart.
You also need to have Helm installed on your workstation and your cluster. Please refer to the How to install Helm on OVHcloud Managed Kubernetes Service tutorial.
Prerequisites
To get the best and most cost-effective benefit from GPUs on OVHcloud Managed Kubernetes, and to take advantage of cluster autoscaling, we recommend that you create separate GPU node pools in your Kubernetes clusters.
GPU node pools group nodes of the same GPU flavor and can be configured with autoscaling to handle variable workloads efficiently.
The GPU operator that you will install should run on Kubernetes nodes that are equipped with GPUs.
So you need to create a node pool with t1 flavor type.
If you already have an OVHcloud Kubernetes cluster with a node pool with t1 flavor type, you can skip the following Autoscaling GPU Node Pool creation step.
GPU Virtual machines are extremely powerful and significantly more expensive than general purpose nodes. If you are usually using OVHcloud Public Cloud at small scale and/or are a new user, you may need to raise your Public Cloud quota to enable access to those type of machines for your project. Also note that these machines are only available in some of our Public Cloud regions.
Also note that while worker nodes (be them added manually or through cluster autoscaler) are created within a few minutes, our GPU worker nodes ready status can take up to a bit more than one hour.
OVHcloud Control Panel Access
- Direct link:
- Navigation path:
Public Cloud> Select your project >Managed Kubernetes Service
Instructions
Autoscaling GPU Node Pool creation
Click on your cluster, then on the Node pools tab.
We will create our special GPU Node Pool.
Click on Add a node pool.
In the node pool creation form, enter a name for your GPU node pool (for example, gpu-node-pool).
On the flavor selection step, click the GPU tab and select a GPU flavor such as T1-45.
Set the node count and, if desired, enable Autoscaling and define the minimum and maximum pool size (for example, 3 minimum and 10 maximum).
Select Hourly as the billing mode for this GPU node pool.
The node pool creation is now in progress. It should be available within a few minutes in your OVHcloud Control Panel.
Once the node pool status shows OK in the OVHcloud Control Panel, you can confirm the GPU nodes are correctly labelled using the command above.
NVIDIA GPU Operator
The NVIDIA GPU Operator uses the Operator Framework within Kubernetes to automate the management of all NVIDIA software components needed to provision GPU. These components include the NVIDIA drivers (to enable CUDA), Kubernetes device plugin for GPUs, the NVIDIA Container Runtime, automatic node labelling, DCGM based monitoring and others.
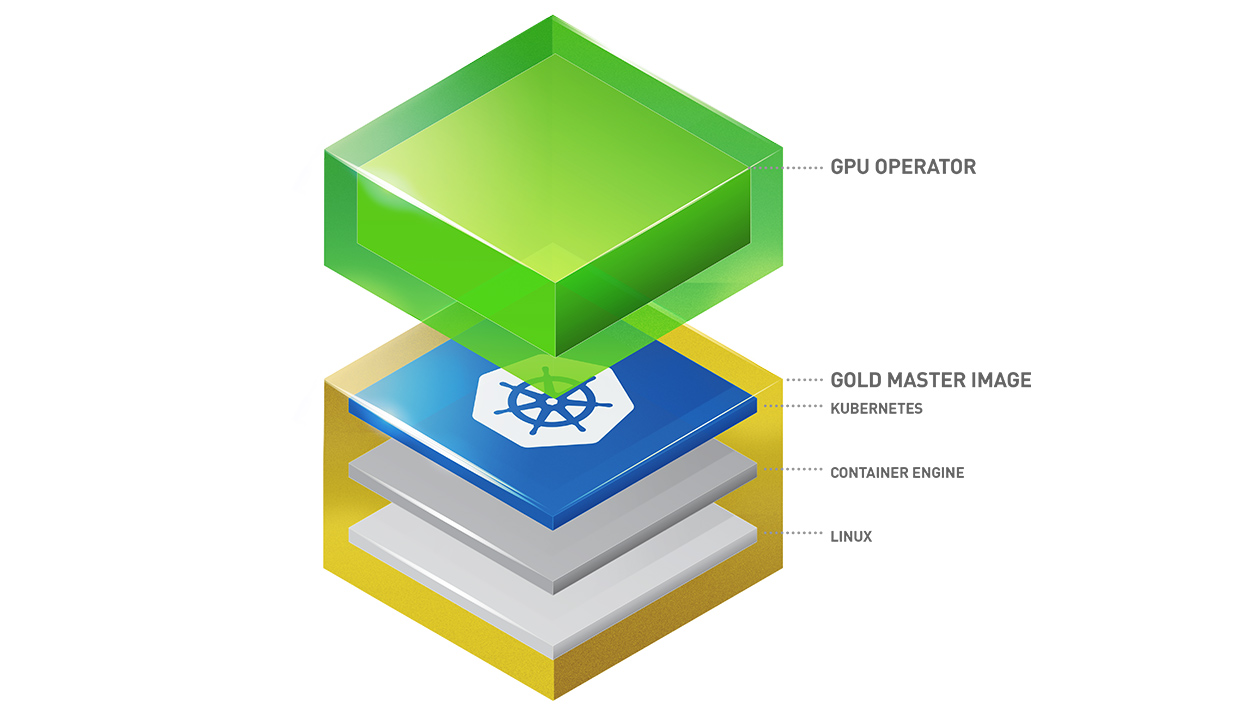
If you are interested about the operator, feel free to read the NVIDIA GPU operator official documentation.
Installing the NVIDIA GPU Operator Helm chart
For this tutorial we are using the NVIDIA GPU Operator Helm chart found on NVIDIA repository. The chart is fully configurable, but here we are using the default configuration, with only the minimal set of customization to make it work well on OVHcloud Managed Kubernetes Service.
Add the NVIDIA Helm repository:
The Nvidia Helm chart has moved. If you already added a repo with the name nvidia, you can remove it: helm repo remove nvidia.
This will add the NVIDIA repository and update all of your repositories:
Install the GPU Operator in the gpu-operator namespace:
We recommend using the latest driver version released by NVIDIA with the *-5.15.0-*-generic-ubuntu22.04 pattern, available in the NVIDIA NGC driver catalog.
Example: 595-5.15.0-185-generic-ubuntu22.04. Set it using driver.version in the gpu-operator chart values.
You should have a GPU operator installed and running:
Verify GPU Operator Install
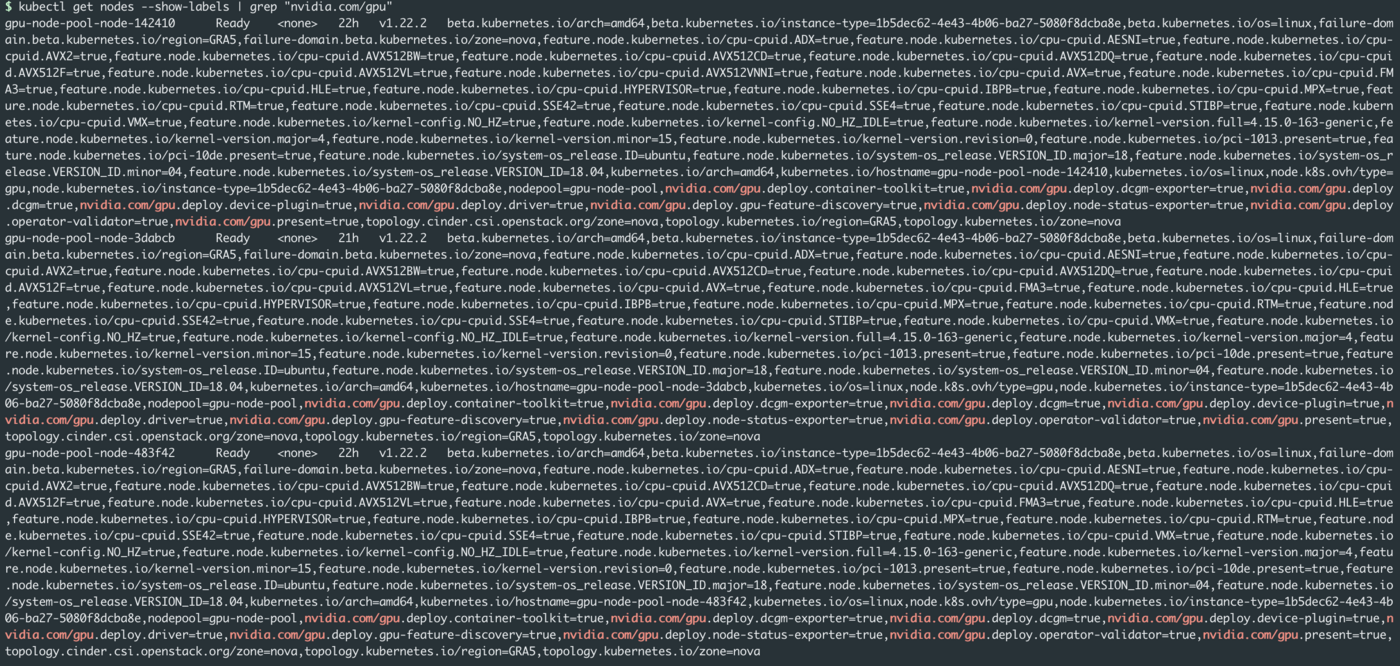
When the GPU operator is UP and running, it will add nvidia.com/gpu labels on GPU Nodes.
You can check new labels with the command:
New labels should appear only on your GPU Nodes:
Running Sample GPU Applications
You can now proceed to running a GPU application/workload on your cluster.
To configure Pods to consume GPUs, you need to use a resource limit in your YAML manifest file. You have to specify a resource limit in a Pod specification using the following key-value pair:
Create a vector.yaml YAML manifest file with the following content:
Apply it:
And watch the Pod startup:
You should have results like this:
When the cuda-vectoradd has started, run and completed its task, watch the logs with the following command:
Our first GPU workload is just started up and has done its task in our OVHcloud Managed Kubernetes cluster.
Go further
To learn more about using your Kubernetes cluster the practical way, we invite you to look at our OVHcloud Managed Kubernetes documentation.
For training or technical assistance implementing our solutions, contact your sales representative or visit our Professional Services page to request a quote and have your project analysed by our experts.
Join our community of users.