
OPCP Admin Console
Find out how to log in to the OPCP Admin Console, create Organizations, deploy services and enable them for Organizations
Alpha version — This guide documents the alpha version of Cloud Store. Features, interfaces and procedures will change until general availability (GA), and this guide will be updated along with them.
Objective
This guide shows IT Admins how to use the OPCP Admin Console to create Organizations, deploy services from the Service Catalog and enable them for Organizations.
The OPCP Admin Console is the Cloud Store interface for IT Admins. For an overview of Cloud Store and its concepts, read the guide Getting started with Cloud Store.
Requirements
- The URL of the OPCP Admin Console and your login credentials, provided during service delivery. These credentials are managed in the OPCP Admin Console Keycloak.
- HTTPS access (TCP/443) to the OPCP Admin Console URL from your workstation.
- Bare-metal hosts enrolled in OPCP Core and assigned to OpenStack projects, with available hosts for the services you plan to deploy.
Instructions
Logging in to the OPCP Admin Console
Navigate to the URL of the OPCP Admin Console and click Log in.
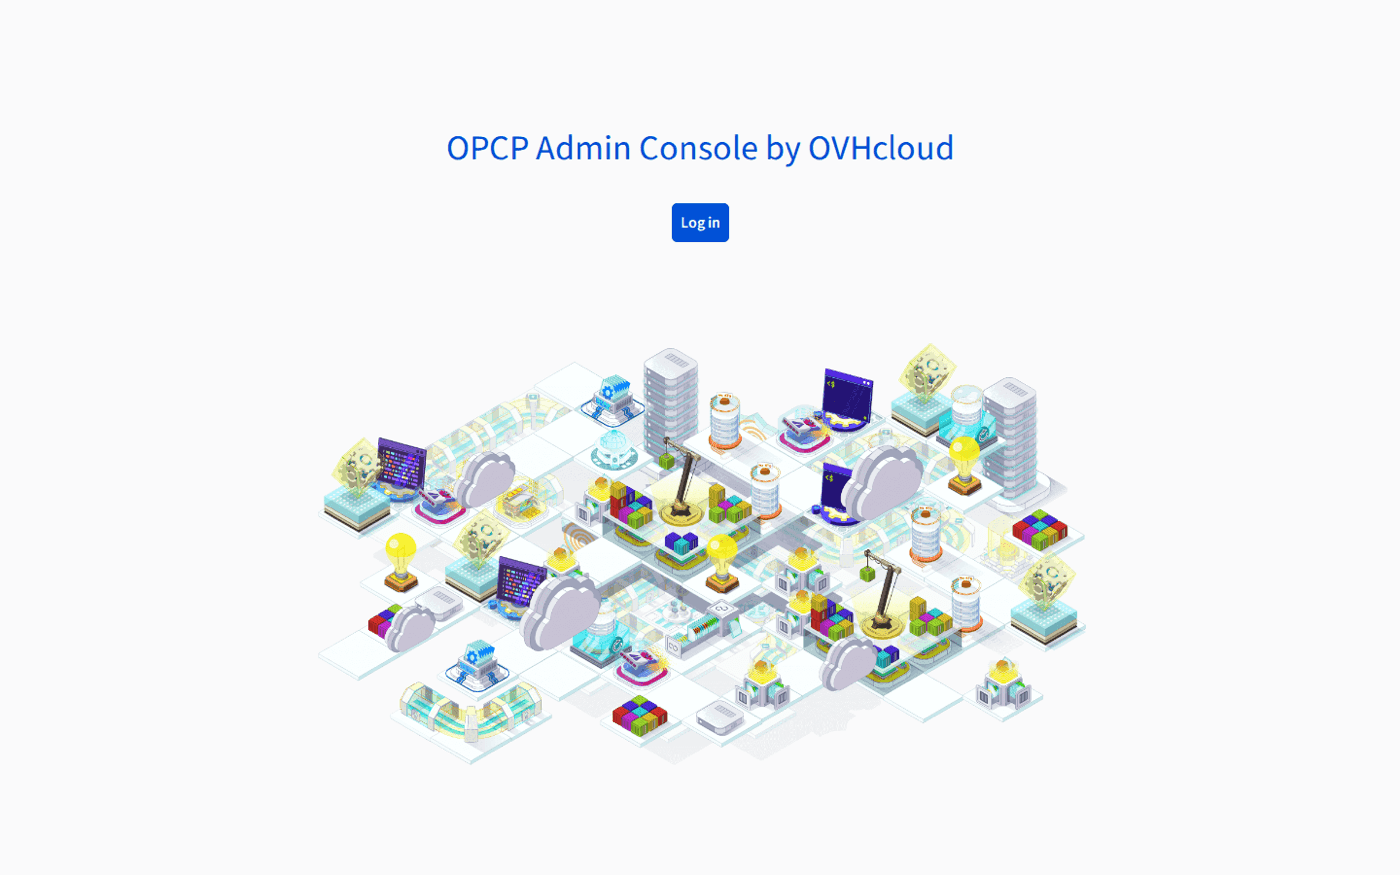
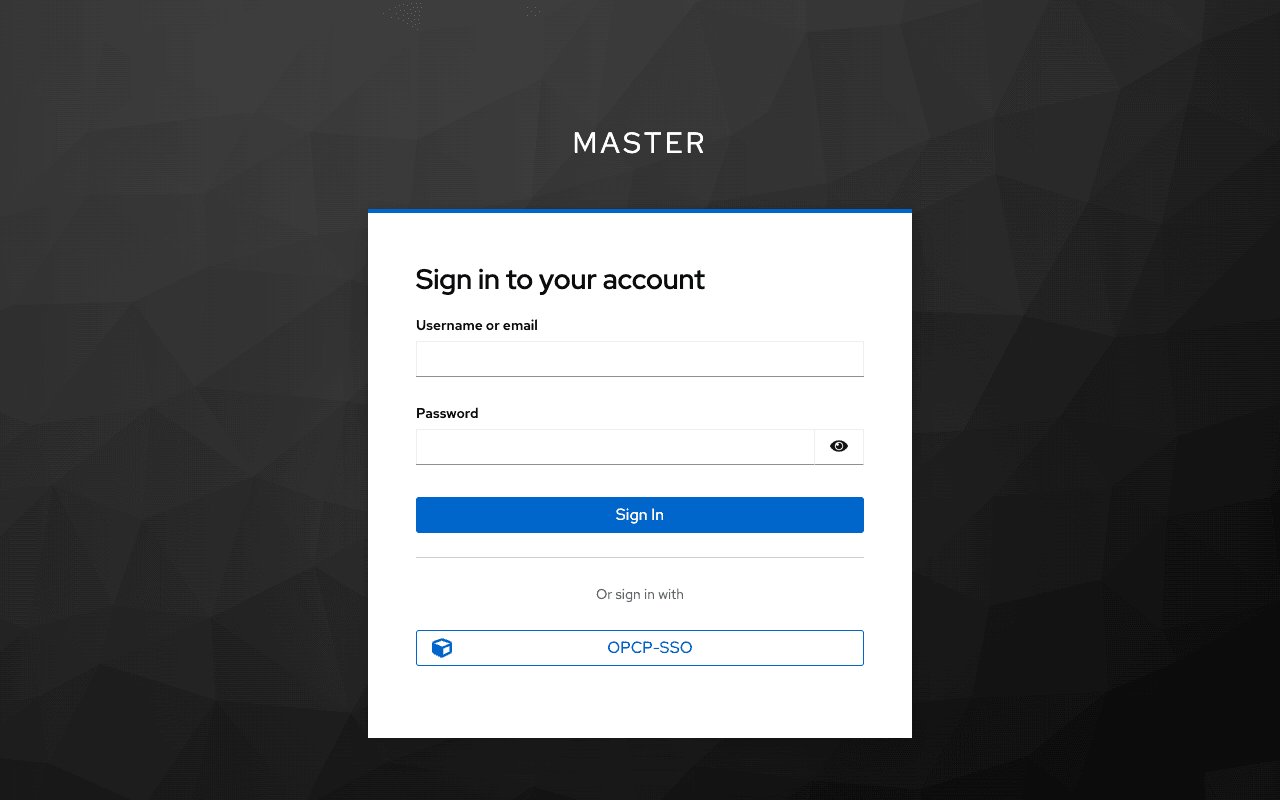
You are redirected to the Keycloak authentication page. You have two options to authenticate:
- Enter your credentials directly in the Keycloak login form.
- Use the
OPCP-SSObutton to authenticate through the federated OPCP Core Keycloak. This option allows users already registered in OPCP Core to log in without managing a separate set of credentials. It is required to manage Host Pools, as the user is then identified against OpenStack.
Once authenticated, you land on the home page of the OPCP Admin Console.
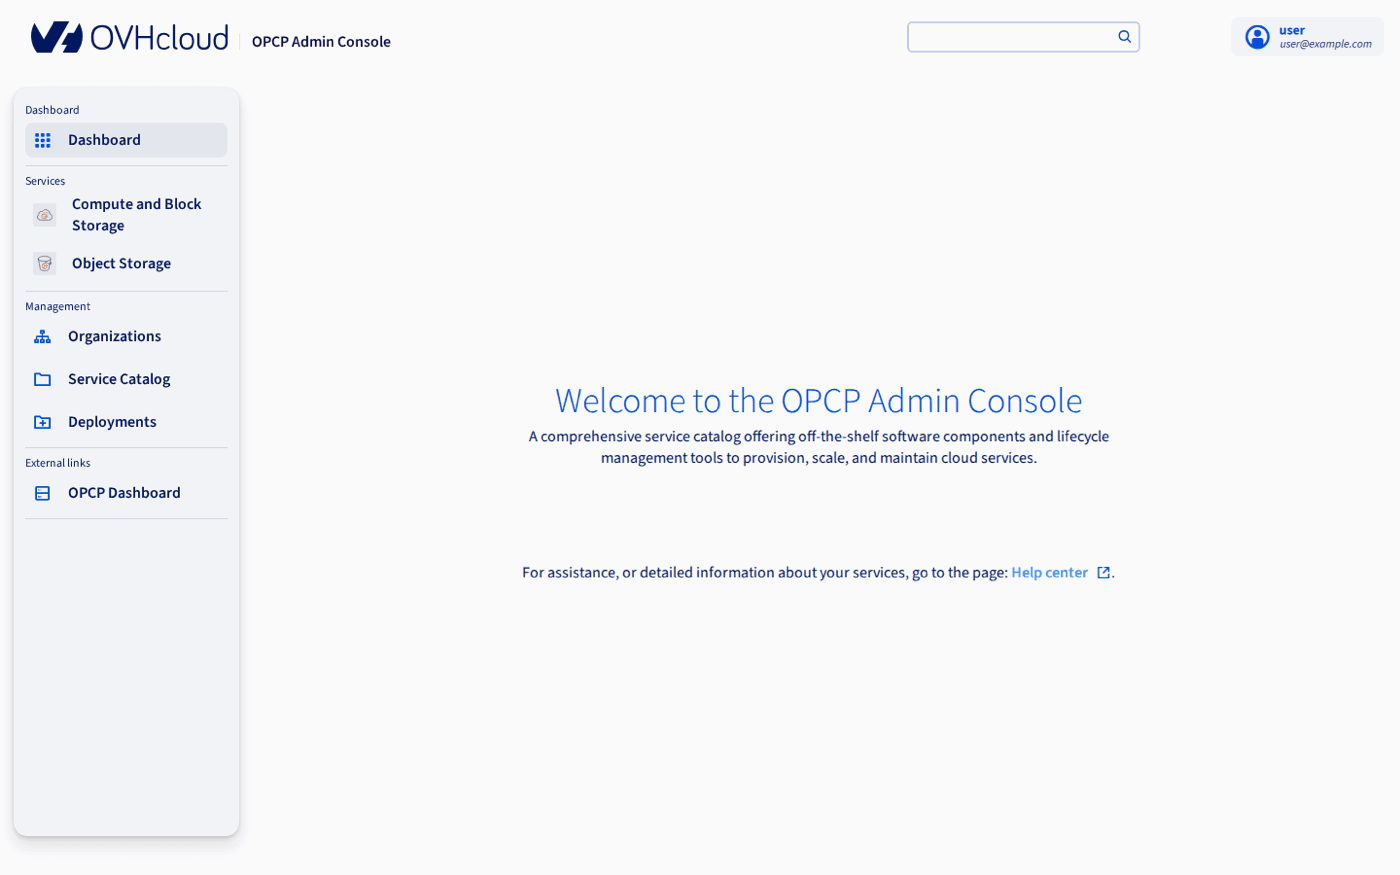
The sidebar gives access to the following areas:
Logging out
To log out, click your user badge at the top right, then choose the logout option in the menu.
The session expires after 30 minutes of inactivity, and at the latest 10 hours after you log in.
Creating an Organization
An Organization is an isolated environment that represents, for example, a company, a department or a team. Create it before enabling services for it.
-
Go to
Management>Organizations. The list shows each Organization with its admin and status. The icons of theActionscolumn open the OPCP Cloud Console of the Organization and its Keycloak administration console.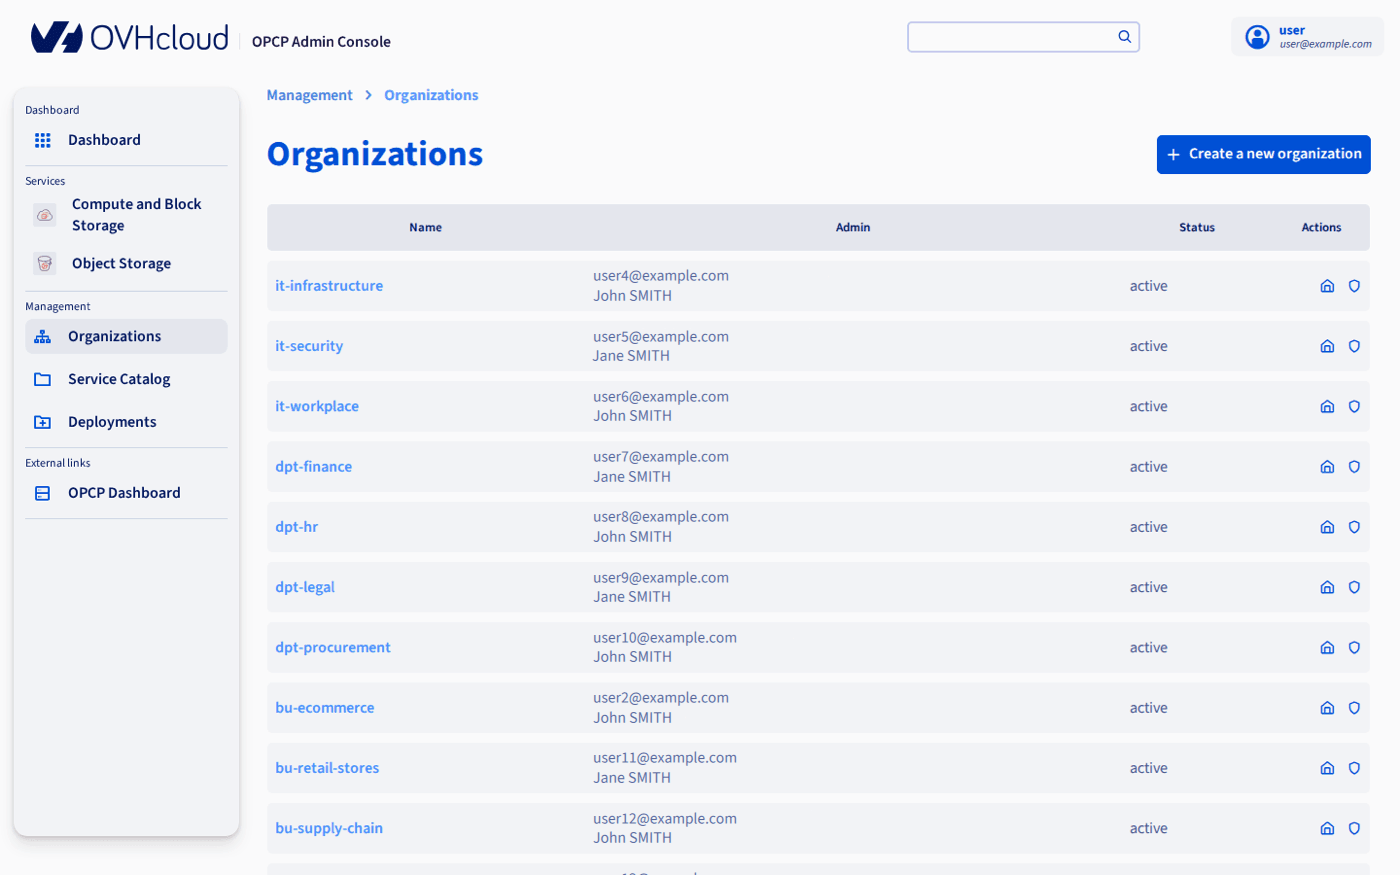
-
Click
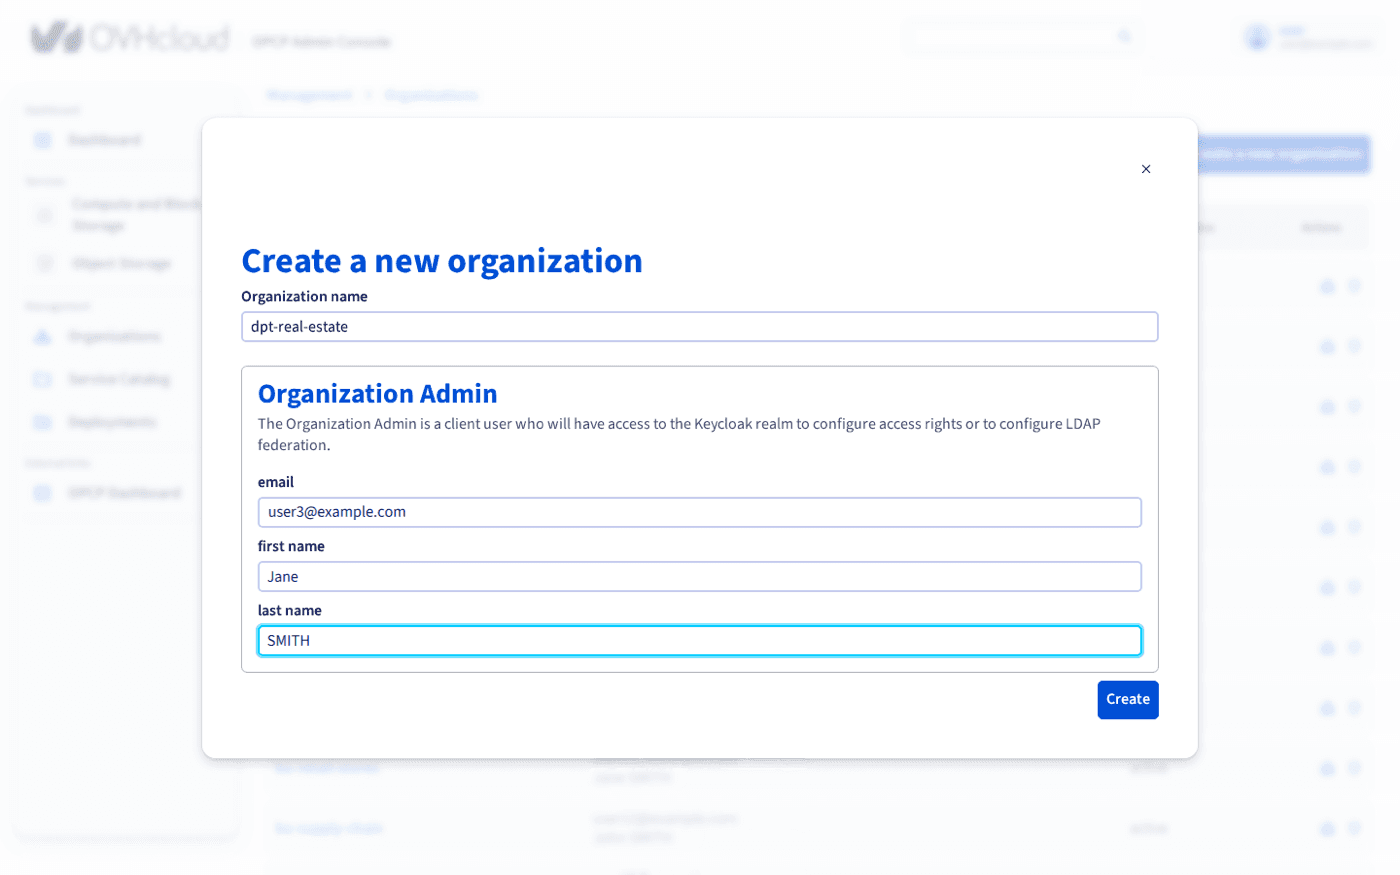
Create a new organization. -
Enter the Organization name, for example
dpt-real-estate. -
Enter the Organization Admin: email, first name and last name.
-
Click
Create. The Organization ispending, thenactive.
The platform automatically:
- creates a dedicated Keycloak realm named
account-{name}; - creates the Organization Admin user. Their login is their email address;
- sets a first-login default password, defined when Cloud Store was installed. The Organization Admin must change it at first login.
No email is sent to the Organization Admin. Once the Organization is active, send them their credentials yourself, as described in the Handing over to the Organization section below.
Deploying a service
A Service Deployment runs a service on bare-metal hosts that you allocate to Host Pools. It is deployed once, and you can then enable it for as many Organizations as needed.
-
Go to
Management>Service Catalog. The catalogue shows the services available on your platform, their latest version and whether they are deployed. To update the catalogue, contact OVHcloud support.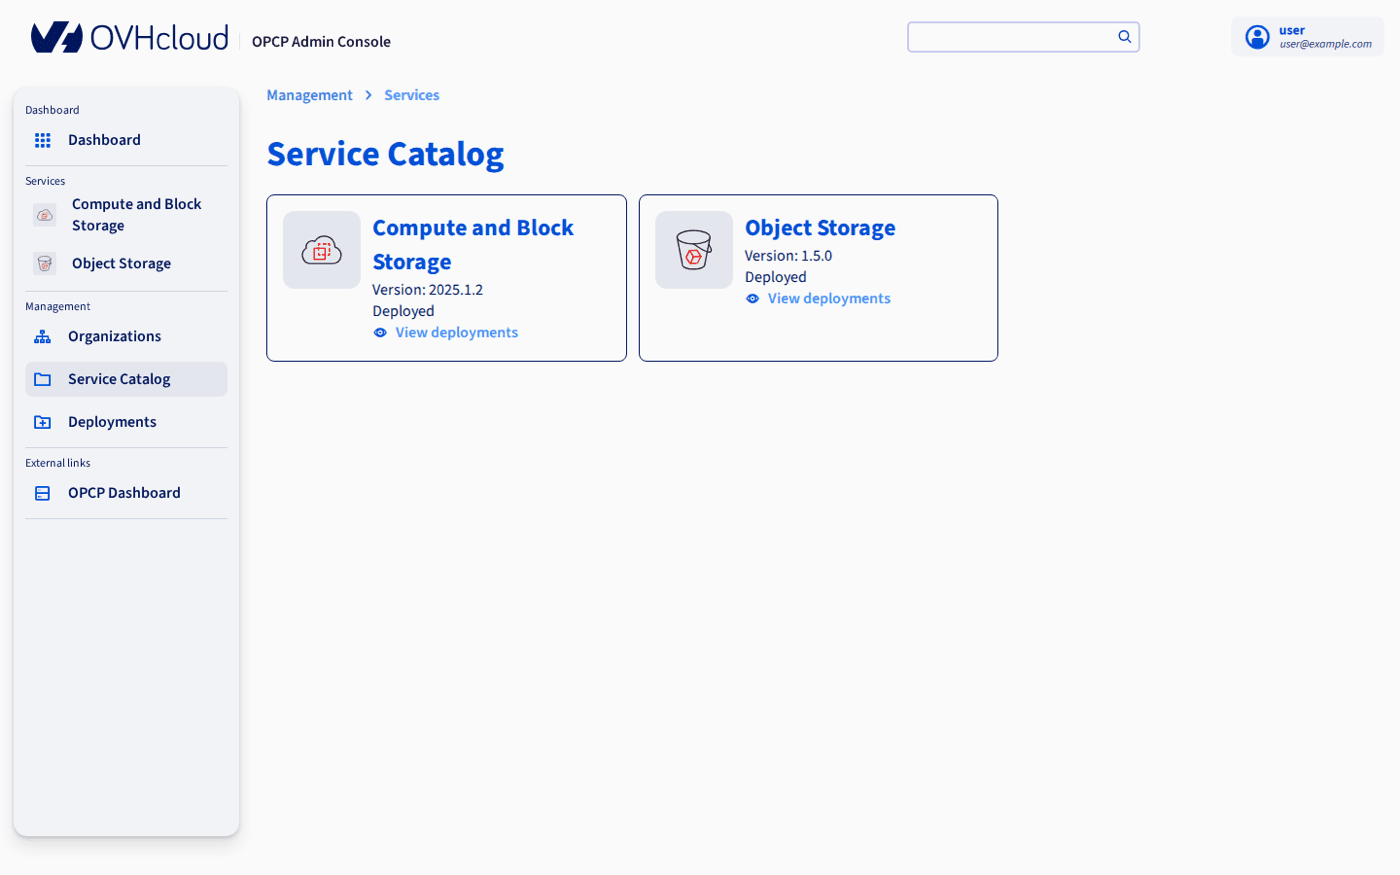
-
Open a service. The page lists its existing Service Deployments. Click
New deployment.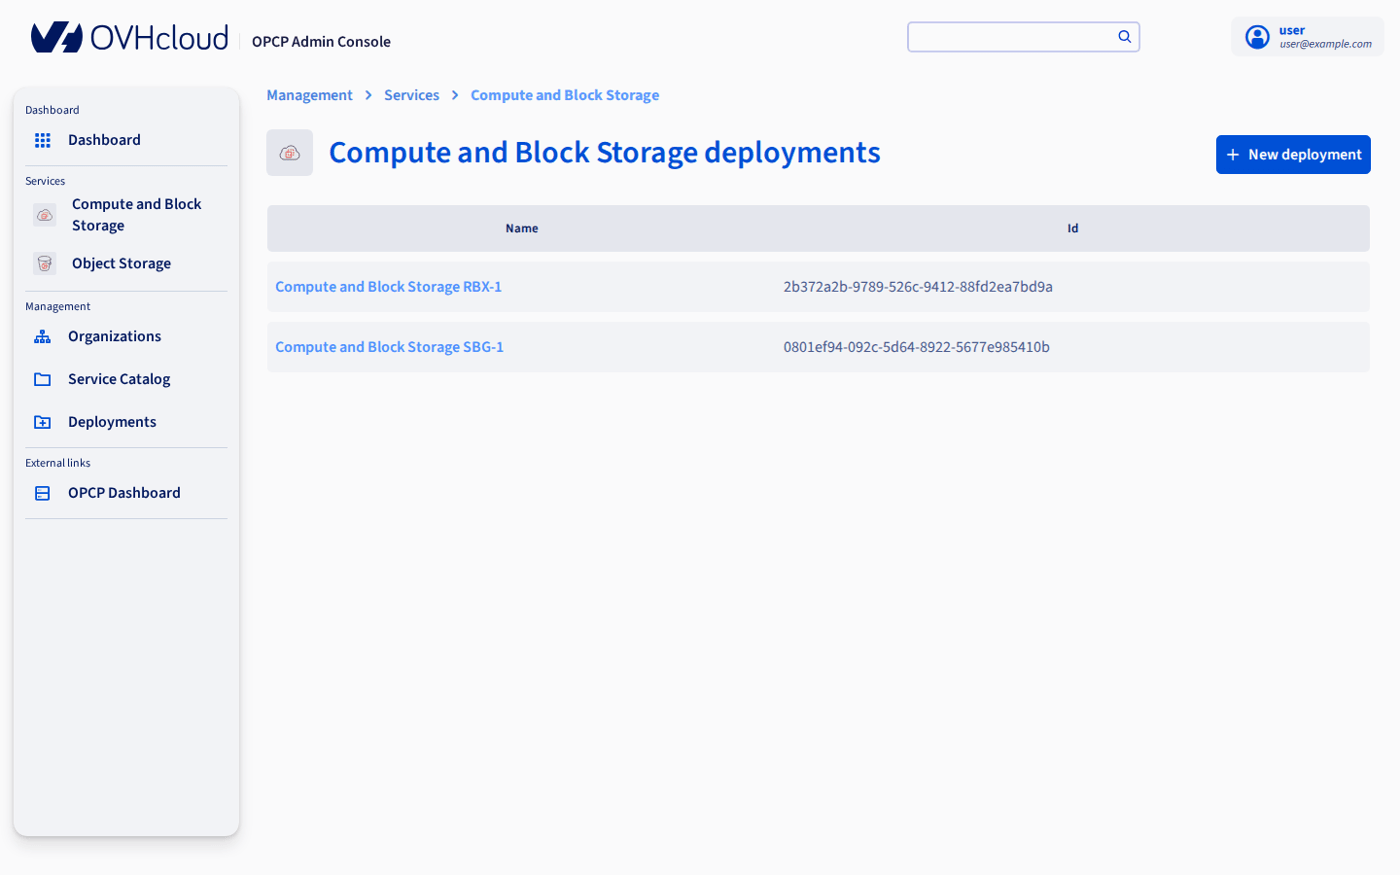
-
Choose the version of your service, then click
Next.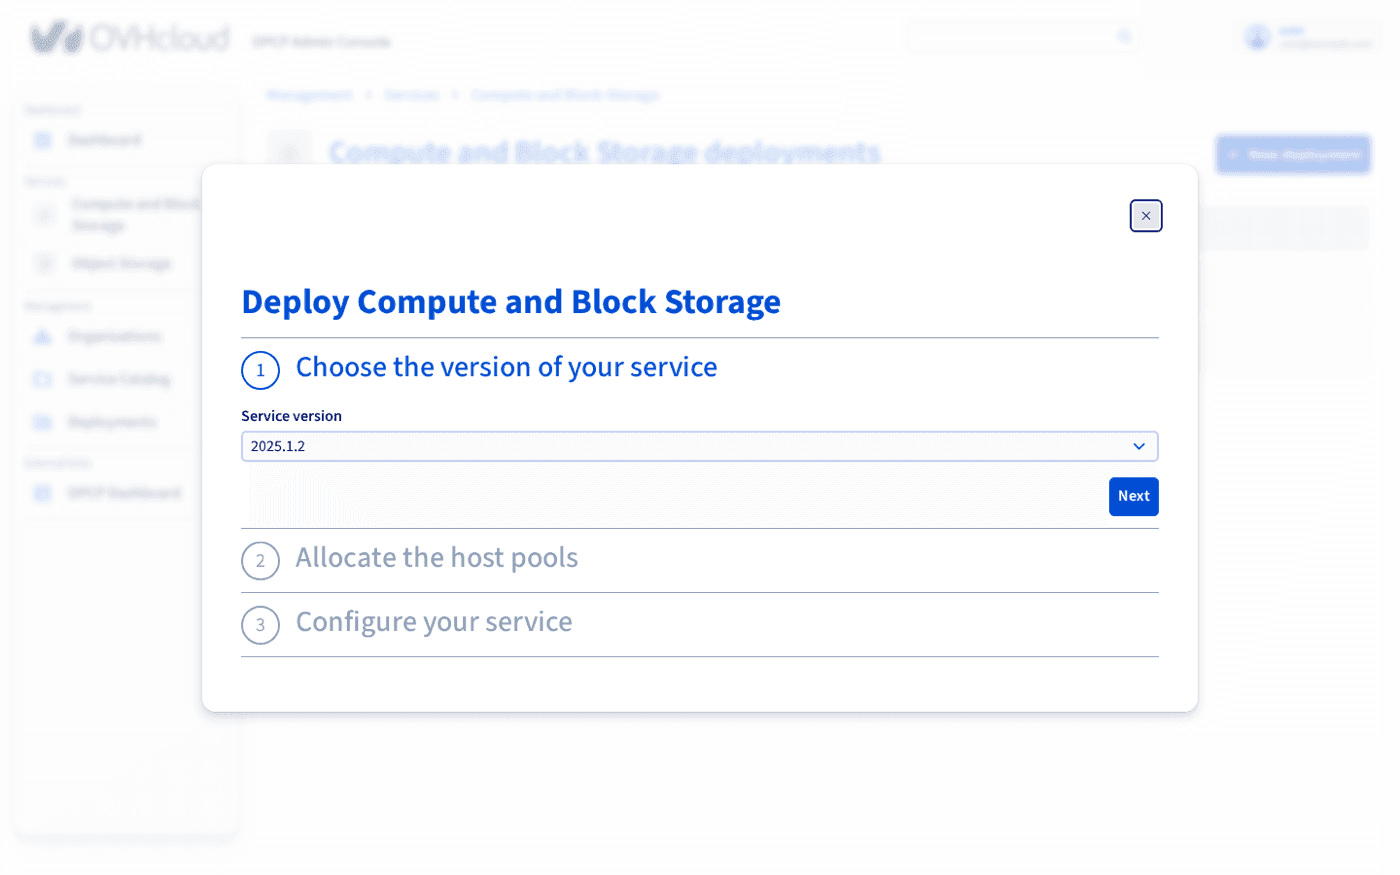
-
Allocate the host pools. For each Host Pool required by the service, for example
computeandblock-storagefor Compute and Block Storage, select the OpenStack project and the hosts to use. The prerequisites of the service (number and type of hosts) are displayed above the list.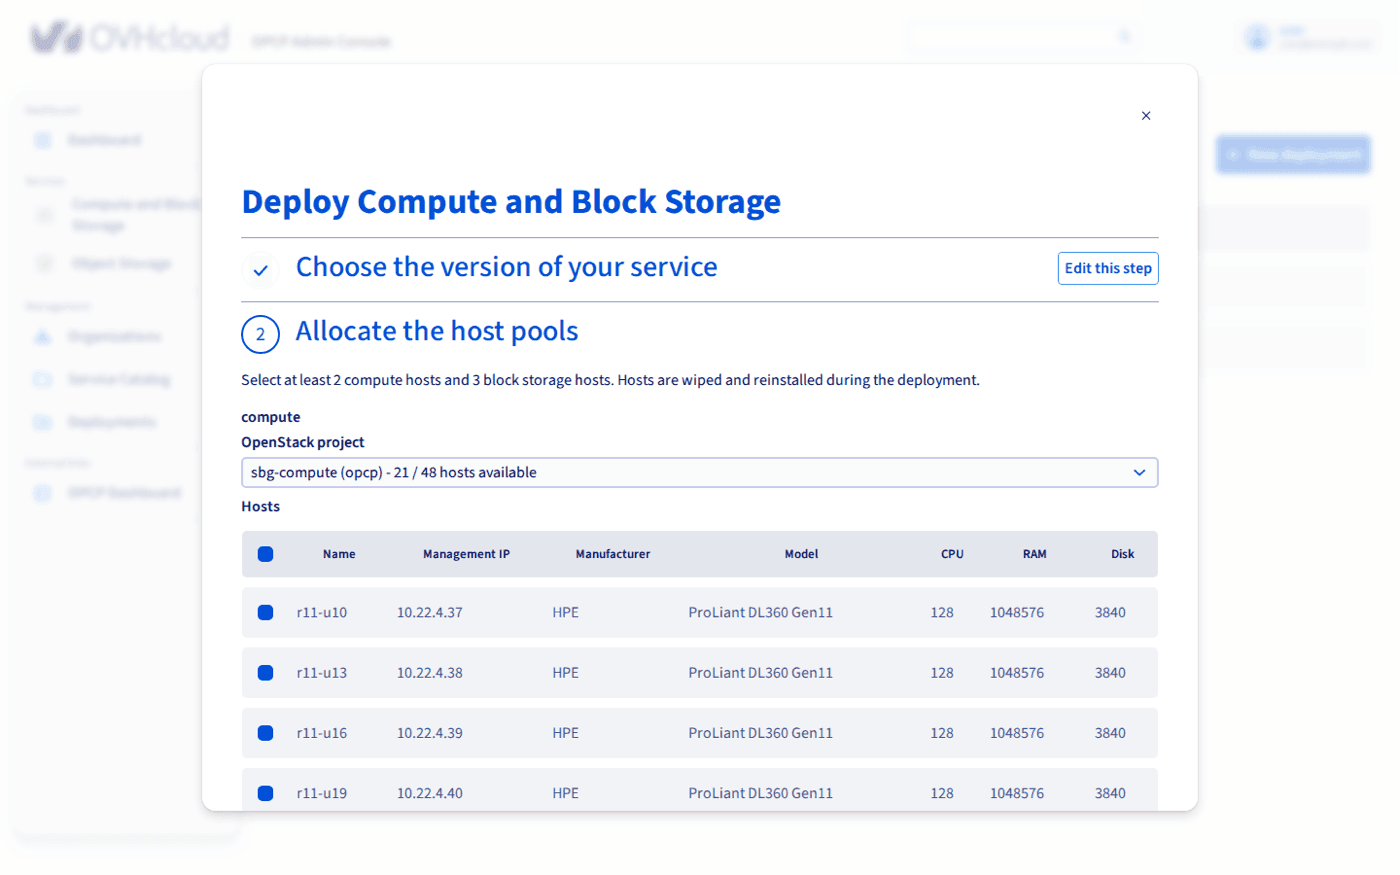
-
Configure your service with the properties defined by the service.
-
Click
Deploy.
Only hosts available in OpenStack are listed. The selected hosts are wiped and reinstalled during the deployment.
Service deployment is asynchronous: the console confirms that the deployment has started, and provisioning runs in the background through Kubernetes and OpenTofu. Its duration depends on the service, from a few minutes to several hours for the most complex ones.
Following a Service Deployment
All Service Deployments are collected in Management > Deployments. They also appear under the service name in the sidebar.
A Service Deployment, like an Enabled Service, has one of three statuses:
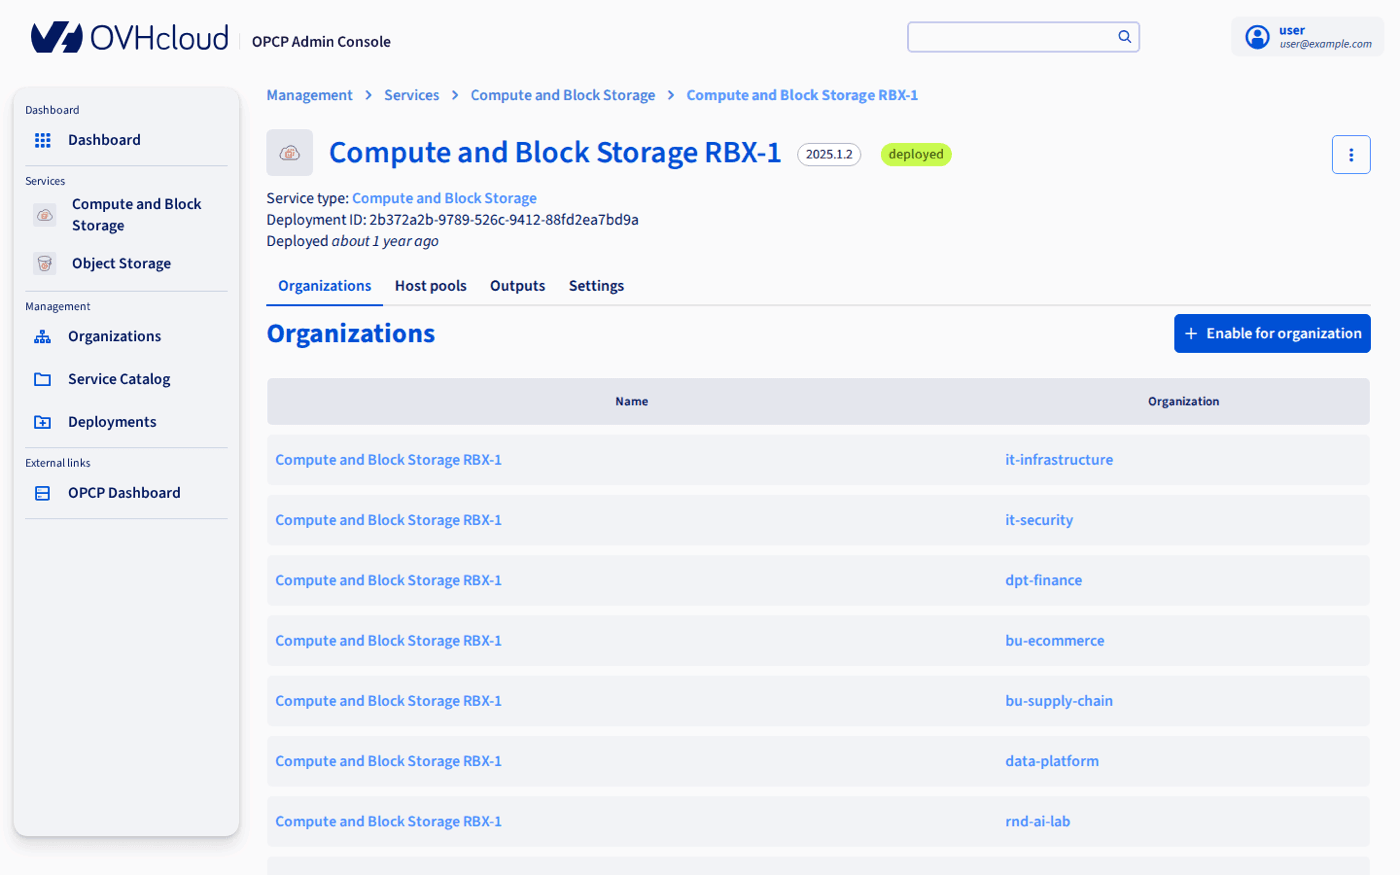
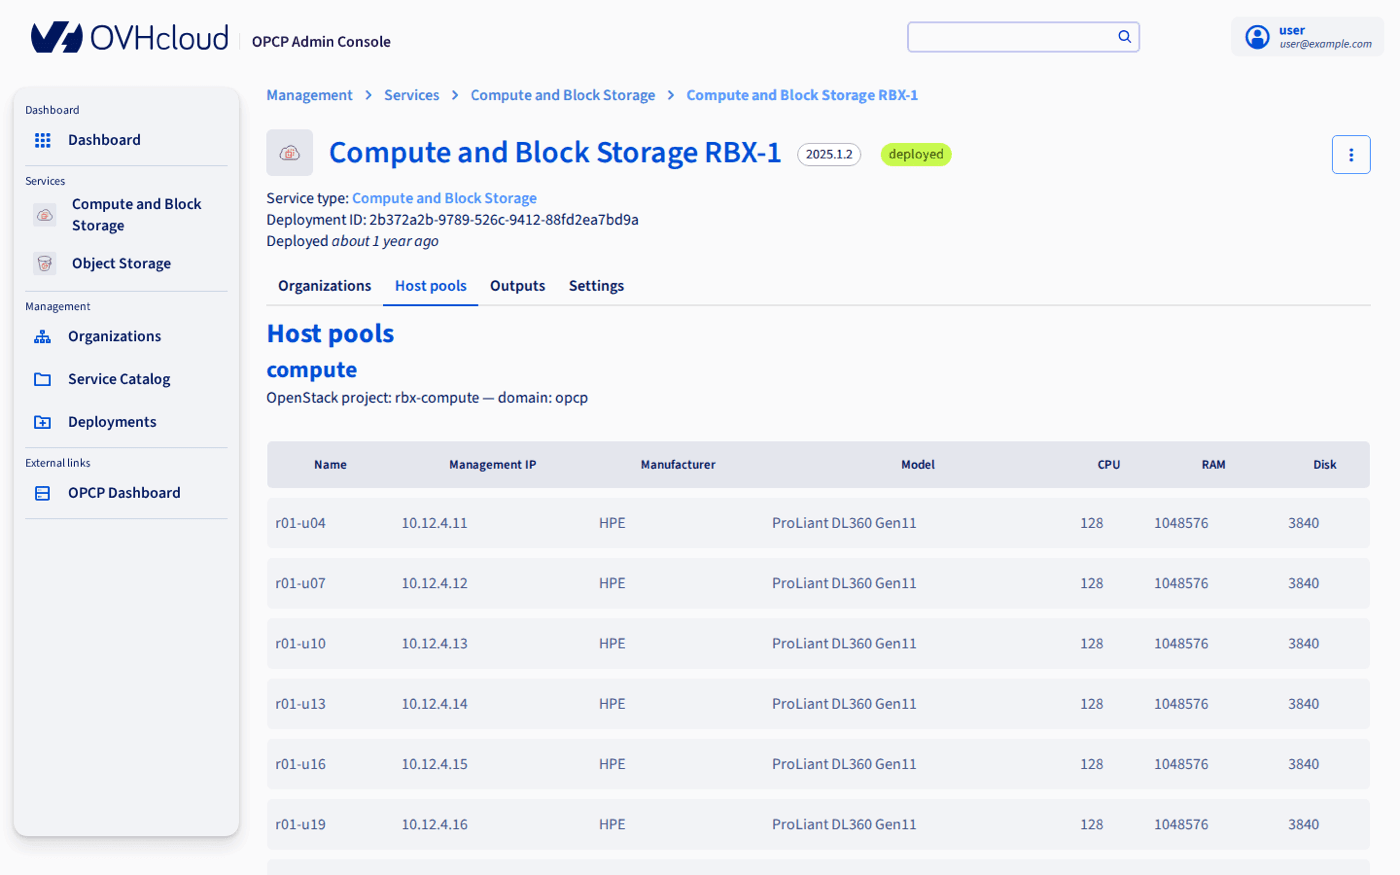
The page of a Service Deployment shows its version, its status and the following tabs:
Scaling capacity
To add hosts to a Service Deployment, open its ⋮ menu and choose Expand capacity. Select available hosts from its OpenStack project, then confirm. The same action exists on Enabled Services that have a dedicated Host Pool.
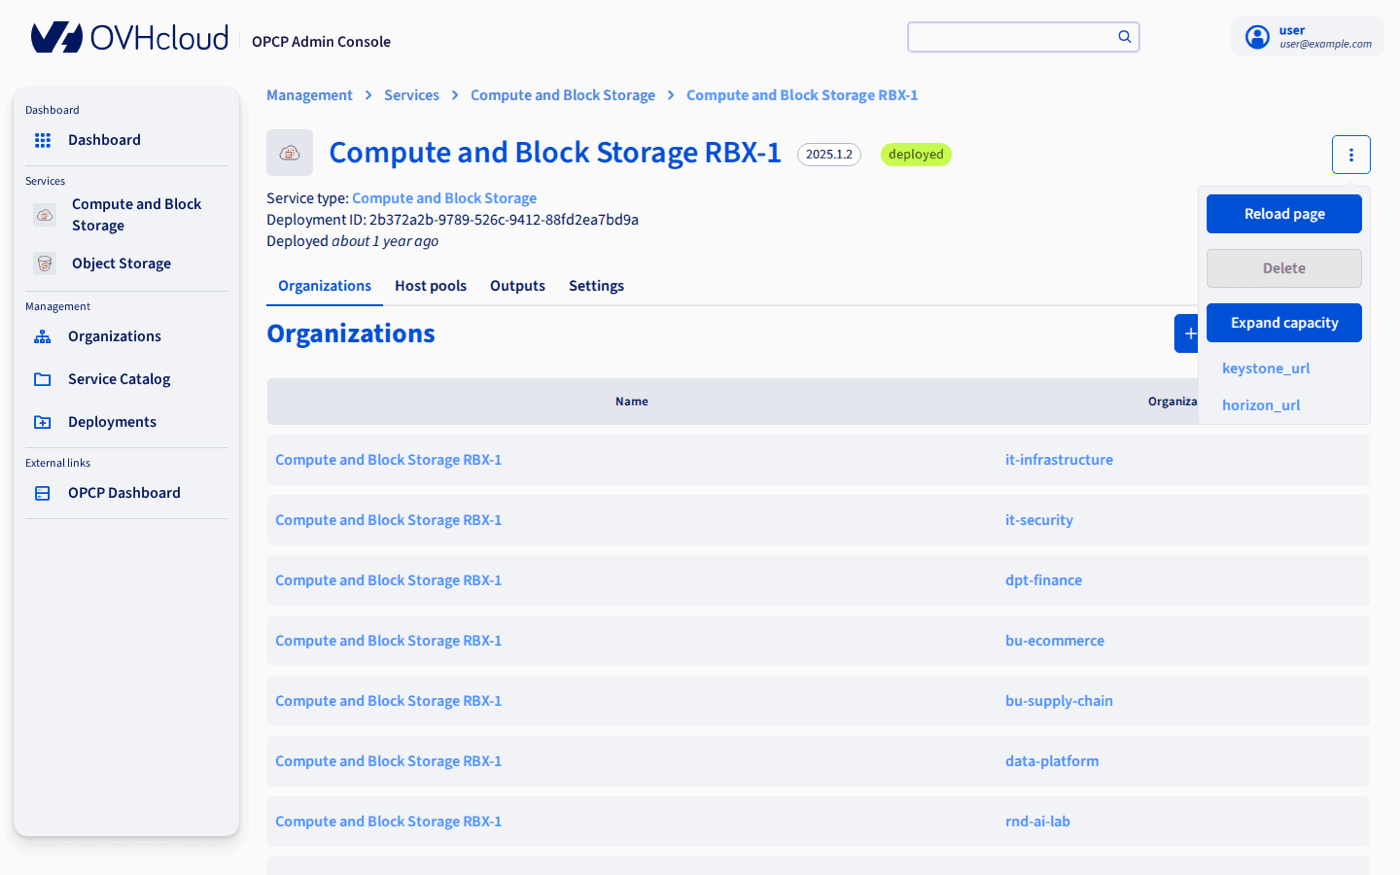
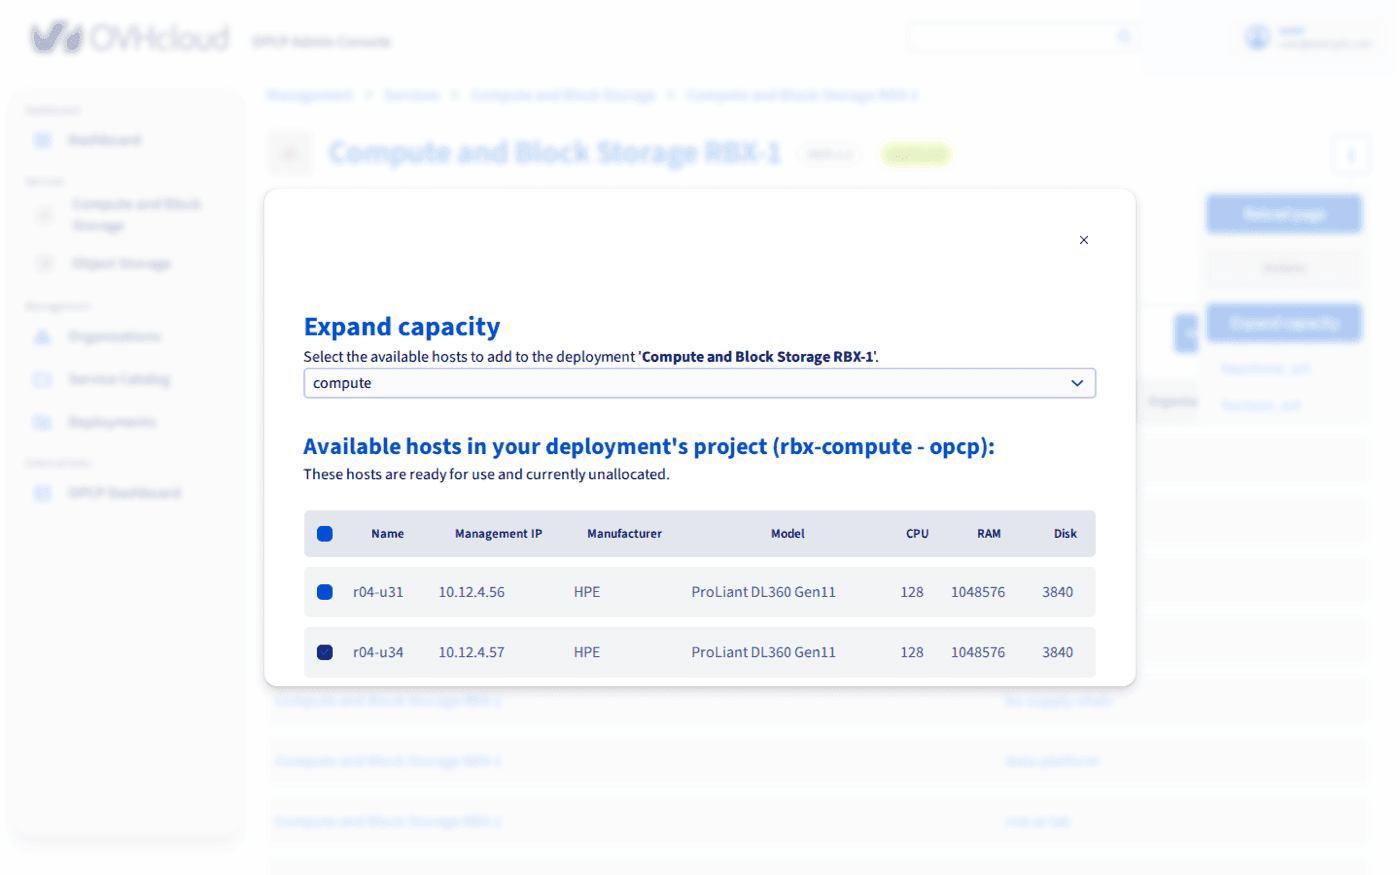
Scaling is asynchronous: Kubernetes reconciles the configuration and provisions the new hosts.
Enabling a service for an Organization
Enabling a Service Deployment for an Organization creates an Enabled Service. It makes the service visible in the OPCP Cloud Console of the Organization. The platform also creates the necessary Keycloak resources (client, roles and groups) in the Organization's realm, so that only the users of that Organization can access the service.
The Service Deployment must be deployed and the Organization must exist.
-
In the
Organizationstab of the Service Deployment, clickEnable for organization. You can also start from the page of an Organization, withEnable a service. -
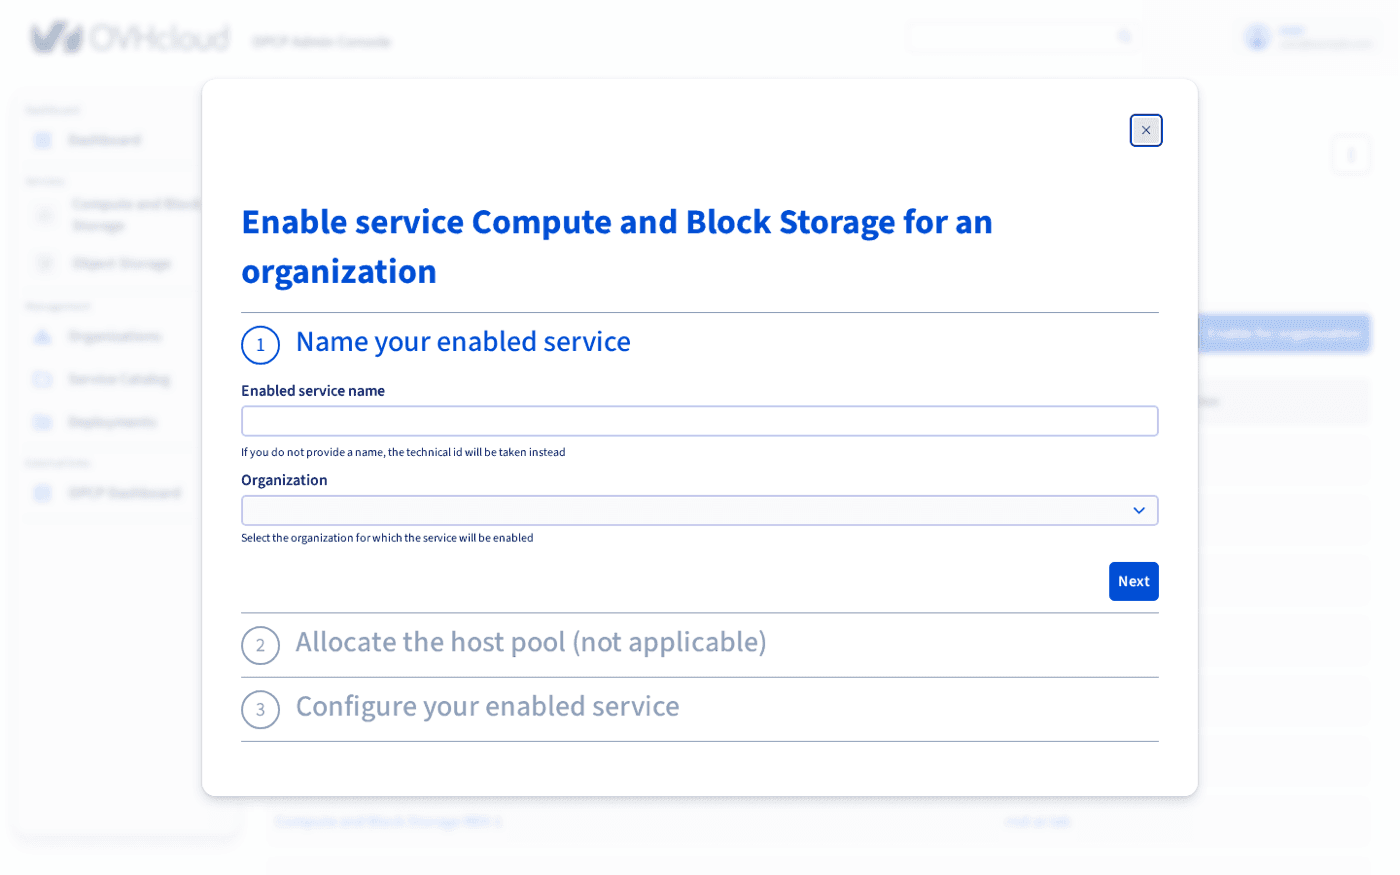
Name your enabled service and select the Organization. If you do not enter a name, the technical ID is used.
-
Allocate the host pool when the service needs hosts dedicated to the Organization. For services whose hosts are shared between Organizations, this step is marked
not applicable. -
Configure your enabled service with the properties defined by the service.
-
Confirm. The Enabled Service is
deploying, thendeployed.
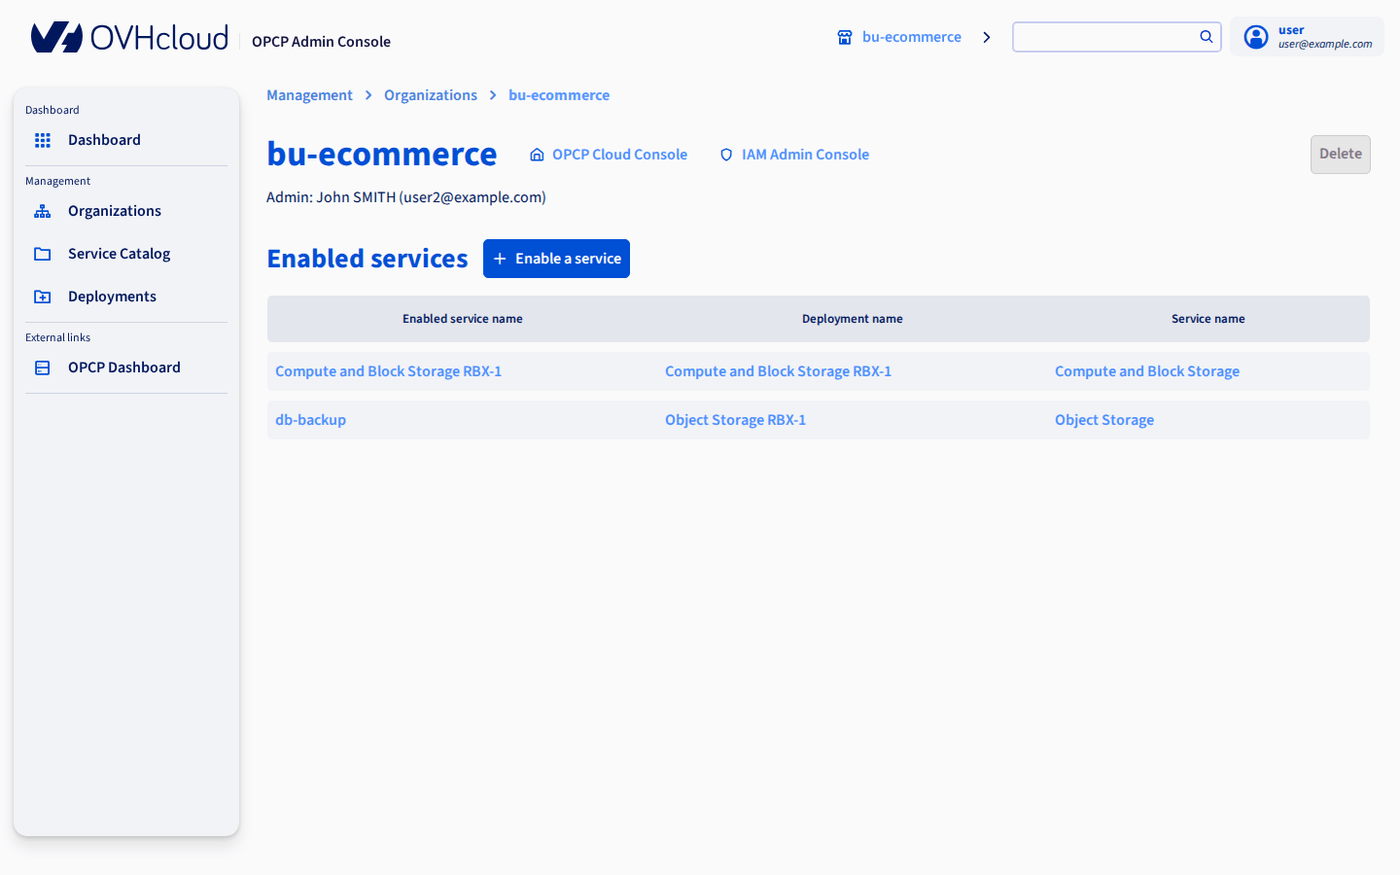
The page of an Organization lists its Enabled Services, with their Service Deployment and service type.
Disabling a service or deleting a Service Deployment
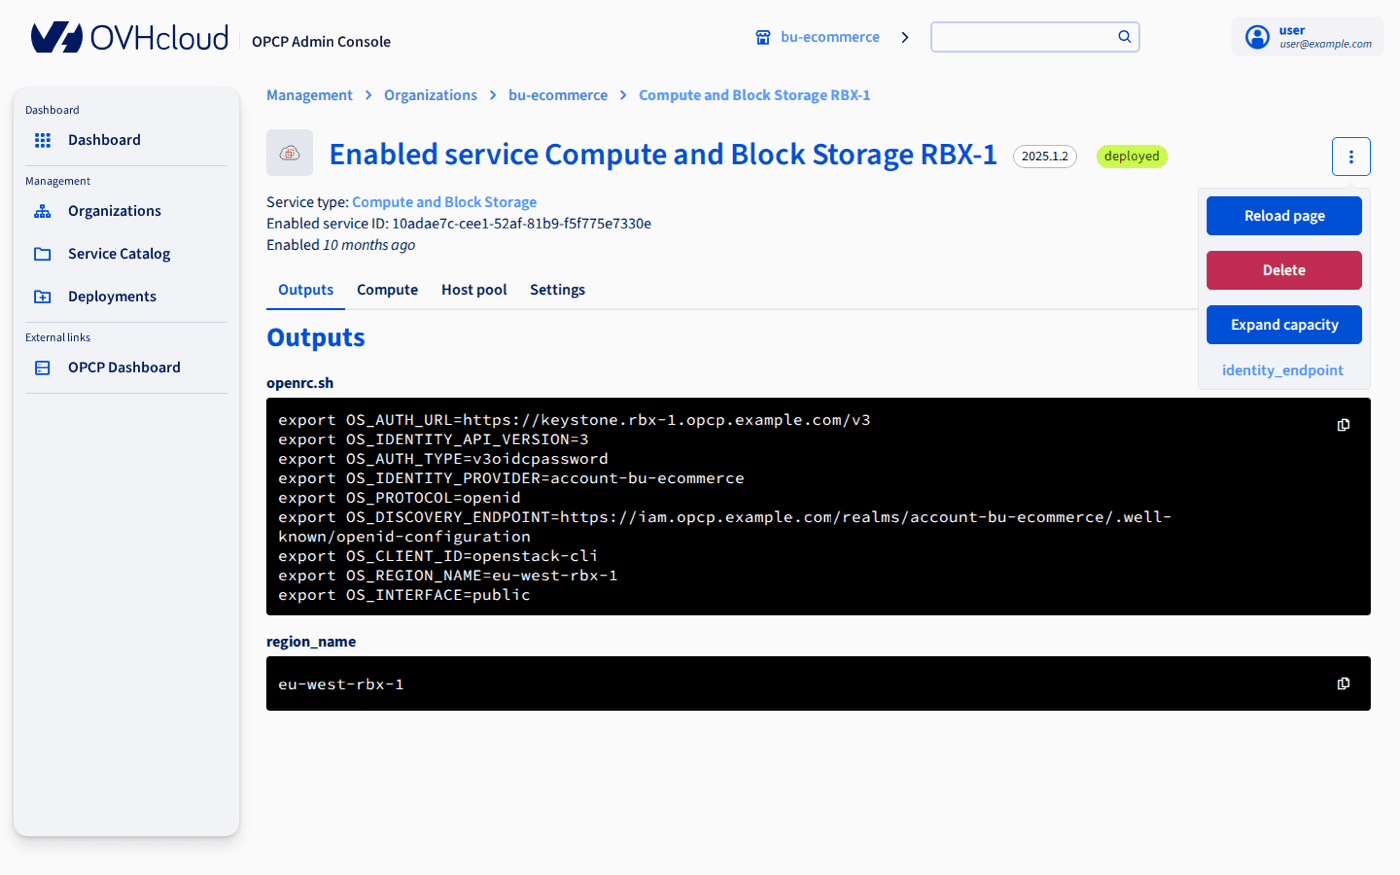
Every Enabled Service can be disabled. Open the Enabled Service from the Organization page, then choose Delete in its ⋮ menu.
A Service Deployment can only be deleted once it has no Enabled Services left. Disable its Enabled Services first, then choose Delete in the ⋮ menu of the Service Deployment. As long as Enabled Services remain, the action is greyed out.
During the deletion, the Enabled Service or Service Deployment is deleting. Once the deletion is complete, its hosts are available again.
Handing over to the Organization
Once the Enabled Service is deployed, the Organization's users find it in the OPCP Cloud Console. From the Organization page, you can open the Enabled Service: its Outputs tab shows the technical data of its deployment. Services can add their own tabs, such as Compute.
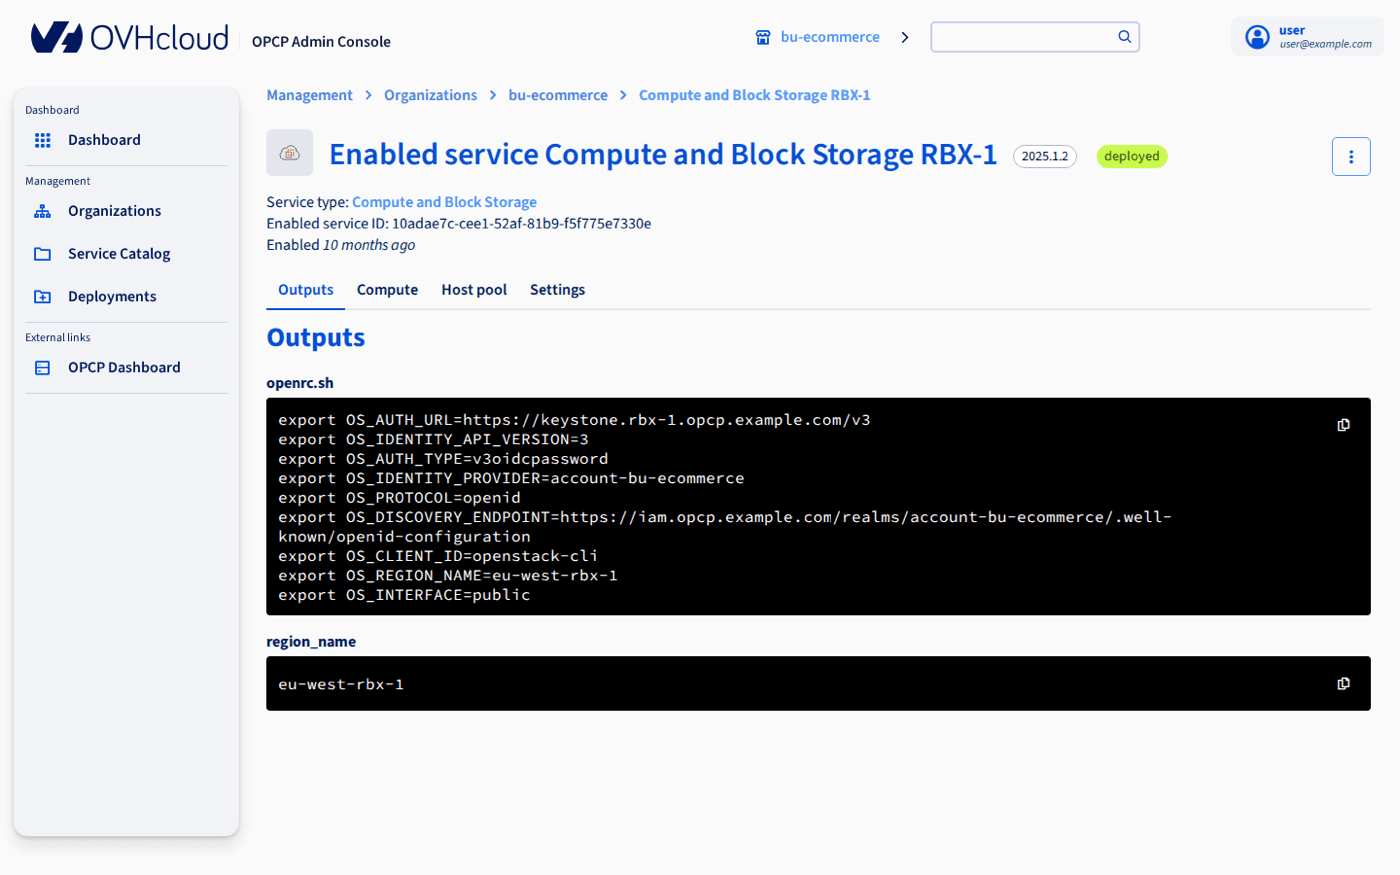
Then send the Organization Admin:
- the OPCP Cloud Console URL: in
Management>Organizations, the house icon opens it with the Organization already selected; - their login: the email address entered when creating the Organization;
- the first-login default password defined at Cloud Store installation.
The first-login default password is shared and defined at installation. The Organization Admin must change it at their first login.
The Organization Admin can then follow the guide OPCP Cloud Console.
Managing IAM on the OPCP Admin Console Keycloak
To manage users, roles and groups on the OPCP Admin Console Keycloak, first assign the cloudstore-admins role to your user in the OPCP Core Keycloak.
-
Log in to the OPCP Core Keycloak administration console.
-
Open the user you want to grant IAM management rights to.
-
In the
Role mappingtab, assign thecloudstore-adminsclient role.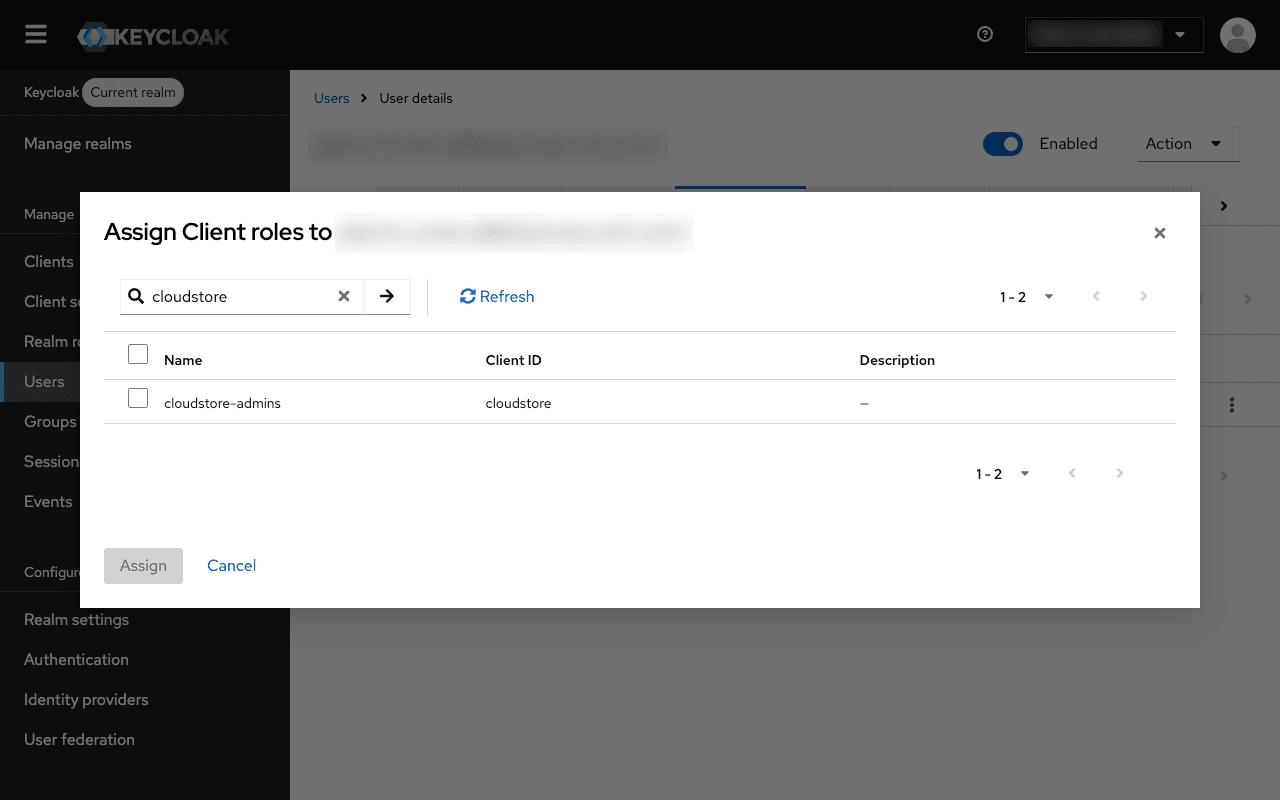
Once this role is assigned, the user has the permissions needed to administer the OPCP Admin Console Keycloak, including managing realms, clients, users and roles.
Go further
Getting started with Cloud Store
For training or technical assistance implementing our solutions, contact your sales representative or visit our Professional Services page to request a quote and have your project analysed by our experts.
Join our community of users.