
Changing the vRack of a Nutanix cluster
Find out how to change the Nutanix cluster vRack
Objective
A Nutanix cluster is delivered with its own vRack. In order to interconnect with other OVHcloud services, you can attach your cluster to a different vRack.
This guide explains how to add a Nutanix cluster to another vRack.
OVHcloud is providing you with services for which you are responsible, with regard to their configuration and management. You are therefore responsible for ensuring they function correctly.
This guide is designed to assist you in common tasks as much as possible. Nevertheless, we recommend that you contact the OVHcloud Professional Services team or a specialist service provider if you have difficulties or doubts concerning the administration, usage or implementation of services on a server.
Requirements
- A Nutanix cluster in your OVHcloud account
- An additional vRack service activated in your account
OVHcloud Control Panel Access
- Direct link:
- Navigation path:
Network>vRack private network
Instructions
Step 1: Removing services
Open the Nutanix cluster vRack configuration page, select all the services (e.g. dedicated server, IP, load balancer) and click on Remove.
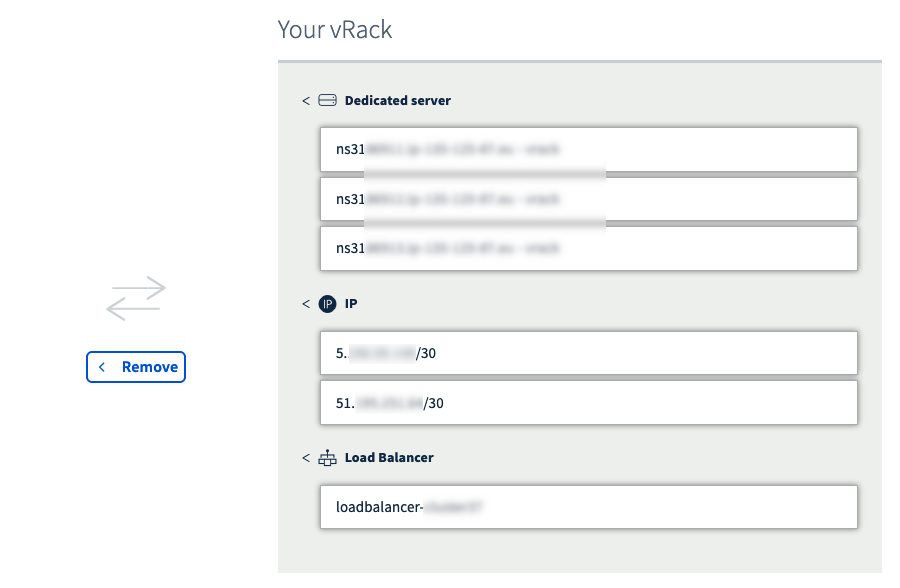
Before removing services, make sure to save their references, especially if you have many servers, IPs, load balancers, etc.
Removing services from the vRack is not immediately effective. Please allow some time for the process to complete.
Step 2: Adding services
Once the process is finished, go to the desired vRack and add all the previously removed services with the Add button.
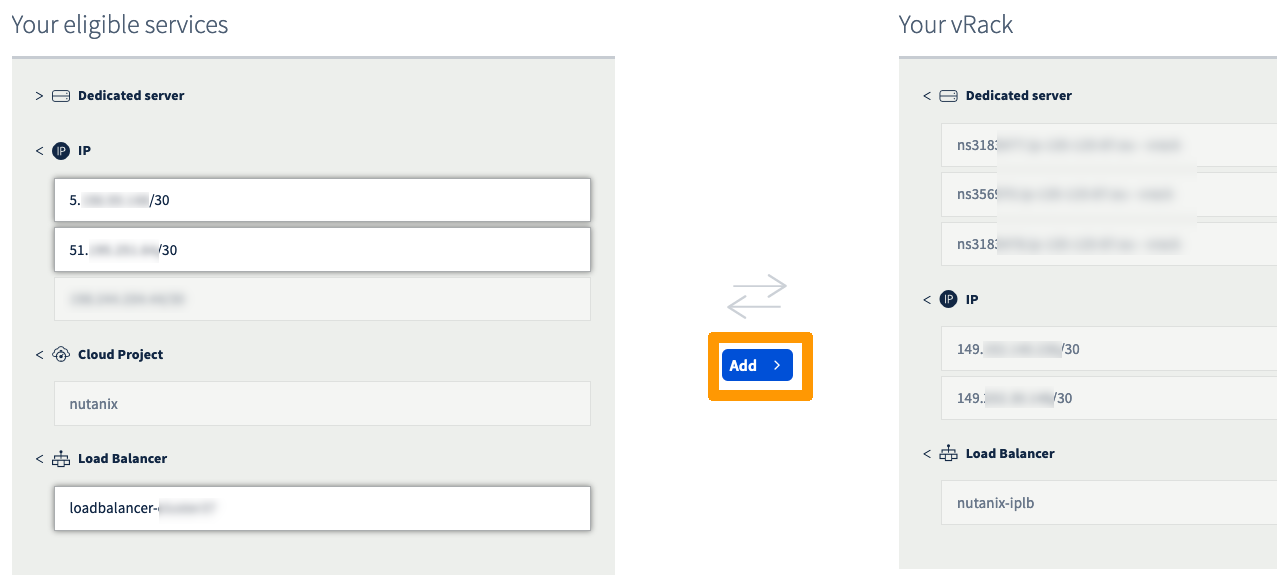
Adding services to the vRack is not immediately effective. Please allow some time for the process to complete.
Accessing Prism Central is not instantaneous: it is necessary that the VM restarts to make the access effective again.
Troubleshooting
If Prism Central stays inaccessible after 30 minutes, create a front-end on the load balancer to reach a CVM with SSH.
When logged in, check if the Prism Central VM is on.
If the answer is state: "kOff" then start the VM:
You can also restart the VM with the following command:
Alternatively, do a hard reboot (if the previous attempts failed):
Go further
For training or technical assistance implementing our solutions, contact your sales representative or visit our Professional Services page to request a quote and have your project analysed by our experts.
Join our community of users.