
Backing up and cloning an instance
Find out how to back up an SNC Cloud Platform instance (system volume snapshot, Restic) and create a new instance from the backup (clone)
Objective
This guide presents two complementary methods for backing up an SNC Cloud Platform instance:
- Full system backup: a snapshot of the system volume is turned into an image, which can be kept, downloaded off-platform for external backup, or used to recreate an identical instance (clone).
- Application data backup: a tool such as Restic automates backups of your instance data to Object Storage. The backups can be used to restore your data in the event of a problem.
Requirements
- An instance
- For the snapshot/clone method: access to the OpenStack console (Horizon) or a configured OpenStack CLI (see the Creating an instance and connecting to it guide for CLI installation and configuration)
- For the Restic method:
- An Access Key generated for Object Storage
- Restic installed
- S3cmd installed and configured with the Access Key
Instructions
Backing up and cloning via a volume snapshot
For reference, a volume is attached to every instance as the system disk. Overall, the operation therefore consists of backing up this volume, then creating a new instance from that backup. In detail, this involves:
- creating a snapshot of the volume
- creating a volume from that snapshot
- uploading this volume as an image
- cleaning up the previously created volume and snapshot (if they are no longer needed)
An instance can then be created from that image.
These operations cannot be performed from the Regional Panel for now. You must use the OpenStack console (Horizon) or the OpenStack CLI.
Log in to the OpenStack console by clicking the Open horizon button from the Regional Panel.

Go to the Instances menu and click on the instance to back up (the test instance in this example).
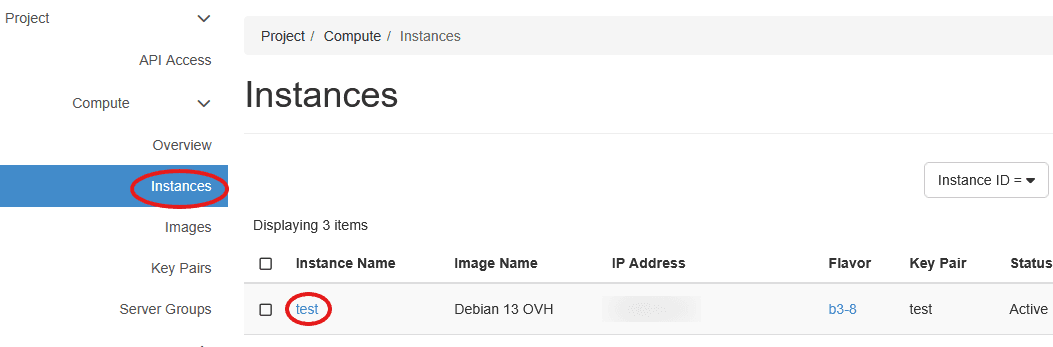
In the Volumes Attached section at the bottom of the instance details page, click the attached volume.

You can also find the volume in the Volumes menu by searching for the one attached to the instance.

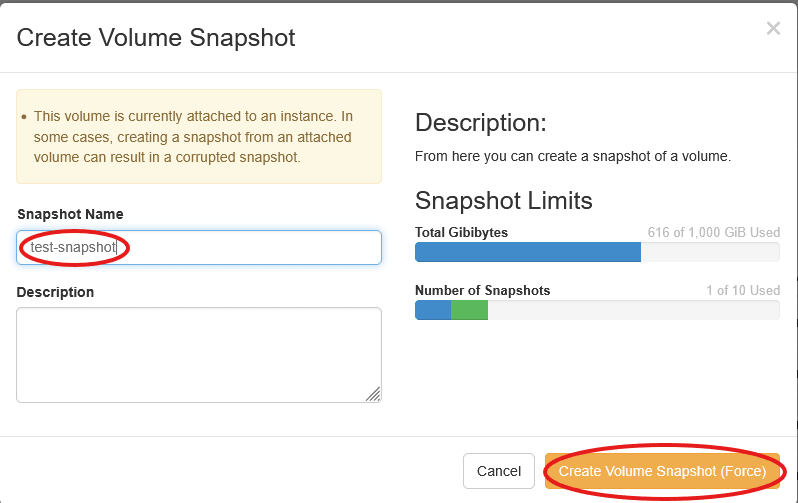
Then create a snapshot of the volume:

Name it and click Create Volume Snapshot (Force).
The operation is almost immediate.
Creating a snapshot of a mounted, in-use volume is crash-consistent but not application-consistent. To guarantee 100% consistency of the backed-up data, it is recommended to stop the instance beforehand.
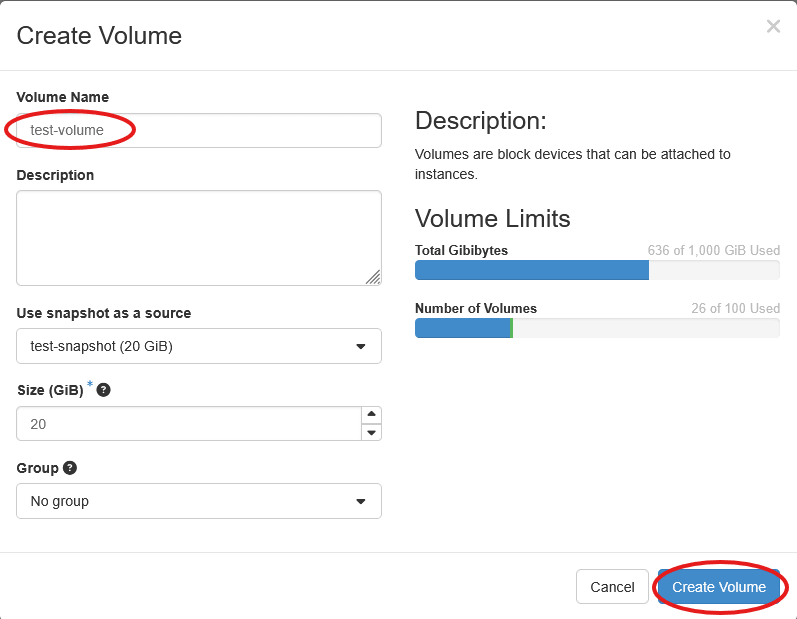
Go to the Snapshots menu and create a volume from the snapshot.

Name it and leave the other values unchanged. Start the volume creation. The operation is almost immediate.
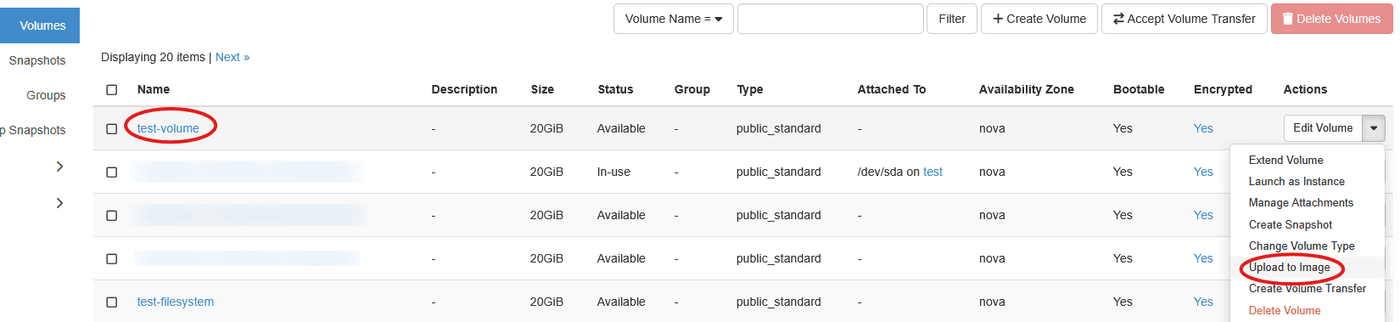
In this example, the volume is saved as an image, which you can then download locally for external backup, for example.
Choose the Upload to Image action in the volume's list of actions.
Name the image, and keep Raw as the disk format. Start the upload.
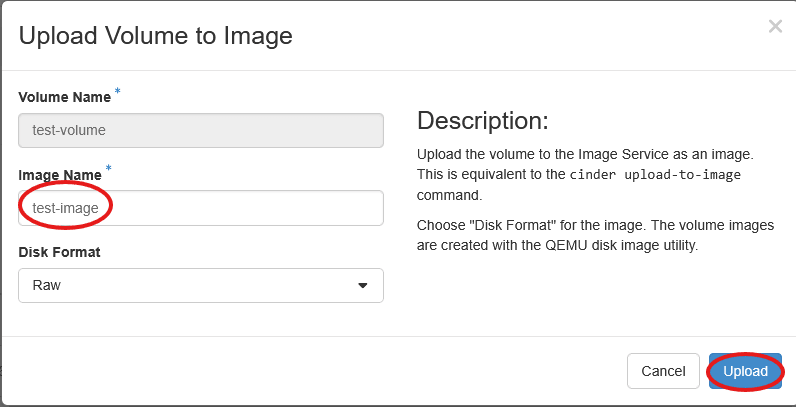
The volume switches to the Uploading status. Image creation time depends on the volume size.
Wait until the image is fully created.
If you no longer need them, delete the previously created volume first, then the snapshot.
To create a new instance from the image, go to the Images menu and click the Launch action for the image.

The instance creation wizard then opens, as described in the Creating an instance and connecting to it guide.
In summary:
- in the
Detailsmenu, name the instance and choosenova-vmas the Availability Zone - in the
Sourcemenu, clickYesfor Create New Volume and set the appropriate size - choose the flavor in the
Flavormenu - choose
Ext-Netas the network - do not choose a key pair: the configuration will not be applied. The instance's
authorized_keysfile will not be modified.
Then launch the instance creation by clicking Launch Instance and wait for the instance to reach the Running state.
At instance startup, cloud-init will detect that the instance has changed and will reinstall the proper network configuration.
Then connect to the instance with its public IP address.
Backing up data with Restic (Object Storage)
The Restic backup tool is used to describe one possible method for performing backups. You are free to choose the solution that suits you best.
Creating a bucket to store the backups
Enter the following command:
Initialising the backup repository
Start by choosing a password to encrypt your backups. In this guide, GPG is used for this purpose:
Make a note of this password in a safe place, along with your S31 credentials. Next, the Restic configuration will be placed in environment variables. This includes sensitive information, such as your S3 secret and the repository password. As a result, make sure that the following commands do not appear in your shell history file. Adjust the contents of the environment variables according to your bucket name, the region, and your user's API credentials.
Once the environment is configured, the Restic command can be called to initialise the repository:
Restic is now ready to be used with S3. Try creating a backup:
A snapshot has been created.
Check the contents of the bucket:
A backup has been created and stored in the S3 bucket.
Go further
For training or technical assistance implementing our solutions, contact your sales representative or visit our Professional Services page to request a quote and have your project analysed by our experts.
Join our community of users.
1: S3 is a trademark of Amazon Technologies, Inc. OVHcloud's service is not sponsored by, endorsed by, or otherwise affiliated with Amazon Technologies, Inc.