
Einen OVHcloud Domainnamen mit iCloud Mail verwenden
Erfahren Sie, wie Sie Ihren OVHcloud Domainnamen mit iCloud konfigurieren, um personalisierte E-Mail-Adressen zu erstellen
Informationen zur Verwaltung Ihrer OVHcloud Dienste und wie Sie die passende Unterstützung finden
Beachten Sie bei der Verwendung der OVHcloud Anleitungen die folgenden Bedingungen:
- Die Anweisungen sind so detailliert wie möglich, können jedoch nicht alle individuellen Anwendungsfälle abdecken. Gegebenenfalls müssen Sie die beschriebenen Schritte an Ihre Anforderungen anpassen.
- Das OVHcloud Ökosystem ist auf Flexibilität und Wahlfreiheit ausgelegt. Kunden sind daher für die sichere und ordnungsgemäße Konfiguration ihrer Dienste verantwortlich. Um Datenverlust vorzubeugen, empfehlen wir dringend, Backup-Strategien für alle wichtigen Daten anzuwenden.
- Unsere Anleitungen und Tutorials können Software oder Dienste von Drittanbietern in Kombination mit OVHcloud Lösungen umfassen. Der technische Support von OVHcloud beinhaltet nicht die Konfiguration von Systemen oder Produkten außerhalb unserer Verantwortung. Dazu zählen unter anderem:
- Betriebssysteme und Benutzeroberflächen (Windows, Debian, Plesk etc.).
- Jegliche andere Drittanbieter-Software (FTP-Clients, E-Mail-Programme etc.).
- Dienste anderer Anbieter (DNS, APIs, Benutzeroberflächen etc.).
Um bei Problemen die passende Unterstützung zu erhalten, beachten Sie folgende Hinweise:
- Sie benötigen individuelle Hilfe oder möchten ein Thema besprechen, das in unserer Dokumentation nicht ausführlich behandelt wird?
Treten Sie der OVHcloud Community bei, um nach Ihrem Thema zu suchen und sich mit anderen Nutzern auszutauschen. - Sie möchten einen Vorfall zu Ihrem OVHcloud Dienst melden oder haben Schwierigkeiten im OVHcloud Kundencenter?
Erstellen Sie eine Supportanfrage in unserem Help Center. - Sie benötigen professionelle Unterstützung für Ihr Projekt oder Hilfe bei Aufgaben außerhalb unseres Support-Bereichs?
Besuchen Sie unser Partnerportal, um Experten zu finden, die mit OVHcloud Lösungen vertraut sind. - Sie suchen ausführlichere Informationen zu unseren Support Levels und Professional Services?
Besuchen Sie unsere Webseiten zu den OVHcloud Support Levels und den OVHcloud Professional Services.
Sie können dazu beitragen, unsere Dokumentation zu verbessern:
- Sie möchten Feedback zur Verbesserung einer Anleitung geben oder unzureichende Informationen auf einer bestimmten Seite melden?
Nutzen Sie die Schaltflächen unter „War diese Seite hilfreich?“ am Ende der Seite. - Sie möchten eine konkrete Aktualisierung der Dokumentation vorschlagen?
Verwenden Sie die Funktion „Diese Seite bearbeiten“ am Ende der Seite oder in der Seitenleiste.
Ziel
Diese Anleitung erklärt Ihnen, wie Sie einen bei OVHcloud registrierten Domainnamen mit dem Dienst iCloud Mail von Apple verwenden. So können Sie personalisierte E-Mail-Adressen (john.smith@mydomain.ovh) erstellen, die vollständig von Apple verwaltet und gehostet werden.
Voraussetzungen
- Sie verfügen über einen bei OVHcloud registrierten Domainnamen.
- Sie verfügen über eine Apple-ID mit einem iCloud+ Abonnement.
Zugriff auf das OVHcloud Kundencenter
- Direkter Link:
- Navigationspfad:
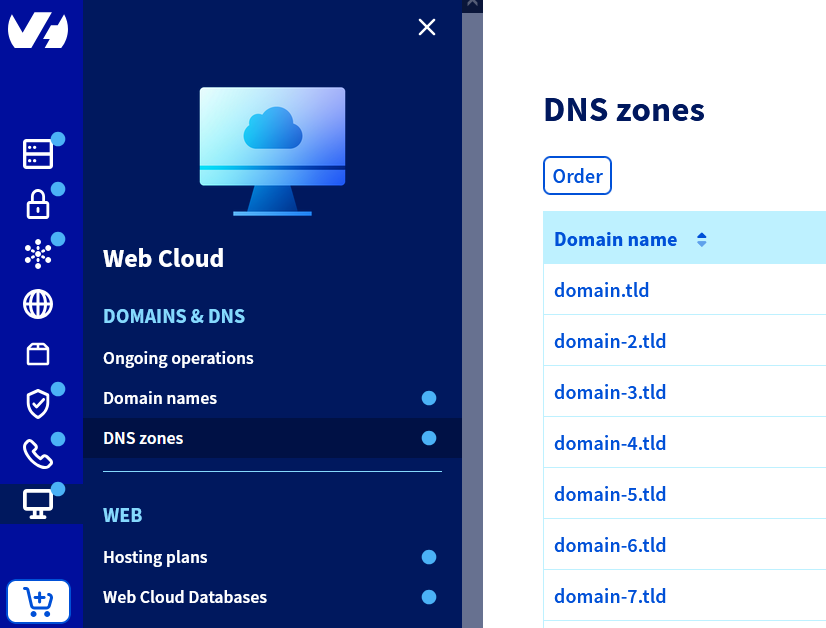
Web Cloud>DNS-Zone> Wählen Sie Ihren Domainnamen aus
In der praktischen Anwendung
1 - Den Domainnamen in iCloud aktivieren
Um Ihren Domainnamen in iCloud zu aktivieren, folgen Sie den Anweisungen auf der Seite "Add a domain you own to iCloud Mail on iCloud.com" der offiziellen Apple Dokumentation. Konzentrieren Sie sich auf den Abschnitt "Step 3: Update the records with your domain registrar", um die DNS-Einträge zu ermitteln, die Sie Ihrer OVHcloud DNS-Zone hinzufügen müssen.
Am Ende dieses Schritts stellt Ihnen Apple die DNS-Einträge (MX, CNAME, TXT) bereit, die Sie in Ihrer OVHcloud DNS-Zone konfigurieren müssen. Bewahren Sie diese für den nächsten Schritt auf.
2 - Die DNS-Einträge in Ihrem OVHcloud Kundencenter konfigurieren
Klicken Sie auf die untenstehenden Tabs, um die 2 Schritte nacheinander anzuzeigen.
Wählen Sie in der Liste DNS-Zone den betreffenden Domainnamen aus.
3 - Einen DMARC-Eintrag hinzufügen (optional)
Um die Zustellbarkeit Ihrer E-Mails zu verbessern und zu vermeiden, dass Ihre Nachrichten als Spam eingestuft werden, fügen Sie einen DMARC-Eintrag hinzu.
Wie Sie einen DMARC-Eintrag im OVHcloud Kundencenter erstellen, erfahren Sie in unserer Anleitung "E-Mail-Sicherheit durch DMARC-Eintrag verbessern".
4 - Die Domain in iCloud überprüfen und aktivieren
Sobald die DNS-Einträge (MX, CNAME, TXT, DMARC) korrekt in Ihrer OVHcloud DNS-Zone hinzugefügt wurden, kehren Sie zu iCloud.com zurück.
Folgen Sie den Anweisungen auf der Seite "Add a domain you own to iCloud Mail on iCloud.com" der offiziellen Apple Dokumentation. Konzentrieren Sie sich auf den Abschnitt "Step 4: Finish setting up the domain".
Nach Abschluss dieses Schritts ist Ihr personalisierter Domainname vollständig aktiviert und Sie können bis zu 3 Adressen pro Person innerhalb Ihrer Familie erstellen.
Die Überprüfung kann fehlschlagen, wenn Ihre DNS-Einträge noch nicht propagiert wurden. Diese Propagation kann mehrere Stunden dauern.
Häufige Fehlerbehebungen
Prüfen, wo die DNS-Zone verwaltet wird
Wenn Ihr Domainname DNS-Server außerhalb von OVHcloud verwendet (Wix, Squarespace, Cloudflare etc.), nehmen Sie die Konfiguration in der Verwaltungsoberfläche dieses Anbieters vor, anstatt im OVHcloud Kundencenter.
CNAME bereits vorhanden
- Ein CNAME-Eintrag kann nicht zusammen mit einem A-, AAAA- oder TXT-Eintrag bestehen, der für dieselbe Domain oder Subdomain konfiguriert ist.
- Löschen Sie den alten Eintrag, bevor Sie den von Apple angeforderten CNAME erstellen.
Doppelter SPF
- Pro Domainnamen darf es nur einen einzigen SPF-Eintrag geben. Wenn bereits ein OVHcloud SPF-Eintrag vorhanden ist (z. B.:
v=spf1 include:mx.ovh.com ~all), führen Sie ihn mit dem von Apple bereitgestellten Eintrag zusammen (z. B.:v=spf1 include:mx.ovh.com include:icloud.com ~all).
Unvollständiges DKIM
- Apple fordert Sie auf, mehrere DKIM-Schlüssel (
sig1,sig2etc.) in Ihrer DNS-Zone zu speichern: Fügen Sie alle hinzu.
Propagationsdauer
- DNS-Änderungen können mehrere Stunden (bis zu 24 Stunden) dauern, bis sie von Apple erkannt werden.
Weiterführende Informationen
Kontaktieren Sie für spezialisierte Dienstleistungen (SEO, Web-Entwicklung etc.) die OVHcloud Partner.
Wenn Sie Hilfe bei der Nutzung und Konfiguration Ihrer OVHcloud Lösungen benötigen, beachten Sie unsere Support-Angebote.
Treten Sie unserer User Community bei.