
Jak używać nazwy domeny OVHcloud z usługą iCloud Mail
Dowiedz się, jak skonfigurować nazwę domeny OVHcloud z usługą iCloud, aby tworzyć spersonalizowane adresy e-mail
Informacje dotyczące administrowania usługami OVHcloud oraz jak znaleźć odpowiednią pomoc
Podczas korzystania z przewodników OVHcloud pamiętaj o następujących warunkach:
- Instrukcje zawierają możliwie najwięcej szczegółów, ale nie mogą obejmować wszystkich indywidualnych przypadków użycia. Może być konieczne dostosowanie opisanych działań do Twoich potrzeb.
- Ekosystem OVHcloud został zaprojektowany z myślą o elastyczności i swobodzie wyboru. Klienci są zatem odpowiedzialni za bezpieczną i prawidłową konfigurację swoich usług. Aby zapobiec utracie danych, zdecydowanie zalecamy stosowanie strategii kopii zapasowych dla wszystkich ważnych danych.
- Nasze przewodniki i tutoriale mogą odwoływać się do oprogramowania lub usług firm trzecich w połączeniu z rozwiązaniami OVHcloud. Wsparcie techniczne OVHcloud nie obejmuje konfiguracji systemów ani produktów pozostających poza naszą odpowiedzialnością. Dotyczy to między innymi:
- Systemów operacyjnych i interfejsów użytkownika (Windows, Debian, Plesk itp.).
- Wszelkiego innego oprogramowania firm trzecich (klienty FTP, programy pocztowe itp.).
- Usług oferowanych przez innych dostawców (DNS, API, interfejsy użytkownika itp.).
Aby uzyskać odpowiednią pomoc w przypadku problemów, postępuj zgodnie z poniższymi wskazówkami:
- Szukasz spersonalizowanej porady lub chcesz omówić temat, który nie został szczegółowo opisany w naszej dokumentacji?
Dołącz do społeczności OVHcloud, aby wyszukać swój temat i skontaktować się z innymi użytkownikami. - Musisz zgłosić incydent dotyczący Twojej usługi OVHcloud lub masz trudności w panelu klienta OVHcloud?
Utwórz zgłoszenie do wsparcia w naszym centrum pomocy. - Potrzebujesz profesjonalnej pomocy przy swoim projekcie lub wsparcia w zadaniach wykraczających poza zakres naszego wsparcia?
Odwiedź nasz portal partnerów, aby znaleźć ekspertów znających rozwiązania OVHcloud. - Szukasz bardziej szczegółowych informacji o naszych poziomach wsparcia i usługach Professional Services?
Odwiedź nasze strony internetowe: poziomy wsparcia OVHcloud oraz OVHcloud Professional Services.
Możesz uczestniczyć w ulepszaniu naszej dokumentacji:
- Chcesz przekazać opinię, aby ulepszyć stronę przewodnika, lub zgłosić niewystarczające informacje na konkretnej stronie?
Skorzystaj z przycisków „Czy ta strona była pomocna?” na dole strony, aby nas o tym poinformować. - Chcesz zaproponować konkretną aktualizację dokumentacji?
Skorzystaj z funkcji „Edytuj tę stronę”, dostępnej na dole strony oraz w panelu bocznym.
Wprowadzenie
W tym przewodniku dowiesz się, jak używać nazwy domeny zarejestrowanej w OVHcloud z usługą iCloud Mail firmy Apple. Dzięki temu możesz tworzyć spersonalizowane adresy e-mail (john.smith@mydomain.ovh), w pełni zarządzane i hostowane przez Apple.
Wymagania początkowe
- Posiadanie nazwy domeny zarejestrowanej w OVHcloud.
- Posiadanie identyfikatora Apple z abonamentem iCloud+.
Dostęp do Panelu klienta OVHcloud
- Link bezpośredni:
- Ścieżka nawigacji:
Web Cloud>Strefy DNS> Wybierz nazwę domeny
W praktyce
1 - Aktywacja nazwy domeny w usłudze iCloud
Aby aktywować nazwę domeny w usłudze iCloud, postępuj zgodnie z instrukcjami na stronie "Add a domain you own to iCloud Mail on iCloud.com" w oficjalnej dokumentacji Apple. Zwróć szczególną uwagę na sekcję "Step 3: Update the records with your domain registrar", aby poznać rekordy DNS, które należy dodać do Twojej strefy DNS OVHcloud.
Na końcu tego etapu Apple przekaże Ci listę rekordów DNS (MX, CNAME, TXT) do skonfigurowania w Twojej strefie DNS OVHcloud. Zachowaj je na potrzeby kolejnego etapu.
2 - Konfiguracja rekordów DNS w Panelu klienta OVHcloud
Kliknij poniższe zakładki, aby wyświetlić kolejno każdy z 2 etapów.
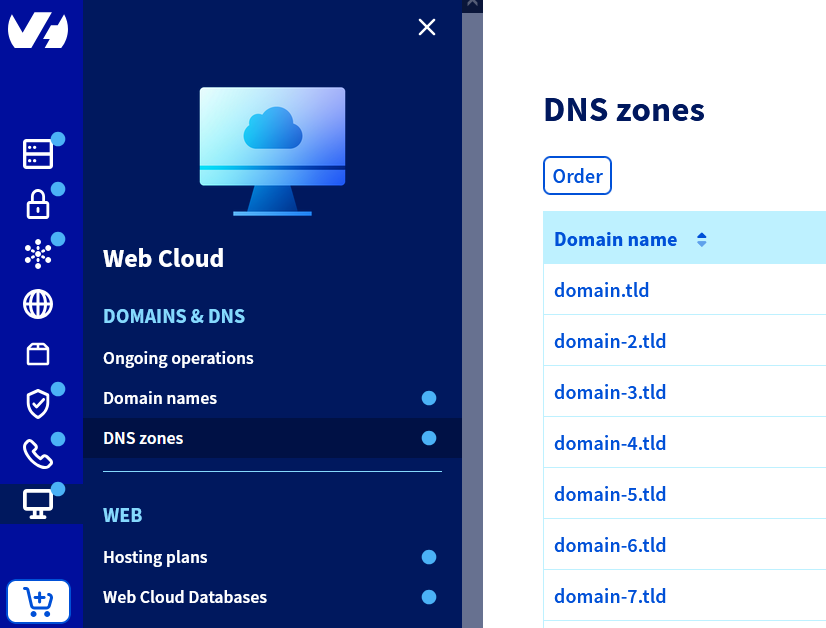
Na liście Strefy DNS wybierz odpowiednią nazwę domeny.
3 - Dodanie rekordu DMARC (opcjonalnie)
Aby poprawić dostarczalność wiadomości e-mail i zapobiec ich trafianiu do spamu, dodaj rekord DMARC.
Aby dowiedzieć się, jak utworzyć rekord DMARC w Panelu klienta OVHcloud, zapoznaj się z naszym przewodnikiem "Poprawa bezpieczeństwa e-maili dzięki rejestracji DMARC".
4 - Weryfikacja i aktywacja domeny w usłudze iCloud
Po prawidłowym dodaniu rekordów DNS (MX, CNAME, TXT, DMARC) do Twojej strefy DNS OVHcloud wróć na stronę iCloud.com.
Postępuj zgodnie z instrukcjami na stronie "Add a domain you own to iCloud Mail on iCloud.com" w oficjalnej dokumentacji Apple. Zwróć szczególną uwagę na sekcję "Step 4: Finish setting up the domain".
Po zakończeniu tego etapu Twoja spersonalizowana nazwa domeny jest w pełni aktywna i możesz utworzyć maksymalnie 3 adresy na osobę w ramach rodziny.
Weryfikacja może się nie powieść, jeśli rekordy DNS nie zostały jeszcze rozpropagowane. Propagacja może potrwać kilka godzin.
Najczęstsze problemy
Sprawdzenie, gdzie zarządzana jest strefa DNS
Jeśli Twoja nazwa domeny jest powiązana z serwerami DNS zewnętrznymi wobec OVHcloud (Wix, Squarespace, Cloudflare itp.), konfigurację należy przeprowadzić w interfejsie zarządzania tymi serwerami DNS, poza Panelem klienta OVHcloud.
Rekord CNAME już istnieje
- Rekord CNAME nie może współistnieć z rekordem A, AAAA lub TXT skonfigurowanym dla tej samej domeny lub subdomeny.
- Usuń stary rekord przed utworzeniem rekordu CNAME wymaganego przez Apple.
Zduplikowany rekord SPF
- Dla jednej nazwy domeny może istnieć tylko jeden rekord SPF. Jeśli rekord SPF OVHcloud już istnieje (np.:
v=spf1 include:mx.ovh.com ~all), scal go z rekordem dostarczonym przez Apple (np.:v=spf1 include:mx.ovh.com include:icloud.com ~all).
Niekompletny DKIM
- Apple prosi o dodanie do Twojej strefy DNS kilku kluczy DKIM (
sig1,sig2itp.): dodaj je wszystkie.
Czas propagacji
- Zmiany DNS mogą zostać rozpoznane przez Apple dopiero po kilku godzinach (do 24 godzin).
Sprawdź również
W przypadku wyspecjalizowanych usług (pozycjonowanie, rozwój itp.) skontaktuj się z partnerami OVHcloud.
Jeśli chcesz otrzymywać wsparcie w zakresie konfiguracji i użytkowania Twoich rozwiązań OVHcloud, zapoznaj się z naszymi ofertami pomocy.
Dołącz do grona naszych użytkowników.