Getting started with Public Cloud Databases
Find out how to set up your managed database service in the OVHcloud Control Panel
Objective
OVHcloud Public Cloud managed databases let you focus on building and deploying cloud applications while OVHcloud handles the database infrastructure and maintenance.
This guide explains how to order a Public Cloud managed database service via the OVHcloud Control Panel, API, CLI, or Terraform.
Requirements
- A Public Cloud project in your OVHcloud account
- Access to the OVHcloud API (API and Terraform methods — create your credentials by consulting the First steps with the OVHcloud API guide)
- Terraform installed (Terraform method only — tested with version v1.14.6)
OVHcloud Control Panel Access
- Direct link: Public Cloud Projects
- Navigation path:
Public Cloud> Select your project
Instructions
Click Databases in the left-hand navigation bar under Databases & Analytics. The adjacent Analytics entry provides access to Kafka, Kafka Connect, Kafka MirrorMaker, Dashboards, and OpenSearch.
Click Create your managed database (or Create a service if your project already contains databases).
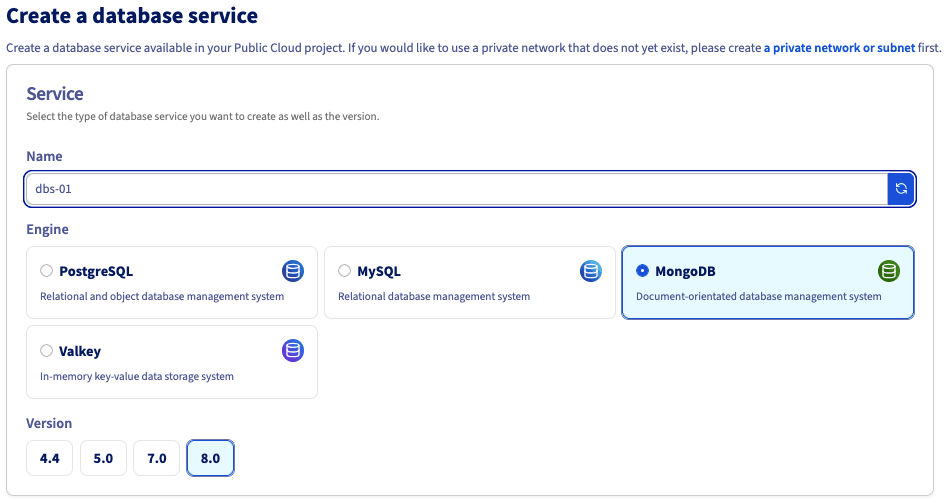
Step 1: Select your engine and version
Optionally rename your service (auto-generated by default), then select the engine and version.
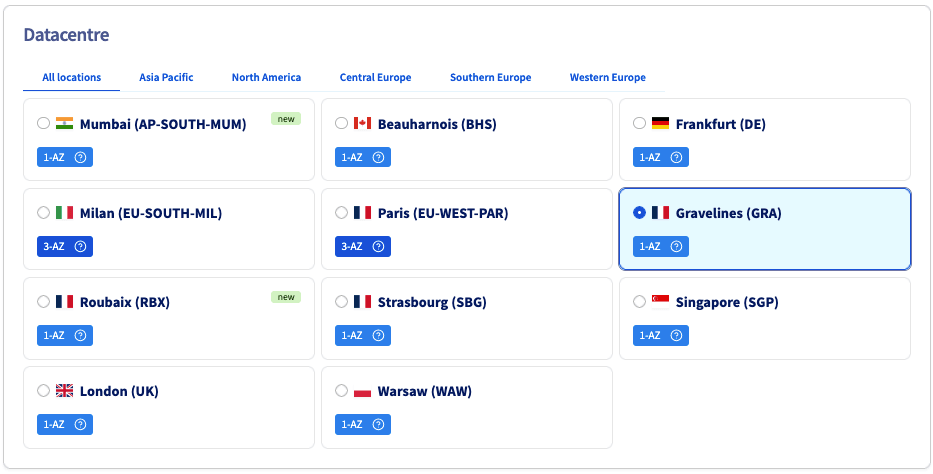
Step 2: Select a datacentre
Choose the geographical region of the data centre in which your database will be hosted.
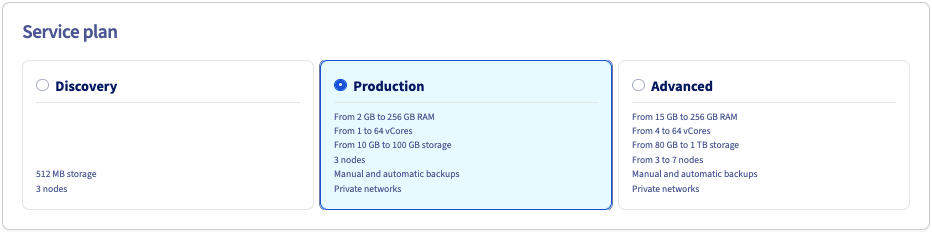
Step 3: Select a service plan
Choose a service plan. You can upgrade it after creation.
See the capabilities page of your selected database type for plan property details.
Step 4: Select your instance
Select the instance. The number of nodes is set by the solution selected above, and cannot be modified in this case.
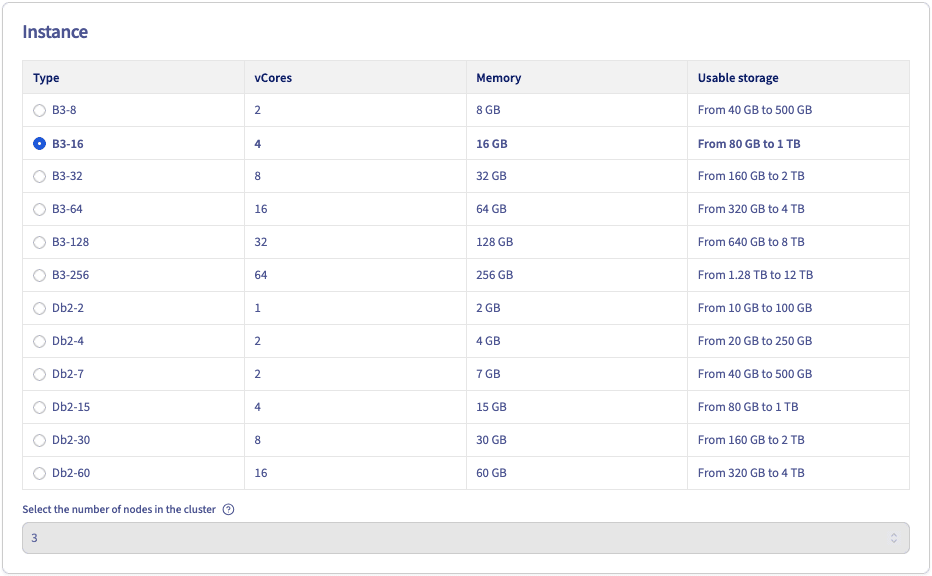
See the capabilities page of your selected database type for hardware and configuration details.
Take note of the pricing information.
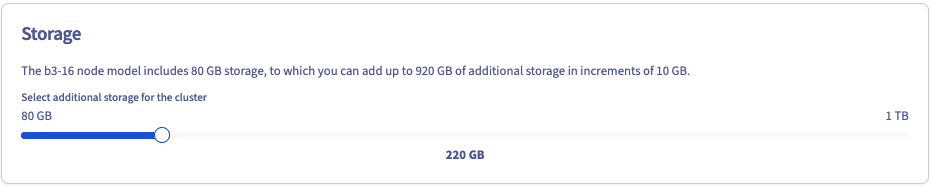
Step 5: Sizing
Additional storage can be ordered and, depending on the engine, the number of nodes in your cluster can be adjusted.
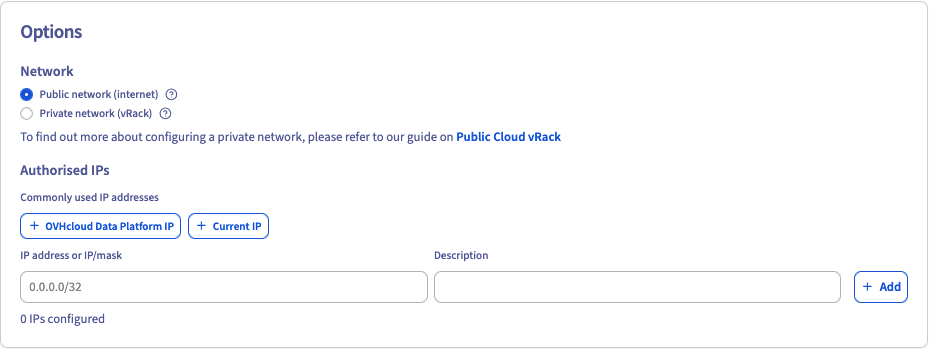
Step 6: Configure your options
Configure the network and authorised IPs.
Connecting a private network (optional)

If you already have a private subnet available, select Private network (vRack) and choose it from the drop-down menu. This option may not be available for the selected service type.
You can be redirected to create a private network or subnet via the corresponding links. In that case, you will need to restart the database order.
For detailed instructions, see the Configuring vRack for Public Cloud guide.
Authorised IPs
Add the IP addresses or address ranges allowed to connect to your service.
For security, the default network configuration blocks all incoming connections. Authorise a suitable IP address to access your database.
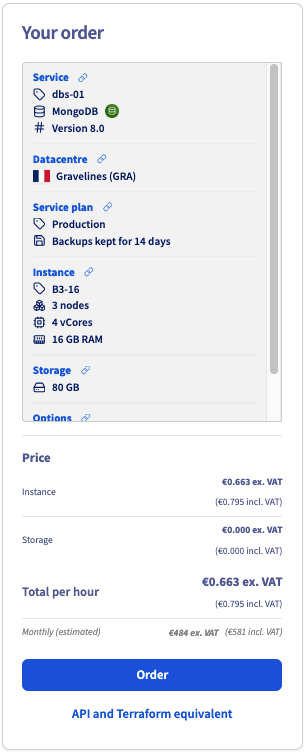
Step 7: Summary and confirmation
The right-hand panel displays a live summary of your order that updates as you make selections. Review it, then click Order to confirm.
To view the equivalent API or Terraform call before ordering, click API and Terraform equivalent.
Your database service deploys within a few minutes. Messages in the OVHcloud Control Panel notify you when the database is ready to use.
To configure your service after installation, see the Configure your instance to accept incoming connections guide for your database type, available in our catalog.
Configuration options vary by database type. Examples are available in the public-cloud-databases-examples repository.
Go further
Managing a MongoDB service from the OVHcloud Control Panel
Configuring vRack for Public Cloud
Visit our dedicated Discord channel to ask questions, provide feedback, and interact directly with the team that builds our databases services.
If you need training or technical assistance to implement our solutions, contact your sales representative or our Professional Services experts for a quote and a custom analysis of your project.
Join our community of users.