
How to install WordPress with Docker on a VPS or a dedicated server
Find out how to quickly install WordPress with Docker on a VPS or an OVHcloud dedicated server
Objective
Installing WordPress on a VPS or dedicated server has several advantages, such as full customization of the environment, performance optimization, and enhanced security. There are several ways to install WordPress on a VPS or dedicated server, depending on your technical level and the time you want to devote to it. One of the quickest and most efficient ways to do this is to use Docker. Docker makes it easy to deploy applications by 'containerizing' them, making WordPress installation fast, easy, and repeatable in any environment.
Find out how to install WordPress manually with Docker on a VPS or an OVHcloud Dedicated Server.
Information regarding OVHcloud service administration and how to find appropriate assistance
When using OVHcloud guides, please be aware of the following conditions:
- User instructions aim to provide as many details as possible but cannot cover individual use cases. You might need to adapt the pertinent actions to your requirements.
- The OVHcloud ecosystem is built for flexibility and freedom of choice. Customers are therefore responsible for the secure and proper configuration of their services. To prevent data loss, we strongly recommend to apply backup strategies to all your important data.
- Our guides and tutorials may reference third-party software or services in combination with OVHcloud solutions. The technical support provided by OVHcloud does not include the configuration of systems or products outside of our responsibility. This includes but is not limited to:
- Operating systems and user interfaces (Windows, Debian, Plesk, etc.).
- Any other third-party software (FTP clients, email software, etc.).
- Services offered by other providers (DNS, APIs, user interfaces, etc.).
To receive the appropriate assistance for any issues you might experience, follow these guidelines:
- You seek personalized advice or you would like to discuss a topic that is not covered in detail by our documentation?
Join the OVHcloud Community to search for your topic and reach out to other users. - You need to report an incident regarding your OVHcloud service or you are experiencing difficulties in the OVHcloud Control Panel?
Create a support request in our Help Centre. - You require professional assistance for your project or you need help with tasks outside our support scope?
Visit our partner portal to search for experts who are familiar with OVHcloud solutions. - You are looking for more detailed information regarding our support levels and Professional Services?
Please visit our web pages for OVHcloud support levels and OVHcloud Professional Services.
You can participate in improving our documentation:
- You would like to share feedback to improve a guide page or you want to report insufficient information on a specific page?
Use the "Was this page helpful?" buttons at the bottom of the page to let us know. - You would like to propose a specific documentation update?
Use the "Edit this page" function, available at the bottom of the page and in the sidebar.
Requirements
- A VPS solution or a dedicated server in your
- Administrative (sudo) access to your server via SSH
- A domain name (registered with OVHcloud or another registrar)
Instructions
The VPS used for this guide has a Debian distribution in version 11 (Bullseye). For more information, see the official Docker website.
Install Docker
Update the package manager:
Install the required packages to allow apt to use a repository over HTTPS:
Add the official Docker GPG key:
Add the Docker repository to your system:
Update the apt package index and install Docker Engine and the Docker Compose plugin:
Verify that Docker is installed and configured:
Test Docker with a simple command:
If the Docker installation is successful, you will receive a message like this:

Install Docker Compose
The Docker Compose plugin was installed with Docker Engine in the previous step.
Check the Docker Compose installation:
If the Docker Compose installation is successful, you will receive a message like this:

Deploy WordPress with Docker Compose
Create a folder for your WordPress project and navigate to it:
Create a docker-compose.yml file with your preferred text editor:
Copy and paste the following configuration into the docker-compose.yml file:
This Compose file creates a WordPress service and a MySQL service.
Launch the services with Docker Compose:
The Docker image used in this example is the official version wordpress:latest. This specific image is designed to work with an Apache web server. The official WordPress images on Docker Hub are regularly updated to include the latest stable PHP versions compatible with the current version of WordPress.
To find out the exact PHP version included in the wordpress:latest image at a specific time, you can run a container based on this image and check the PHP version directly.
Launch a temporary container with the image wordpress:latest:
This command gives you an answer like this:
As a reminder, Docker images are updated regularly. The version of the components in wordpress:latest can therefore change over time, as new versions are published and integrated into the image.
If you wish, you can use another Docker image.
Use a specific Docker image
Go to the Docker Hub WordPress section and identify the image that fits your needs. For example, if you choose to use the image wordpress:php8.3-fpm, you will need to edit your docker-compose.yml file with a text editor. Once the file is open, find the section of the wordpress service and modify the line image: to use the specific tag of the wordpress:php8.3-fpm image you have chosen. For example:
Apply changes
Launch or update your containers with Docker Compose. If this is your first time launching the project, use:
If your containers are already running and you want to apply the changes, use:
Check that everything is working as expected. You can check the logs of your WordPress container to ensure that it starts correctly and that there are no errors:
Access WordPress
You can now access WordPress from a browser. There are two ways of doing this:
- Via the IP address of your VPS:
<VPS_IP_ADDRESS>:8000 - Via your website's domain name:
<DOMAIN_NAME>:8000
Link the domain name to the IP address of the VPS or dedicated server
To access your website from a browser, first link the domain name of your WordPress website to the IP address of your VPS. To do this, edit the A record of the active DNS zone so that it targets that IP address, as described in our guide on "Editing an OVHcloud DNS zone".
Initialize your WordPress website
When you log in for the first time, your browser must redirect you to <VPS_IP_ADDRESS>:8000/wp-admin/install.php (or <DOMAIN_NAME>:8000/wp-admin/install.php if you use the domain name). This means that WordPress is ready for the initial configuration phase. This page is the starting point for configuring your WordPress website, where you need to define key elements such as:
- Language
- The title of your website
- The username for site administration
- An associated password
- An email address
- etc.
Complete the installation of your WordPress website
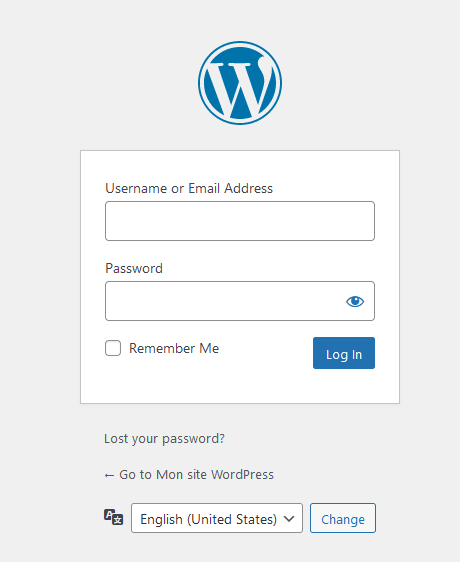
Once all the necessary information has been completed and the form has been submitted, WordPress will finalize the installation. You will then be redirected to the login screen (wp-login.php), where you can log in with the username and password you have just created.
Conclusion
You have just installed WordPress on your VPS or OVHcloud dedicated server with a Docker image. You can now access your WordPress website from a browser.
For some general tips on securing a GNU/Linux-based server, see our guides:
Go further
How to install a web development environment on a VPS or a dedicated server
How to install WordPress with WP-CLI on a VPS or a dedicated server
For specialised services (SEO, development, etc.), contact OVHcloud partners.
Join our community of users.