Enabling NSX-T in a Hosted Private Cloud VMware on OVHcloud
Find out how to add the rights to a user and to the Datacentres for NSX-T
Objective
This guide explains how to add read rights to a user so they can access the NSX-T web console of your Hosted Private Cloud - VMware on OVHcloud.
These rights are granted from the .
OVHcloud Control Panel Access
- Direct link: VMware vSphere
- Navigation path:
Hosted Private Cloud>Managed VMware vSphere> Select your vSphere service
Requirements
- A subscription to a Hosted Private Cloud plan with the "Network Security Virtualization" or "Software-Defined Datacenter" options
- You must be the administrator contact of the VMware infrastructure on OVHcloud, as this contact receives the login credentials.
- You must have completed the steps in this documentation: Getting started with NSX
Instructions
Step 1 - Enabling NSX-T
How do I enable the NSX-T interface for my user?
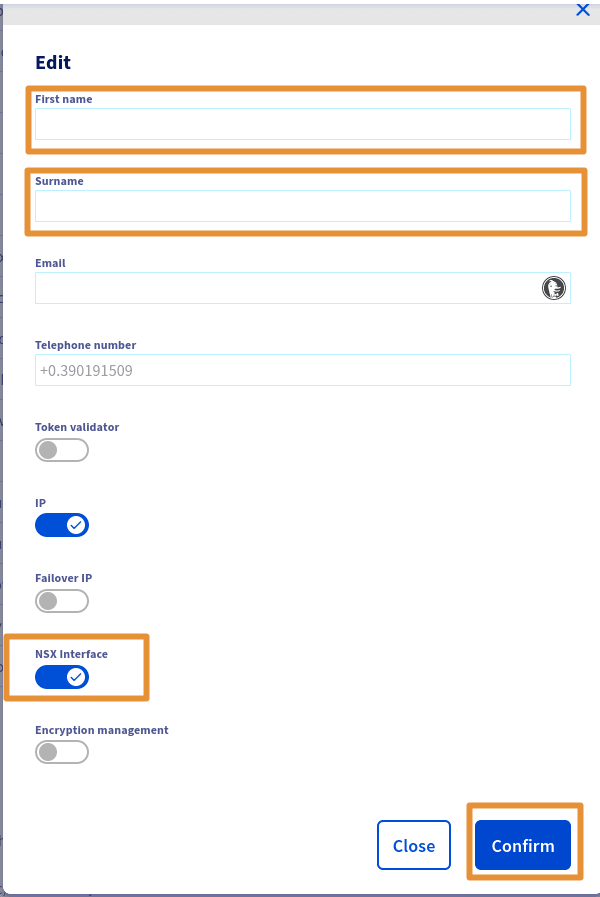
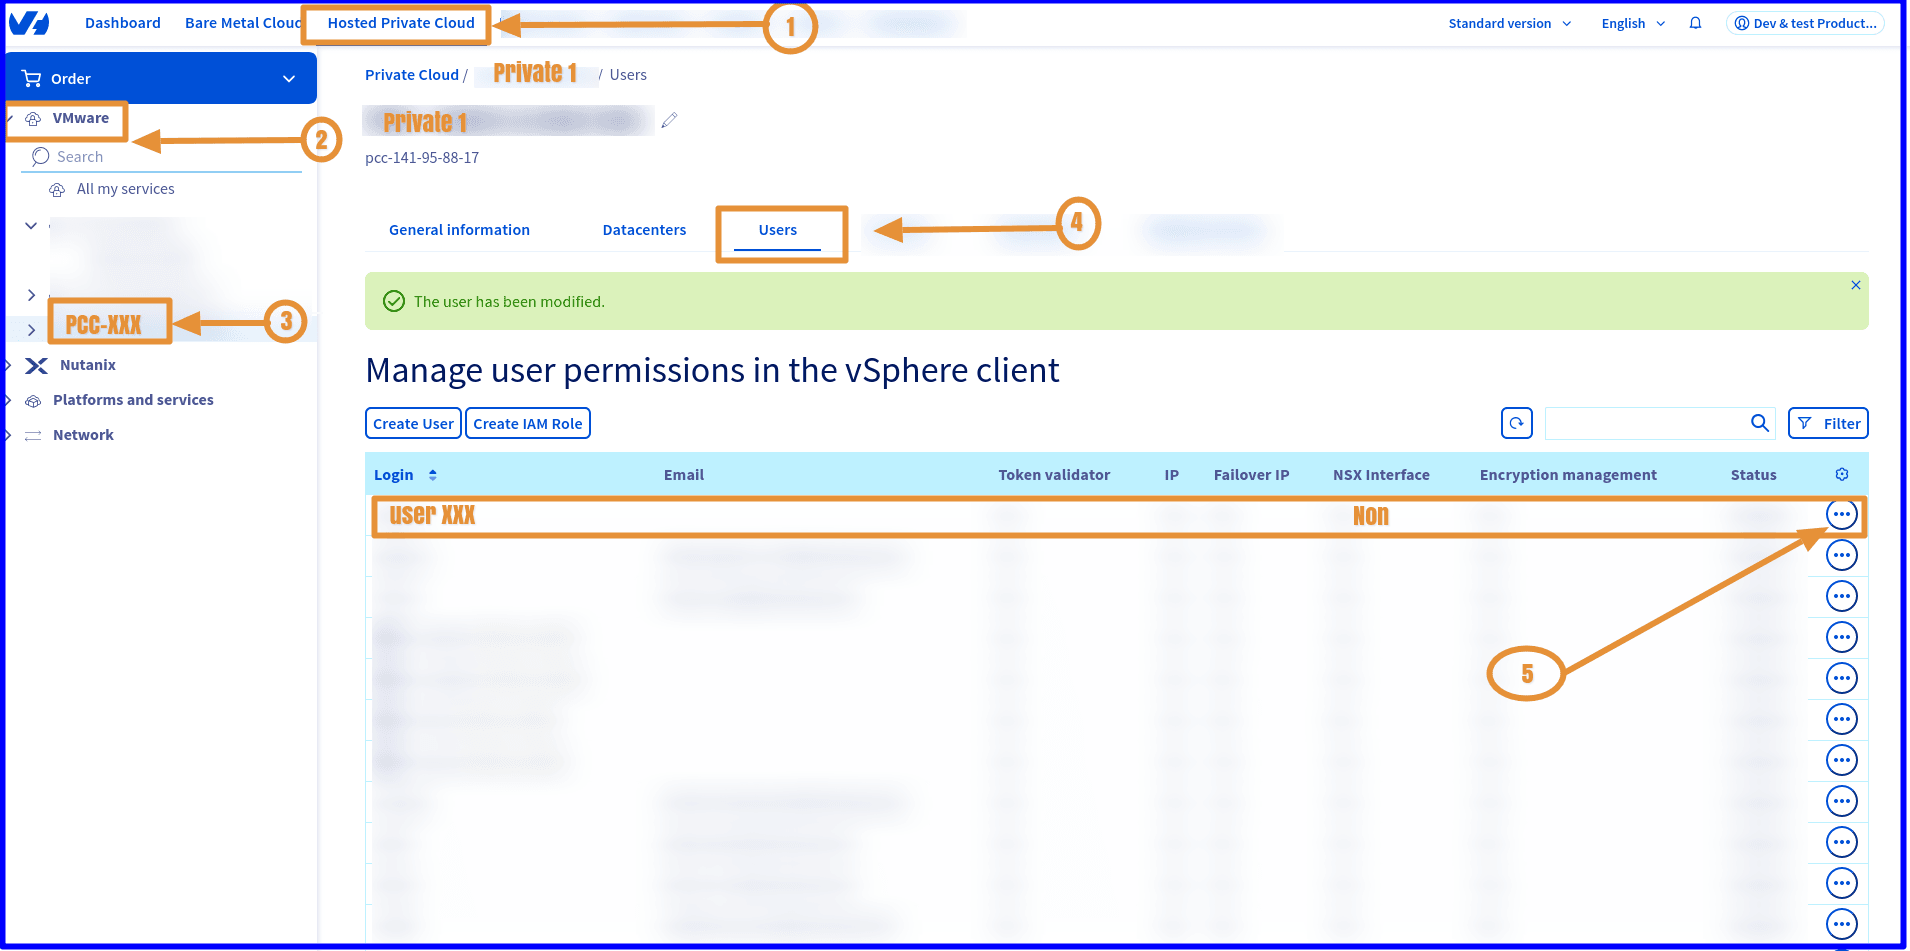
Edit the user with whom you want to access the NSX-T web interface:
VMware > PCC-XXX.XXX.XXX.XXX > Users > Modify then enable the NSX Interface button.

Step 2 - Adding NSX-T rights
How do I add the rights for my user?
Click: VMware > PCC-XXX-XXX-XXX-XXX > Users > Modify.
Step 3 - Adding NSX-T rights to the Datacentres
How do I add the rights to the Datacentres?
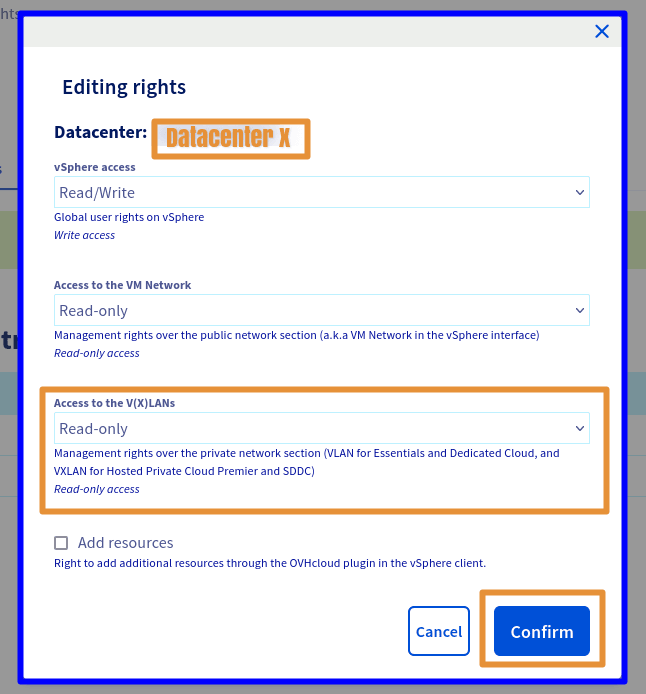
All that is left to do is modify the rights for each desired Datacenter by clicking: VMware > PCC-XXX-XXX-XXX-XXX > Users > View/Edit the rights for each DC > Modify.
A window then opens. Choose the necessary rights from the 3 main sections > vSphere access / Access to the VM Network / Access to V(X)LANs.
The following rights are available: Operator / Administrator / None / Read-only
Only Read-only access to the V(X)LANs is required to access the NSX-T web interface.
Choose Read-only.
If you want to make changes in the NSX-T web interface, additional rights will then be required, such as Operator or Administrator.
Step 4 - Accessing the NSX-T interface
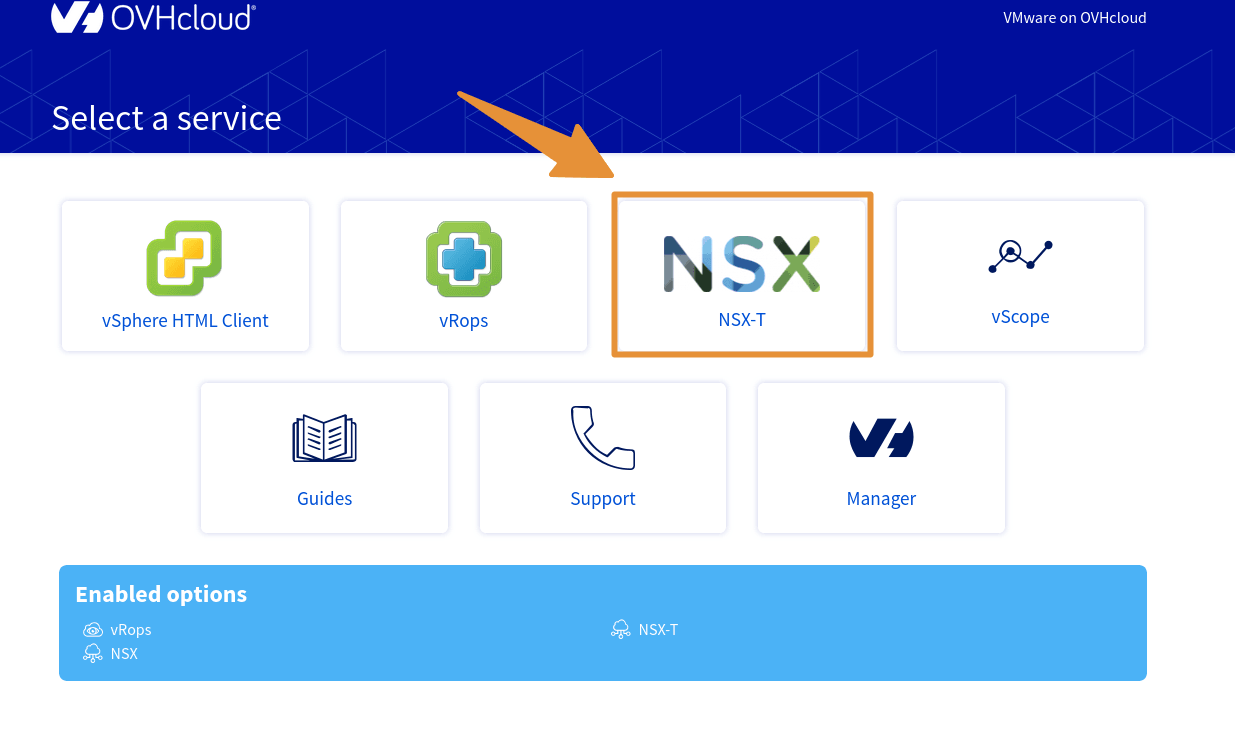
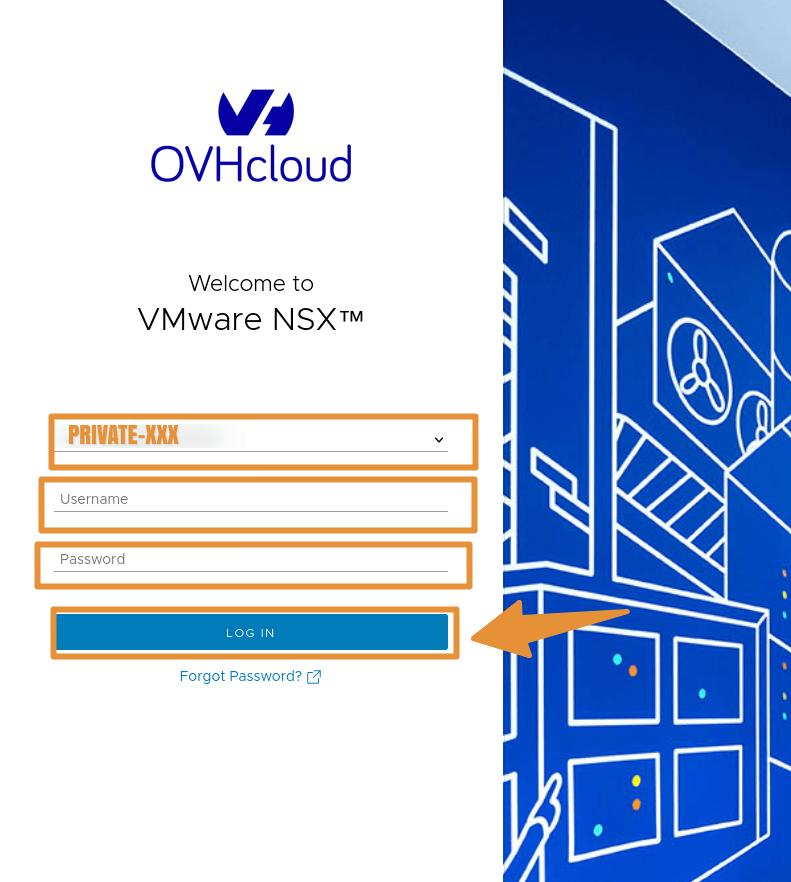
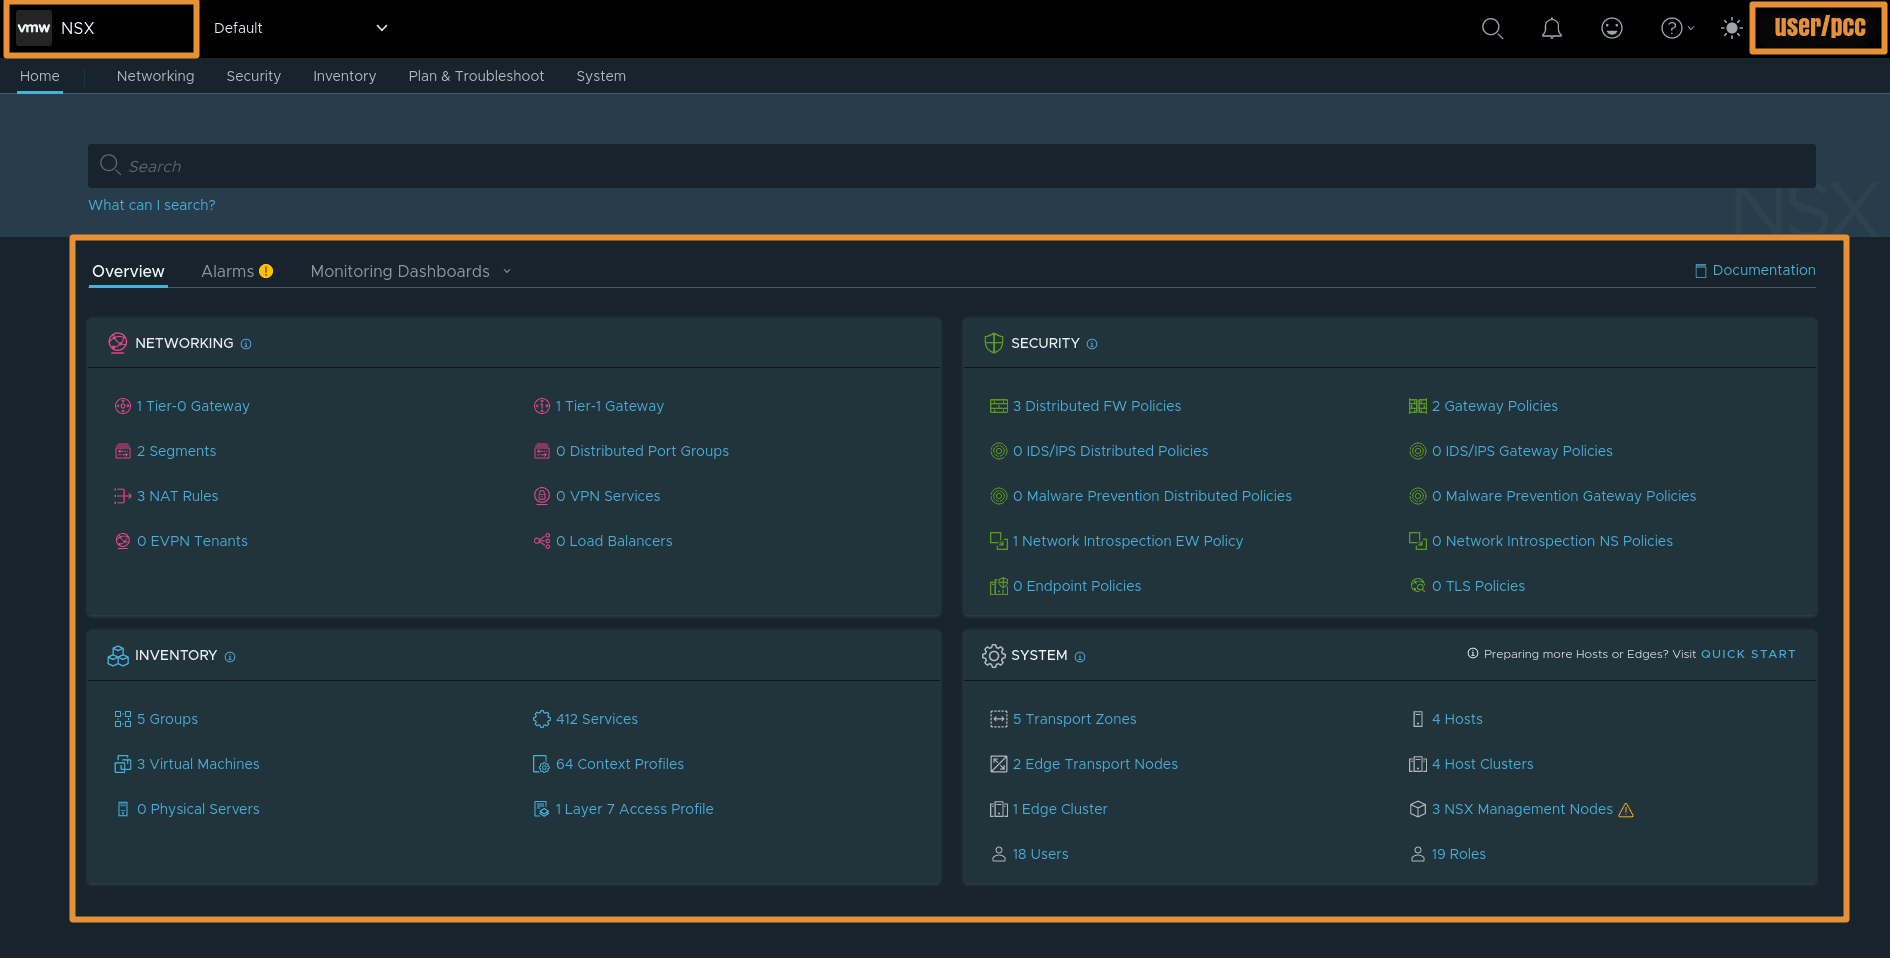
How do I access the NSX-T web interface?
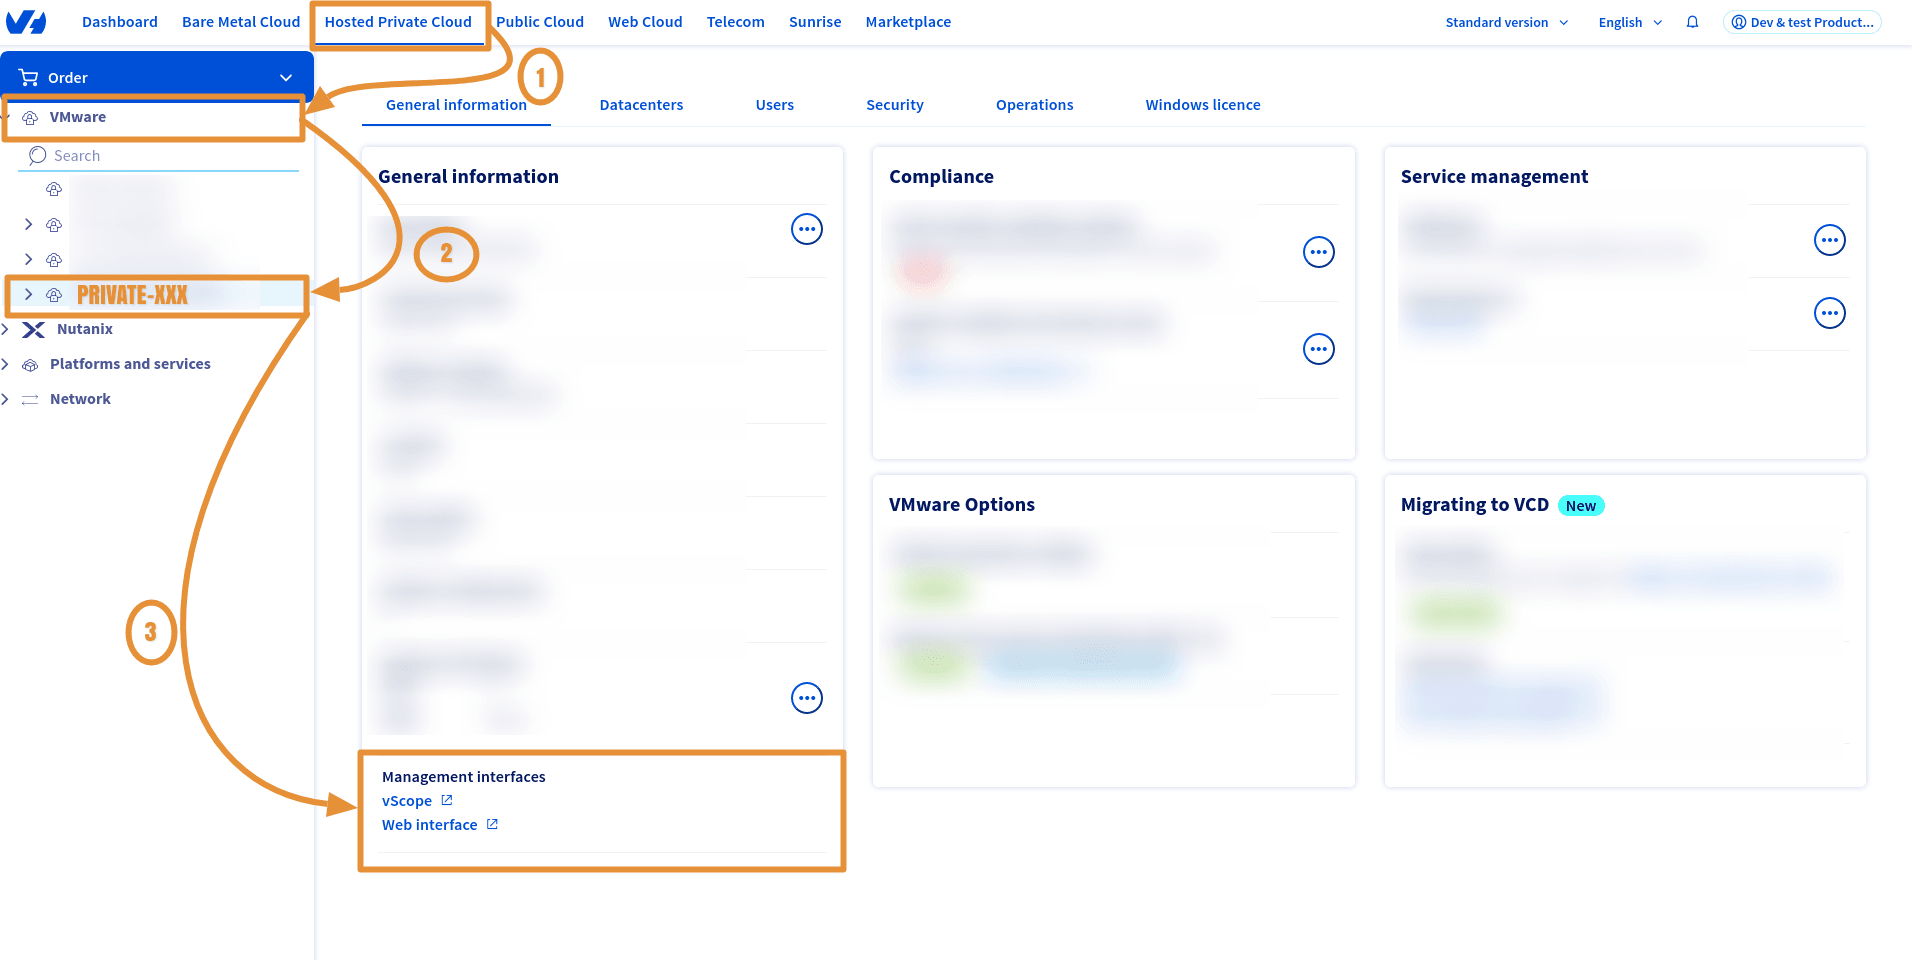
Still from your Hosted Private Cloud tree, click VMware > PCC-XXX-XXX-XXX-XXX.
- OVHcloud link:
https://www.ovh.com/manager/#/dedicated/dedicated_cloud/PCC-XXX-XXX-XXX-XXX> Replace PCC-XXX-XXX-XXX-XXX with the name of your PCC service.
Step 5 - Useful information
You can check whether NSX-T is enabled on your Datacenter. You can also find your NSX-T URL and its version:
Via the OVHcloud API
Parameters:
serviceName: The reference of your PCC in the form
pcc-XX-XX-XX-XX.
Example response:
Find out more about the OVHcloud API in our guide "Getting started with the OVHcloud API".
Go further
If you need training or technical assistance to implement our solutions, please contact your sales representative or click this link to get a quote and request a personalised analysis of your project from our Professional Services team.
Join our community of users.