How to manage nodes and node pools on an OVHcloud Managed Kubernetes cluster
Learn how to manage nodes and node pools using the OVHcloud Control Panel, the OVHcloud API, and the NodePools Custom Resource Definition (CRD)
Objective
The OVHcloud Managed Kubernetes service provides you with production-ready Kubernetes clusters without the hassle of installing or operating them.
This guide covers one of the first steps after ordering a cluster: managing nodes and node pools.
Depending on your preferred workflow, you can manage them through:
- The .
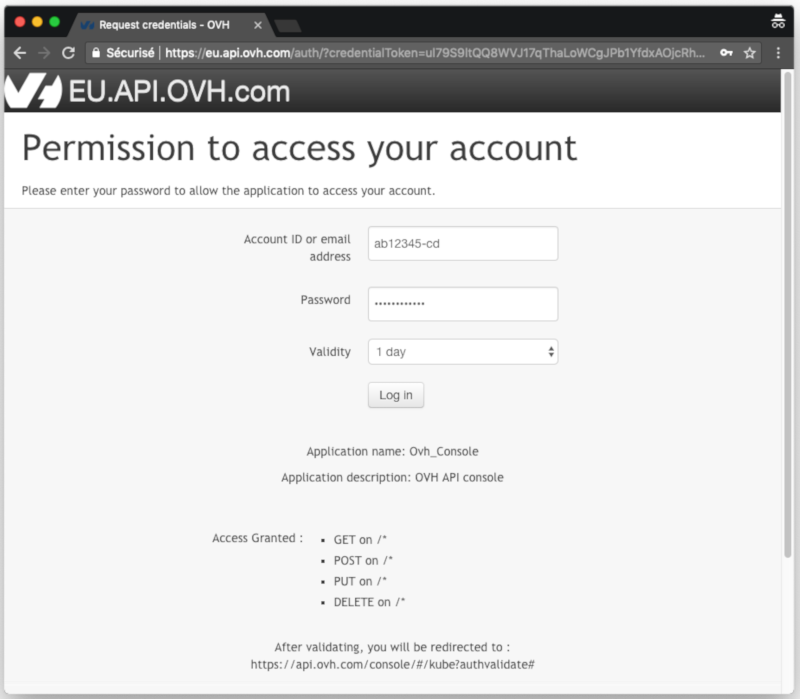
- The OVHcloud API.
- The
NodePoolsCustom Resource Definition (CRD) viakubectl.
We will walk you through each method to help you efficiently scale and manage your Kubernetes infrastructure.
Requirements
- You have an OVHcloud Managed Kubernetes cluster.
- If you plan to manage node pools using the
NodePoolsCRD, make sure you have the kubectl command-line tool installed. You can find detailed installation instructions on the official Kubernetes website.
OVHcloud Control Panel Access
- Direct link:
- Navigation path:
Public Cloud> Select your project
On nodes and node pools
In your OVHcloud Managed Kubernetes cluster, nodes are grouped in node pools (group of nodes sharing the same configuration).
When you order a new cluster, it is created with a default node pool. Refer to our guide on creating a cluster for more information.
In this guide we explain how to do some basic operations with nodes and node pools using the Public Cloud section of the .
Instructions
Access the administration UI for your OVHcloud Managed Kubernetes clusters by clicking on Managed Kubernetes Service in the left-hand menu. In the table, select a cluster by clicking on the cluster name.
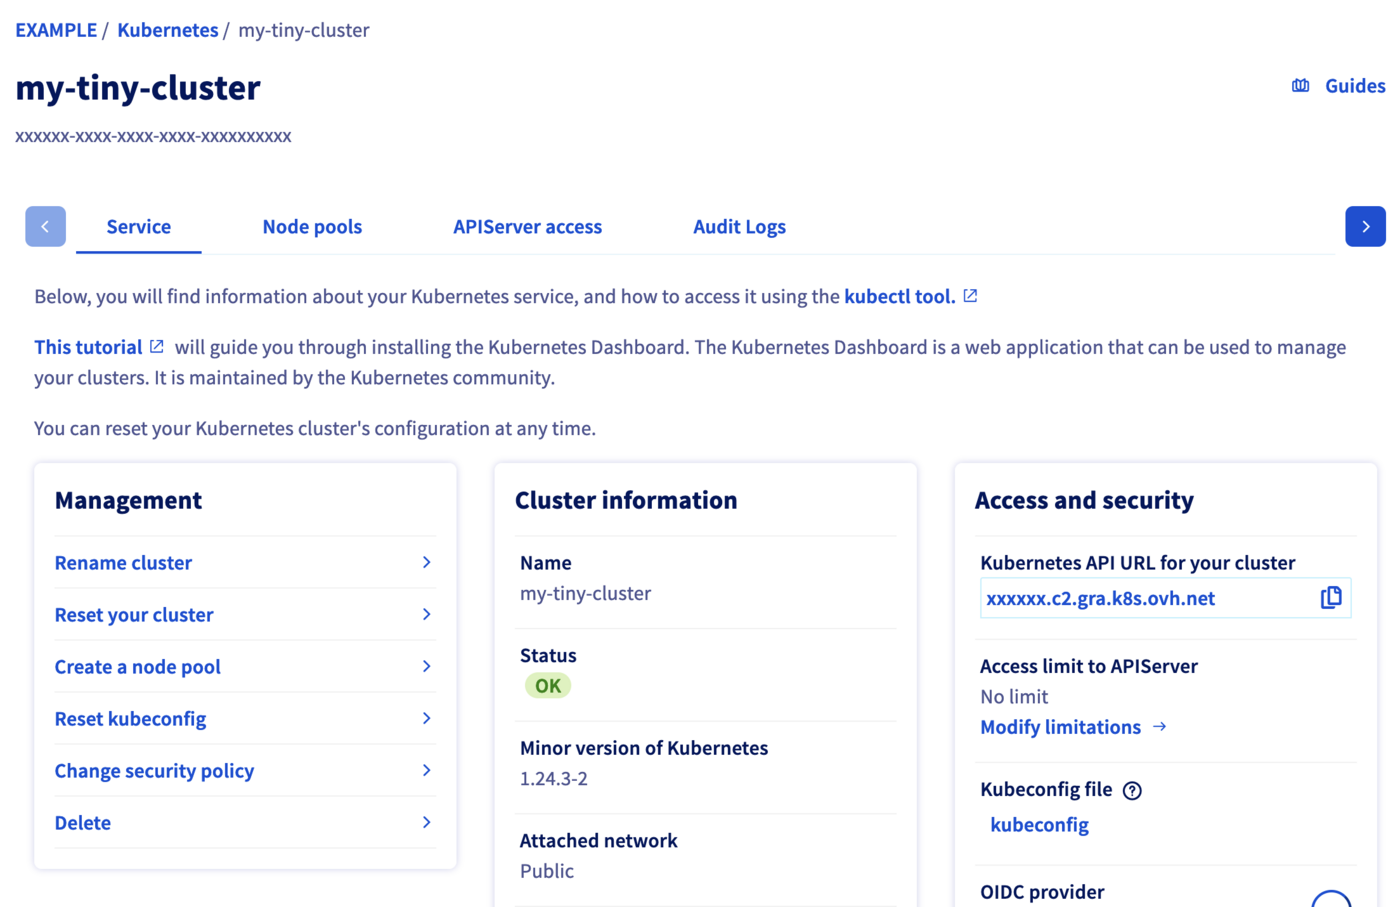
In this administration UI you have several tabs:
-
Service: Here you will have a global view of your cluster, with important information like the status, the API URL or the
kubectlconfiguration file. -
Node pools: You will find here the active node pools of your cluster. You will be able to add, resize or remove node pools.
-
APIServer access: You can add IPv4 ranges in order to restrict access to your cluster’s APIServer.
-
Audit Logs: Here, you will find the logs for your Kubernetes cluster’s control plane.
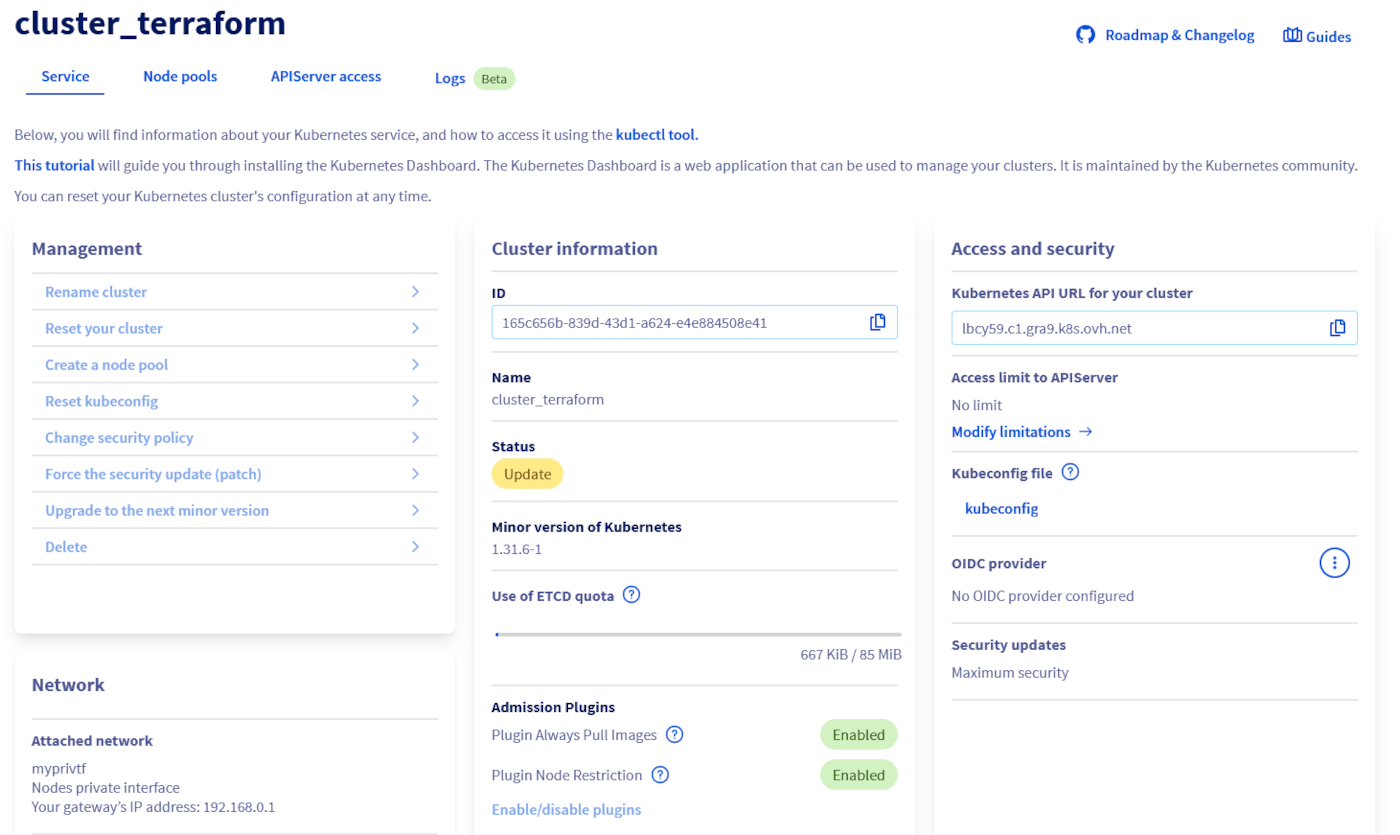
Getting your cluster information
Click on Managed Kubernetes Service, then click on the name of the relevant cluster.
Listing node pools
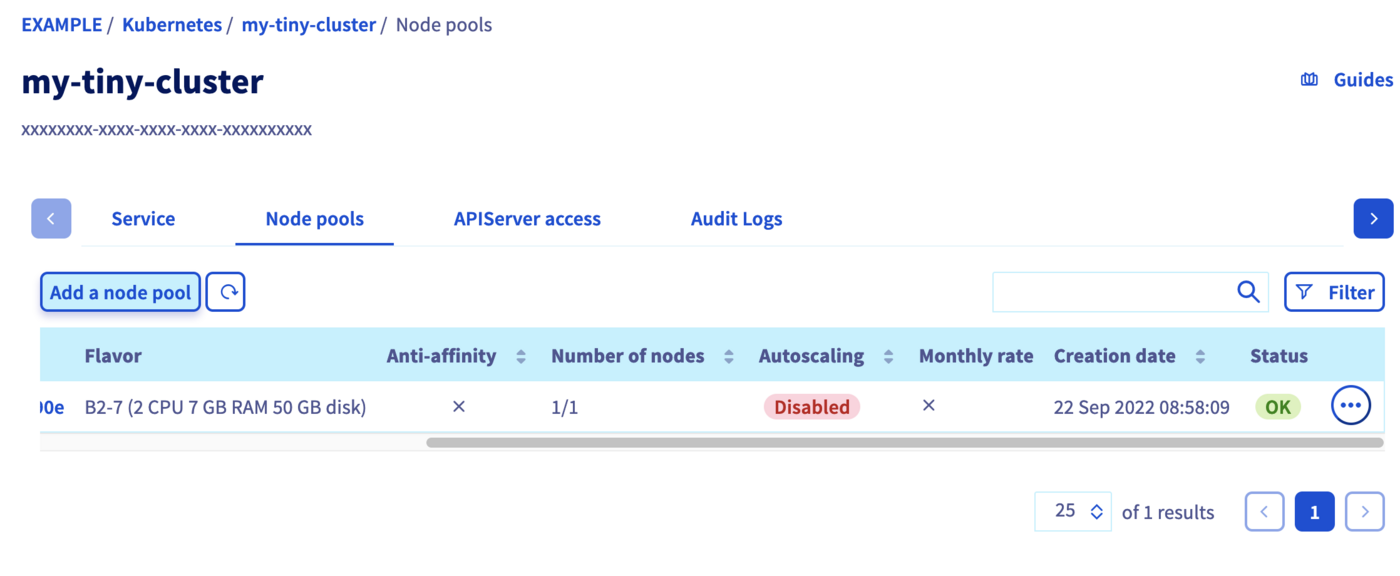
Click on Managed Kubernetes Service, then click on the name of the relevant cluster and open the Node pools tab.
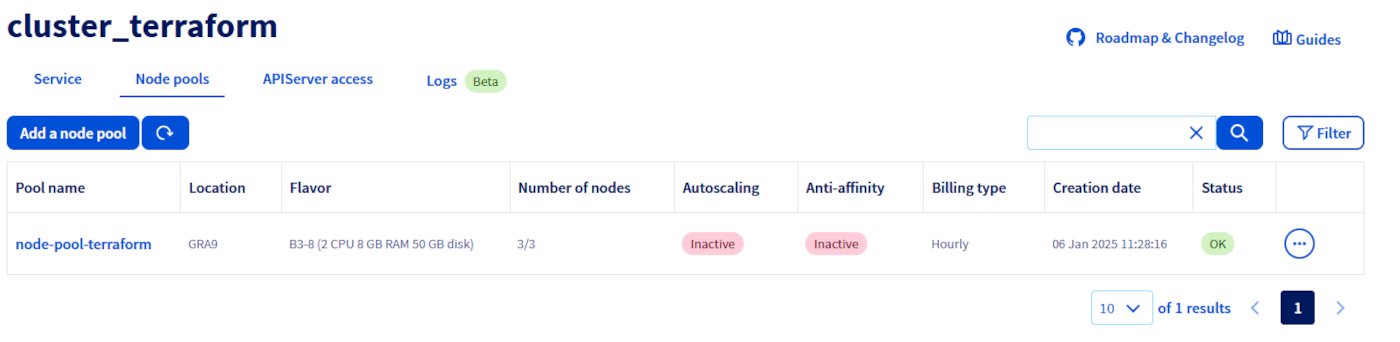
Getting information on a node pool
Click on Managed Kubernetes Service, then click on the name of the relevant cluster and open the Node pools tab.
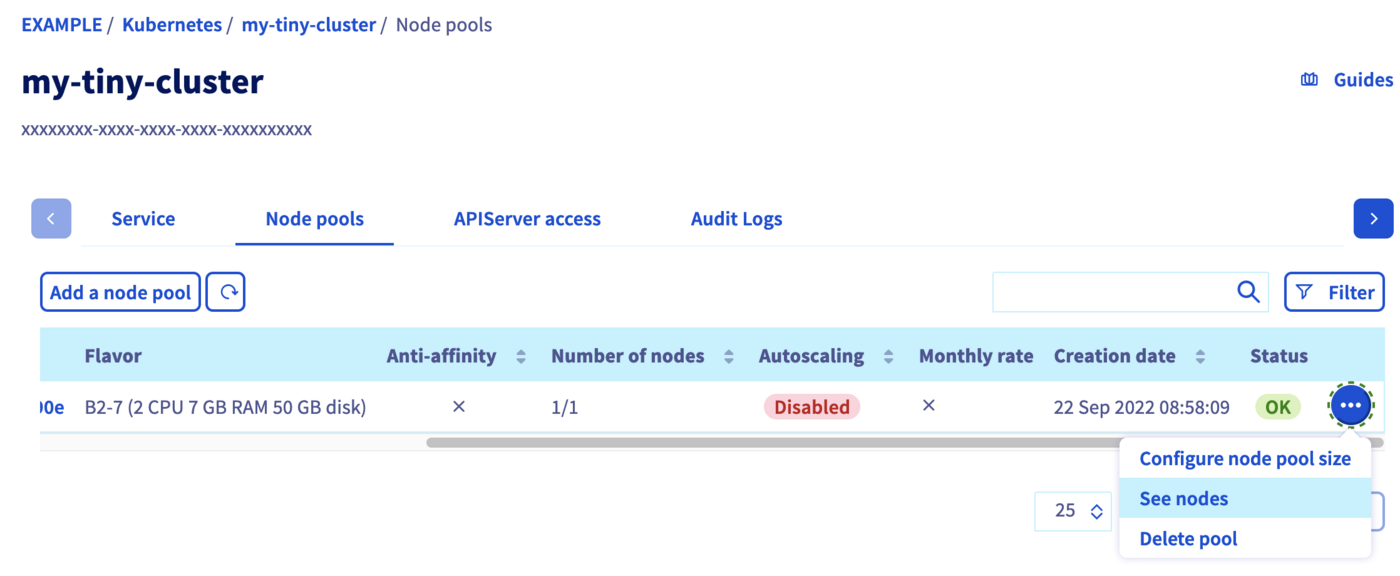
You can also view the nodes that make up a node pool, by clicking on the name of one of them.
Create a node pool
In the Node pools tab, click on the button Add a node pool.
Fill the fields to create a new node pool.
The name of node pool should be in lowercase. The “_” and “.” characters are not allowed. The node pool name cannot begin with a number.
The subsequent node pool configuration steps are described in Creating a cluster.
To learn more about the flavors of the current OVHcloud range, refer to this page.
The API will return you the new node pool information.
Result:
Via the NodePools CRD To create a new node pool, you simply need to create a new node pool manifest.
Copy the next YAML manifest in a new-nodepool.yaml file:
antiAffinity, flavor and name fields will not be editable after creation.
You cannot change the monthlyBilled field from true to false.
Then apply it to your cluster:
Your new node pool will be created:
At the beginning the new node pool is empty, but if you wait a few seconds, you will see how the nodes are progressively created and made available (one after another)...
Updating the node pool
Configuring a node pool
To access the nodes configuration, switch to the Node pools tab. Click on the ... button in the row of the node pool concerned, then select See nodes.
Here you can change the billing method for a node or delete a node by clicking on the respective ... button of a node.
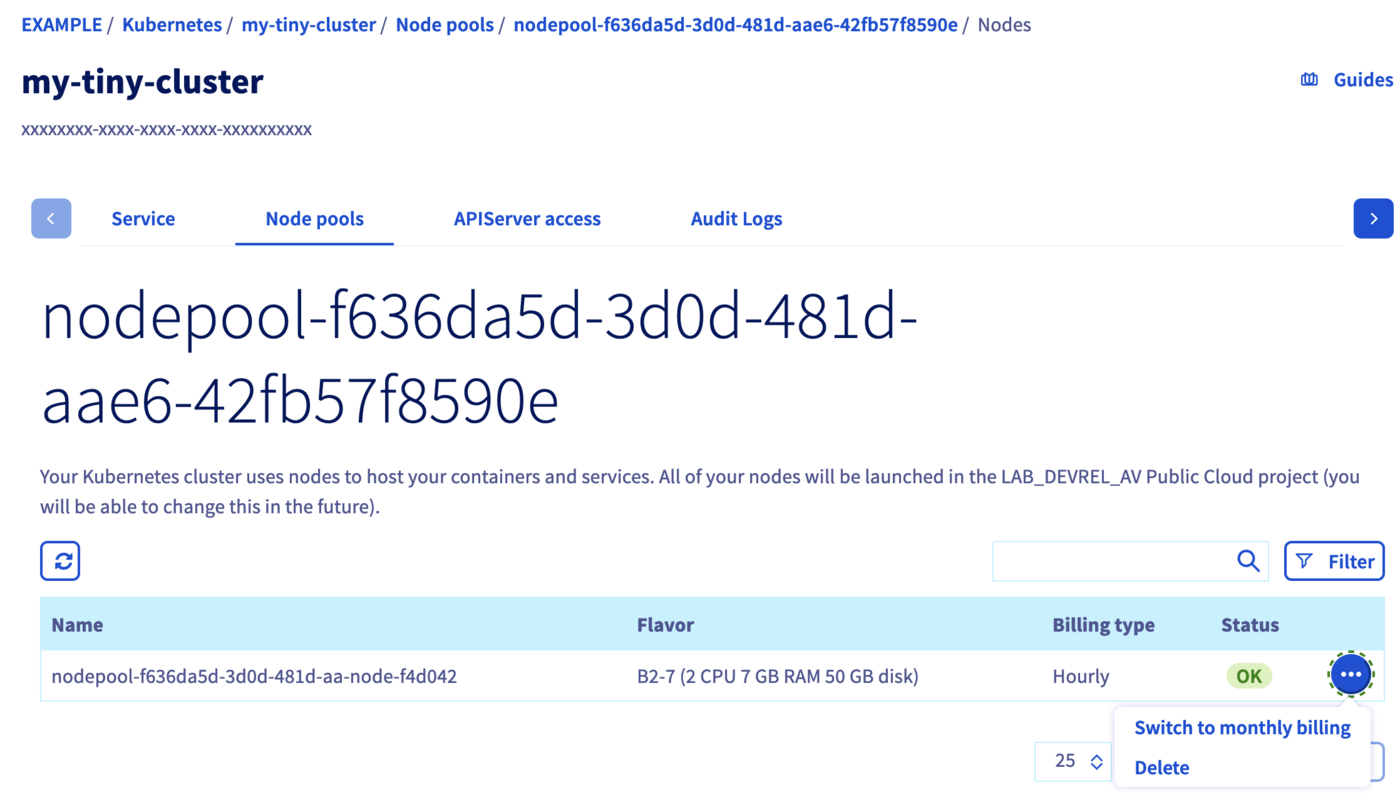
You can only switch from an hourly billing method to a monthly billing method, not vice versa.
Adding nodes to an existing node pool
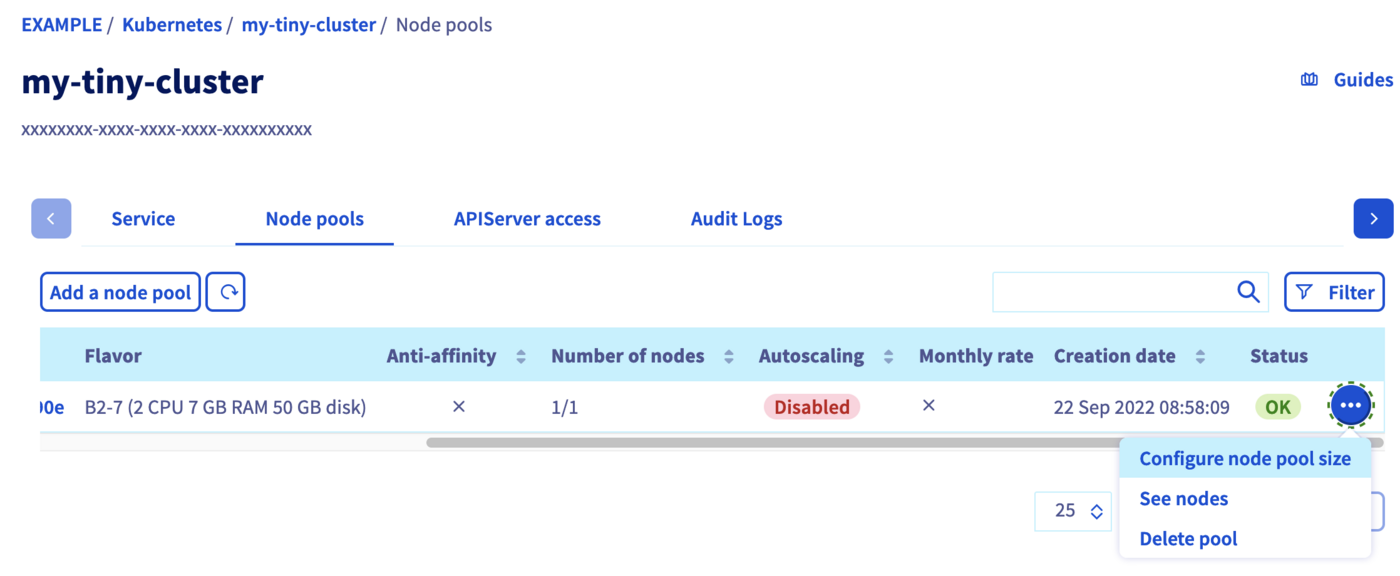
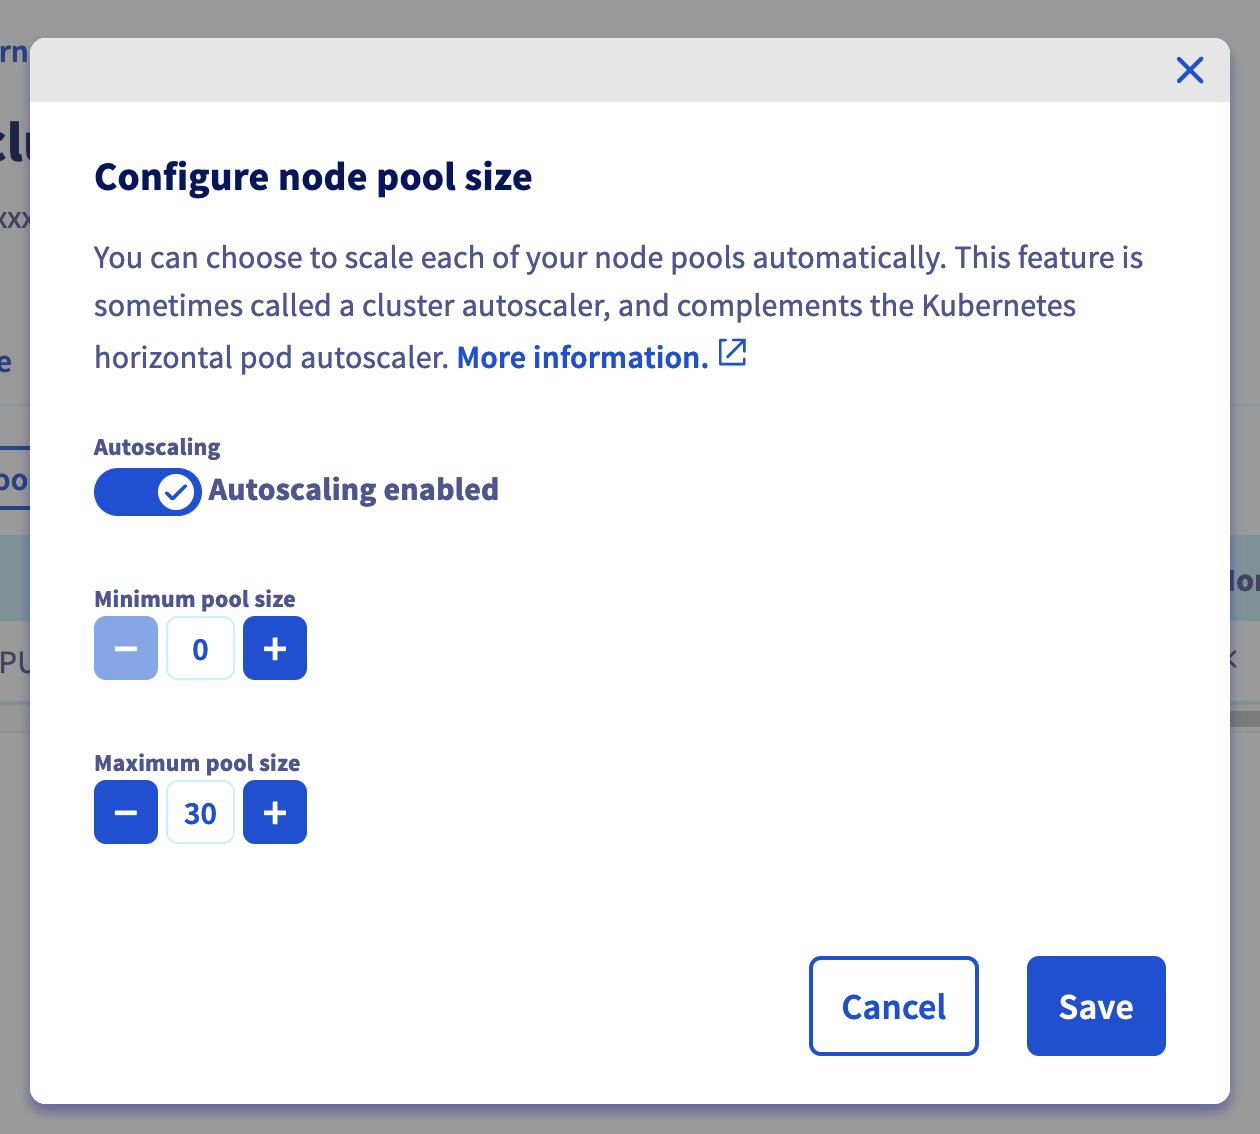
In the Node pools tab, click on the ... button in the row of the node pool concerned, then select Configure node pool size.
In the popup window, you can re-size your node pool by adding nodes. You can alternatively enable the autoscaling feature which allows you to set the minimum and maximum pool size instead.
Deleting a node pool
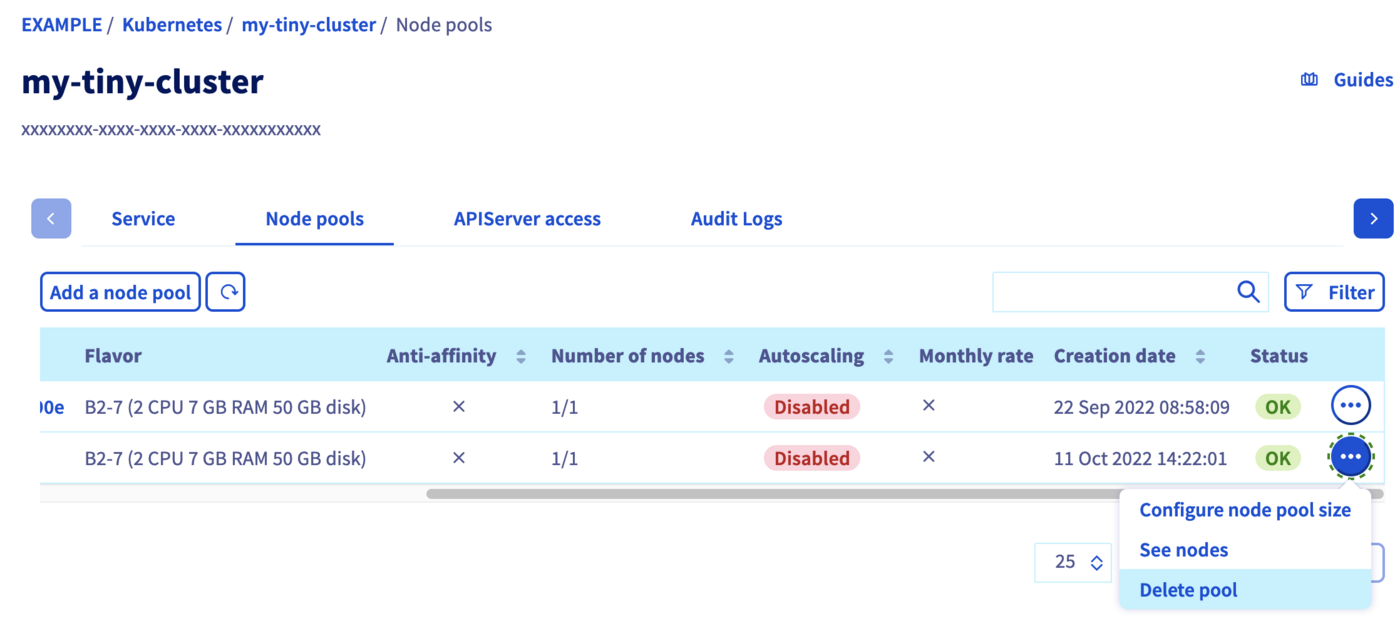
In the Node pools tab, click on the ... button in the row of the node pool concerned, then select Delete pool.
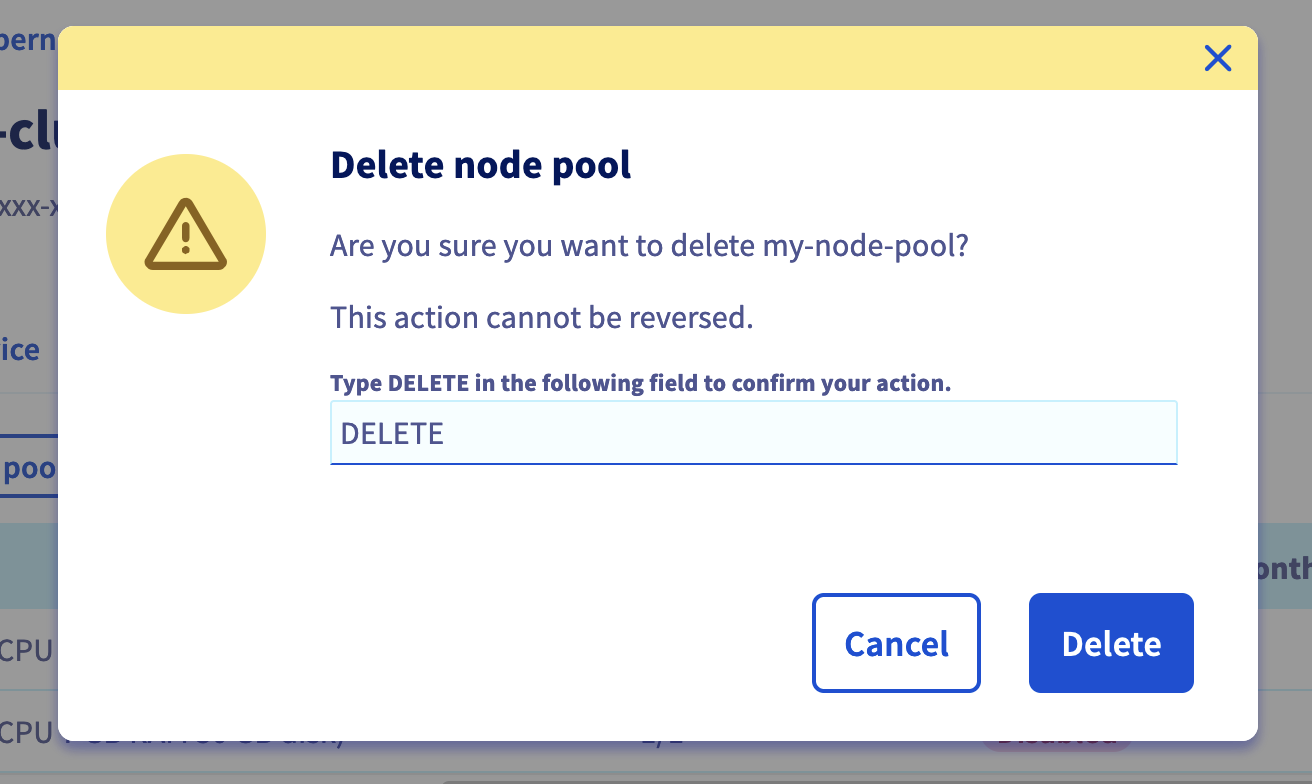
Confirm the decision by typing DELETE into the field, then click on the Delete button.
Go further
To have an overview of the OVHcloud Managed Kubernetes service, visit the OVHcloud Managed Kubernetes page.
To deploy your first application on your Kubernetes cluster, we invite you to follow our guides to configure default settings for kubectl and to deploy a Hello World application.
If you need training or technical assistance to implement our solutions, contact your sales representative or click on this link to get a quote and ask our Professional Services experts for a custom analysis of your project.
Join our community of users.