Configurazione del ripristino di emergenza con Metro (EN)
Objective
This guide introduces Metro Availability, which provides an automated disaster recovery plan.
OVHcloud provides services for which you are responsible, with regard to their configuration and management. It is therefore your responsibility to ensure that they work properly.
This guide is designed to assist you as much as possible with common tasks. Nevertheless, we recommend contacting a specialist provider if you experience any difficulties or doubts when it comes to managing, using or setting up a service on a server.
Requirements
- Access to the OVHcloud Control Panel
- Access to your clusters via Prism Central
- You need to have 3 Nutanix clusters within the OVHcloud infrastructure with Pro or Ultimate packs if you have a Nutanix on OVHcloud packaged service on both clusters in the P.R.A. These 3 clusters will need to be at remote sites for maximum security.
- You must have less than 5 ms of latency between the two replicated clusters. Please note that latency is not covered by SLAs.
Introduction
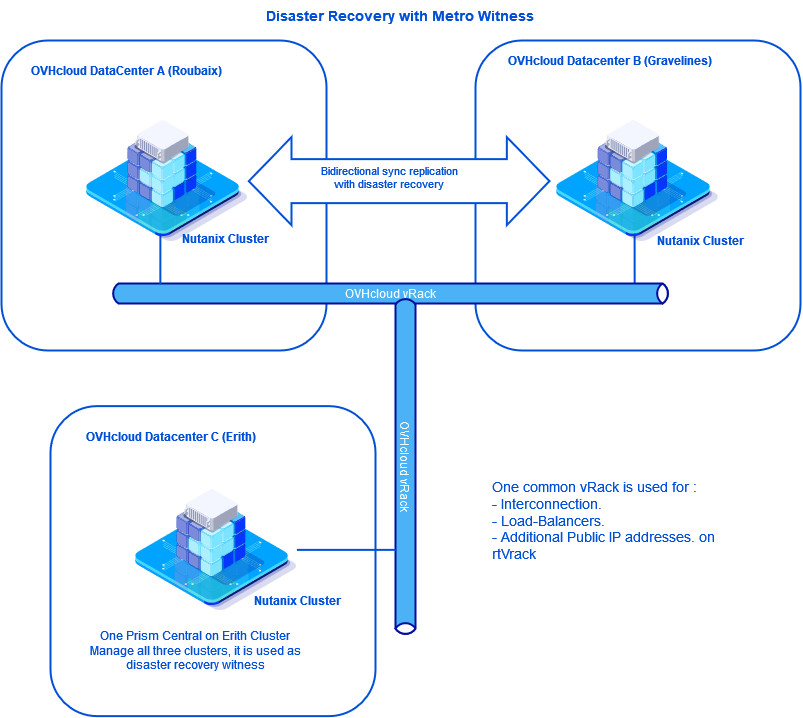
We will set up a two-way disaster recovery plan between two clusters with this hardware:
- A Nutanix cluster in Roubaix, France, with virtual machines replicated in Gravelines.
- A Nutanix cluster in Gravelines, France, with virtual machines replicated in Roubaix.
- A Nutanix cluster in Erith, England with Prism Central to serve as a witness in the disaster recovery plan.
We will only use one vRack, which will contain:
- The three Nutanix clusters.
- Load balancers.
- Additional IP addresses on the rtvRack.
Below is the diagram showing the three sites:
Instructions
- Step 1 Configuration
- Step 1.1 Interconnection of the three clusters
- Step 1.2 Delete the Prism Central records for the Roubaix and Gravelines clusters
- Step 1.3 Register both clusters on Prism Central in Erith
- Step 1.4 Adding IP Addresses for iSCSI Connections on All Three Clusters
- Step 1.5 Creating two Storage Containers
- Step 1.6 Move virtual machines to the Storage Container
- Step 1.7 Creation of a category to be used when implementing the P.R.A.
- Step 1.8 Add virtual machines in categories
- Step 1.9 Setting up synchronous replications between Roubaix and Gravelines
- Step 1.10 Create Subnets for Disaster Recovery Plan
- Step 1.11 Implementation of disaster recovery plans
- Step 2 - Validate Disaster Recovery Plan
We will implement this disaster recovery plan step by step.
The cluster configuration information used in our guide is as follows:
-
Roubaix cluster:
- Server 1: VM address CVM
192.168.0.21, hypervisor IP address AHV192.168.0.1. - Server 2: VM address CVM
192.168.0.22, hypervisor IP address AHV192.168.0.2. - Server 3: VM address CVM
192.168.0.23, hypervisor IP address AHV192.168.0.3. - Prism Element virtual address:
192.168.0.100. - Prism Element iSCSI address:
192.168.0.102. - Prism Central IP address:
192.168.0.101. - Gateway:
192.168.3.254. - Mask:
255.255.252.0 - Cluster version:
6.5
- Server 1: VM address CVM
-
Gravelines cluster:
- Server 1: VM address CVM
192.168.1.21, hypervisor IP address AHV192.168.1.1. - Server 2: VM address CVM
192.168.1.22, hypervisor IP address AHV192.168.1.2. - Server 3: VM address CVM
192.168.1.23, hypervisor IP address AHV192.168.1.3. - Prism Element virtual address:
192.168.1.100. - Prism Element iSCSI address:
192.168.1.102. - Prism Central IP address:
192.168.1.101. - Gateway:
192.168.3.254. - Mask:
255.255.252.0 - Cluster version:
6.5.
- Server 1: VM address CVM
-
Erith Cluster:
- Server 1: VM address CVM
192.168.2.21, hypervisor IP address AHV192.168.2.1. - Server 2: VM address CVM
192.168.2.22, hypervisor IP address AHV192.168.2.2. - Server 3: VM address CVM
192.168.2.23, hypervisor IP address AHV192.168.2.3. - Prism Element virtual address:
192.168.2.101. - Prism Element iSCSI address:
192.168.2.102. - Prism Central IP address:
192.168.2.100. - Gateway:
192.168.3.254. - Mask:
255.255.252.0 - Cluster version:
6.5.
- Server 1: VM address CVM
In addition to this guide, you can use these documents:
Step 1 - Configuration
Step 1.1 - Interconnection of the three clusters
The first step is to interconnect the three clusters on the same OVHcloud vRack.
Use this guide to connect your clusters: Interconnect clusters through the vRack. To connect the three clusters, use the instructions provided in the guide:
- Roubaix clusters in the vRack dedicated to Gravelines.
- Erith clusters in the vRack dedicated to Gravelines.
When you have finished configuring your vRack, you will have these elements in your vRack:
- 9 dedicated servers (3 per cluster)
- 3 public IP addresses
- 3 Load Balancers
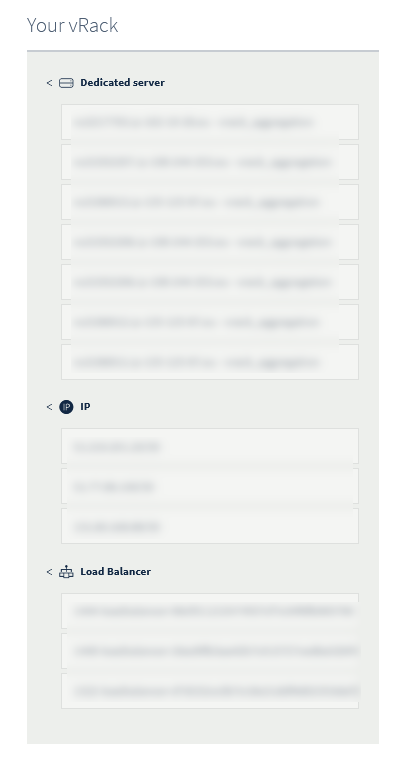
The three clusters are currently accessible from the Prism Central URL of each cluster.
Step 1.2 - Delete the Prism Central records for the Roubaix and Gravelines clusters
To implement a disaster recovery plan solution with Metro Availability, a cluster witness is required to automate tasks in the event of one of the clusters becoming unavailable. The cluster witness is located on a Prism Central virtual machine.
The Erith cluster will host the Prism Central virtual machine for the three clusters, and serve as a cluster witness for the disaster recovery plan between Roubaix and Gravelines.
Disabling Prism Central on the Roubaix cluster
Connect via SSH to the Prism Element cluster in Roubaix:
Run this command to remove Prism Element from the Prism Central configuration:
This message appears when disconnecting from Prism Central.
Enter this command:
Note the value of the Cluster UUID that must have this form xxxxxxxx-xxxx-xxxx-xxxx-xxxxxxxxxxxx.
Disconnect from Prism Element and connect via SSH on the Prism Central virtual machine in Roubaix.
Enter this command:
Disabling Prism Central on the Gravelines cluster
Log in to the Prism Element cluster in Gravelines via SSH.
Enter this command:
This message appears when disconnecting from Prism Central.
Enter this command:
Note the value of Cluster UID that should be in this form xxxxxxxx-xxxx-xxxx-xxxx-xxxxxxxxxxxx
Disconnect from Prism Element and connect via SSH on the Prism Central virtual machine in Gravelines.
Step 1.3 - Registration of the two clusters on the Prism Central in Erith
Log in to the Prism Element in Roubaix via SSH:
Run this command:
This message appears:
Wait and enter this command:
If the cluster is connected to Prism Central in Erith, you will see this information:
Log in to Prism Element in Gravelines via SSH:
Run this command:
This message appears:
Wait and enter this command:
If the cluster is connected to the Prism Central in Erith, you will see this information:
From a web browser, log in to the URL from Prism-Central to Erith, you will see the three clusters.
The Prism Central virtual machines in Gravelines and Roubaix are no longer being used. You can stop them.
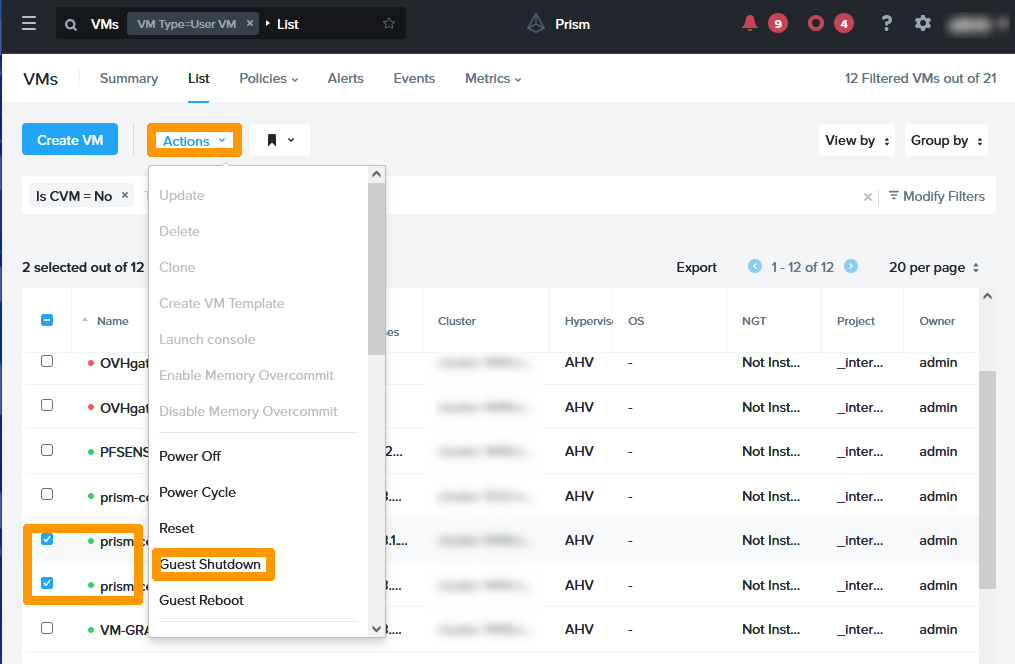
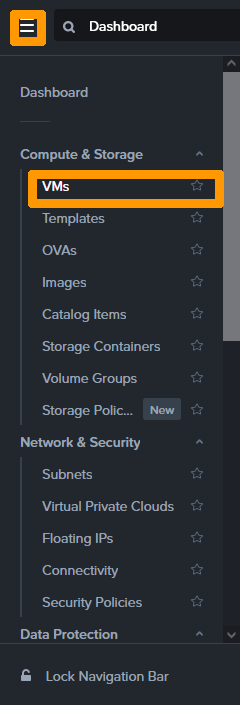
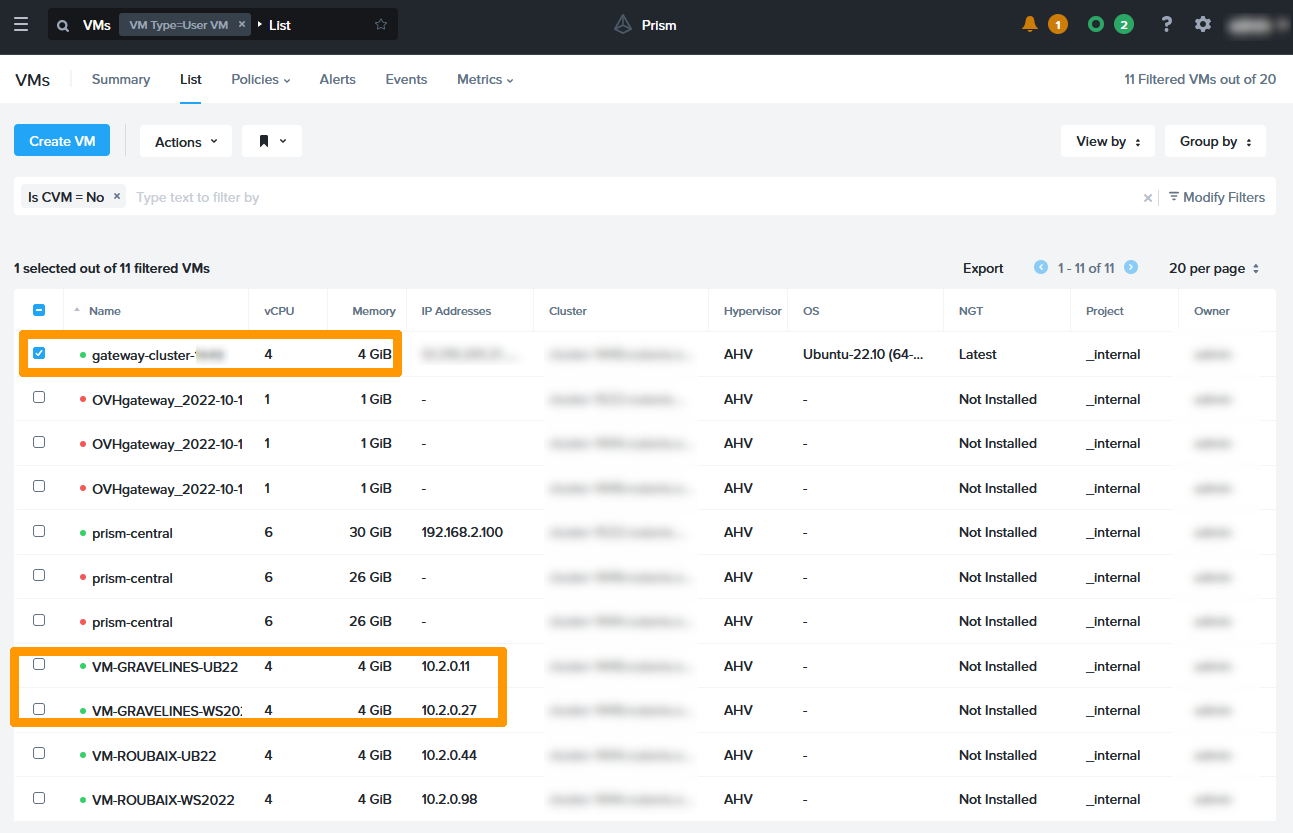
In the main menu, click Vms in the Compute & Storage submenu.
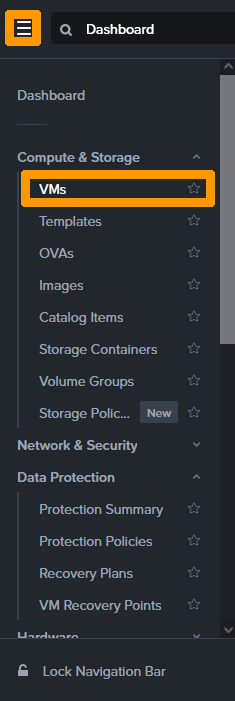
Select the Prism Central virtual machines in Gravelines and Roubaix and click Guest Shutdown from the Actions menu.
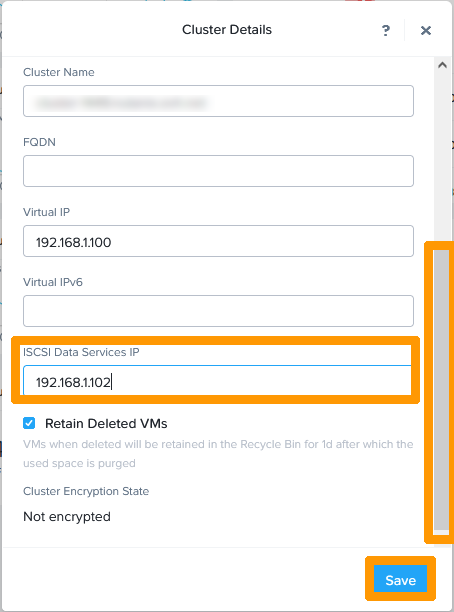
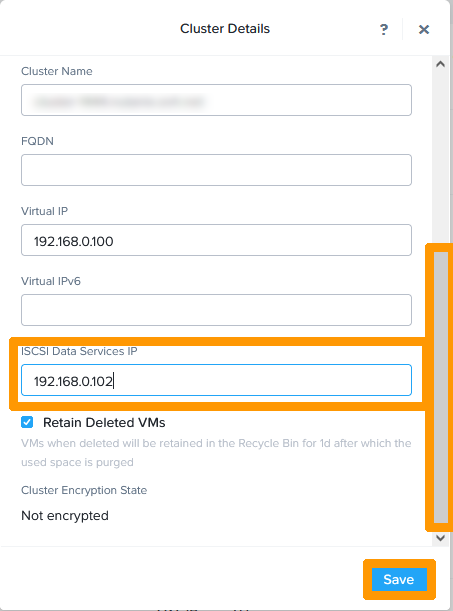
Step 1.4 - Adding IP Addresses for iSCSI Connections on All Three Clusters
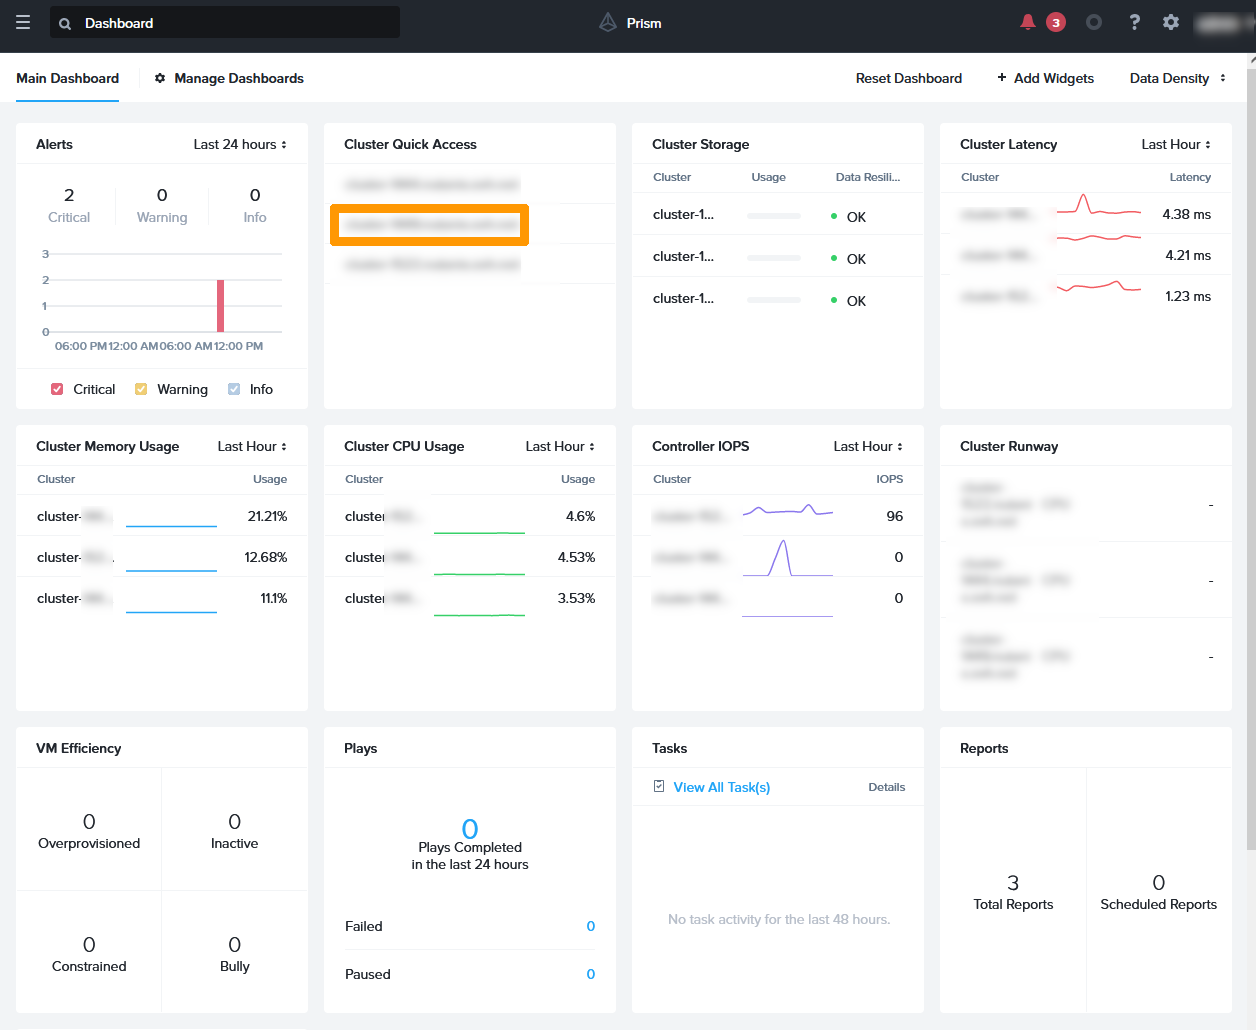
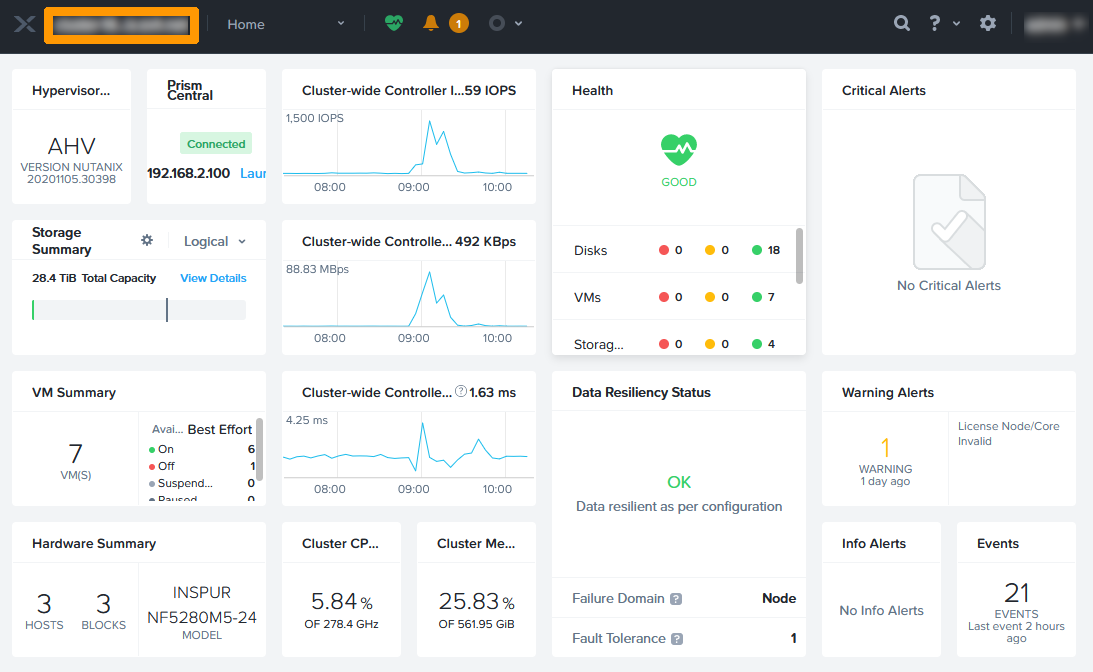
From the Prism Central dashboard, click the link to the Erith cluster .
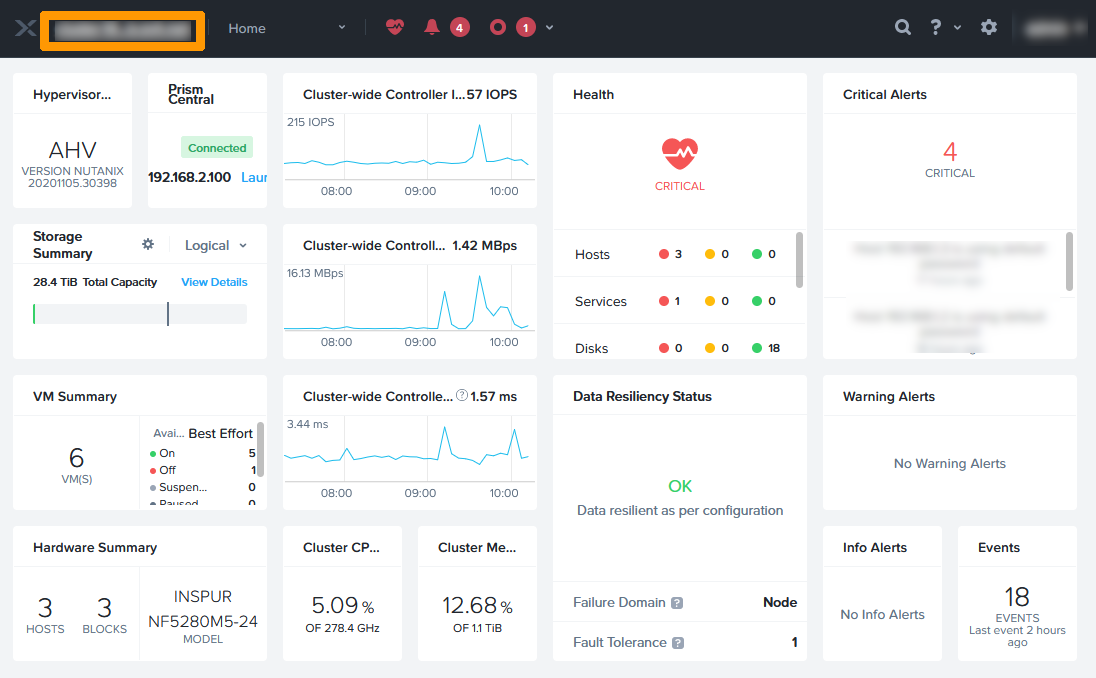
On the Prism Element dashboard, click the cluster name in the top left-hand corner.
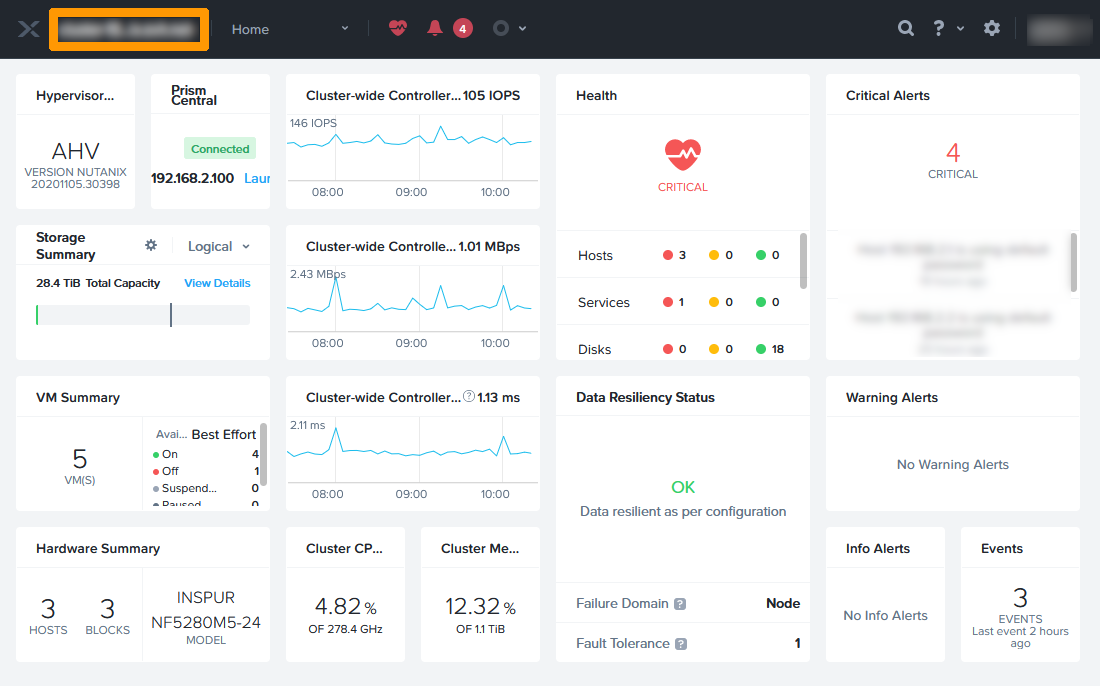
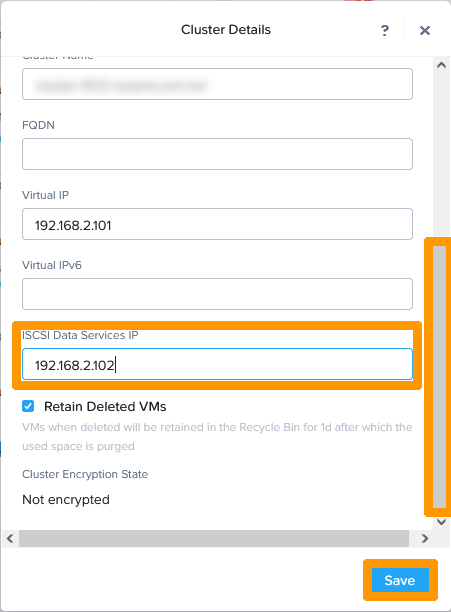
Scroll down the window and check the IP address in ISCSI Data Services IP.
From the Prism Central dashboard, click the link to the "Gravelines cluster".
On the Prism Element dashboard, click "the cluster name" in the top left-hand corner.
Scroll down the window and check the IP address in ISCSI Data Services IP.
From the Prism Central dashboard, click on the link to the "Roubaix cluster".
On the Prism Element dashboard, click the "cluster name" in the top left-hand corner.
Scroll down the window and check the IP address in ISCSI Data Services IP.
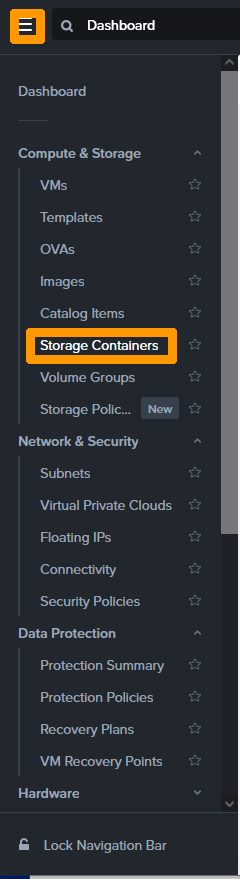
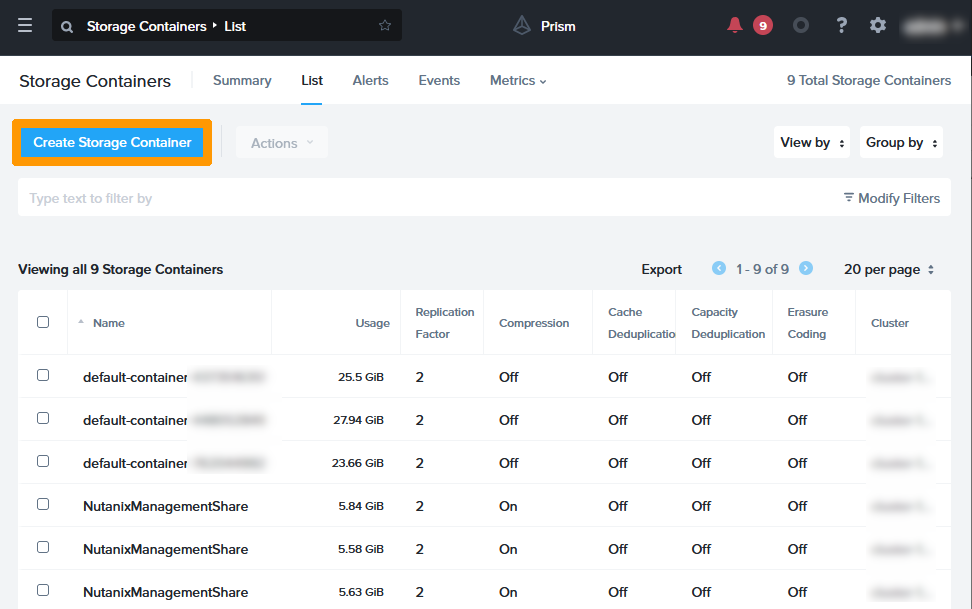
Step 1.5 - Creating Two Storage Containers
We will create two Storage Containers with the same name, one in Roubaix and the other in Gravelines.
From the Prism Element main menu, click Storage Containers in the Compute & Storage submenu.
Click Create Storage Container.

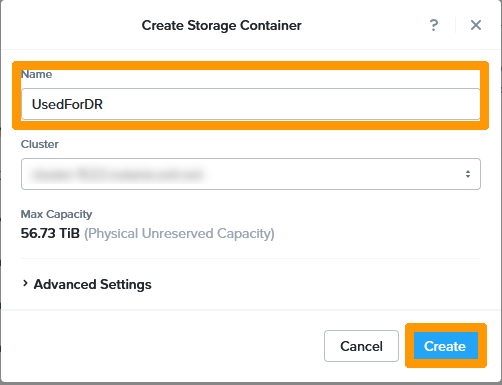
Type UsedForDR in Name, choose the Roubaix cluster in Cluster, and click Create.
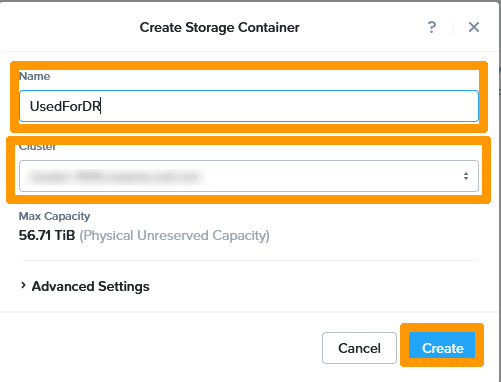
Click Create Storage Container.
Type UsedForDR in Name, choose the Gravelines cluster in Cluster, and click Create.
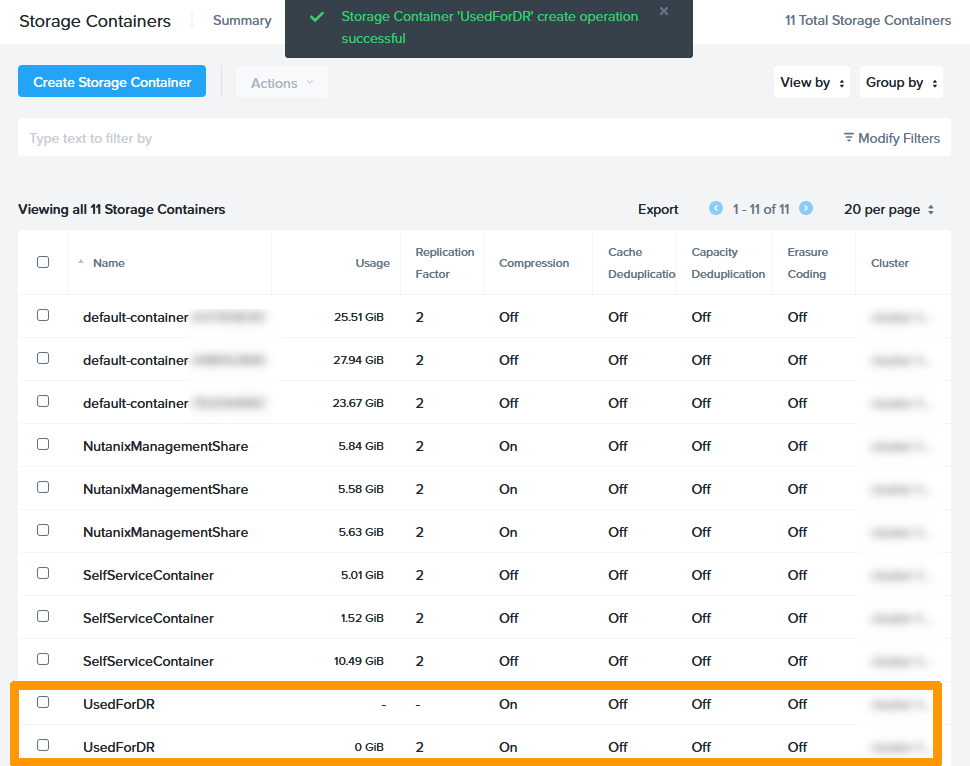
In the list of Storage Containers, you will see two Storage Containers with the same name. One on the Roubaix cluster and the other on the Gravelines cluster.
Step 1.6 - Moving virtual machines to the Storage Container
We will move the virtual machine storage to the Storage Container we have created.
Connect via SSH on the Prism Element of the Roubaix cluster:
Run this command for each VM we will move to the Storage Container, replacing vmname with the name of the virtual machine (in our disaster recovery plan, we have two virtual machines in Roubaix, one on Windows and one on Linux).
Log in to the Prism Element of the Gravelines cluster via SSH:
Execute this command for each VM that we will move to the Storage Container, replacing vmname with the name of the virtual machine (in our disaster recovery plan, we have three virtual machines in Gravelines, one on Windows, another on Linux and the gateway that gives access to the Internet).
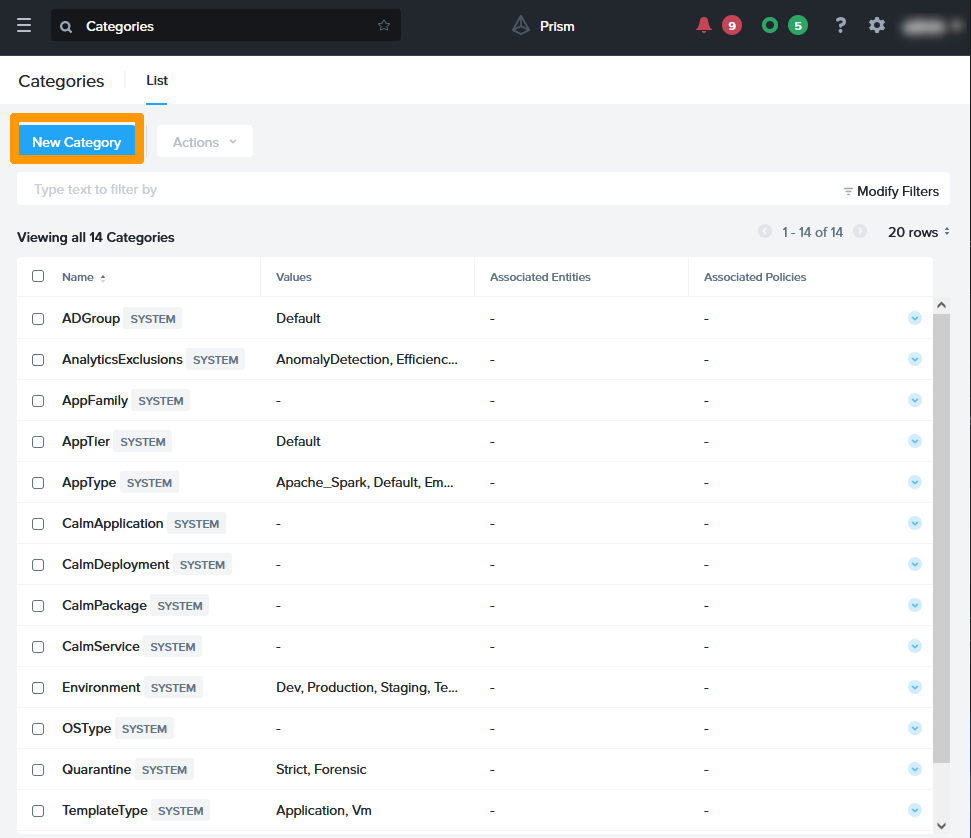
Step 1.7 - Creation of a category to be used when implementing the P.R.A
We will create a category with two values in Prism Central to assign the virtual machines involved in replication.
Scroll through the main menu, click Categories on the Administration submenu.
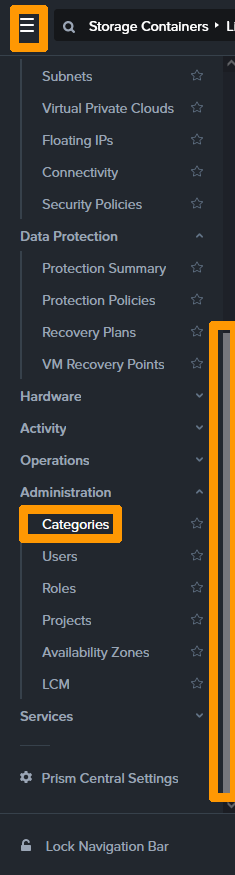
Click New Category.
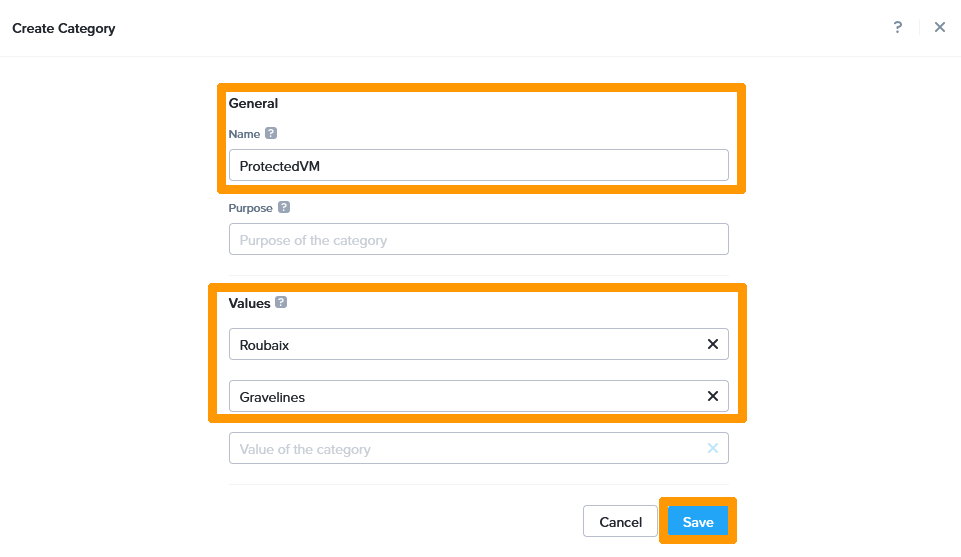
Type Protected VM in Name, add the Roubaix and Gravelines values in Values and click on the next button Save.
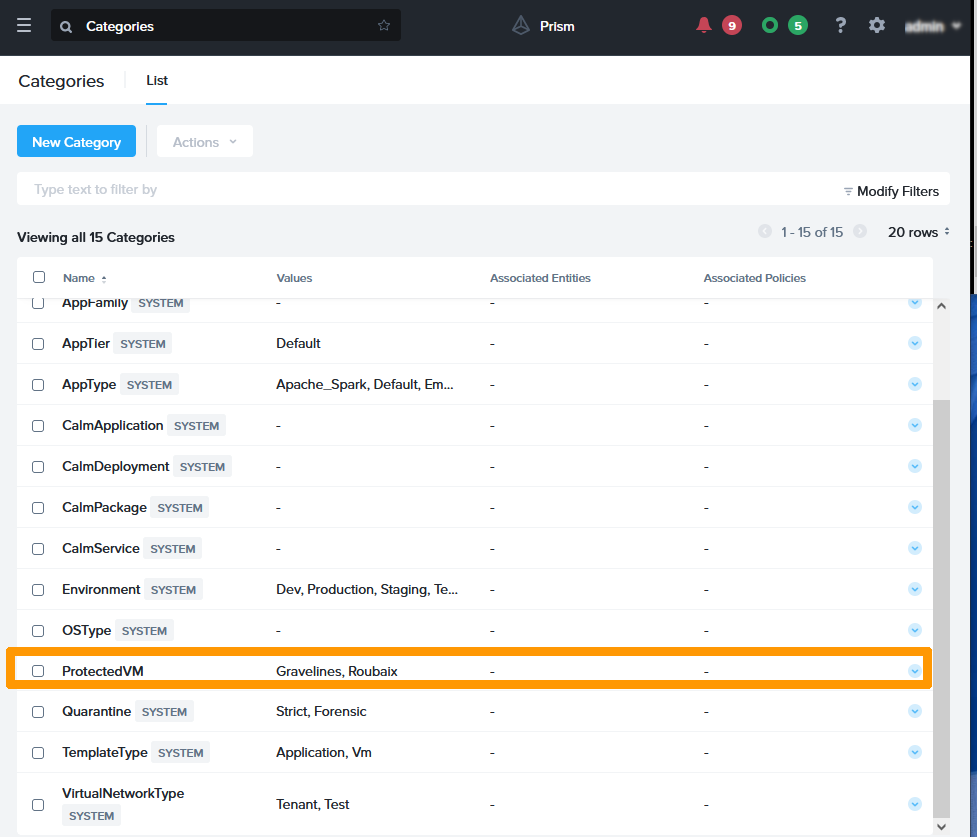
The category appears in the list and is ready to use.
Step 1.8 - Adding virtual machines in categories
We will assign two virtual machines on the Roubaix cluster in one category and three virtual machines on the Gravelines cluster in another category.
From the Prism Central main menu, click Vms in the Compute & Storage submenu.
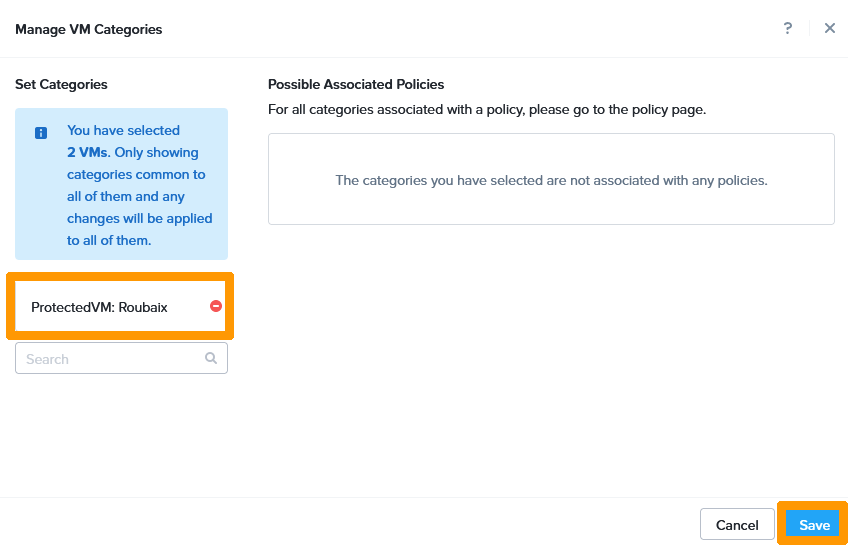
Select the two virtual machines in Roubaix on the left, then on the Actions menu, click Manage Categories.
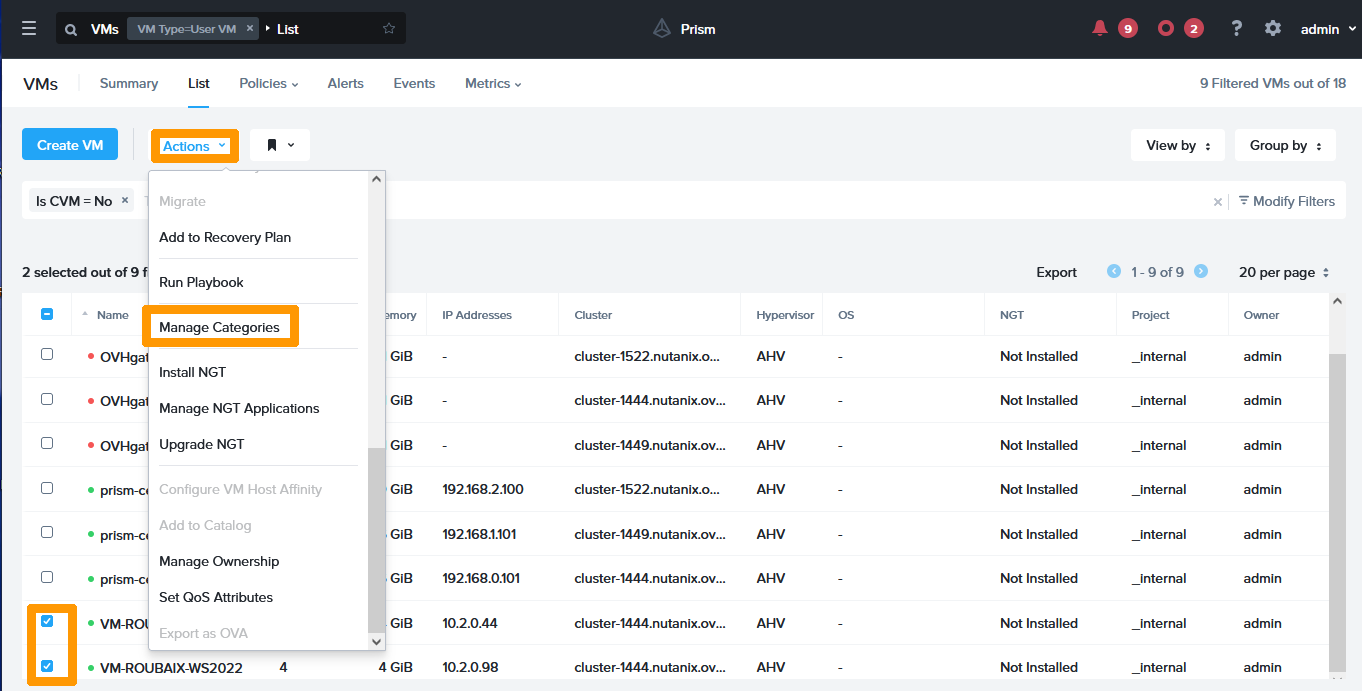
Add the category ProtectedVM: Roubaix, then click Save.
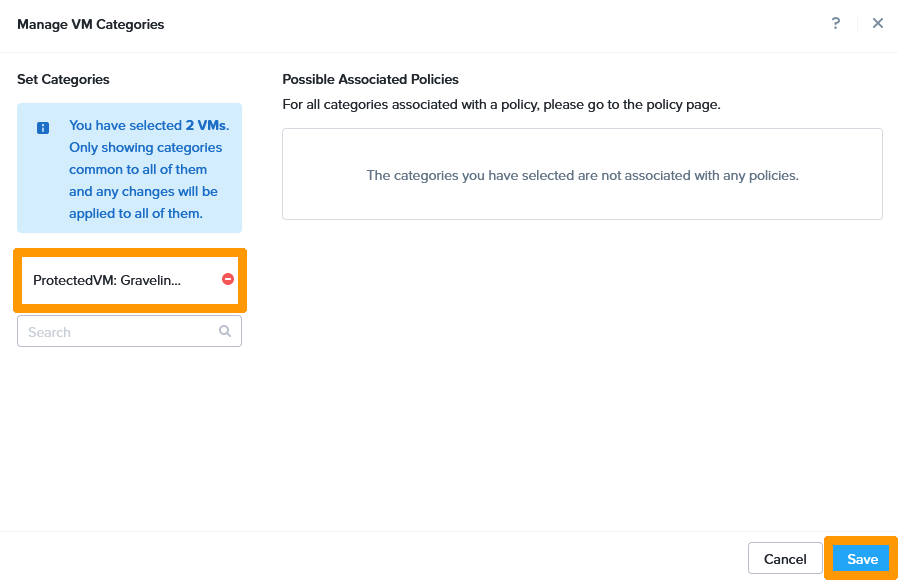
Select the three virtual machines in Gravelines on the left, and on the Actions menu, click Manage Categories.
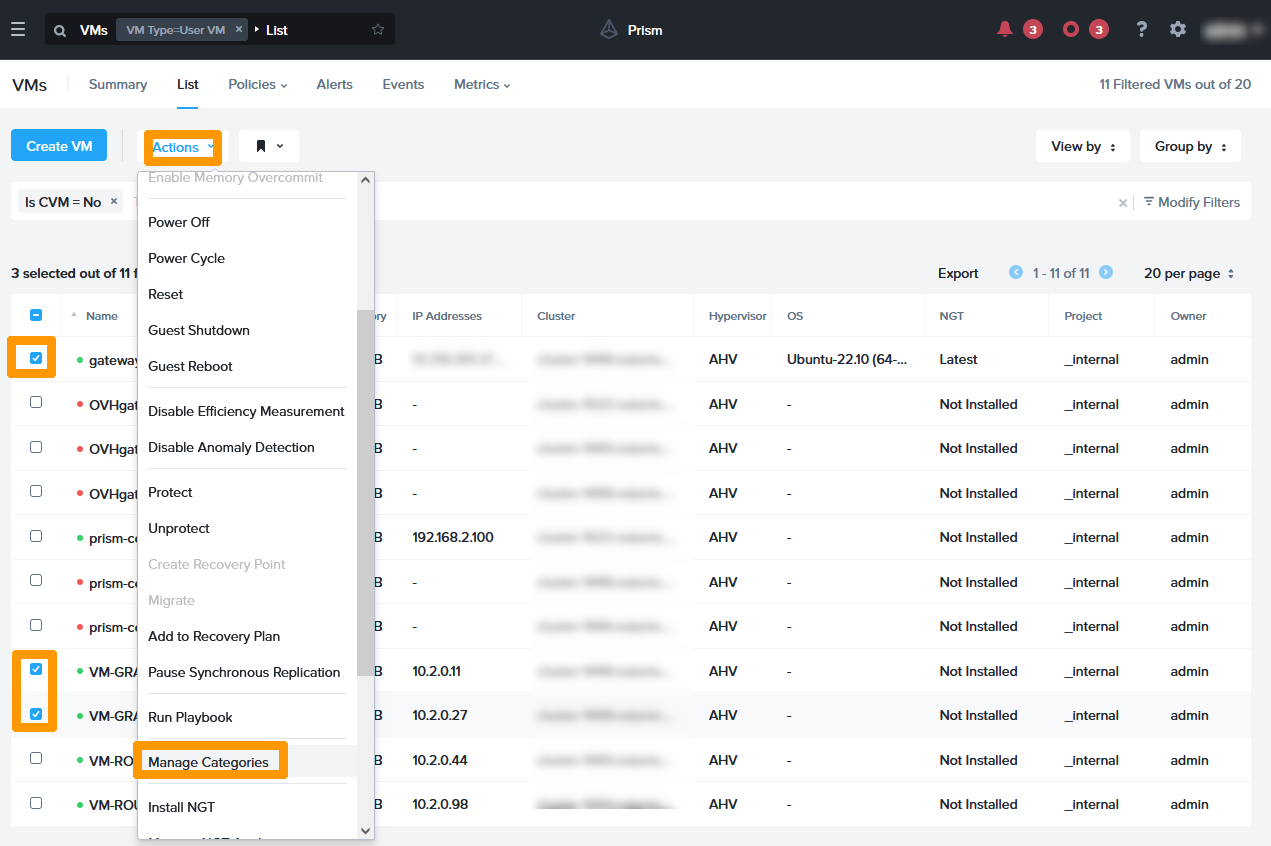
Add the category ProtectedVM: Gravelines, then click Save.
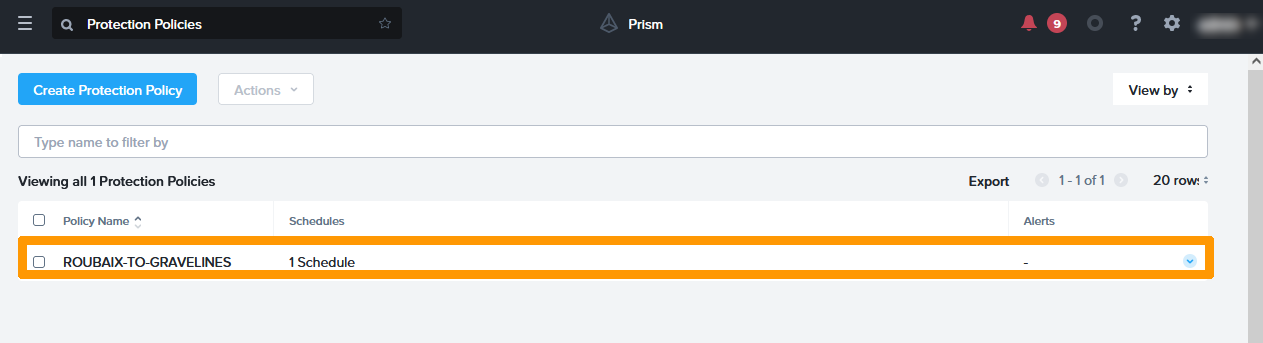
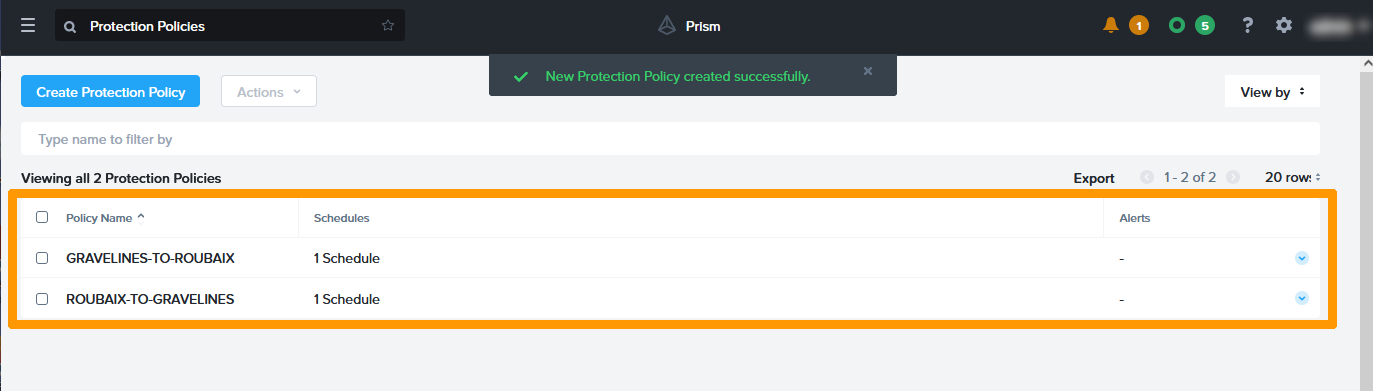
Step 1.9 - Setting up synchronous replications between Roubaix and Gravelines
Synchronous replication allows permanent replication with 0 seconds of data loss.
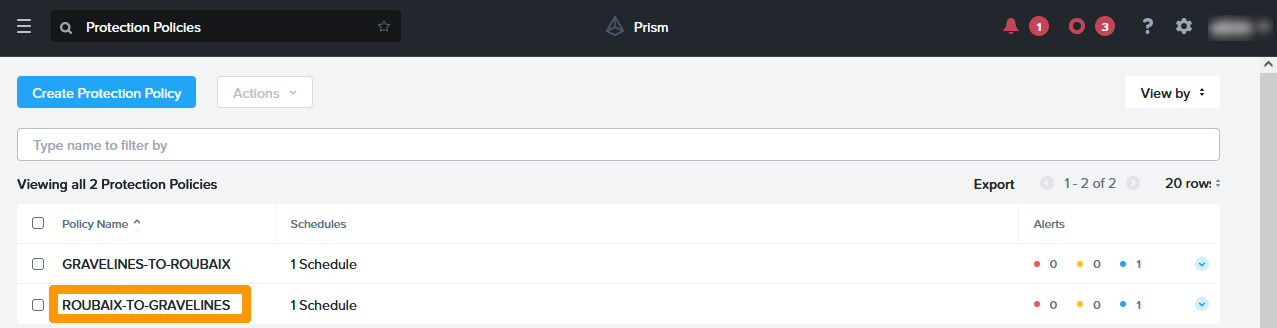
Replication setup between Roubaix and Gravelines
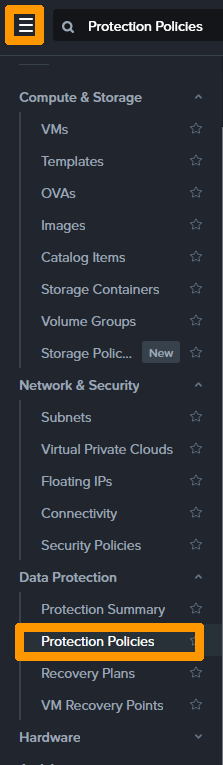
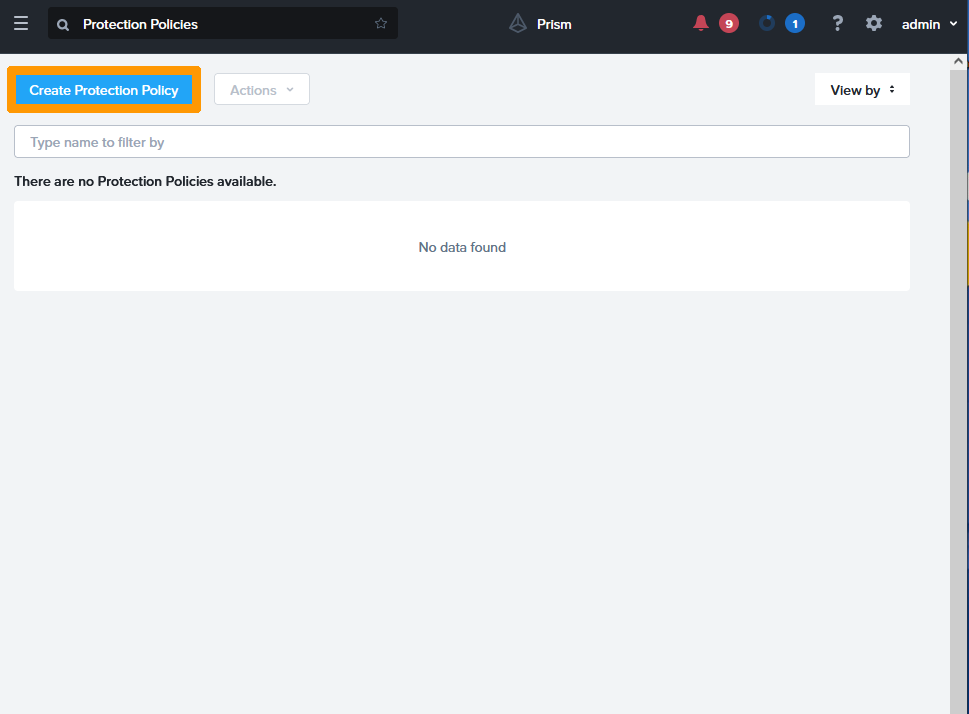
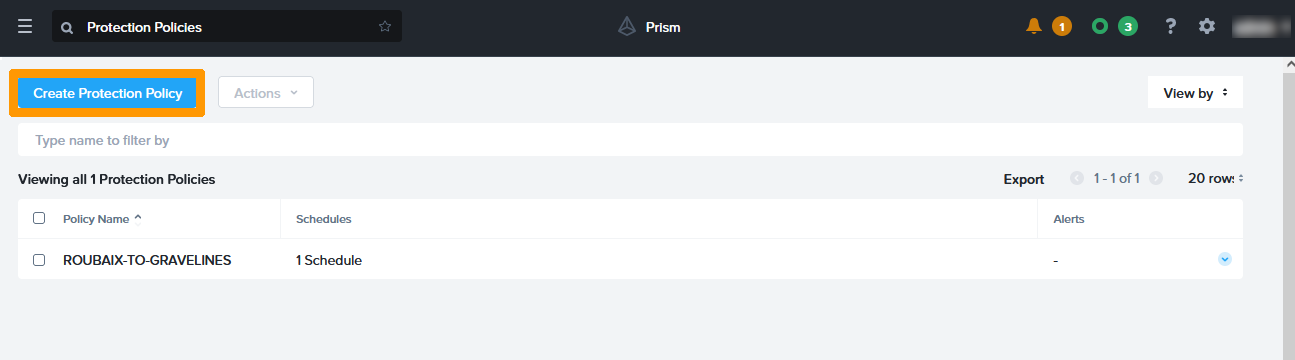
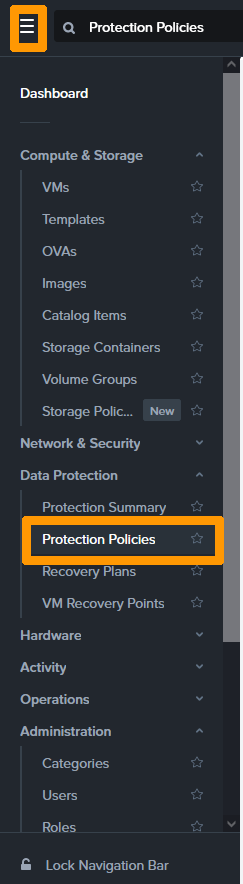
On the Prism Central main menu, click Protection Policies in the Data Protection submenu.
Click Create Protection Policy.
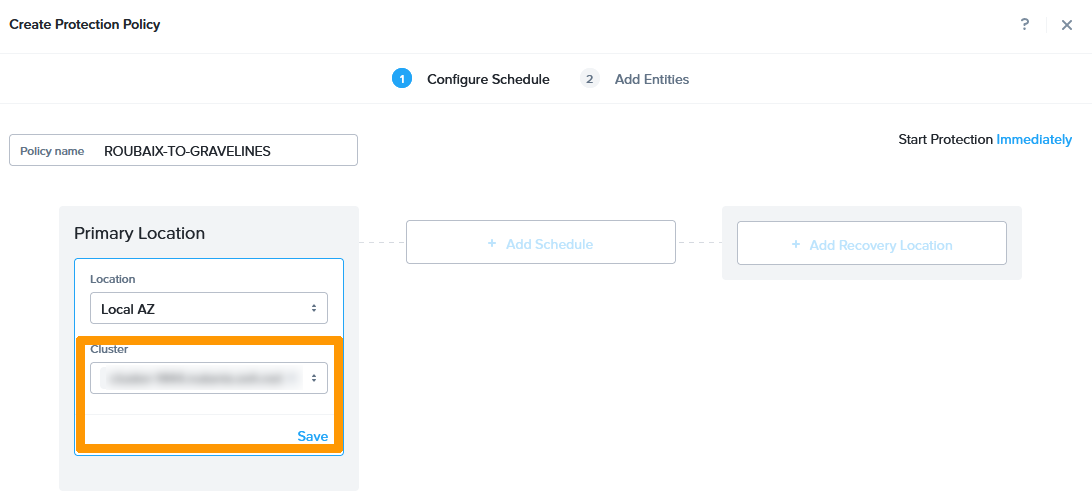
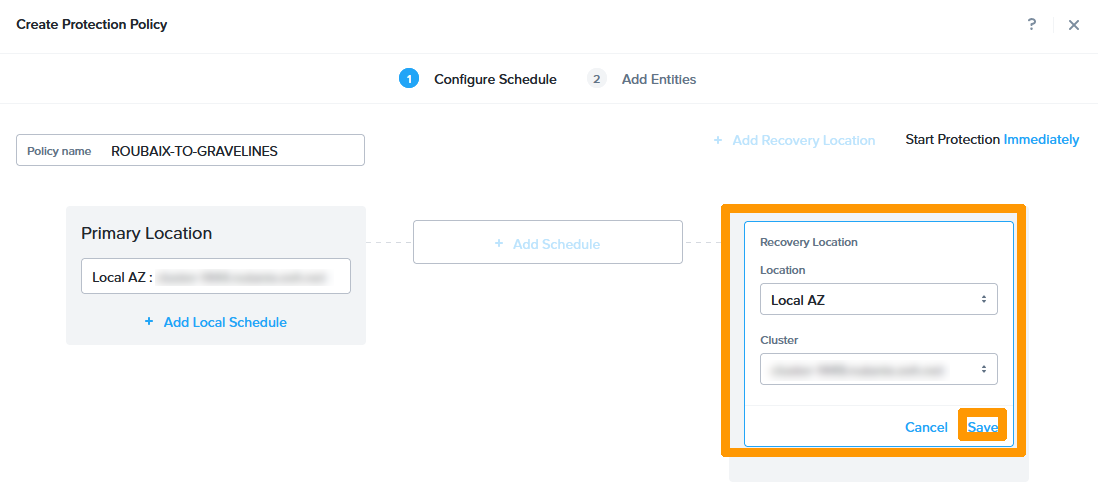
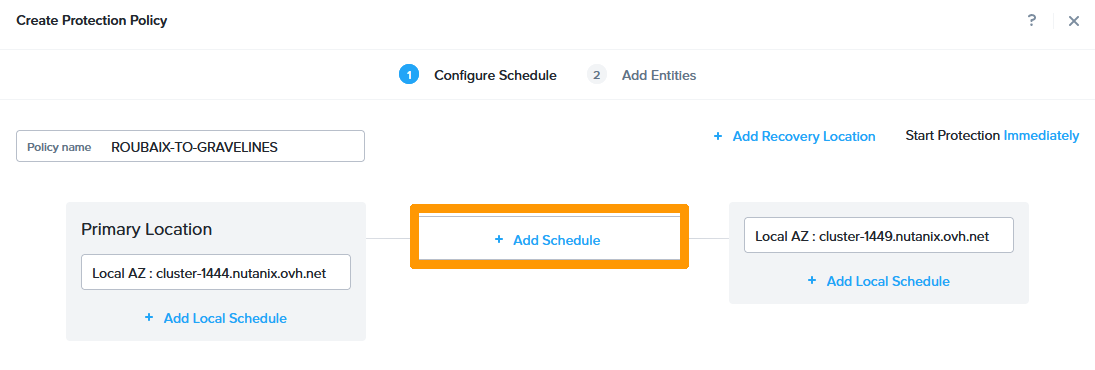
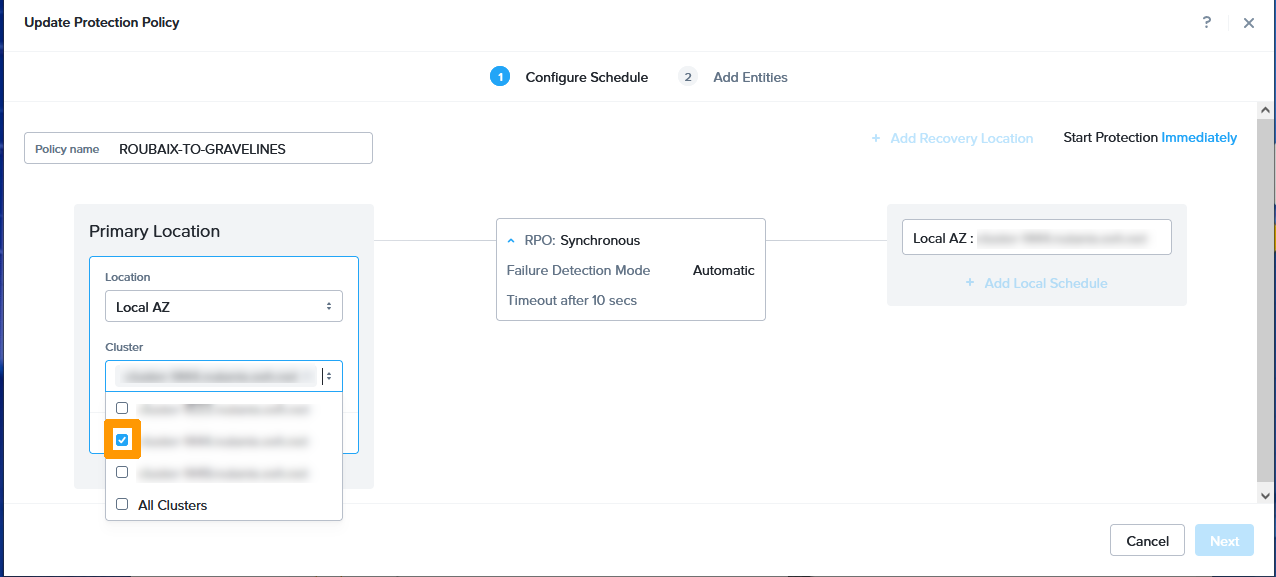
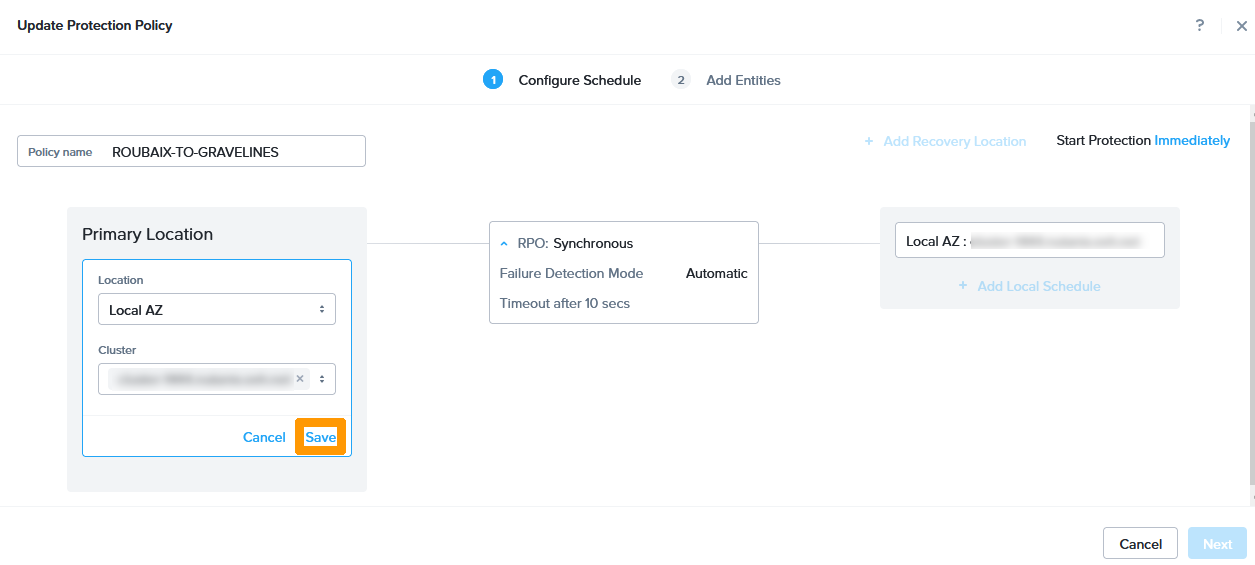
Type ROUBAIX-TO-GRAVELINES in Policy name, keep Local AZ, and click Select Cluster in Primary Location.
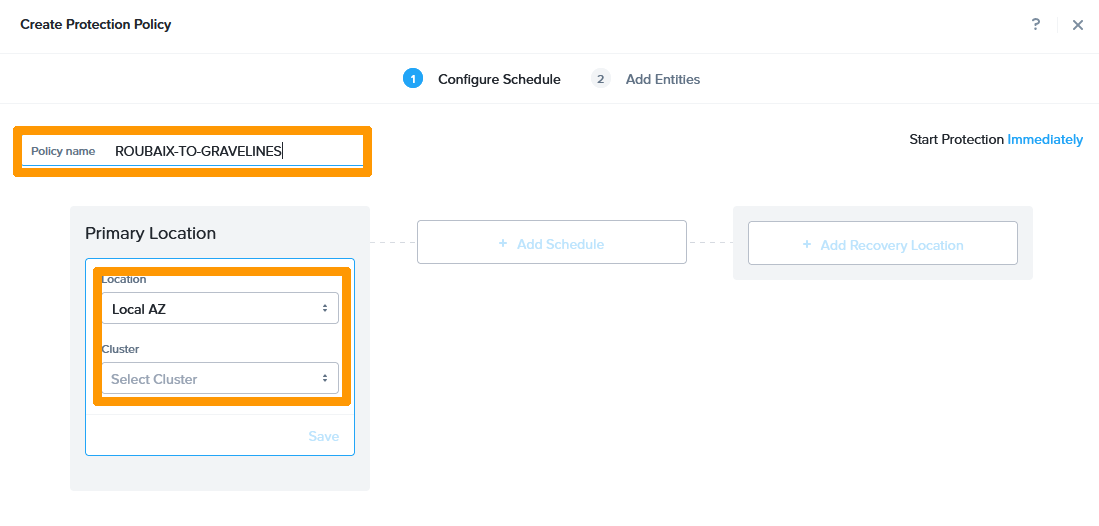
Choose the Roubaix cluster and click Save.
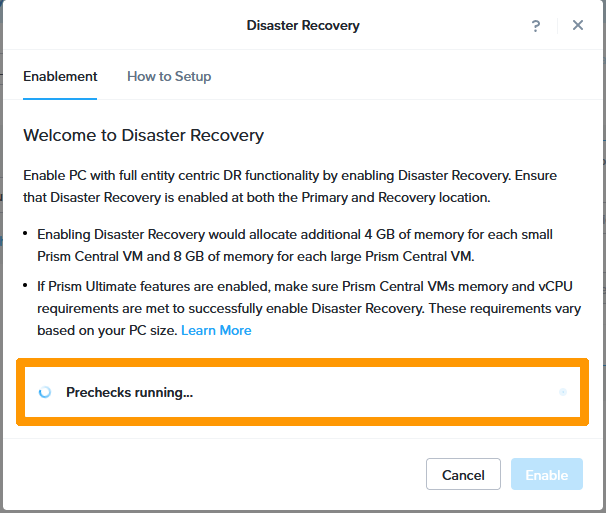
In the top left-hand corner next to Disaster Recovery, click Enable.

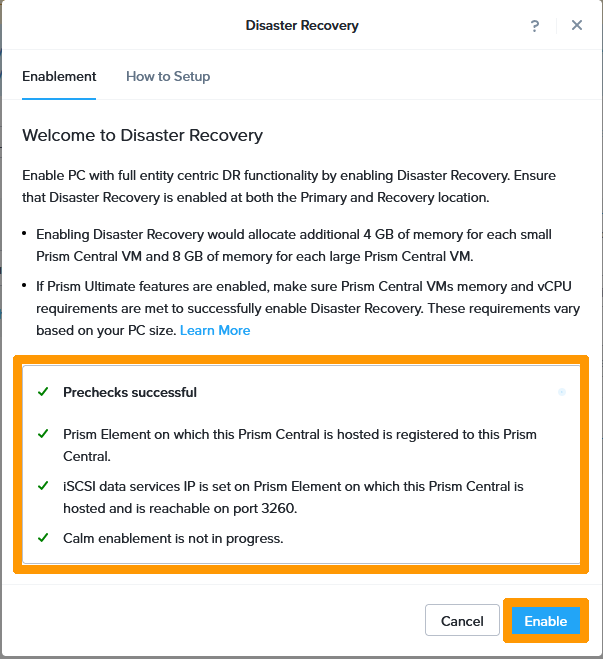
The system checks that everything is correct before enabling Disaster Recovery.
Click Enable to enable the Disaster Recovery option.
Click Enable again.
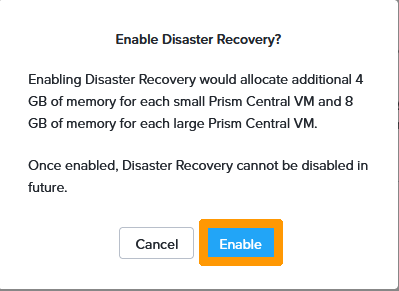
Your Disaster Recovery option is being activated.
Keep Local AZ, select the cluster in Recovery Location and click Save.
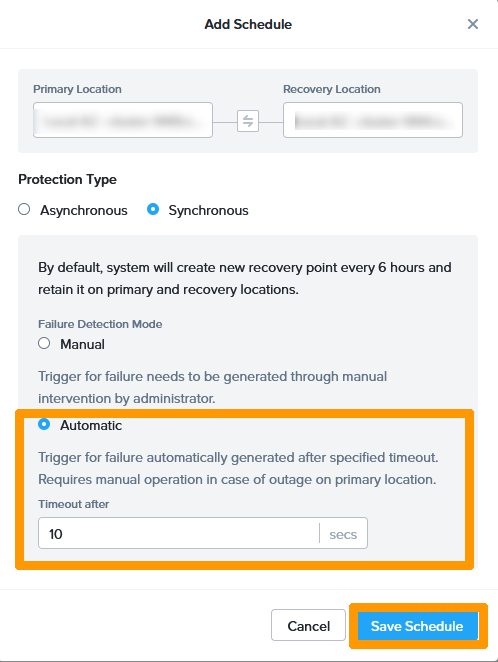
Click + Add Schedule.
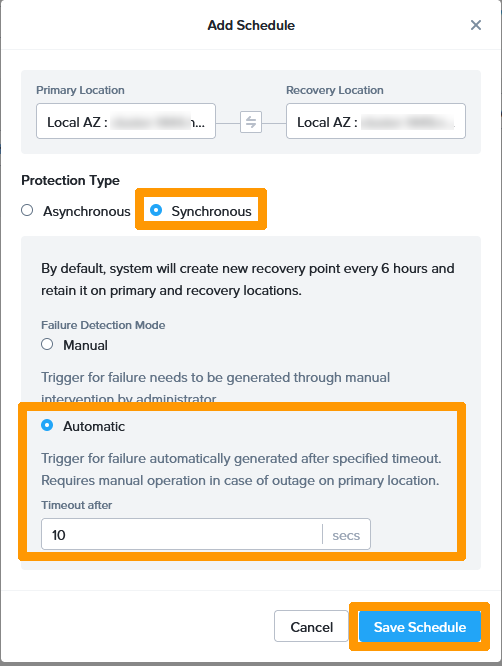
Choose Synchronous for Protection Type and Automatic for Failure Detection Mode. Then click Save Schedule.
Click Next.

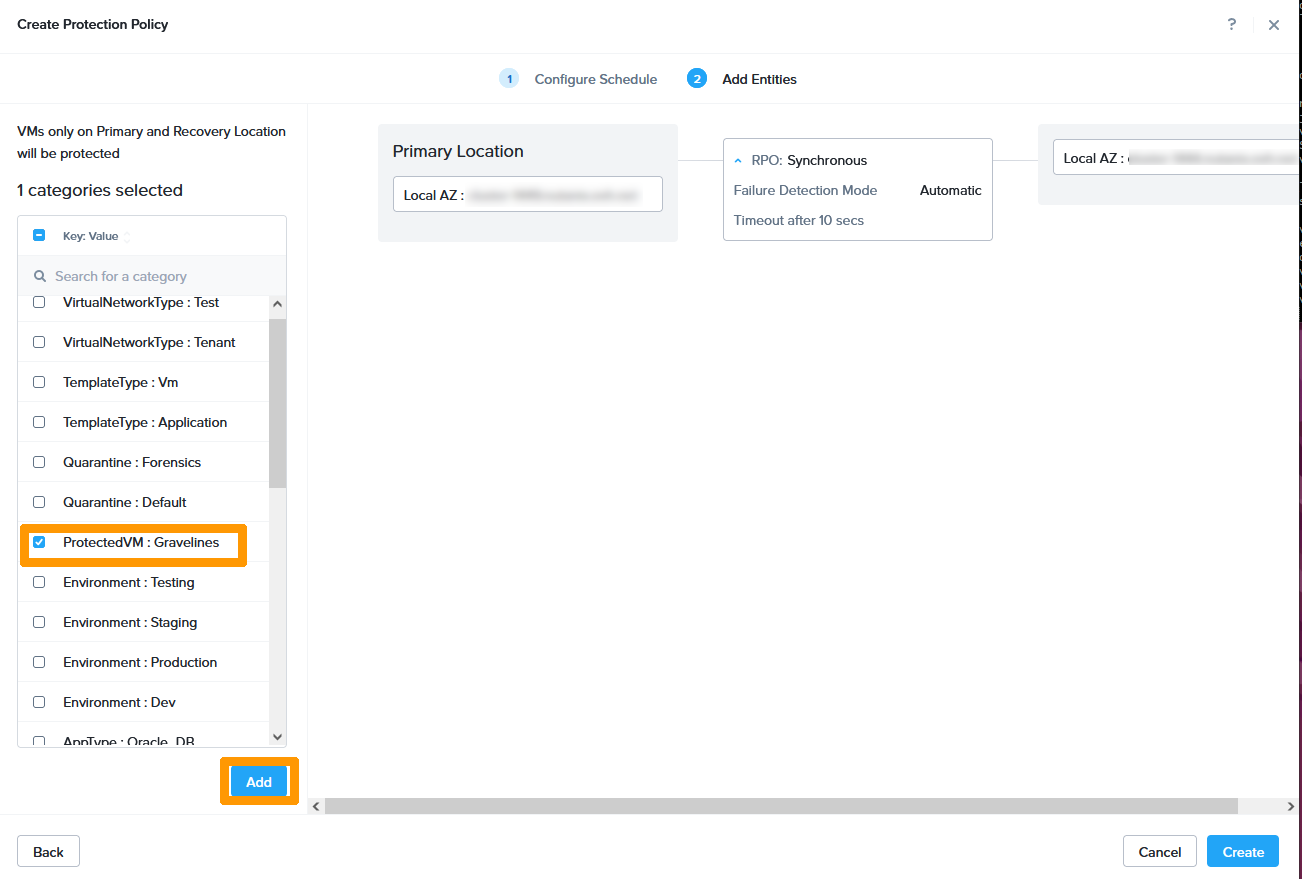
Select the category ProtectedVM : Roubaix and click Add.
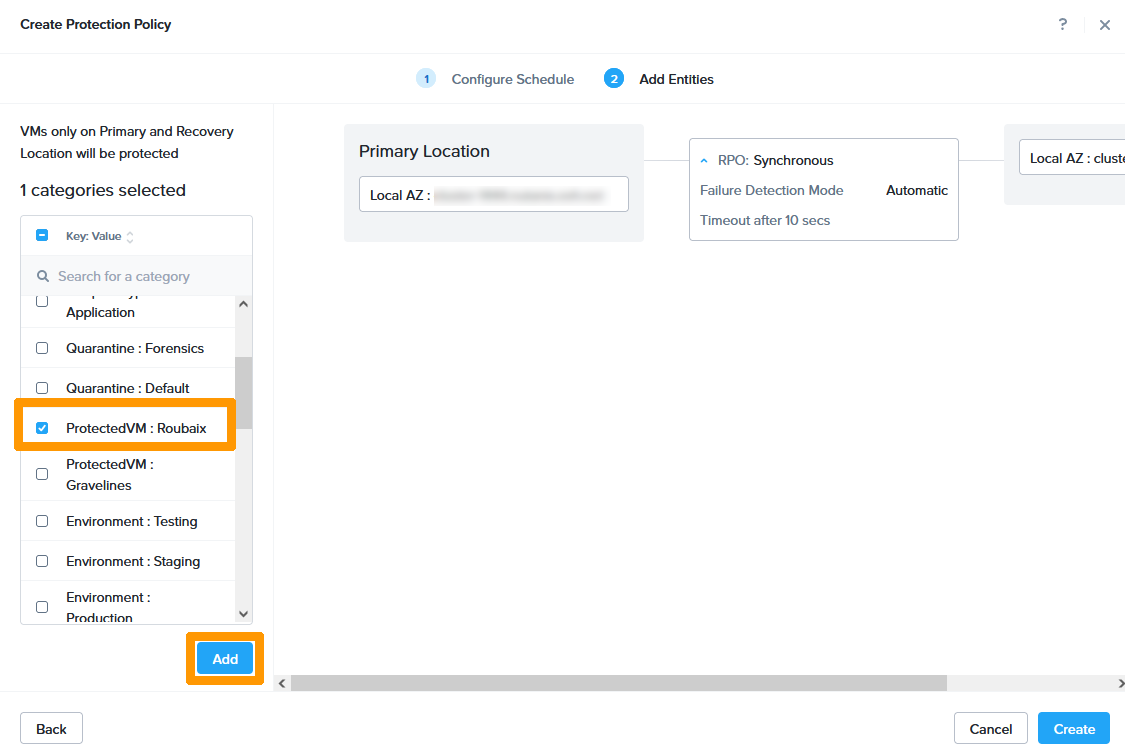
Click Create.
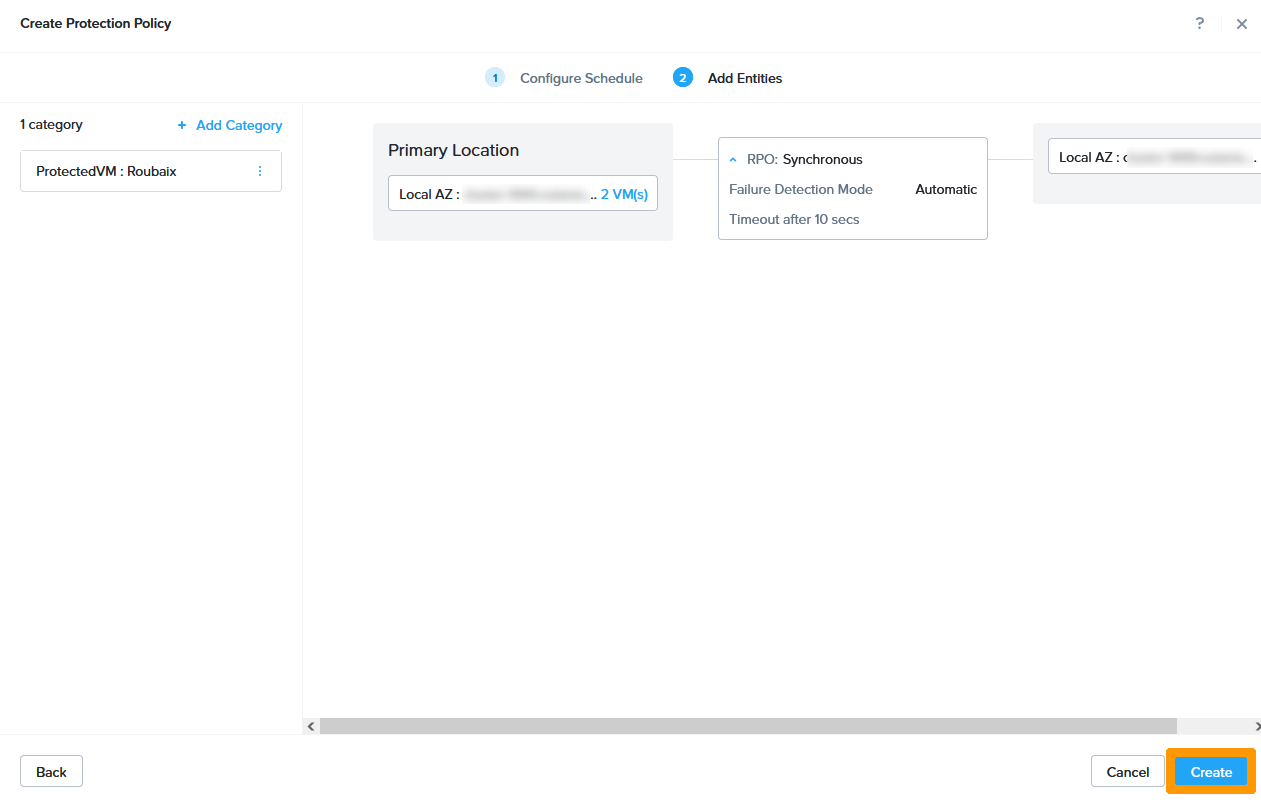
Virtual machines in Roubaix are now replicated to Gravelines. You must wait for a first full replication to have permanent replication.
Replication setup between Gravelines and Roubaix
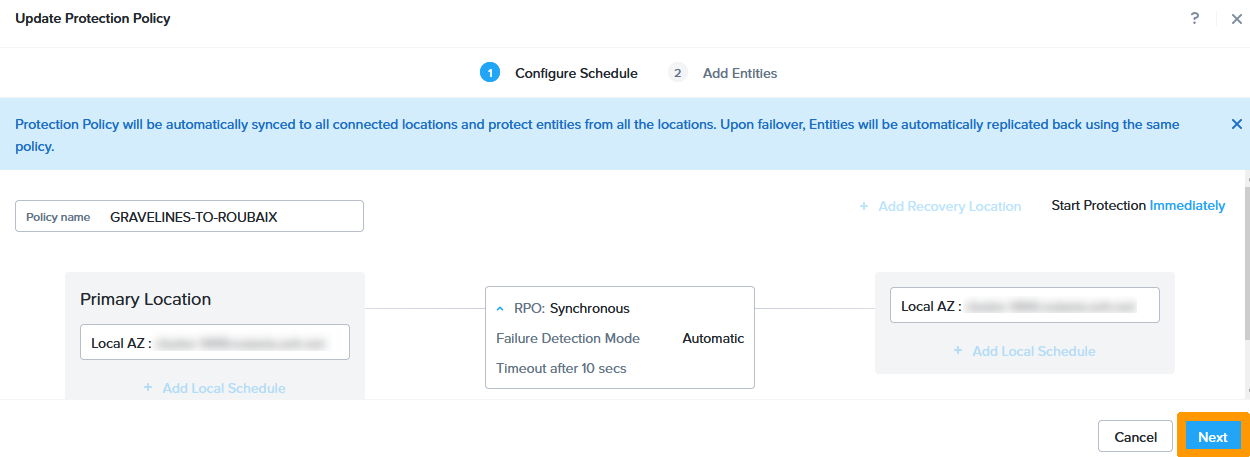
Replication can be two-way. We will now create replication from Gravelines to Roubaix.
Click Create Protection Policy.
Choose as name GRAVELINES-TO-ROUBAIX in Policy Name, keep Local AZ and choose Gravelines cluster in Primary Location. Then click Save.

Keep Local AZ, select the Roubaix cluster and click Save.
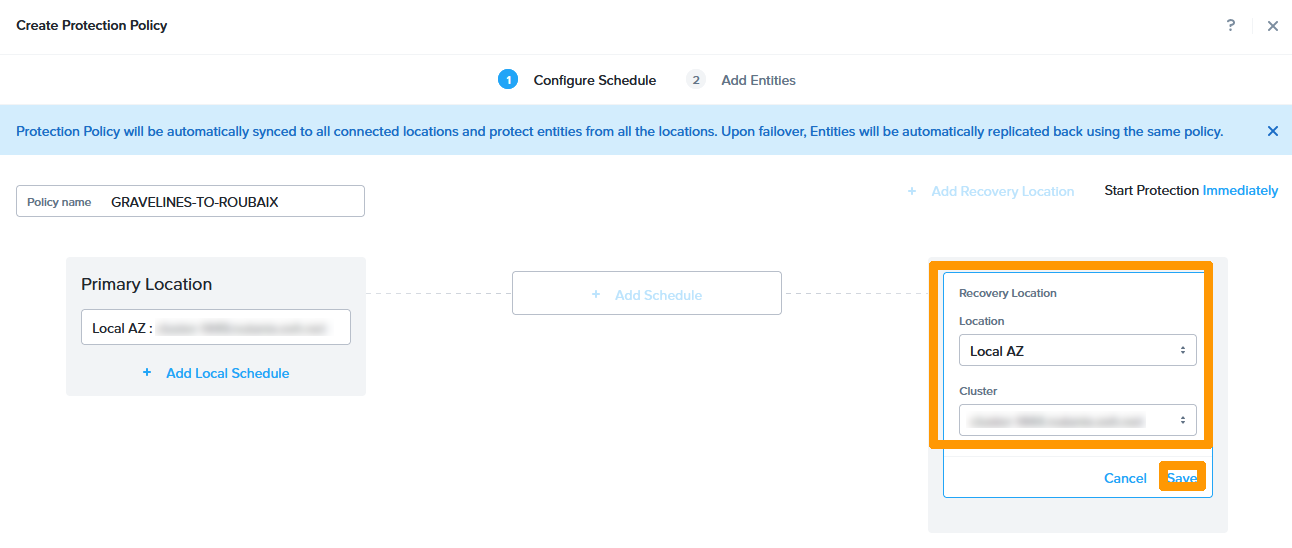
Click + Add Schedule.
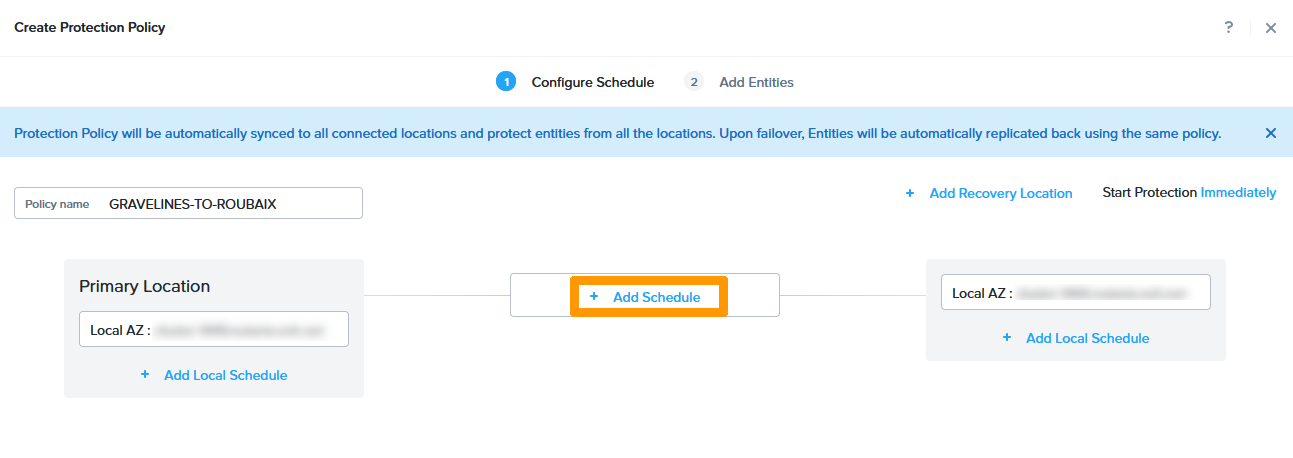
Choose Synchronous for Protection Type and Automatic for Failure Detection Mode. Then click Save Schedule.
Click Next.
Select the category ProtectedVM: Gravelines and click Add.
Click Create.
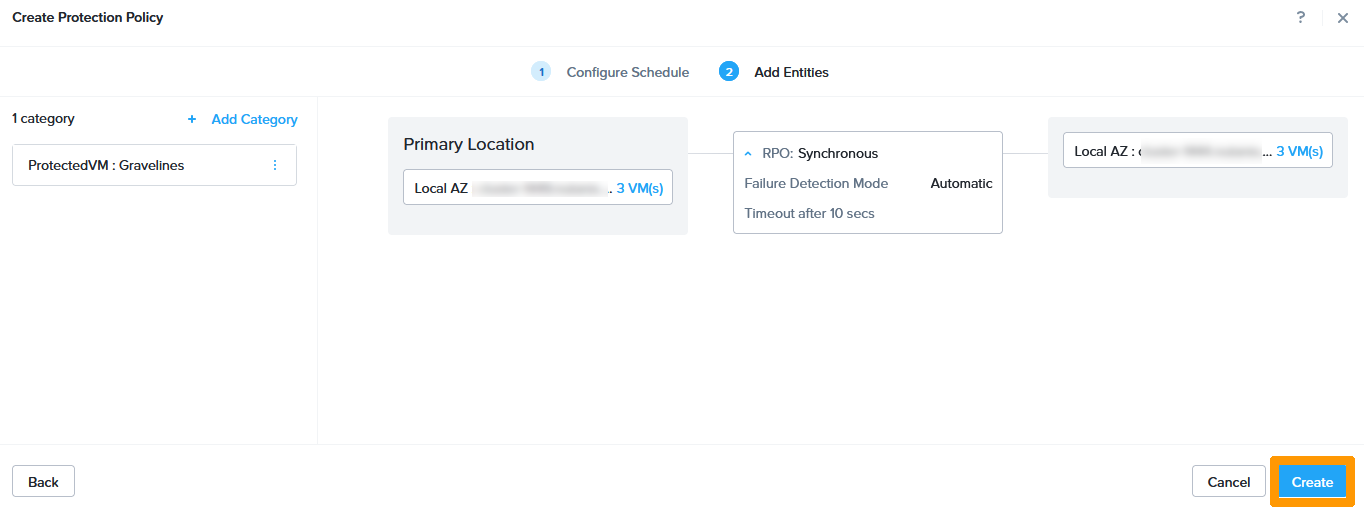
A second protection strategy is in place.
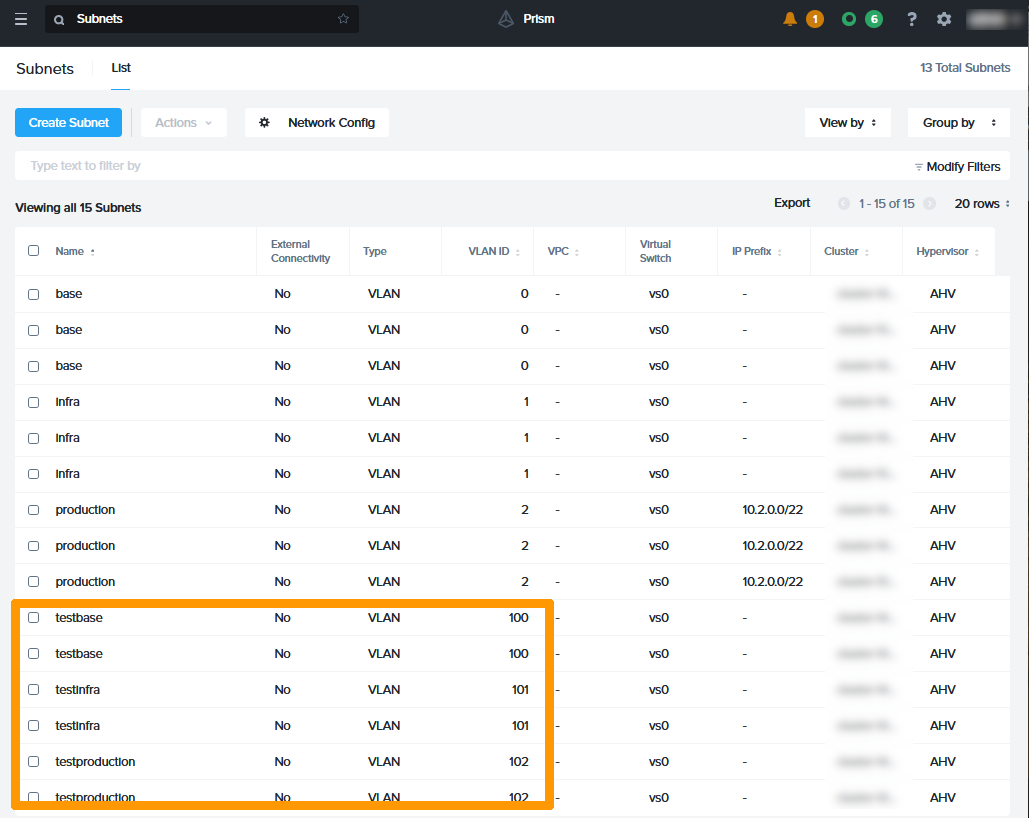
Step 1.10 - Create Subnets for Disaster Recovery Plan
We will create subnets that will be used to test disaster recovery plans.
For each existing subnet, a test network is required. On the two clusters of the Disaster Recovery Plan, we have three production subnets.
- based on VLAN 0.
- infrastructure on VLAN 1.
- production on VLAN 2.
We will therefore create 3 additional subnets on the Gravelines and Roubaix clusters with these names:
- testing on VLAN 100.
- testinfra on VLAN 101.
- production on VLAN 102.
Use this guide to create VLANs on your Nutanix clusters: isolate production management machines.
In the Prism Central Subnets dashboard, you will see six new subnets.
Step 1.11 - Implementation of disaster recovery plans
Now that the replications and subnets are in place, we will implement automated or manual disaster recovery plans on demand to:
- migrate virtual machines on the fly between the two clusters
- Test that replication is working properly
- Automatically restart the VMs that are members of the P.R.A in the event of a failure of one of two clusters.
Creation of a disaster recovery plan for the Roubaix cluster
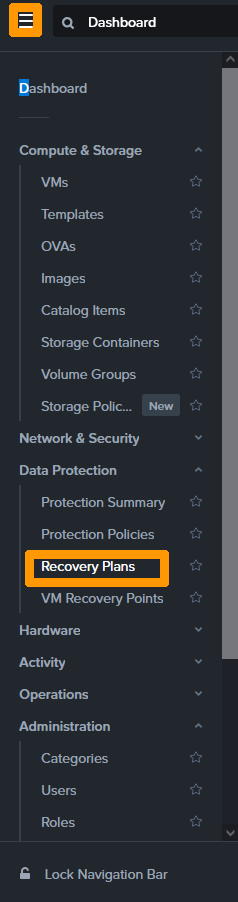
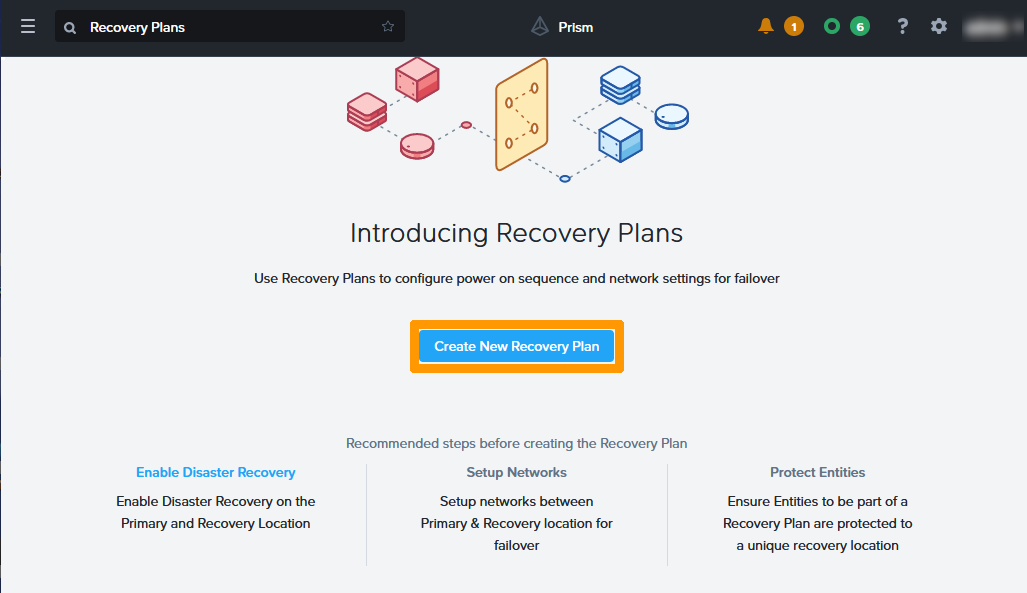
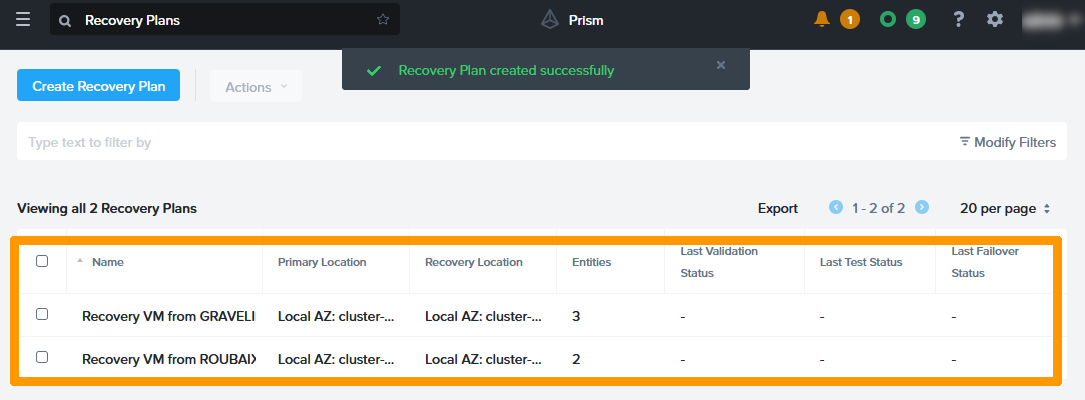
In the main menu of Prism Central, click Recovery Plans in the Data Protection submenu.
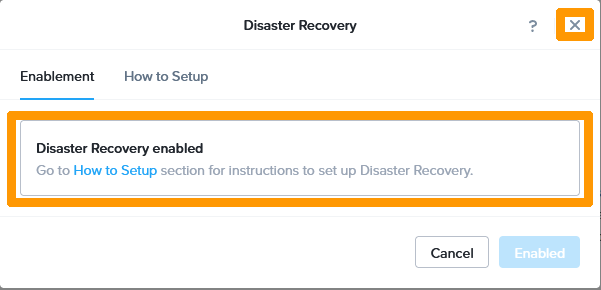
Click on Enable Disaster Recovery on the left.
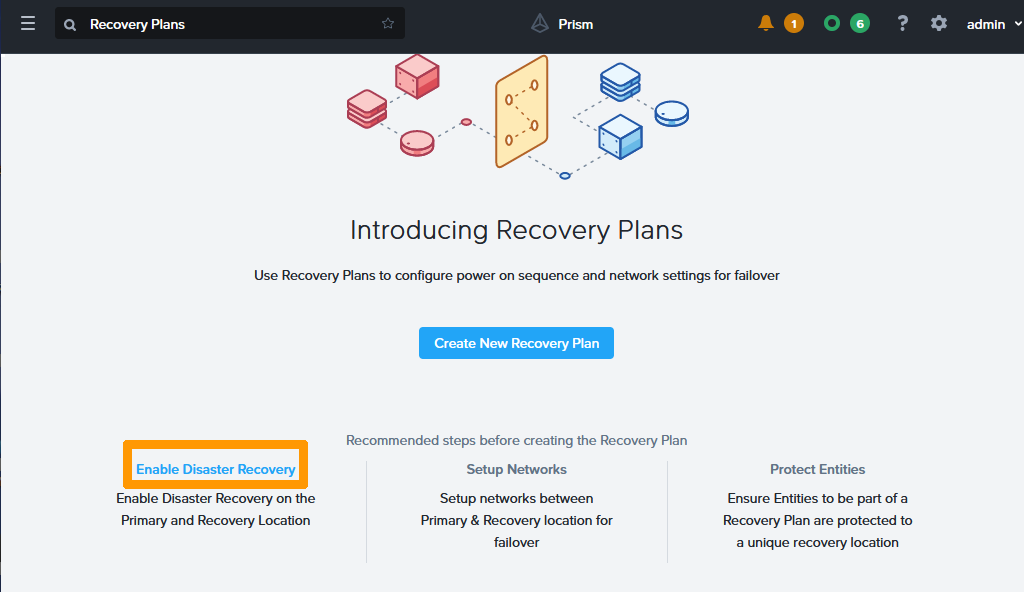
Normally, the recovery plan must be activated as indicated with the message Disaster Recovery enabled. Click on the right to close this window.
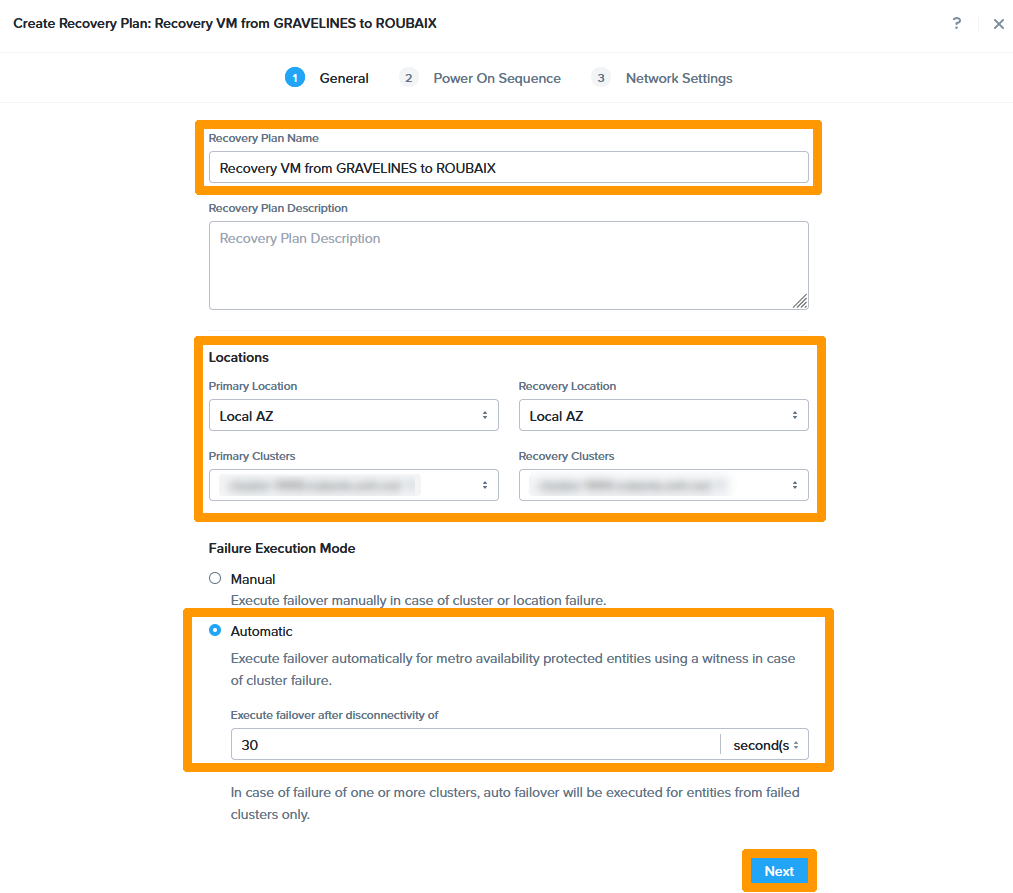
Click Create New Recovery Plan.
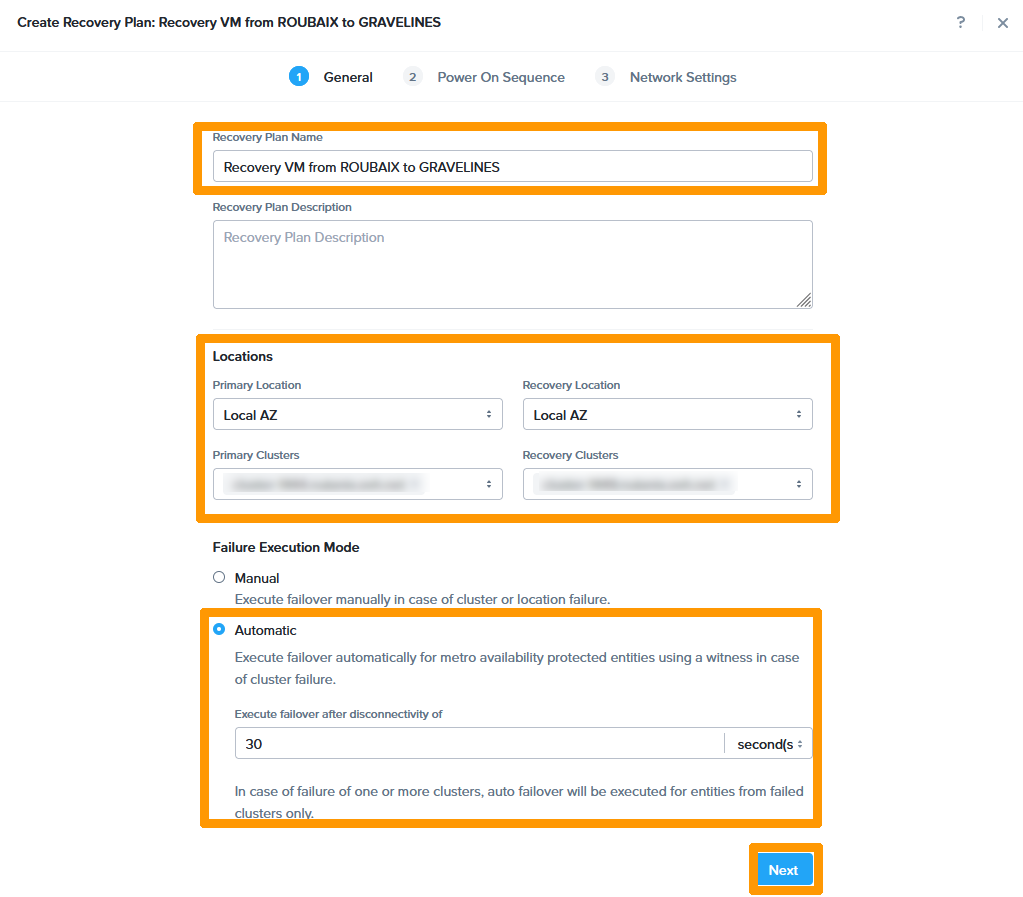
Choose this information:
-
Recovery Plan Name:
Recovery VM from ROUBAIX to GRAVELINES. -
Primary Location:
Local AZ. -
Primary Cluster:
cluster in Roubaix. -
Recovery Location:
Local AZ. -
Recovery Cluster:
cluster in Gravelines. -
Failure Execution Mode:
Automatic. -
Execute failover after disconnectivity of:
30 seconds.
Then click Next.
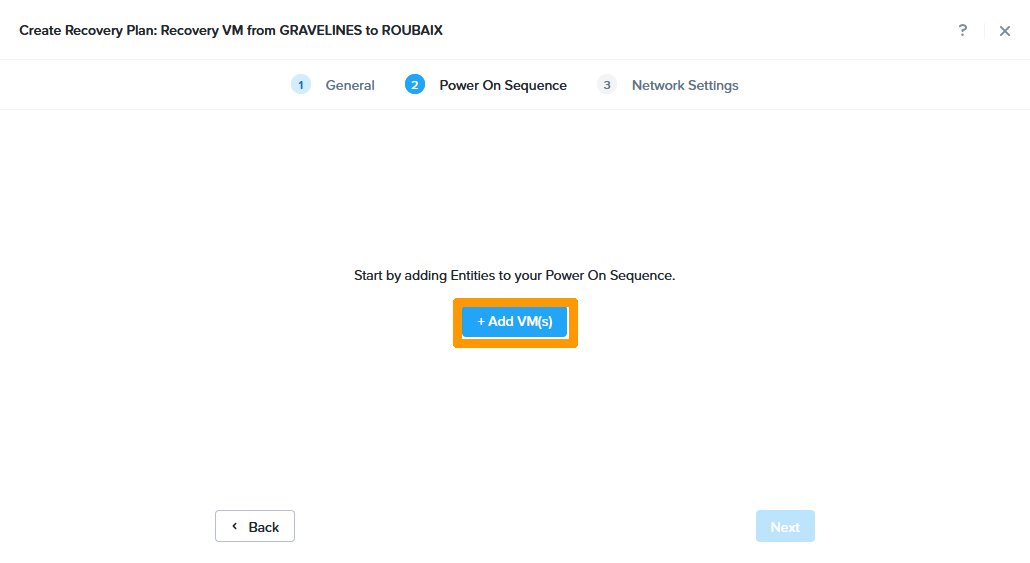
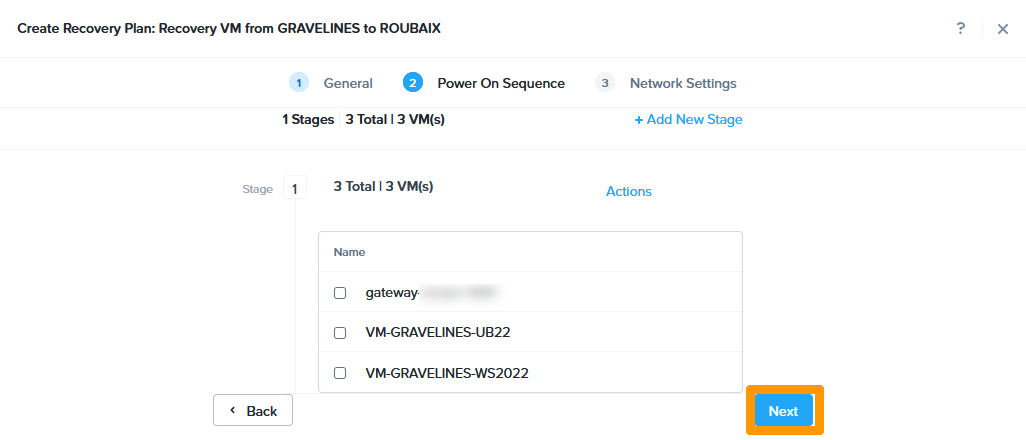
Click + Add VM(s).
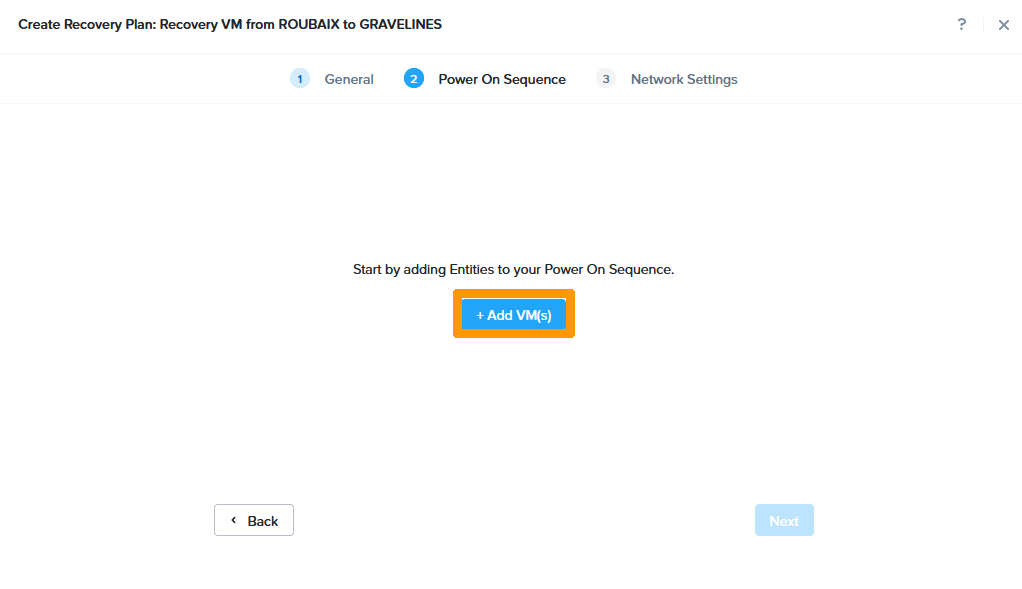
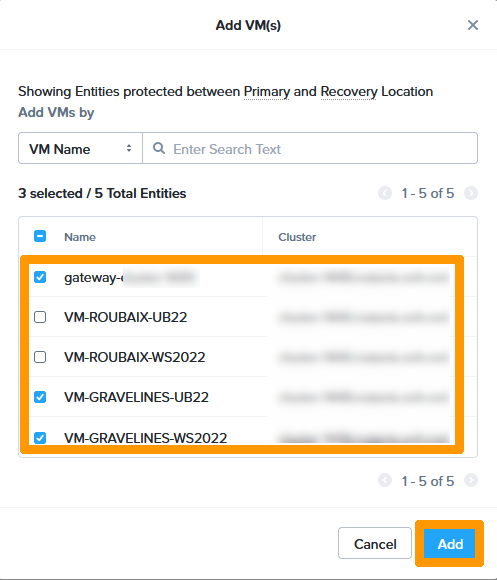
Select both virtual machines and click Add.
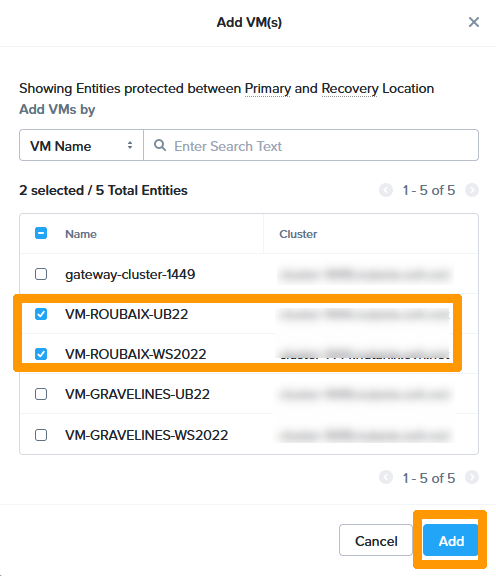
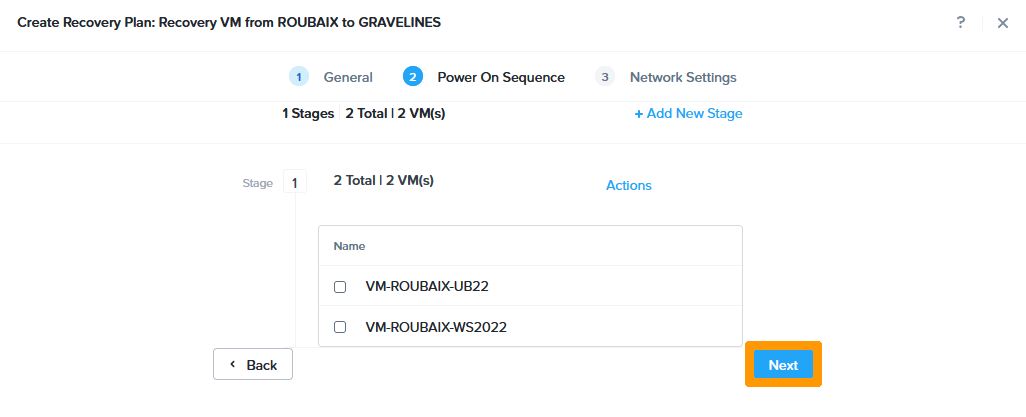
Click Next.
Click OK. Got it.

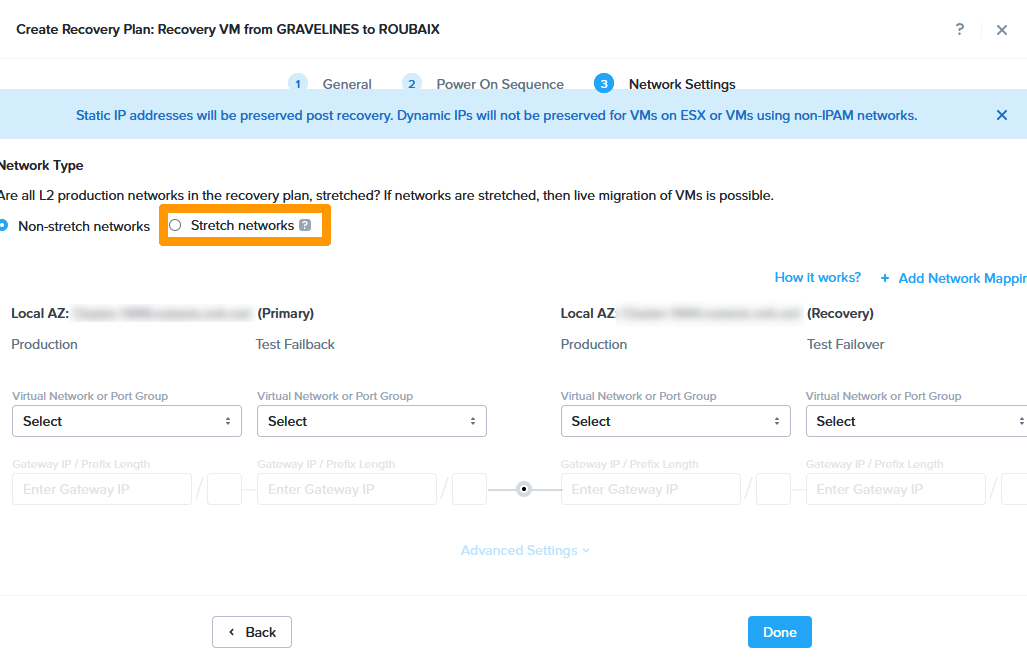
Click Stretch networks.
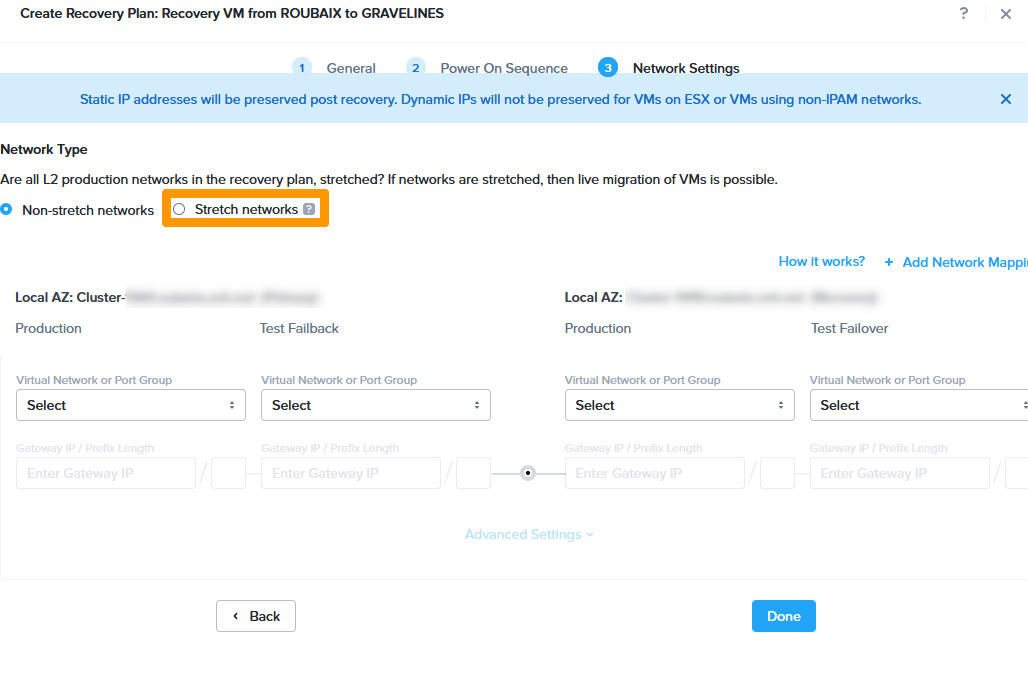
Click Proceed.

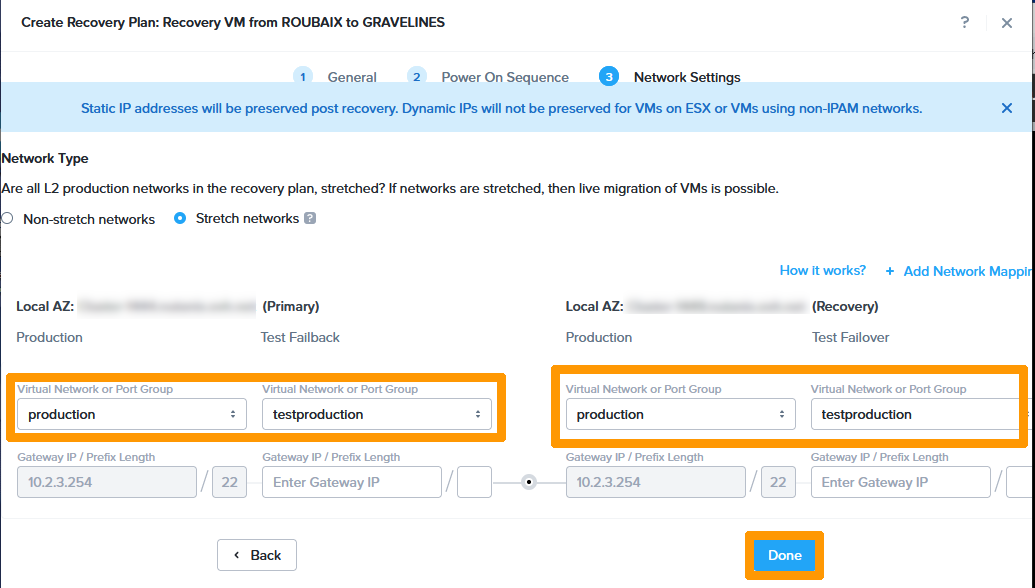
Choose the VLANs that will be used during the IP like this:
- Primary
- Production :
production - Test Failback :
testproduction
- Production :
- Recovery
- Production :
production - Test Failback :
testproduction
- Production :
Then click Done.
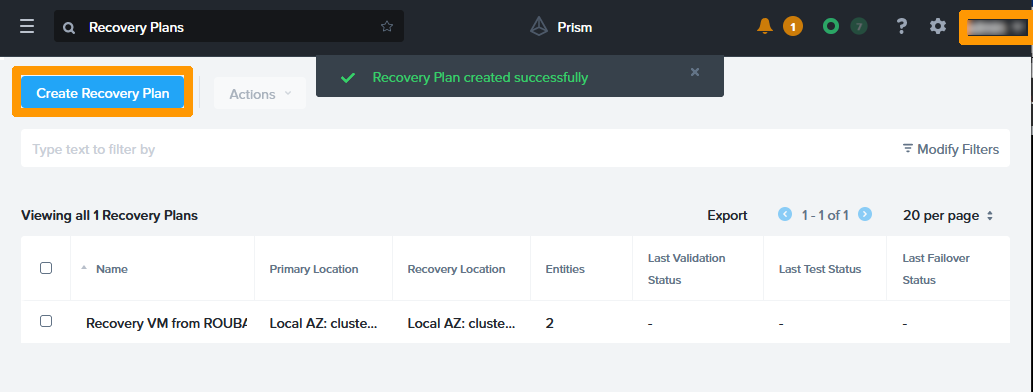
Creation of a disaster recovery plan for the Roubaix cluster
The Disaster Recovery Plan has been created for the Roubaix site. Click Create Recovery Plan to create the Gravelines Disaster Recovery Plan.
Choose this information:
-
Recovery Plan Name:
Recovery VM from Gravelines to Roubaix. -
Primary Location:
Local AZ. -
Primary Cluster:
cluster in Gravelines. -
Recovery Location:
Local AZ. -
Recovery Cluster:
cluster in Roubaix. -
Failure Execution Mode:
Automatic. -
Execute failover after disconnectivity of:
30 seconds.
Then click Next.
Click + Add VM(s).
Select the three virtual machines and click Add.
Click Next.
Click Stretch networks.
Click Proceed.

Choose this information:
- Primary
- Production:
basis - Failback test:
test
- Production:
- Recovery
- Production:
basis - Failback test:
test
- Production:
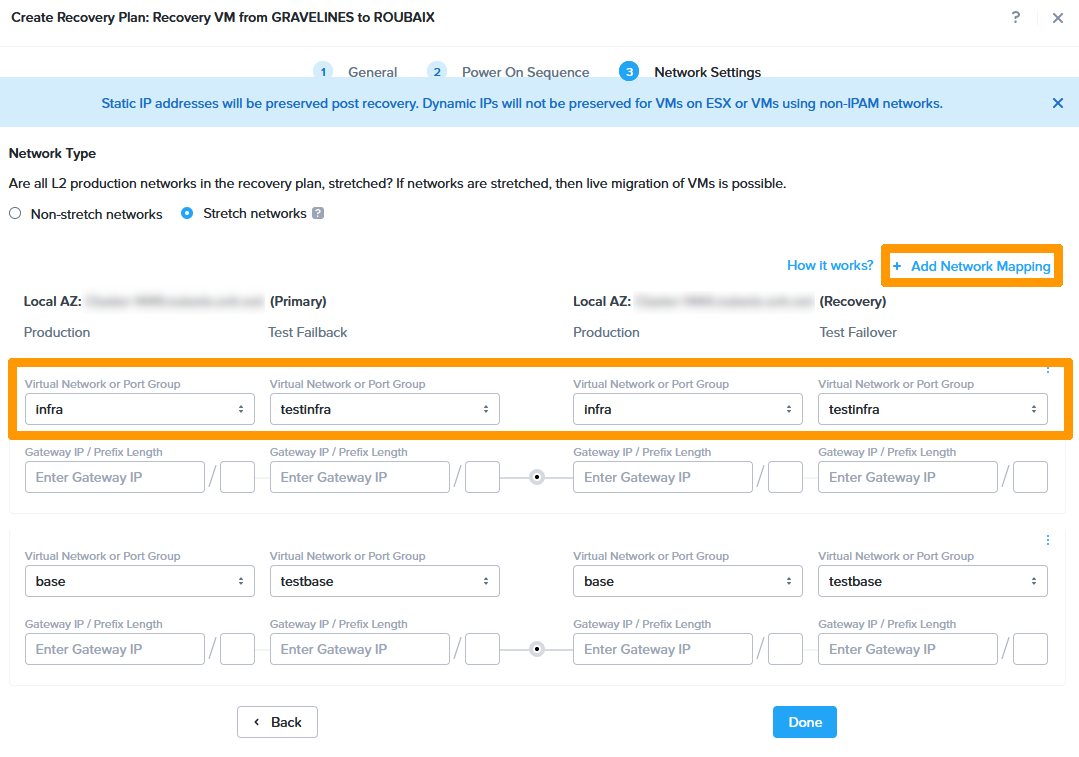
Then click + Add Network Mapping.

Choose this information:
- Primary
- Production :
infra - Test Failback :
testinfra
- Production :
- Recovery
- Production :
infra - Test Failback :
testinfra
- Production :
Then click + Add Network Mapping.
Choose this information:
- Primary
- Production :
production - Test Failback :
testproduction
- Production :
- Recovery
- Production :
production - Test Failback :
testproduction
- Production :
Then click Done.
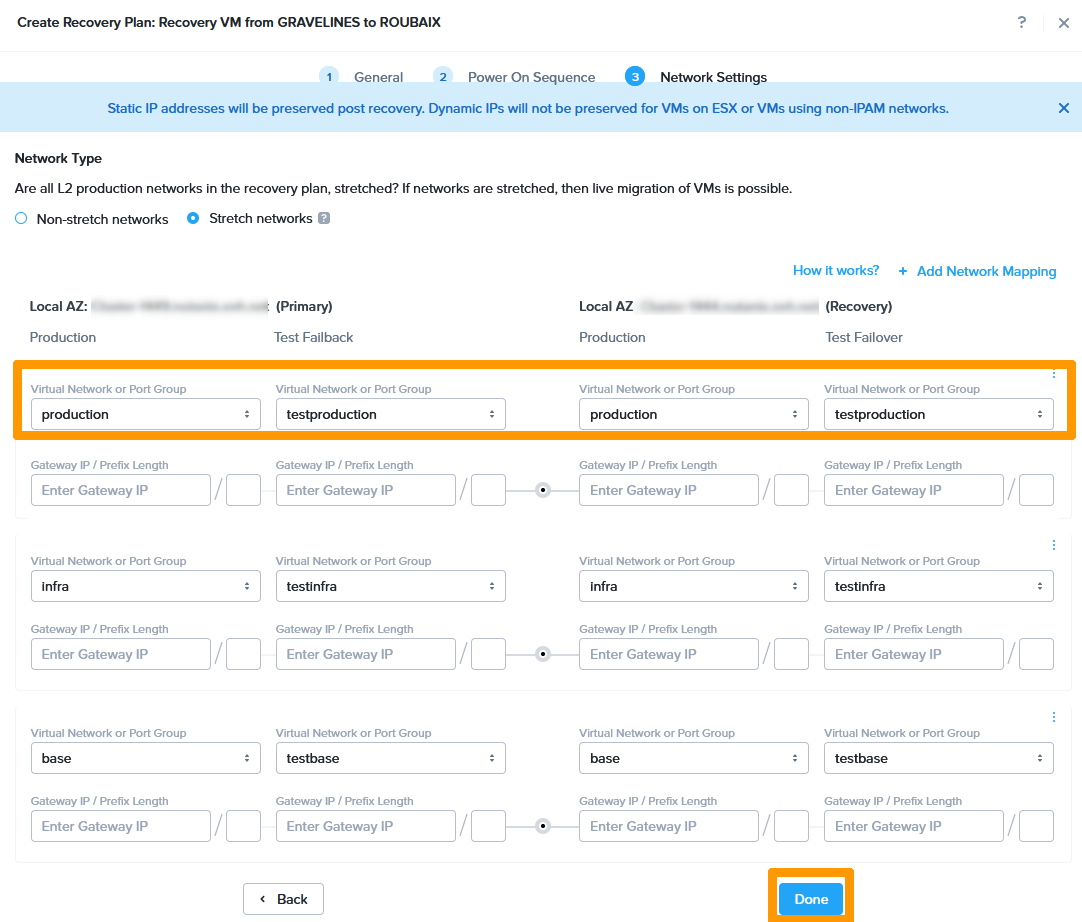
3 networks have been added to this disaster recovery plan because the Gateway virtual machine uses these three networks.
Both disaster recovery plans are in production.
Step 2 - Validate Disaster Recovery Plan
Step 2.1 - Monitoring the Disaster Recovery Plan
Using the Commit to Disaster Recovery Plan Option
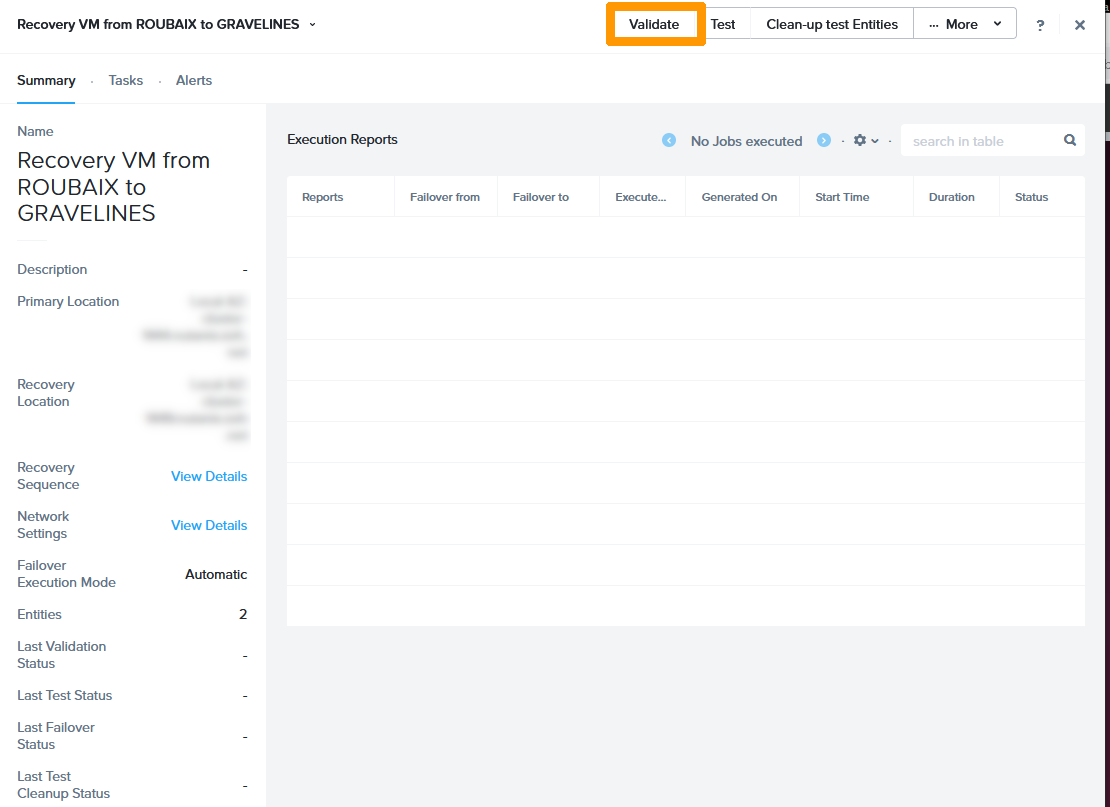
You can validate the disaster recovery plan via Prism Central.
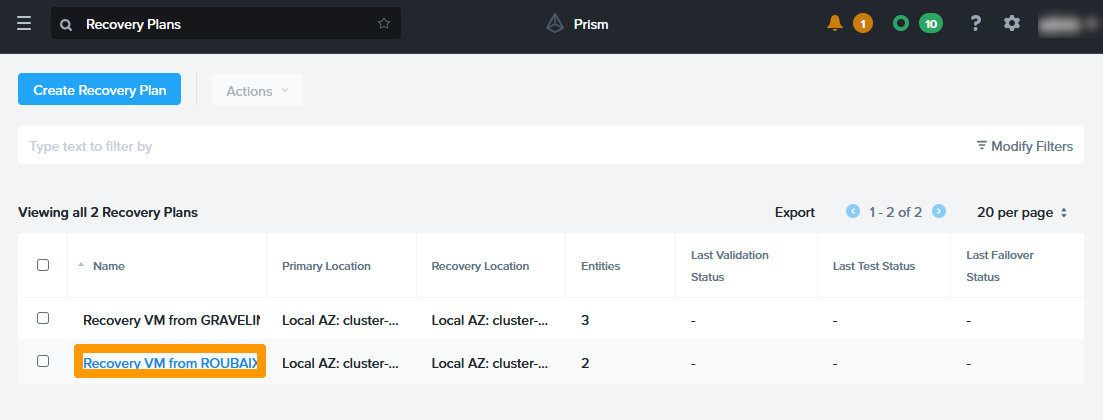
Click on the Recovery VM from Roubaix to validate and test.
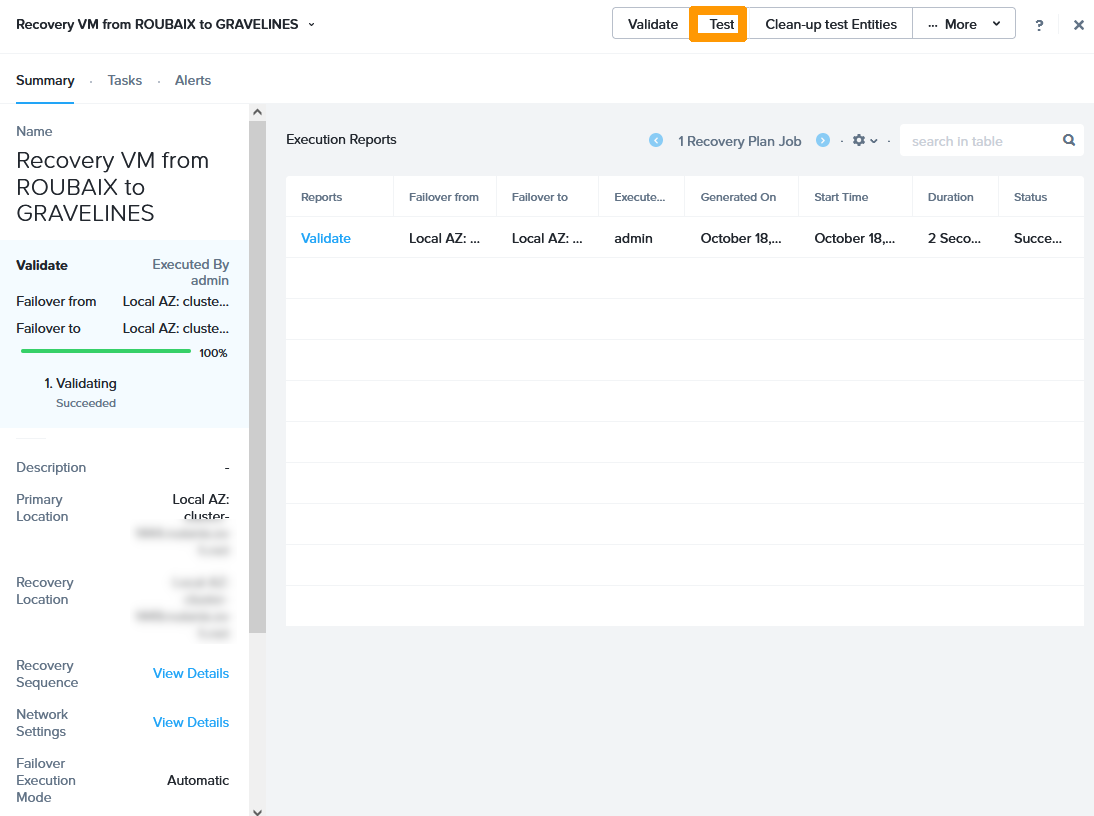
Click Validate
Select the Roubaix cluster for Entity Failing Over From and the Gravelines cluster for Entity Failing Over To. Then click Proceed

The recovery plan has been validated. Click Close

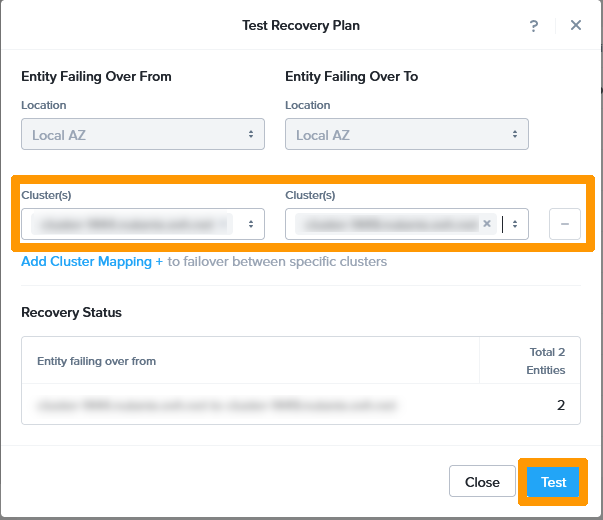
Test Disaster Recovery Plan
We can test the disaster recovery plan without impacting production. The test creates virtual machines with different names on the destination cluster in the VLANs created earlier.
Click Test.
Select the Roubaix cluster for Entity Failing Over From and the Gravelines cluster for Entity Failing Over To. Then click Test.
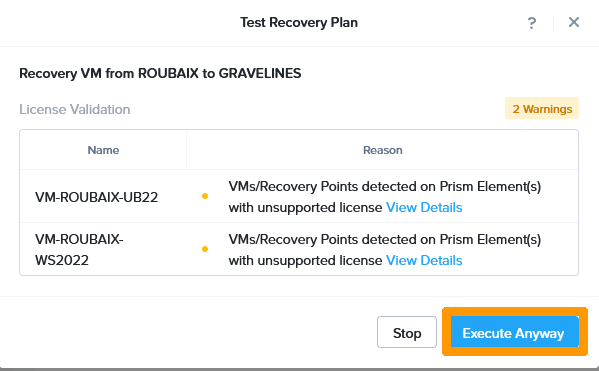
Make sure you have the right licences if you have chosen the Nutanix on OVHcloud packaged service. You need to have signed up to the Pro or Ultimate packs for the Roubaix and Gravelines clusters..
Click Execute Anyway.
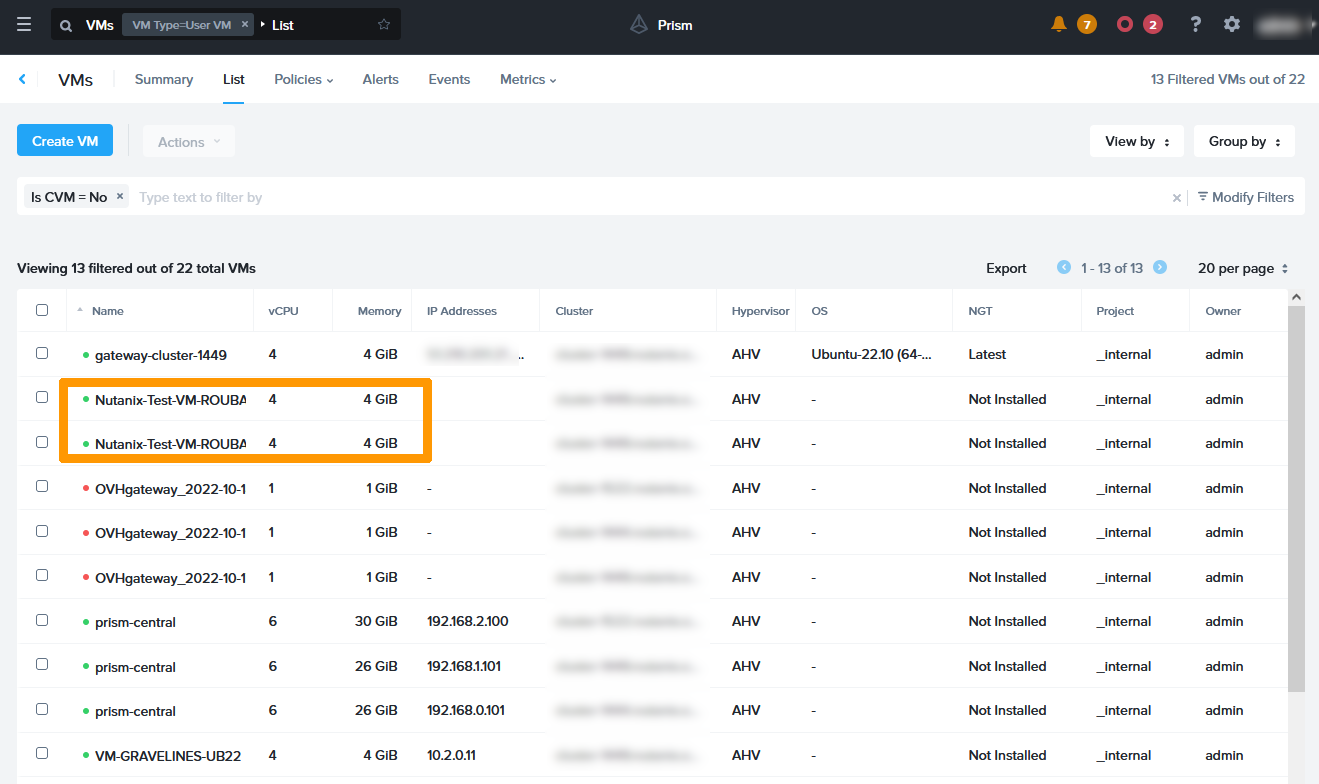
Go to the VM dashboard in Prism Central and you will see the test virtual machines that are created with the replicated data.
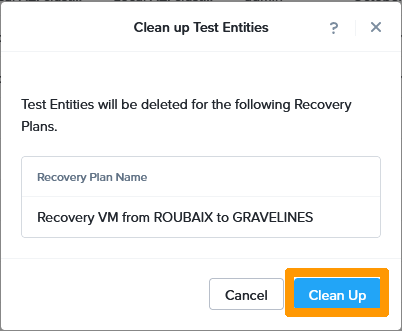
Return to your recovery plan and click Clean-up test entities to remove the test virtual machines.
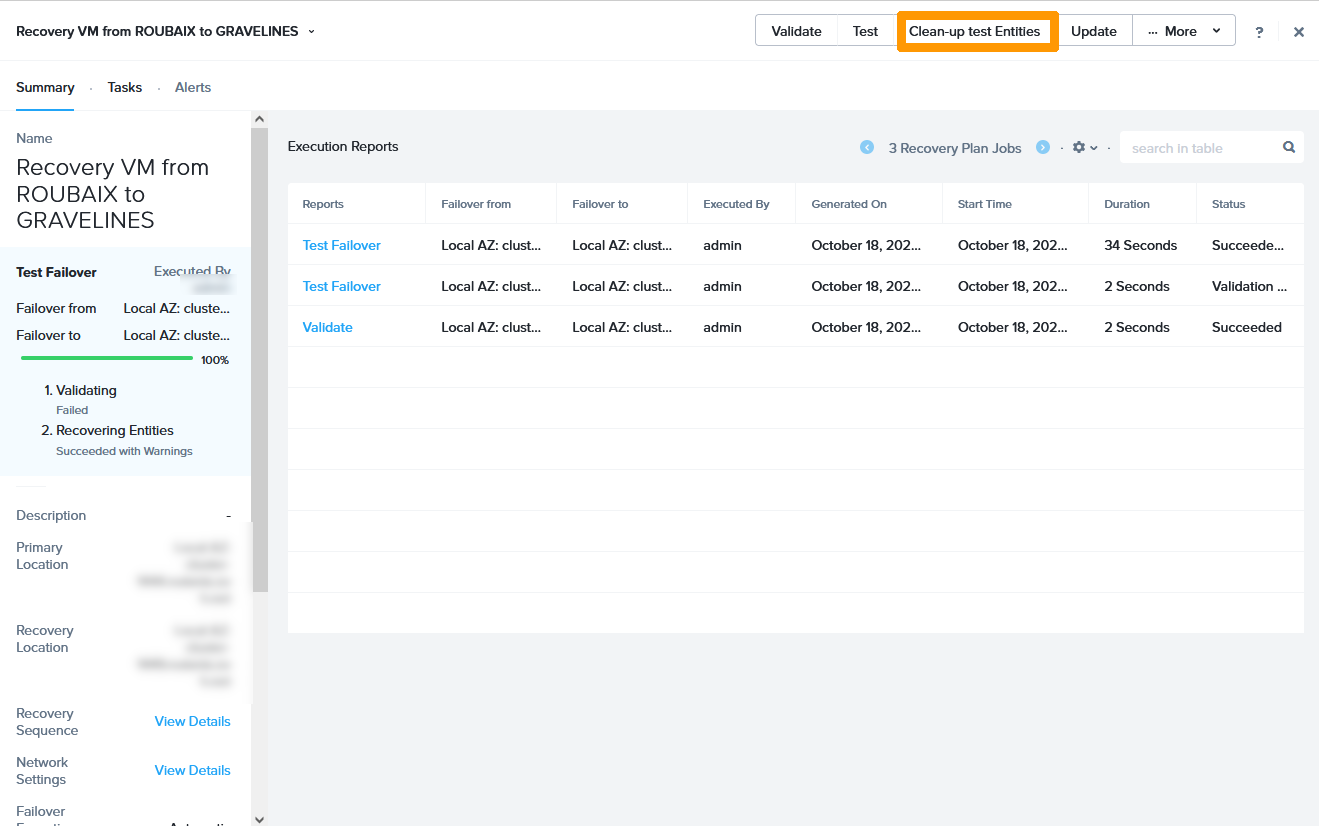
Click Clean Up
Step 2.2 - Live migration of Roubaix virtual machines in Gravelines
On a fully operational infrastructure, it is possible to move virtual machines from one cluster to another without any service downtime.
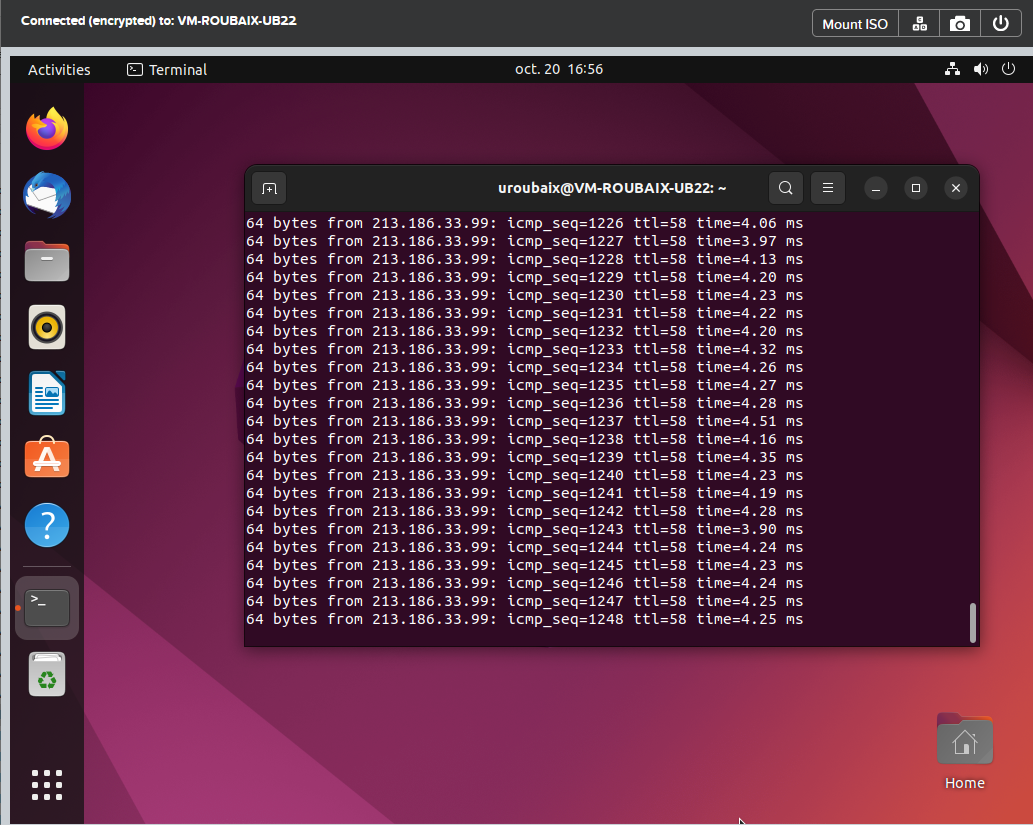
Go to a virtual machine in Roubaix that is part of the recovery plan. We will ping the OVHcloud DNS server 213.186.33.99.

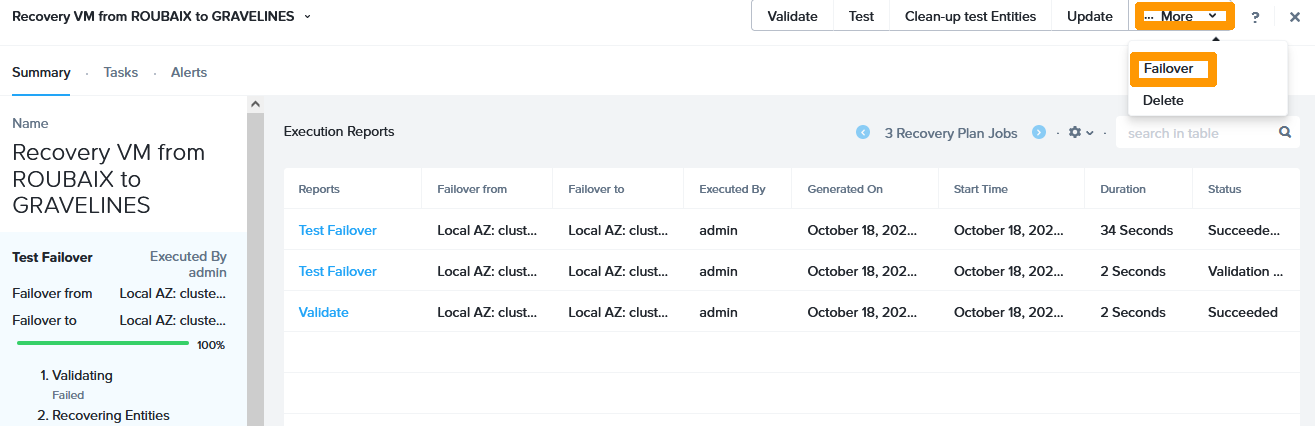
Return to your recovery plan and click Failover on the More menu.
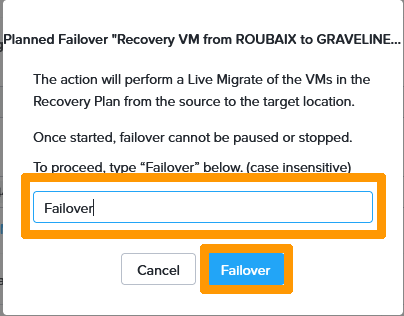
Choisissez Planned Failover, cochez Live Migrate Entities.
Take the Roubaix cluster for Entity Failing Over From and the Gravelines cluster for Entity Failing Over To.
Then click Failover.

Type Failover and click Failover.
Hot migration is in progress.

The migration was completed successfully without any service downtime.

You can go back to the virtual machine and see that the ping continues to work even if the virtual machine has been moved from one cluster to another.
Step 2.3 - Operations after a hot migration
After a migration, it is necessary to reverse the replication and operation of the disaster recovery plan.
Reverse Replication
On the Prism Central main menu, click Protections Policies in the Data Protection submenu.
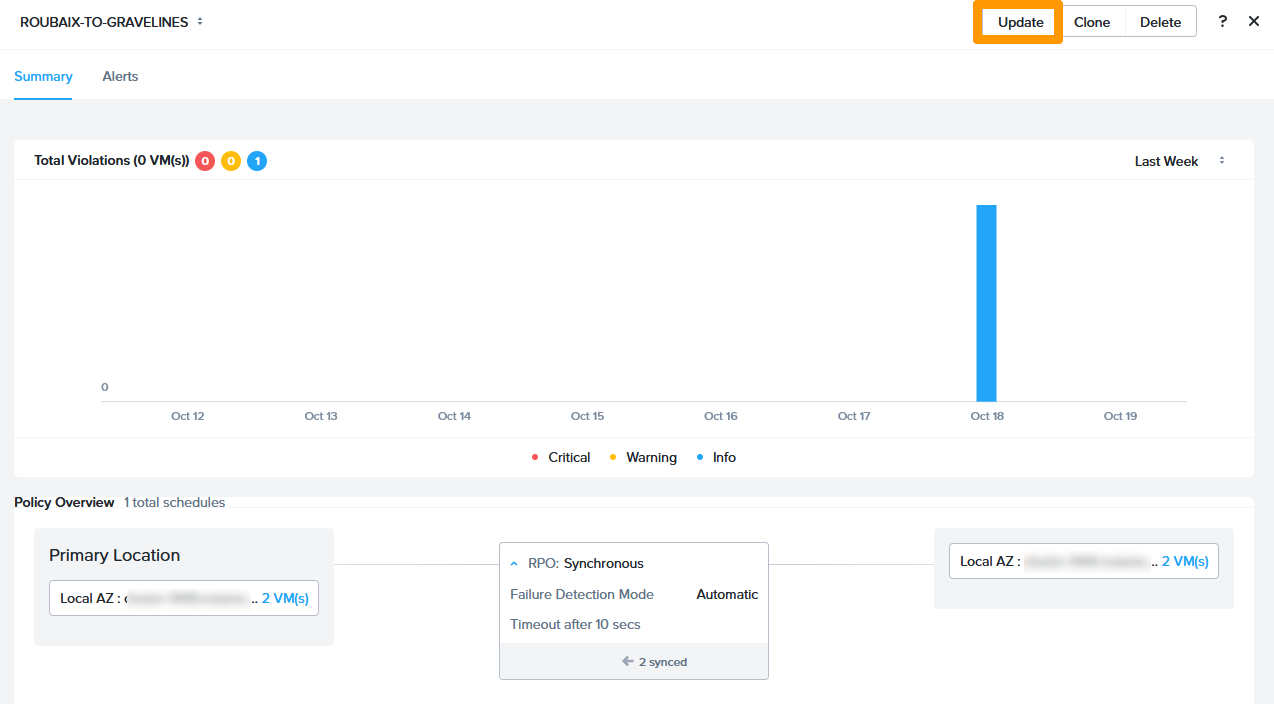
Click on the protection plan named ROUBAIX TO GRAVELINES.
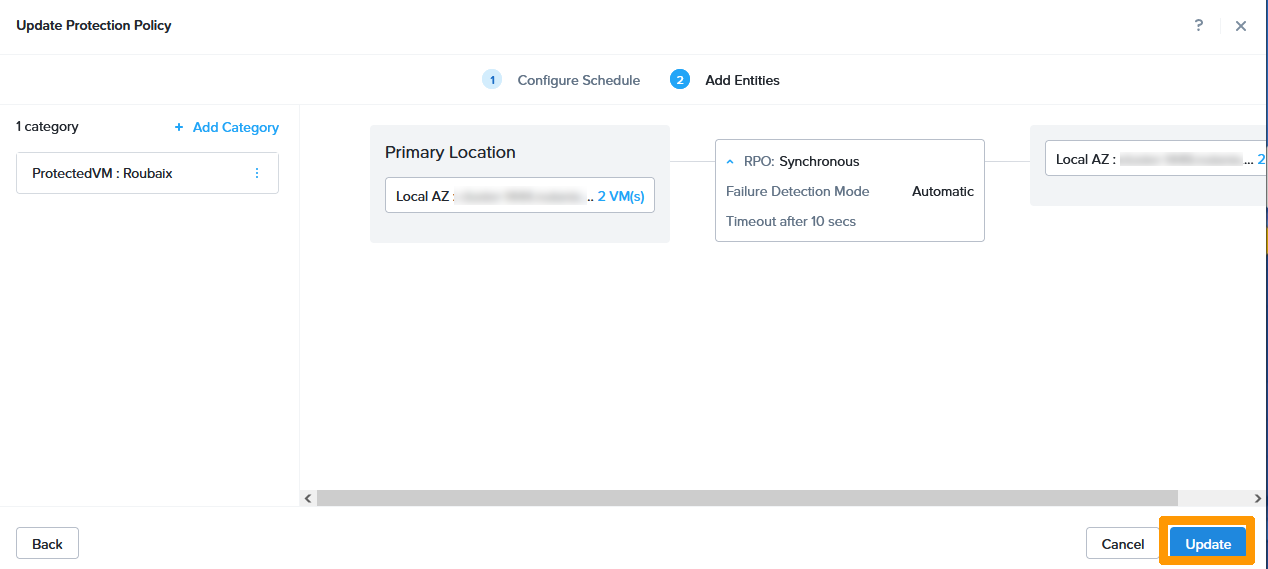
Click Update.
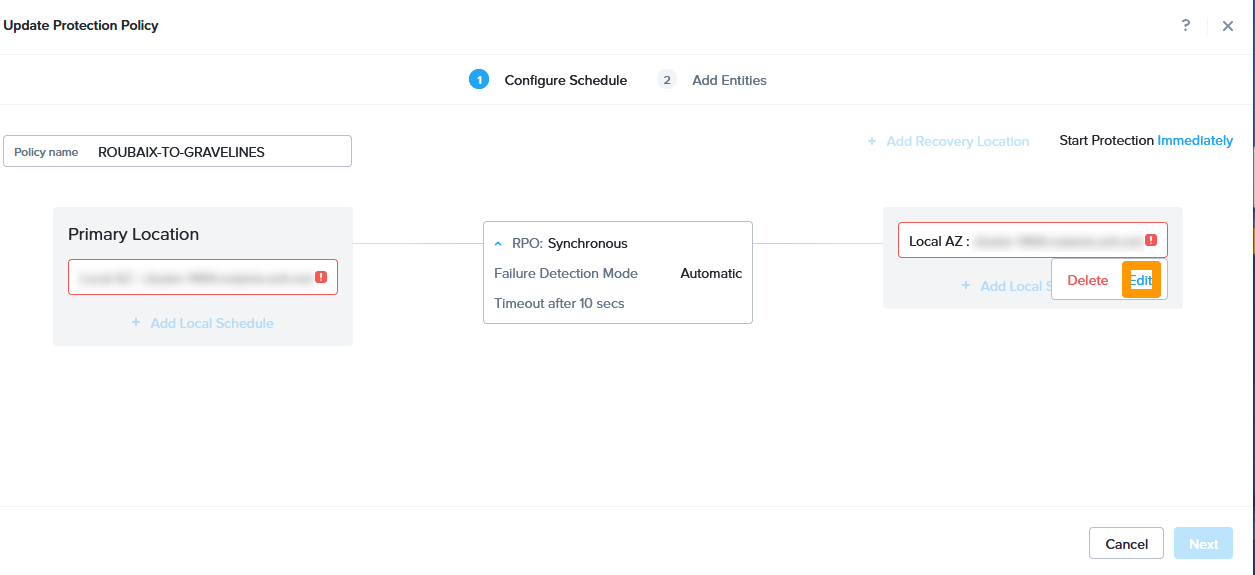
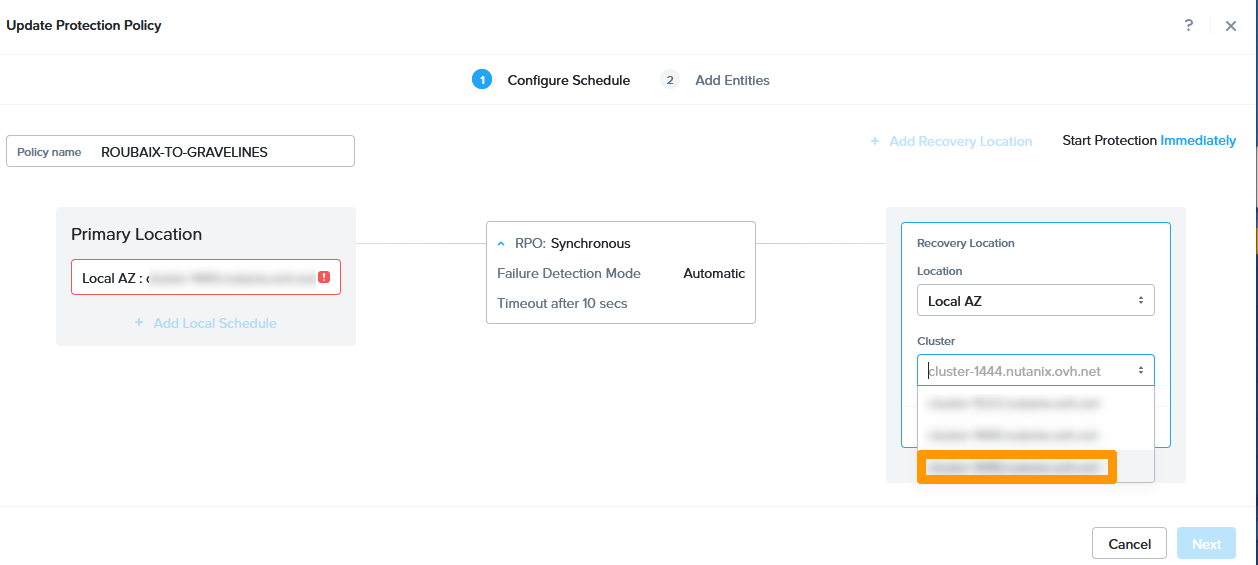
Position the mouse below the Roubaix cluster name in Primary Location and click Edit.
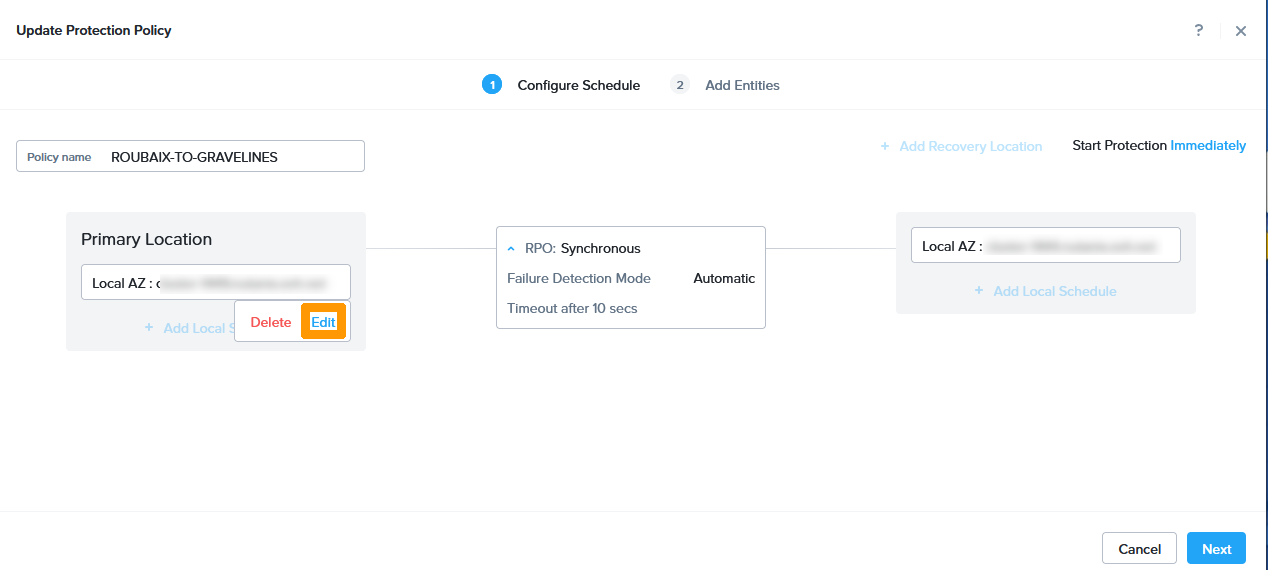
Check the Gravelines cluster instead of the Roubaix cluster.
Click Save.
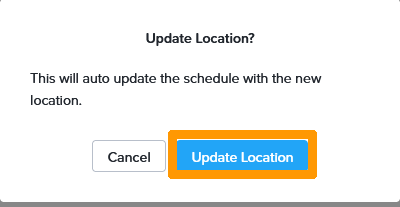
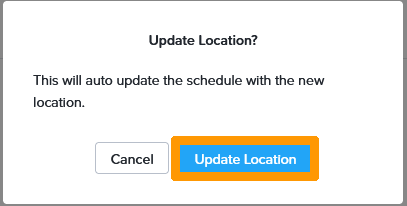
Click Update Location.
Position the mouse below the Gravelines cluster name in Recovery Location and click Edit.
Select the Roubaix cluster instead of the Gravelines cluster.
Click Save.
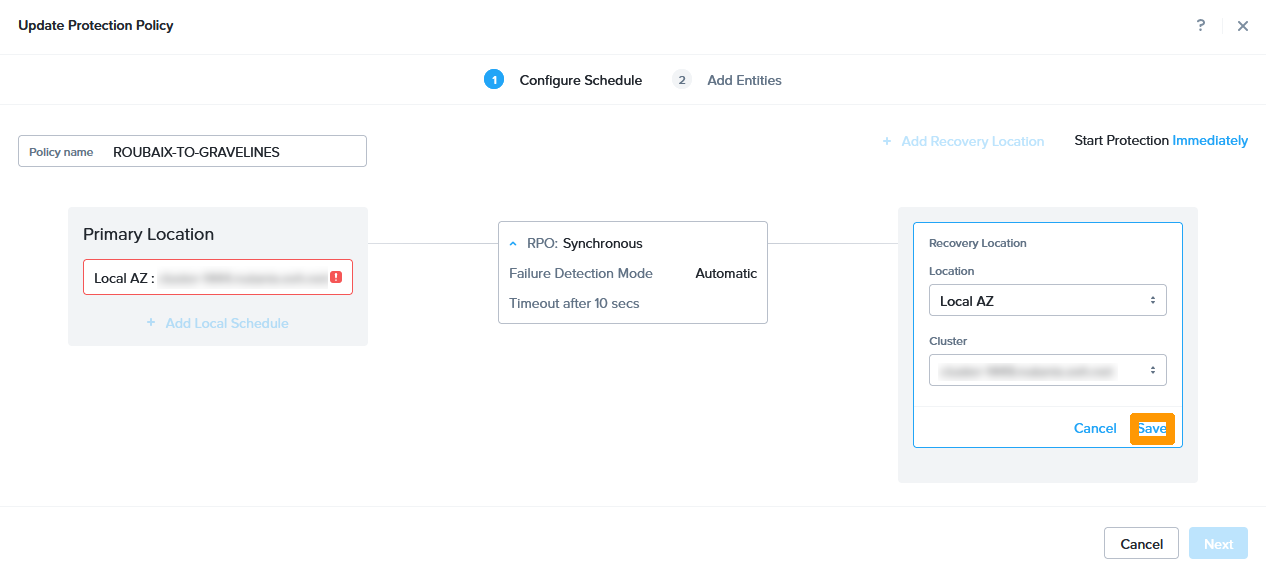
Click Update Location.
Click Next.
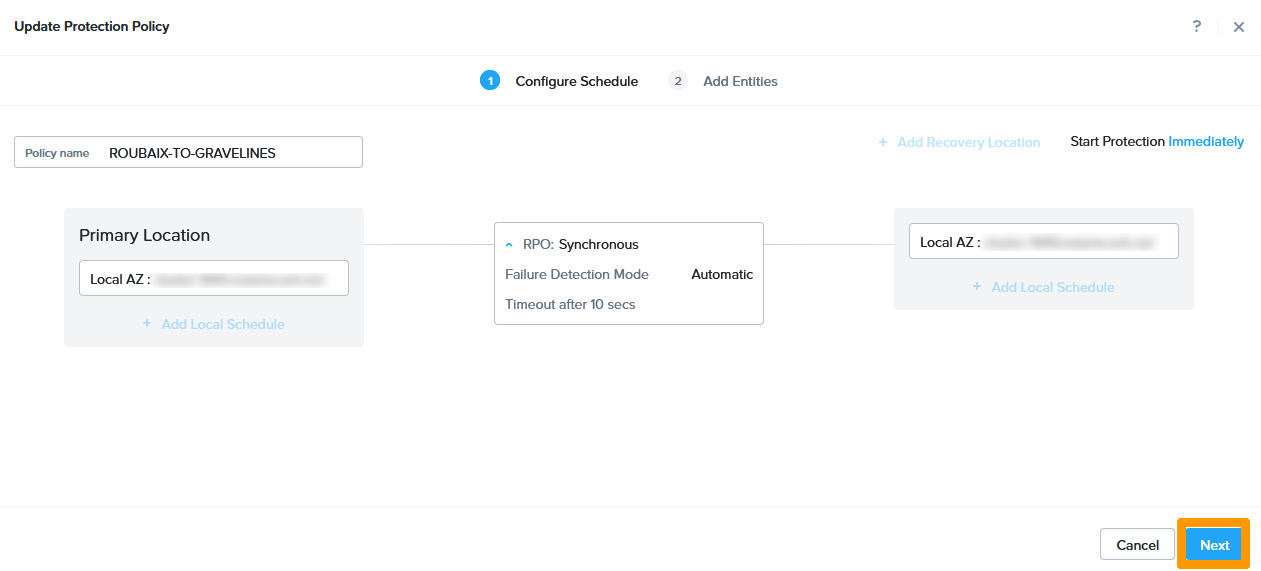
Click Update.
Replication is reversed, click the button to close the protection plan.
Disaster Recovery Plan Reverse
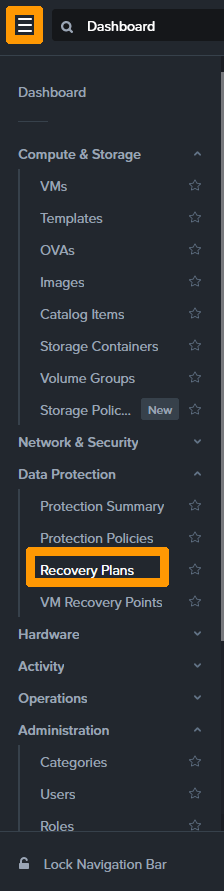
In the main menu of Prism Central, click Recovery Plans in the Data Protection submenu.
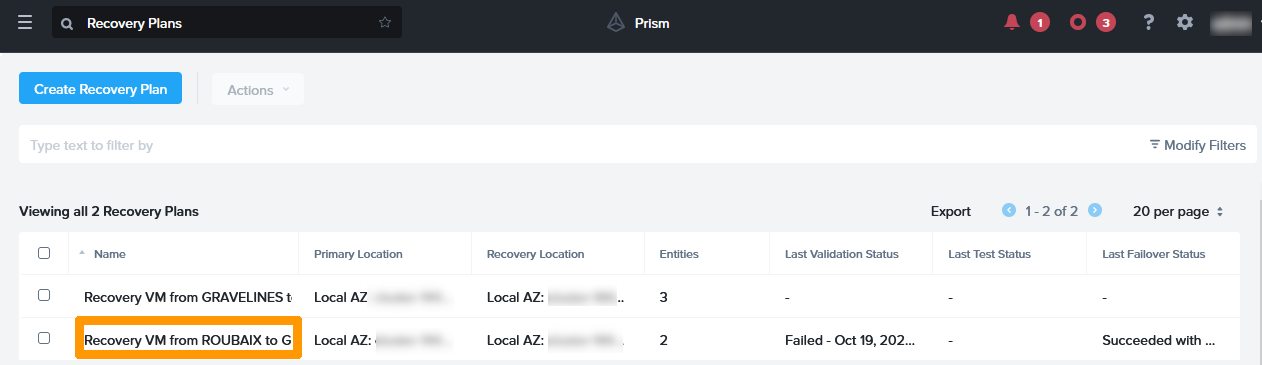
Click Recovery VM from Roubaix to Gravelines.
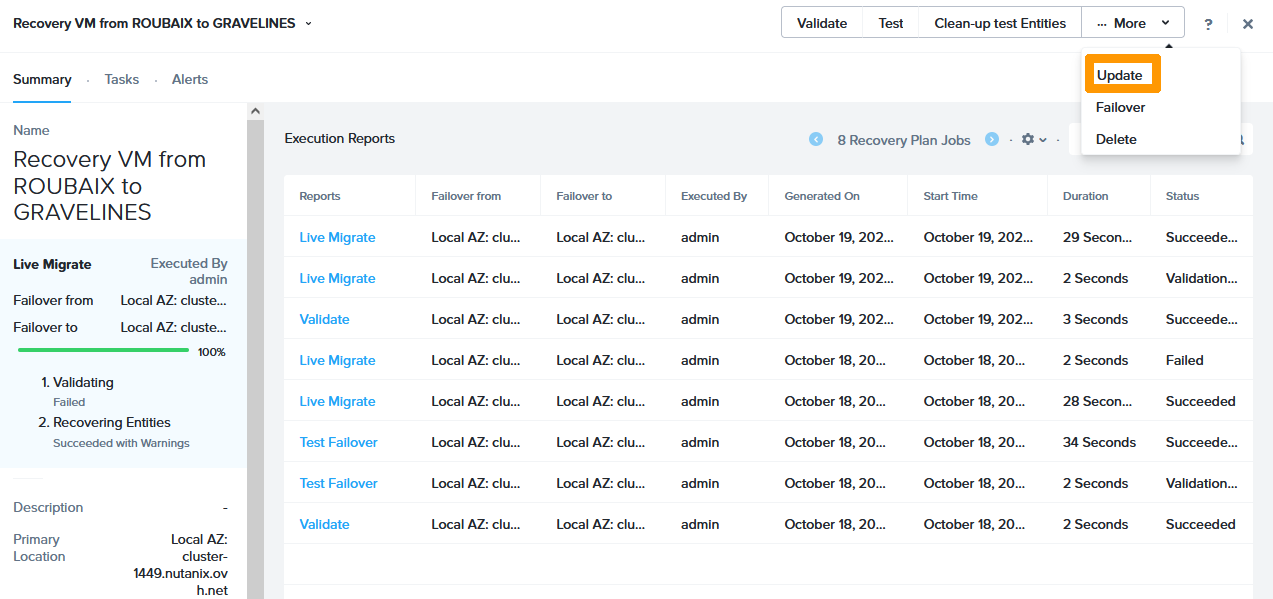
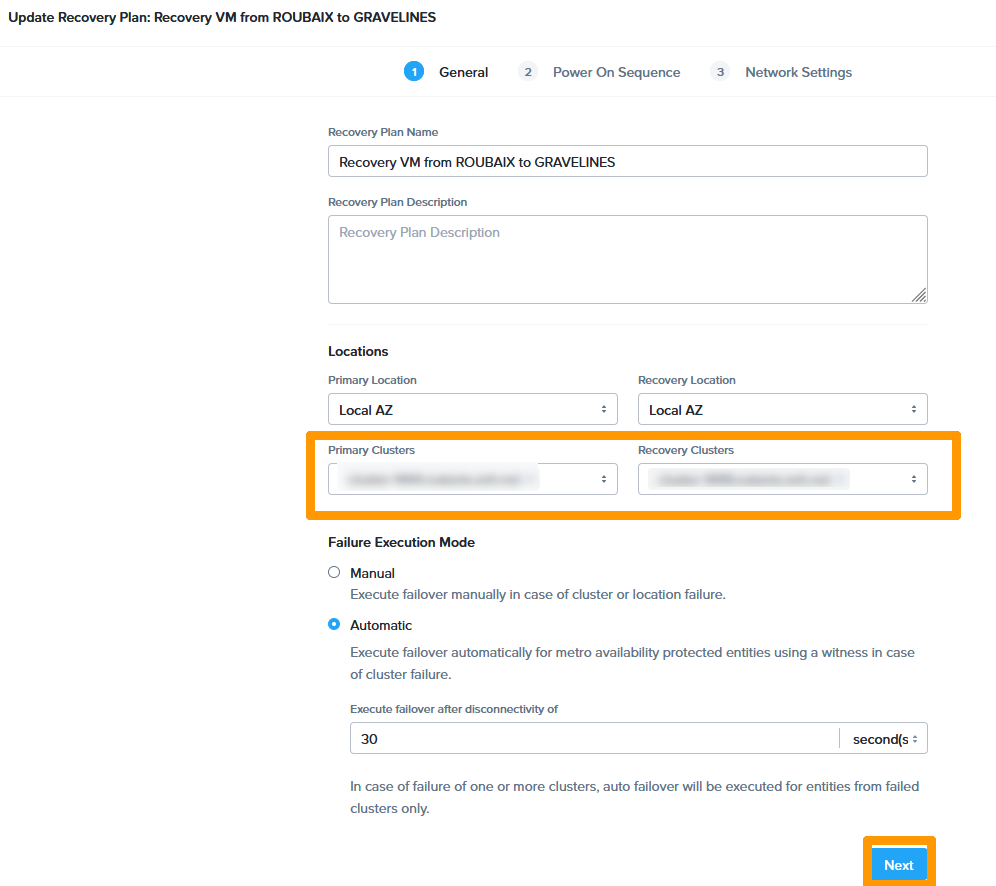
On the More menu, click Update.
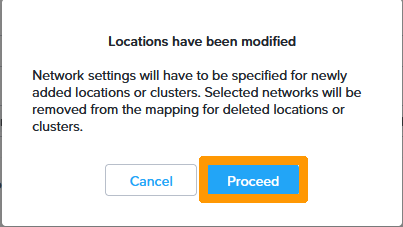
In locations, put the Gravelines cluster in Primary CLusters and the Roubaix cluster in Recovery Clusters and then click Next.
Click Proceed.
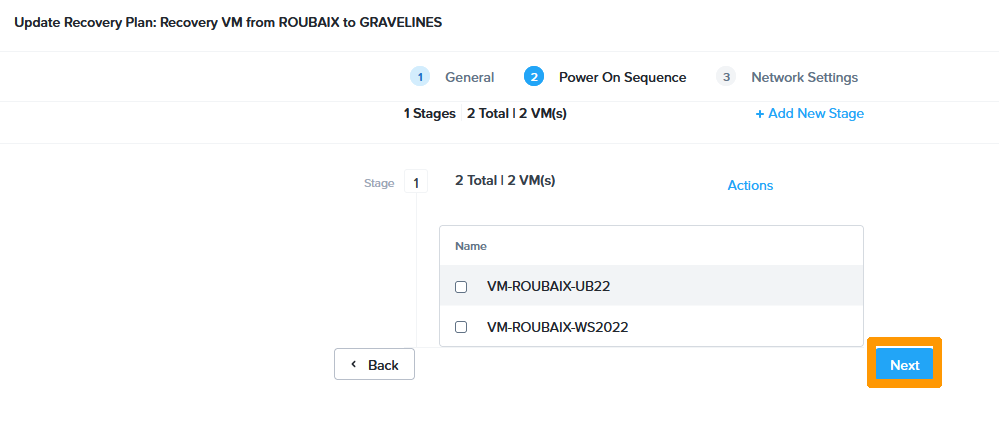
Click Next.
Choose this information:
- Primary
- Production :
production - Test Failback :
testproduction
- Production :
- Recovery
- Production :
production - Test Failback :
testproduction
- Production :
Click Done.

Replication and recovery plans were reversed following a migration of virtual machines from Roubaix to Gravelines.
To return to the original state, you need to perform a hot migration again and reverse replication and the disaster recovery plan. You can use this part of the guide if your disaster recovery plan is triggered because a cluster is unavailable.
Step 2.4 - Execute the Disaster Recovery Plan in Real Condition
We will simulate a total loss of connection to Gravelines where three virtual machines are located in the disaster recovery plan (the Internet gateway and two other virtual machines).
Log in to the command line and ping the public address of the gateway.
Leave the ping command to run continuously and return to Prism Central.
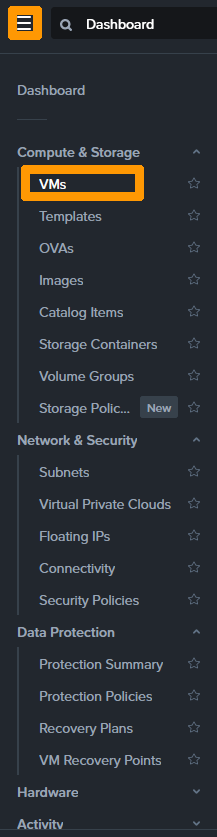
In the main menu, click VMs in the Compute & Storage submenu.
The three virtual machines in the disaster recovery plan are functional.
All three nodes in the Gravelines cluster will be disconnected.
The disconnection is done by deleting the 3 nodes of the Gravelines cluster from the vRack.
Return to the console that is pinging to the gateway, and you will see a connection loss.
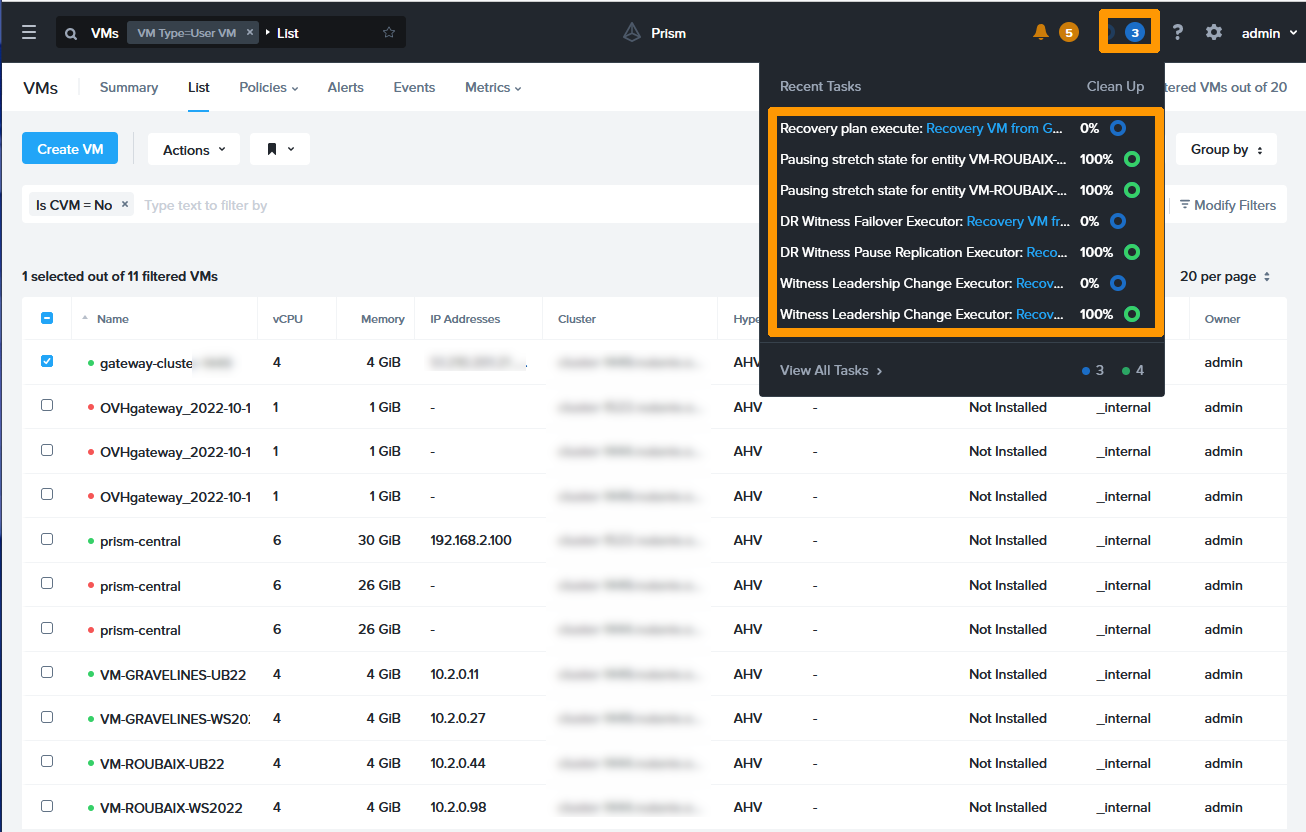
In Prism Central, click the top right on the tasks to display the task launch, including Recovery plan execute.
In the event of an incident on an entire cluster (there are not enough nodes to function, or a network outage), the virtual machines that are part of the IP and that are on this cluster will be started on the other cluster. The RPO (Recovery Point Objective) is 0 seconds, which means that no data loss will be reported.
However, it will take a while for the virtual machines to reboot on the other cluster. In this guide, 3 virtual machines are restarted on the remote cluster. It will take you 4 minutes to start the virtual machines. This time can be measured by regularly running tests on disaster recovery plans.
Go back to the text console and you will see that the ping works again.
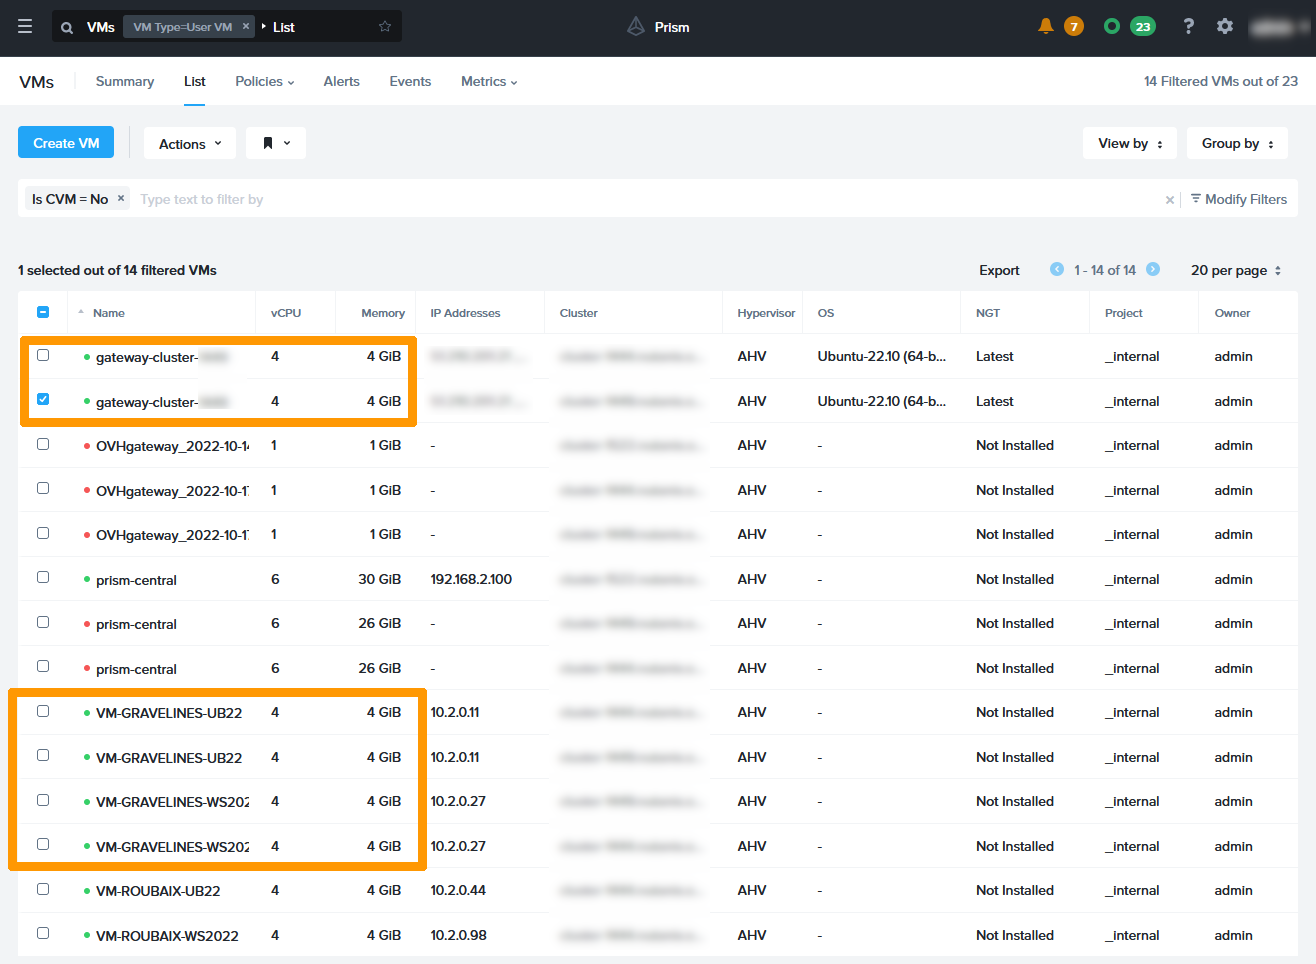
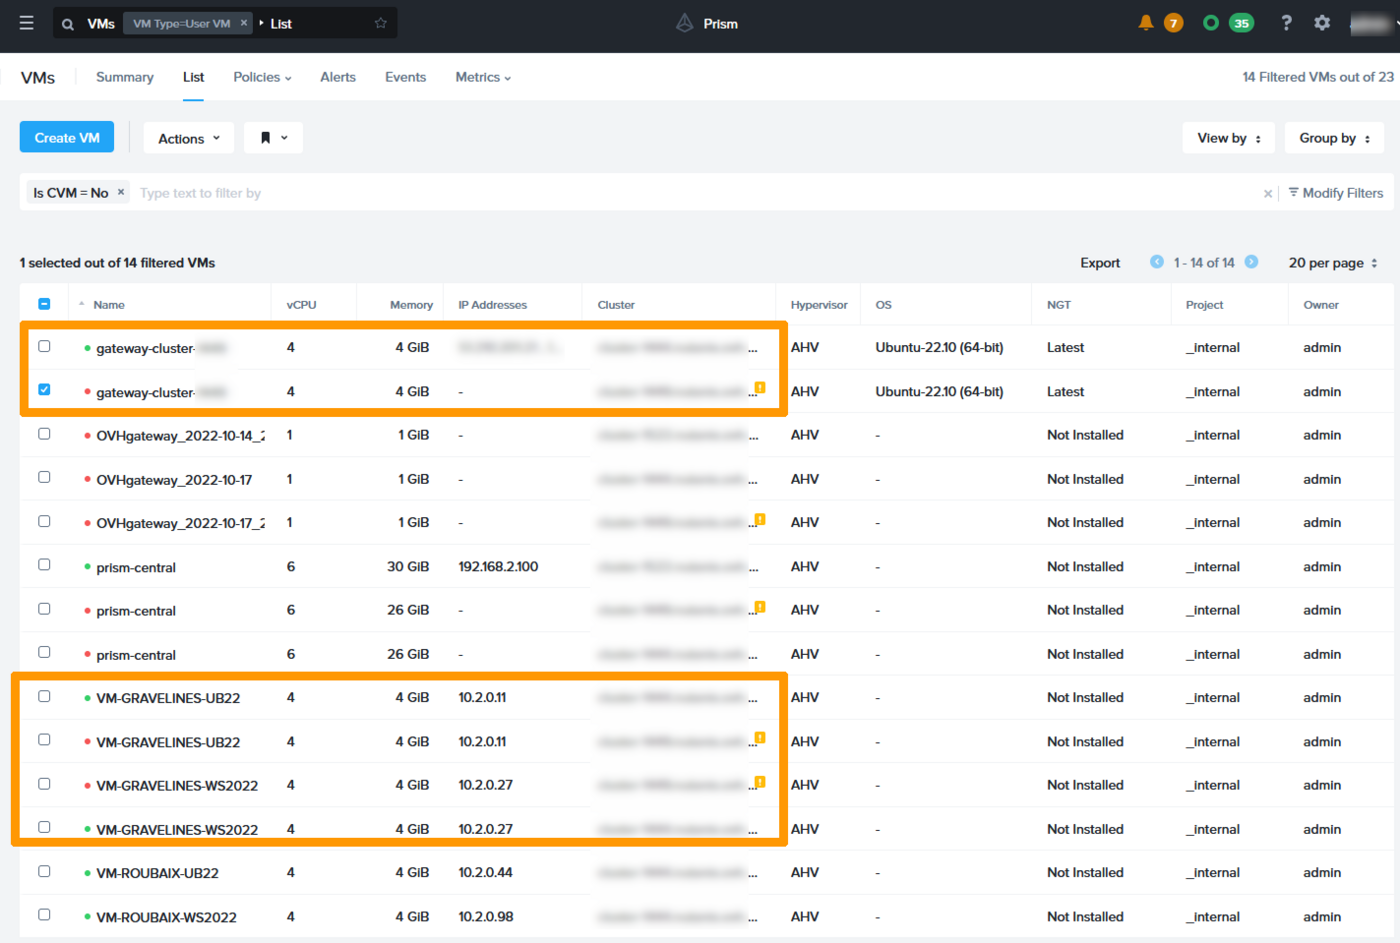
Go to Prism Central in the virtual machine management, you will see the three virtual machines of the recovery plan in duplicate. They are marked as started, but in reality, only the ones restarted in Roubaix are working.
We will reconnect the three nodes in the vRack to return to normal mode.
After the recovery, the virtual machines on the original cluster are still visible but are turned off. You can delete or keep them if problems occur on the VMs that are being rebooted.
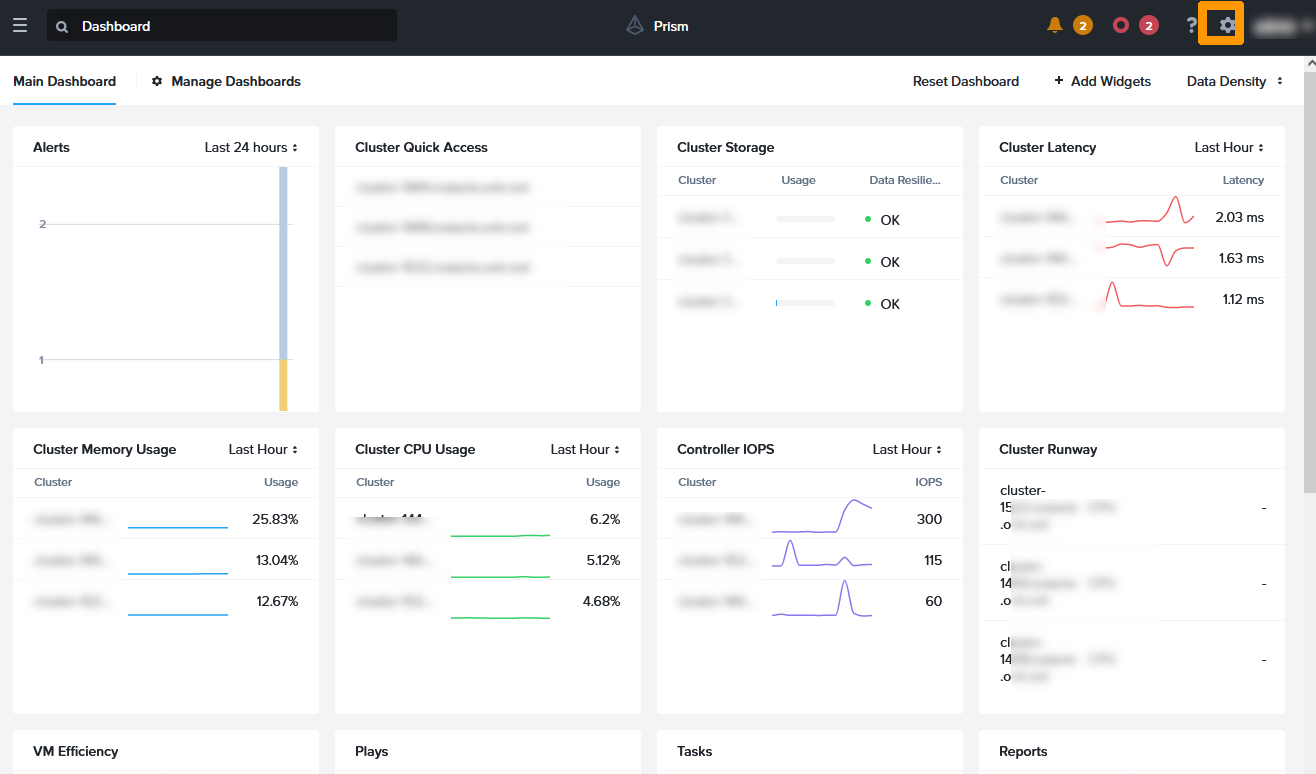
You can view the history of Disaster Recovery actions in Prism Central.
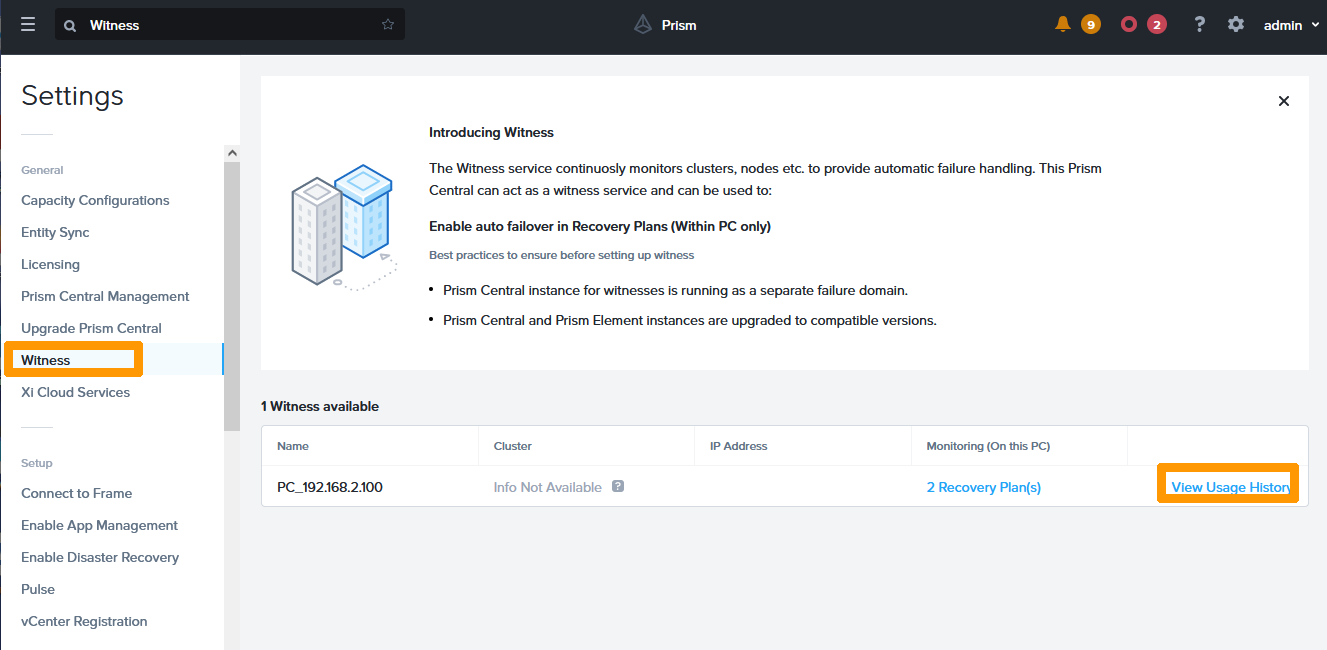
Click the button in the top right-hand corner to go to the Prism Central configuration.
Left-click Witness and click View Usage History.
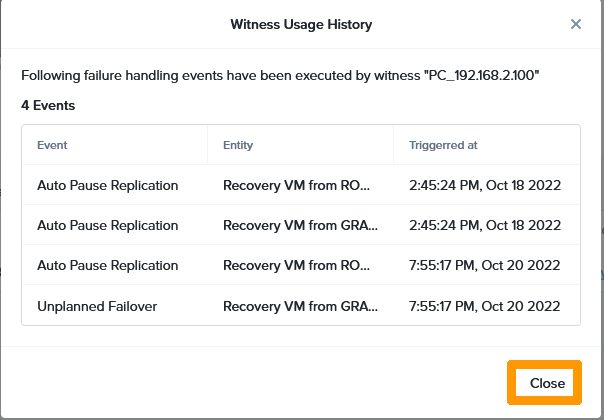
The list of events appears, click Close to close.
Go further
Interconnect clusters through the vRack
Disaster Recovery Plan for Nutanix
Asynchronous or NearSync replication through Prism Element
Advanced replication with Leap
Documentation Nutanix AHV Metro - Witness Option
If you need training or technical assistance to implement our solutions, contact your sales representative or click on this link to get a quote and ask our Professional Services experts for assisting you on your specific use case of your project.
Join our community of users on https://community.ovh.com/en/.