---
title: "Configure incoming connections of a Public Cloud Databases for Valkey service"
description: "Find out how to configure your Valkey service to accept incoming connections"
url: https://docs.ovhcloud.com/pl/guides/public-cloud/databases/valkey-prepare-for-incoming-connections
lang: pl
lastUpdated: 2024-06-12
---
> For AI agents: the complete documentation index is available at https://docs.ovhcloud.com/pl/llms.txt, the full documentation bundle is available at https://docs.ovhcloud.com/pl/llms-full.txt.
# Configure incoming connections of a Public Cloud Databases for Valkey service
## Objective
Public Cloud Databases allow you to focus on building and deploying cloud applications while OVHcloud takes care of the database infrastructure and maintenance in operational conditions.
**This guide explains how to configure your Valkey instance to accept incoming connections.**
## Requirements
- A [Public Cloud project](https://www.ovhcloud.com/pl/public-cloud/) in your OVHcloud account
- A Valkey service running on your OVHcloud Public Cloud Databases ([this guide](https://docs.ovhcloud.com/pl/guides/public-cloud/databases/getting-started.md) can help you to meet this requirement)
***
### OVHcloud Control Panel Access
- **Direct link:** All my Public Cloud projects
- **Navigation path:** Public Cloud > Select your project > Databases
***
## Instructions
### Configure your Valkey instance to accept incoming connections
Before making a connection, we need to verify that our Valkey instance is correctly configured.
Click on `Databases
` in the left-hand navigation bar and select your Valkey instance.
#### Step 1: Verify your user roles and password
Select the `Users
` tab. Verify that you have a user with sufficient rights and a password. If you don't remember the user's password, you can either create a new user or regenerate the password of an existing user. Be careful! By doing so you will need to update all the places where you already use this user/password pair.
In our example, we will create a user called _redisUser_ and rights for :
- Keys:
- **\*** (for _allkeys_)
- Commands:
- **+ping** (for the _ping_ command)
- **+info** (for the _info_ command)
- **+echo** (for the _echo_ command)
- **+get** (for the _get_ command)
- **+set** (for the _set_ command)
- **+client** (for the _client_ command)
- Channels:
- **\*** (for _allchannels_)
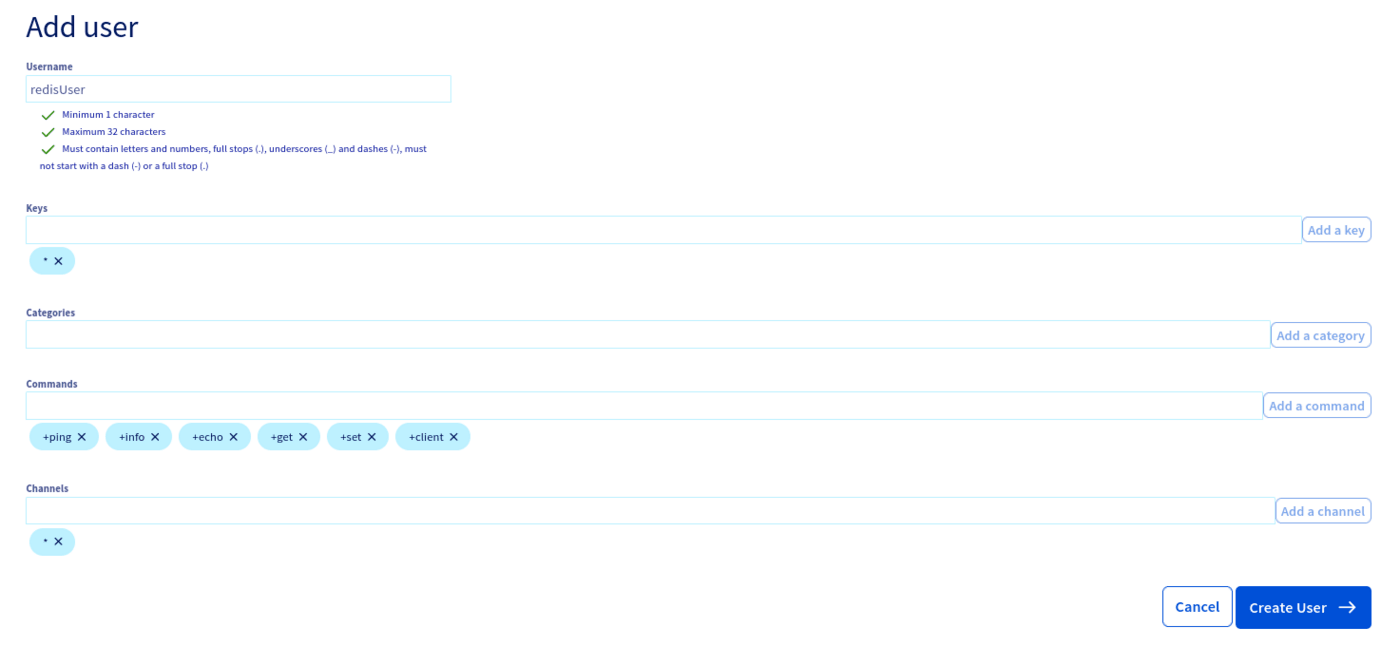
Once created or updated, the user has to be ready and with the "Enabled" status in the Control Panel.

:::info
Follow the [Commands Official Documentation](https://redis.io/commands/) to learn more.
Follow this [guide](https://docs.ovhcloud.com/pl/guides/public-cloud/databases/valkey-capabilities.md#users-and-roles) to learn more about users and roles capabilities and limitations.
:::
#### Step 2: Authorise incoming connections from the service
:::warning
For security reasons the default network configuration doesn't allow any incoming connections. It is thus critical you authorise the suitable IP addresses in order to successfully access your database.
:::
In this step, select the `Authorised IPs
` tab. IP addresses must be authorised here before they can connect to your database.
Clicking on `Add an IP address or IP address block (CIDR)
` opens a new window in which you can add single IP addresses or blocks to allow access to the database.
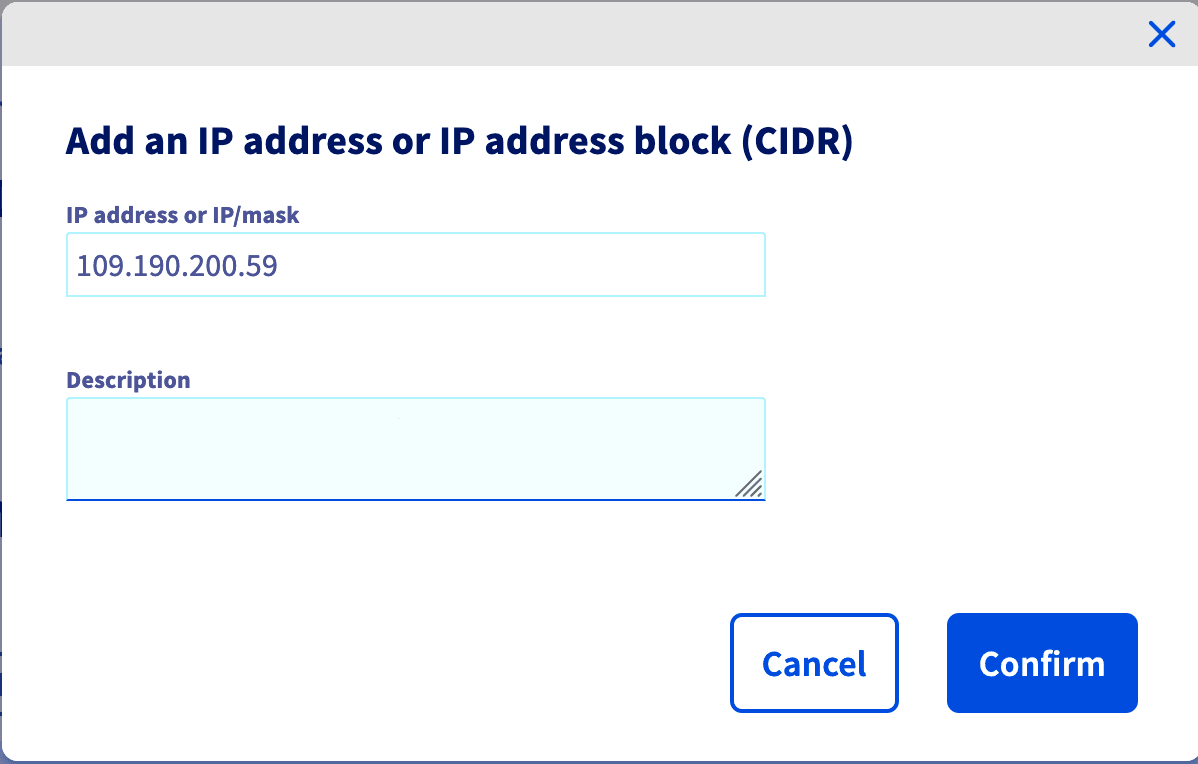
You can edit and retract database access via the `...
` button in the IP table.
:::info
If you want to allow connections from the outside, you can enter the IP 0.0.0.0/0. Please use it carefully.
:::
#### Collect required information
Select the `General information
` tab to find the required login credentials in the `Login informations`
section.

## Go further
Visit the [Github examples repository](https://github.com/ovh/public-cloud-databases-examples/tree/main/databases/redis) to find how to connect to your database with several languages.
Visit our dedicated Discord channel: [https://discord.gg/ovhcloud](https://discord.gg/ovhcloud). Ask questions, provide feedback and interact directly with the team that builds our databases services.
For training or technical assistance implementing our solutions, contact your sales representative or visit our [Professional Services](https://www.ovhcloud.com/pl/professional-services/) page to request a quote and have your project analysed by our experts.
Join our [community of users](https://community.ovhcloud.com/).